In this tutorial, we will be showing you how to install and set up an FTP server on Ubuntu.
FTP stands for file transfer protocol and is a way of transferring files between two devices. Setting up an FTP server on Ubuntu allows other devices to upload files to your device directly.
Let us start by mentioning this isn’t the most secure way of transferring files, but it is one of the most supported protocols and the easiest to use.
If you are after a more secure way of transferring files to your Ubuntu server, we recommend setting up SFTP instead. SFTP works over an SSH tunnel, making it significantly more secure.
To set up an FTP server on our Ubuntu device, we will use a piece of software called vsftpd. This FTP server is known for being secure and incredibly easy to configure.
Setting up an FTP Server on Ubuntu
In the following sections, we will walk you through all the steps of setting up an FTP server on Ubuntu.
We will do our best to explain the various options we set so you understand how it all works.
Installing the vsftpd Server on Ubuntu
vsftpd stands for “very secure file transfer protocol (FTP) daemon” and is one of the more popular FTP servers on Ubuntu.
Its popularity is because the FTP daemon is easy to configure and has been battle-tested over the years.
1. Before installing the vsftpd FTP server to your Ubuntu system, you must first update your package list cache.
You can update the package cache by using the following command within the terminal. This cache stores what packages you can install and what mirror the package manager can download them from.
sudo apt updateCopy2. Once the update completes, we can now install vsftpd. Luckily for us, vsftpd is available from the Ubuntu package repository, which makes installing the server very easy.
Run the following command to install the FTP server on your Ubuntu system.
sudo apt install vsftpdCopy3. The FTP server should begin running immediately after it has been installed on your system.
We can verify this by checking the status of the service by using the following command.
sudo systemctl status vsftpdCopy6. If everything is working correctly, you should see the status marked as “active (running)“.
Active: active (running) since Wed 2023-11-15 18:08:58 AEDT; 8s agoAllowing the FTP Server Through the Firewall
If you are running an FTP server on your Ubuntu system, you should have a firewall installed and configured.
These next steps will show you how to allow FTP traffic through the UFW firewall. If, for some reason, you have chosen not to use a firewall, then skip to the next section.
7. The first ports we need to allow through the firewall are 20 and 21.
- 20: This port is used to handle data transfer
- 21: FTP uses this port to handle commands. For example, listing the contents of a directory.
You can allow these two ports by running the following two commands.
sudo ufw allow 20/tcp
sudo ufw allow 21/tcpCopy
8. To use passive mode, we will need to allocate a particular block of ports for the FTP server to use on Ubuntu.
There are various advantages to using passive mode, especially for users attempting to connect to the FTP server.
For our passive mode, we will be opening ports 40000 to 50000. This should give more than enough ports for heavy usage while also being out of the range of what most software uses.
sudo ufw allow 40000:50000/tcpCopy9. The final port we need to allow port 990. This is used by FTP servers on Ubuntu, such as vsftpd, to handle SSL/TLS connections.
If you want to use SSL to improve connectivity, use the command below to allow this port.
sudo ufw allow 990/tcpCopy10. Now verify that the ports have been allowed by using the following command within the terminal.
sudo ufw statusCopyAfter running the above command, you should see something similar to what we have below.
20/tcp                     ALLOW       Anywhere
21/tcp                     ALLOW       Anywhere
40000:50000/tcp            ALLOW       Anywhere
990                        ALLOW       Anywhere
OpenSSH (v6)               ALLOW       Anywhere (v6)
20/tcp (v6)                ALLOW       Anywhere (v6)
21/tcp (v6)                ALLOW       Anywhere (v6)
40000:50000/tcp (v6)       ALLOW       Anywhere (v6)
990 (v6)                   ALLOW       Anywhere (v6)
Creating a Dedicated User for FTP on Ubuntu
Our next step is to create a user dedicated on Ubuntu for you to use with FTP. We do this as it adds a layer of separation from your normal users.
vsftpd attempts to improve security by locking all users to their home directories. This functionality is called a chroot jail. This means the user cannot access anything outside of their home.
Additionally, with the way vsftpd’s jail works. The user’s root directory can not be writeable. While this is fine for an FTP user, it would be problematic for a local user.
Adding the New User
11. Our first step is to create a new user for our FTP server. We can begin creating this user by running the following command.
We will be naming this user “pimyftp“, but you can assign any name to this user.
sudo adduser pimyftpCopyFollow the prompts to set up your user and give it a secure password.
Creating a More Secure Upload Location
12. After creating your new user, we will have to make some changes to its new home directory.
Our first step will be to create a directory within this new user’s home that will be used for the FTP jail.
This directory isn’t where you will be uploading files.
sudo mkdir /home/pimyftp/ftpCopy13. We don’t want this directory to be owned by anyone so let’s use the chown command to change this folders owner to “nobody:nogroup“.
sudo chown nobody:nogroup /home/pimyftp/ftpCopy14. Now remove the write permissions from this directory for all users on your system.
This stops anyone from being able to modify the directory and helps try and lock the FTP user in to its home.
sudo chmod a-w /home/pimyftp/ftpCopy15. Now, we need to create a directory where you will upload your files to your Ubuntu FTP server.
This directory will exist within the “/ftp/” folder we created earlier and is where you will upload files.
sudo mkdir /home/pimyftp/ftp/filesCopy16. Since we created the previous folder using “sudo” we need to put this new directory under the ownership of our “pimyftp” user.
If we forget to do this, we won’t be able to upload any files using FTP.
sudo chown pimyftp: /home/pimyftp/ftp/filesCopy17. Finally, we must add this user to our allowed users list.
Only users within this list can log in to your FTP server. We can do this in one line by using the following command.
echo "pimyftp" | sudo tee -a /etc/vsftpd.user_listCopyPreparing for FTPS
One of the key things we will be configuring the vsftpd server to use on our Ubuntu devices is SSL / TLS.
This helps secure the connection for anyone uploading files to your server. Normal FTP connections are incredibly insecure.
18. The only thing we need to do here is generate a self-signed certificate for the server to use for its connection.
Let us generate a certificate by using the following command in the terminal.
sudo openssl req -x509 -nodes -days 365 -newkey rsa:2048 -keyout /etc/ssl/private/vsftpd.pem -out /etc/ssl/private/vsftpd.pem
This command will generate a certificate using a 2048-bit RSA key that will expire in 365 days.
Configuring the vsftpd FTP Server on Ubuntu
We are finally at the stage where we can begin configuring the FTP server. Within this section, we will be improving the security of your FTP server.
Backing up the Existing Config File
19. Our first step is to create a backup of the existing configuration file. This gives us something to fall back on if we break something.
sudo cp /etc/vsftpd.conf /etc/vsftpd.conf.bkCopyEditing the FTP Server Configuration
20. Let us begin modifying the “/etc/vsftpd.conf” file by running the following command within the terminal.
We will use the nano text editor as it is relatively simple.
sudo nano /etc/vsftpd.confCopyDisable Anonymous Configuration
a. The first option we will change within this configuration file is to disable anonymous logins. This feature would allow someone to connect to your FTP server without a user.
In recent distributions, this value should be disabled by default, but let us make sure.
Find the following line within this config file. While using the nano text editor, you can use CTRL + W to search this file easier.
anonymous_enable=YESCopyChange the “YES” value to “NO” to disable anonymous logins.
anonymous_enable=NOCopyAllow Local Users to Login
b. Next, we want to set our FTP server to allow local users’ logins. This means any user within the “/etc/passwd” file can log in. But we will be adjusting that with another settings.
To do this, you will want to find the following option within the configuration file.
#local_enable=yesCopyOnce you have found it, adjust it to look like what we have shown below.
local_enable=yesCopyEnable Writing to the FTP Server
c. By default, the FTP server on Ubuntu is configured not to allow users to upload files, create directories, or perform write actions.
To enable this functionality, find the following line within the file.
#write_enable=YESCopyAll you need to do is remove the comment at the start of the line so that it looks like the following.
write_enable=YESCopyLock FTP Users to Their Home Directory
d. A core way of securing FTP users on your Ubuntu system is to enable the “chroot” functionality.
This functionality prevents the user from executing commands outside their “root” directory.
To enable this functionality, find the following line within the file.
#chroot_local_user=YESCopyChange that line so that it looks like the following.
chroot_local_user=YESCopySetting the User Sub Token
e. The sub token is used by vsftpd internally for generating a home directory for the FTP user that logs in.
We need to set this option to “$USER” so that it utilizes the logged-in user name as the token. This option doesn’t exist in the default configuration, so you must add it to the bottom.
user_sub_token=$USERCopySet the Local Root Directory
f. With the user sub-token set, we must specify the “local_root” option. This option allows us to specify the directory to which we will lock logged-in users.
Add the following line to the bottom of the configuration file to lock the logged-in users to their home directory.
local_root=/home/$USER/ftpCopySpecifying the Passive Ports for Ubuntu’s FTP Server
g. Earlier in this guide, we allowed particular ports through our Ubuntu firewall for our FTP server to use. These ports are used for what is called the “passive mode“.
Add the following lines to ensure that vsftpd uses the specific ports we set.
pasv_min_port=40000
pasv_max_port=50000Copy
Setting Up the Allow List
h. Currently, with how we have set up our FTP Server on Ubuntu, any user can use the FTP server.
However, it is possible to lock this to a specific list of users, which is something that we will be doing.
To enable the allow list, enter the following lines at the bottom of the file. With the way this is written, only users specified within the “/etc/vsftpd.user_list” file can log in.
userlist_enable=YES
userlist_file=/etc/vsftpd.user_list
userlist_deny=NOCopy
Enabling SSL for the Ubuntu FTP Server
i. The last thing we will be configuring within this file will enable SSL for our FTP server.
For this to work, we need to point it at the SSL certificate we generated earlier and set the “SSL_ENABLE” variable to “YES“.
To add SSL support to your FTP server, you need to find the following lines.
rsa_cert_file=/etc/ssl/certs/ssl-cert-snakeoil.pem
rsa_private_key_file=/etc/ssl/private/ssl-cert-snakeoil.key
ssl_enable=NO
Copy
Replace these lines with the ones shown below.
rsa_cert_file=/etc/ssl/private/vsftpd.pem
rsa_private_key_file=/etc/ssl/private/vsftpd.pem
ssl_enable=YES
Copy
Saving the Changes to the Config File
21. At this point, you should hopefully be finished configuring the vsftpd FTP server on your Ubuntu device.
We can save these changes to the file by pressing CTRL + X, Y, and then the ENTER key.
Restarting the FTP Server
22. With all the changes we made to the FTP server’s configuration, we must restart it now.
You can restart the server by running the following command.
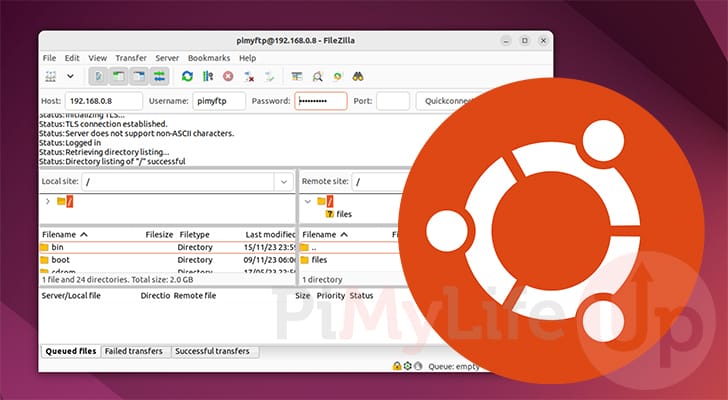
sudo systemctl restart vsftpdCopy23. You should now be able to connect to your FTP server using the user you created earlier in this guide.
Conclusion
Hopefully, you will have an FTP server up and running on your Ubuntu device at this stage.
To achieve this, we installed vsftpd and configured it so only a single user can access it.
While FTP can be simple to set up, it can also be very insecure unless appropriately configured. Even then, you should be careful with how you utilize FTP.
Please feel free to comment below if you have any questions about setting up an FTP server.
If you found this tutorial to be helpful, please check out our many other Ubuntu tutorials.