In this article, we will be checking out the Raspberry Pi powered PiCar-X from SunFounder.
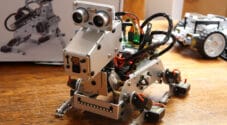
The PiCar-X is a robot car developed by SunFounder and driven by a Raspberry Pi. The Pi acts as the brains of the car and is used to send commands to the car’s main board.
This robotic car comes with three different modules that you can use to add AI behaviors. These modules are all connected back to the Raspberry Pi, where you will run the code that drives the PiCar-X.
Having a robot car you can program can be a fun project for those wanting to learn programming. Combining this with the built-in camera can be a gateway to learning how to use computer vision to operate a car.
If you want a cool project to help, get someone into science and technology then this relatively inexpensive kit is something you should consider checking out.
The car comes in pieces, so you must be comfortable following an instructions sheet and putting things together. It is, however, packaged with everything you need to put it together, including enough spares that you can lose a couple of screws and still be okay.
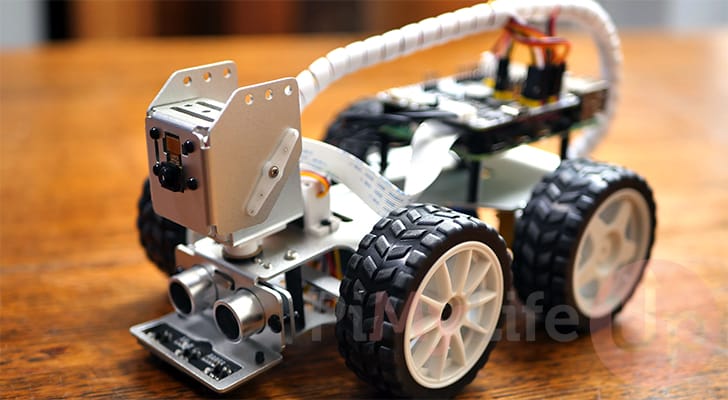
Four components help drive everything and connect it all back to the Raspberry Pi.
- Robot HAT: This HAT drives the various components of the PiCar-X, such as the motors and servos. It is also what connects the various sensors back to your Raspberry Pi.
- Ultrasonic Module: The ultrasonic sensor allows the PiCar-X to gauge the distance between it and objects in front. This is useful for performing tasks such as obstacle avoidance and more.
- Camera Module: Another component that is included with this robotic car is the camera module. This allows you to expand functionality by implementing computer vision to drive the car.
- Grayscale Module: The final module is a sensor that measures the light intensity from “black” to white“.
We were sent the PiCar-X for free from SunFounder. All they asked in return was our honest thoughts on their product.
On this page, we have links to Amazon, on which we earn a small commission if you make a purchase using them.
Please note that this kit does not include a Raspberry Pi. You will need to purchase a Raspberry Pi Zero or a Pi 3 or newer to make use of the PiCar-X.
Unboxing the Raspberry Pi PiCar-X
Let us start with unboxing the Raspberry Pi PiCar-X and seeing how it is all shipped and the many pieces it comes with.
Like most of SunFounder’s STEM projects, these are sent in individual pieces alongside a decent set of instructions that generally cover everything you need to get the device up and running.
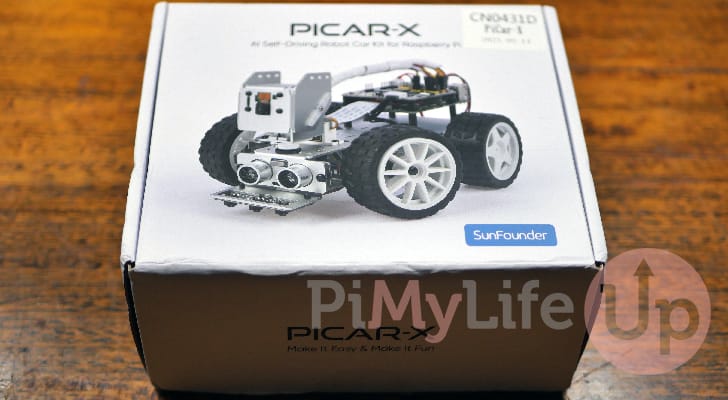
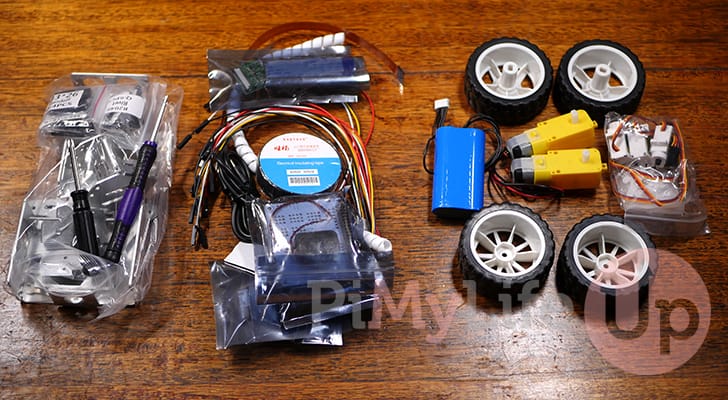
The robotic car is shipped in a small, sturdy, square box, as shown below. The SunFounder team did a good job at packing everything down in to such a small box.
Opening the box, you will find everything is placed into more boxes. Even though these boxes are numbered, you will need parts from each of these at different points in time during construction.
We reckon the numbers on the boxes are purely for packing purposes helping ensure all the parts are packed and shipped properly.

Unpacking all these boxes, you will find all the parts you will soon assemble. To us it didn’t feel like there was an overwhelming number of parts to put together unlike with the Pironman case from SunFounder.
You should find that the SunFounder team has included two screwdrivers and a tiny spanner. This means you won’t need your own tools to put the Raspberry Pi PiCar-X together.
Building the PiCar-X
One thing we learned from our experience of building the PiCar-X is that you should set up your Raspberry Pi before you get started.
The PiCar-X needs certain software to be installed to your Raspberry Pi and you will need this all to be running for the initial setup of the servos.

Building the PiCar-X is something you want to take your time on. While there isn’t to many little parts, they do rely on some tiny screws and washers.
Pay attention to the way things are placed in the instruction sheet. The orientation of certain components is crucial for everything to slot together properly.
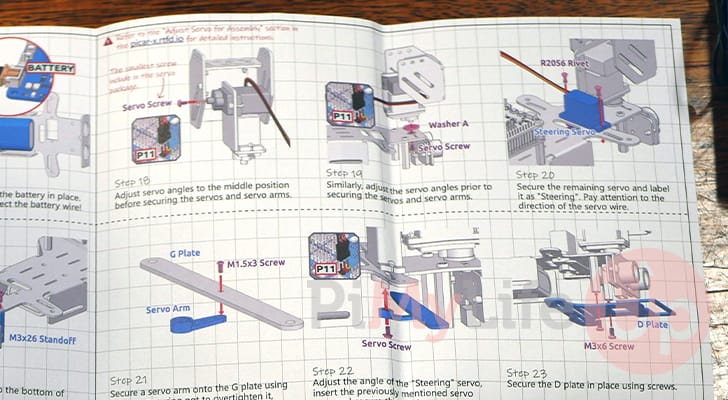
The provided instruction sheet covers most steps clearly. However, it falls apart a bit when you are installing the server motors. Before you install the servo screw and the servo itself, you must ensure its zeroed. Zeroed is when the servo motor is in its starting position.
To do this, you need to power your Raspberry Pi on by flicking the switch on the Robot Hat to “On“. Then, once it is powered on, you need to run the servo adjustment script. If you don’t see your Raspberry Pi Power on then check that the battery is plugged in to the SunFounder Robot HAT.
Finally, plug the servo into the Robot HAT in the P11 slot. The servo will move to the “zero” position, and you can now install it as indicated in the instructions.
You can safely follow the rest of the instructions without any issues. The servos were only the only thing that tripped us up.
Taking the PiCar-X for a Spin
The SunFounder team has many tutorials on their official website that show you how to use the PiCar-X. It even has examples of using their Python libraries to control the car.

These examples all seemed simple enough to follow, and checking out the example scripts, you can very easily modify these scripts for your own uses.
We tested out a couple of the examples. The first is the simplest example that tests that the motors and servo work as intended. The car drives forward, makes a small “S” maneuver, and then moves the camera.
Secondly, we tried out the obstacle avoidance example. This script makes use of the ultrasonic sensor that is on the front of the Pi-CarX. If an object is detected close to it, the code tells it to drive either left or right to avoid the object.
It is an excellent example of how a simple sensor can make a robotic car significantly smarter.
We also tested out the line following the script. This utilizes the grayscale sensor you installed at the front of the PiCar-X. It is the module that points down towards the ground.
Using this sensor, the Raspberry Pi can get a scale from white to black from the sensor. Using this, you can write a script that turns the PiCar-X to follow a black or white line.
We tested the example script that came with the PiCar-X and found it worked alright for the most part. It just wasn’t great at handling turns. You could improve this by slowing the car down and fine-tuning the code.
Conclusion
The SunFounder PiCar-X is an excellent device, especially for those interested in learning about automation, computer vision, and more.
Using the Raspberry Pi connected to the PiCar-X, you can control everything it does. It is a great way to learn how you could potentially implement things like obstacle avoidance and more.
Overall, the device’s build quality seems decent, especially for the asking price. You get quite a bit for your money, and it is a great base for learning more about electronics.
If you have any questions about our thoughts on this device, please feel free to leave a comment below.