In this tutorial, we will be showing you how to install and use Lutris on your Steam Deck.

Lutris is a free and open-source game manager designed specifically for Linux operating systems such as SteamOS.
One of the key features of using Lutris on your Steam Deck is that it gives access to your GoG, Humble Bundle, and Epic Games Stores games. This makes it super helpful as none of those stores offer a Linux-based client.
This game manager even comes with support for emulators, so you can easily launch games for multiple other systems. It is a decent alternative to EmuDeck if you don’t mind your emulated games appearing within the Steam Deck’s interface.
Another advantage of using Lutris is that it will help install game clients like Ubisoft Connect and EA App for you.
Installing and Using Lutris on your Steam Deck
Throughout the following steps, we will walk you through every step you need to get Lutris up and running on your Steam Deck.
This is one of the more accessible programs to get up and running on your Deck, thanks to being available as a Flatpak through the Discover app.
All you need to complete the following steps is a few minutes of your time.
Swap to Desktop Mode
1. Since Lutris isn’t available through the Steam Deck store, we must first switch to desktop mode.
Desktop mode gives us full access to the operating system so we can install software that isn’t provided through Steam.
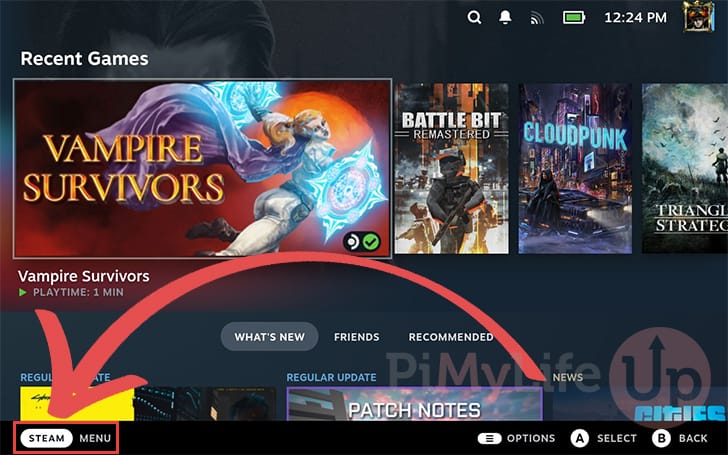
To access this mode, bring up the Steam Menu by clicking “STEAM MENU” or pressing the STEAM button.
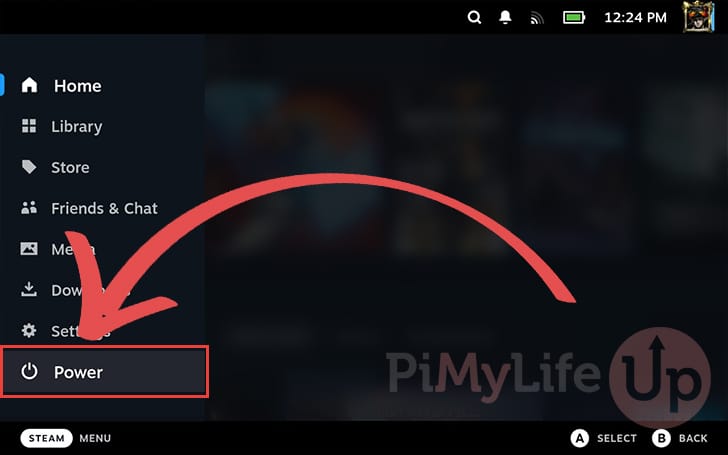
2. After opening the Steam Menu, navigate down to the “Power” option and select it.
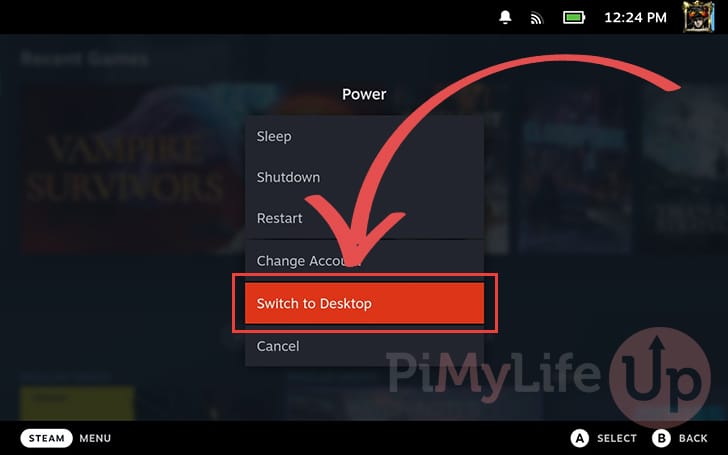
3. Once you have the “Power” menu on your screen, click the “Change to Desktop” option.
Installing Lutris using Discover on the Steam Deck
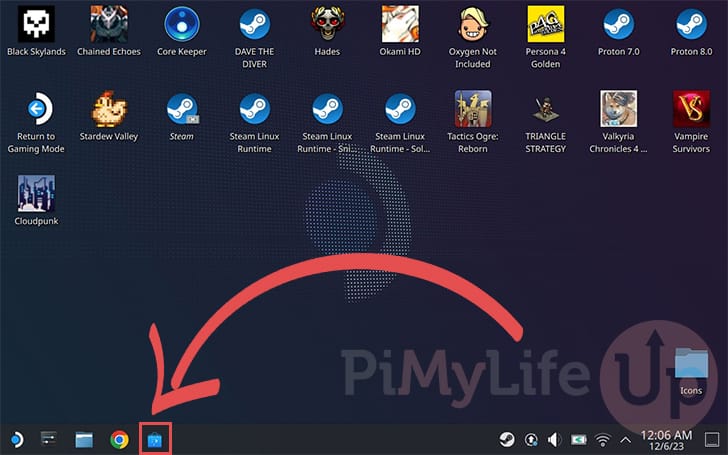
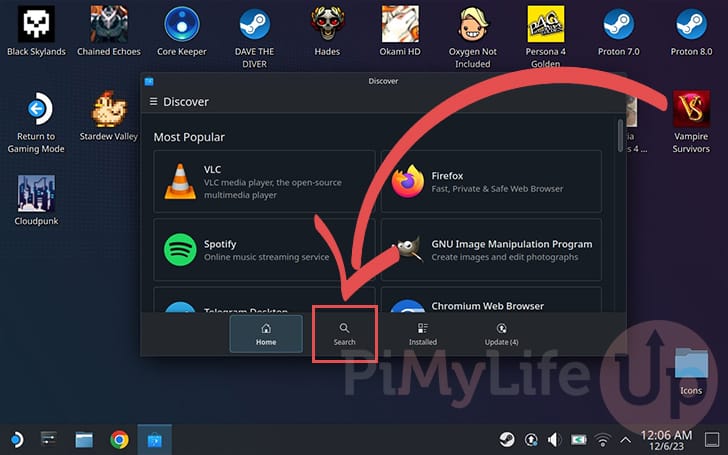
4. After swapping to the Steam Deck’s desktop mode, we must open the Discover application. You can open this application by clicking the little shopping bag icon.
This application will allow us to install Lutris in a few short clicks.
5. Now that you have the Discover application open, swap to the “Search” page.
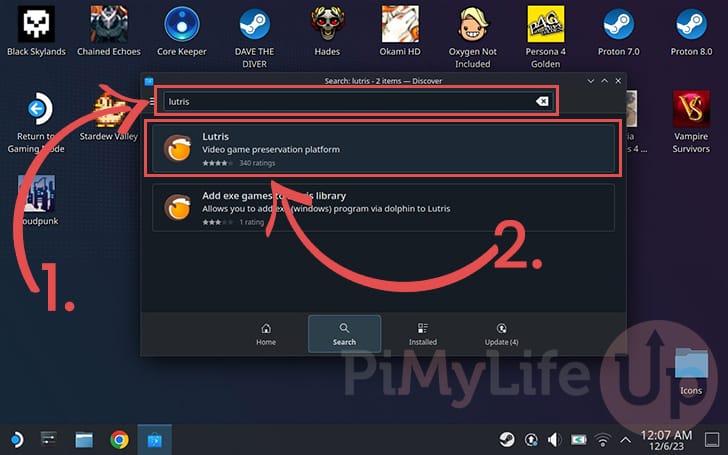
6. Using the search box, type in “Lutris” (1.).
Once you see “Lutris” appear within the application list, double-click it to open its entry (2.).
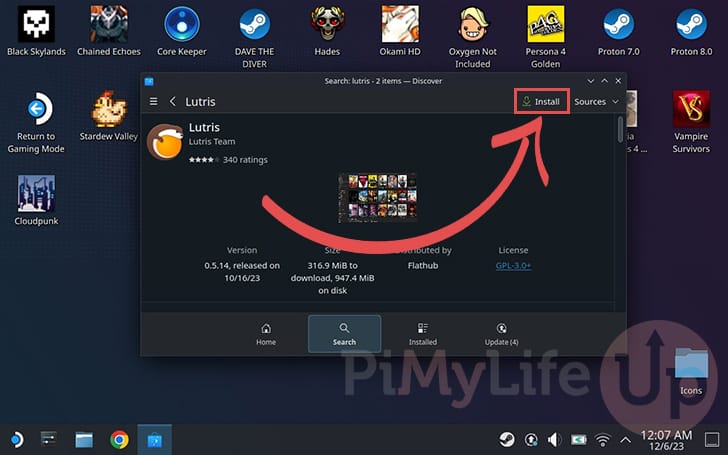
7. All you need to do now to install Lutris to your Steam Deck is to click the “Install” button.
Lutris is fairly big for a game manager, so this process might take a few minutes to complete if you have a slow network connection.
8. Once the game manager finishes installing, you can launch it by clicking the “Launch” button.

Adding a Third-Party Source to Lutris on the Steam Deck
9. At this point, you should now have the Lutris game manager open on your Steam Deck.
This section will show you how to add one of the third-party sources.
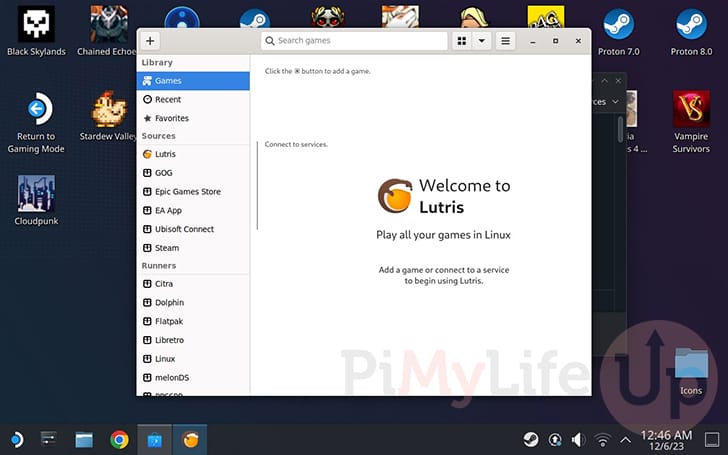
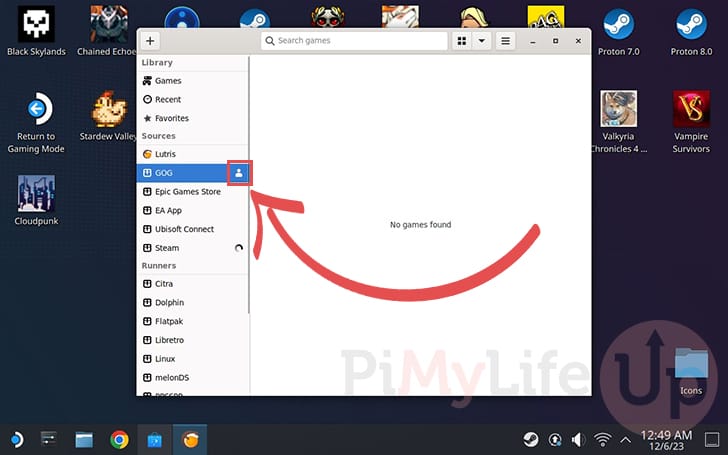
10. First, under the “Sources” header, select one of the clients that you want to set up on your Stean Deck.
For our example, we will be choosing GoG. After selecting an option, click the person icon in the sidebar to begin connecting the client to Lutris.
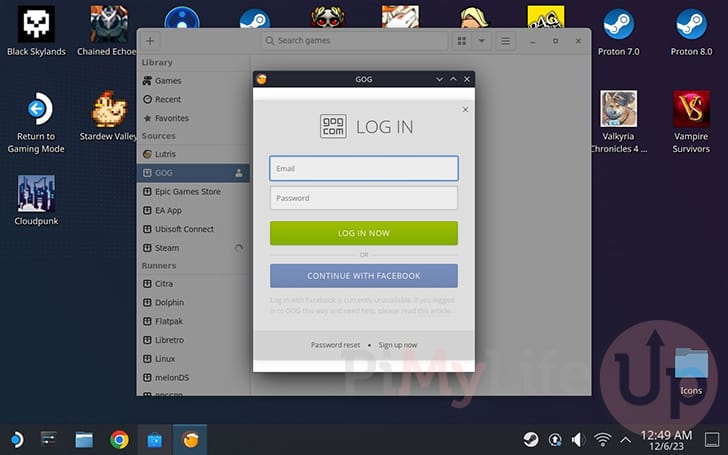
11. If you are connecting GoG, you will be asked to log in to your GoG account before proceeding.
Other sources may require you to install additional software. However, Lutris will handle this entire process for you and walk you through the required steps.
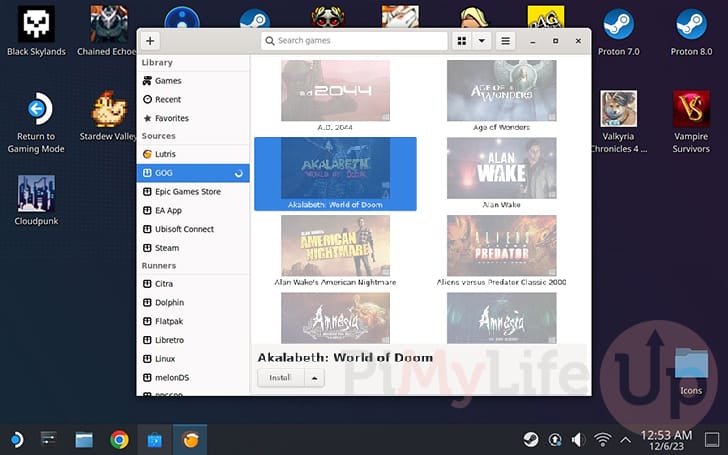
12. Below, you can see that Lutris can now see all of the games we own and GoG and offer them up for installation.
Please note from our experience it can take a few minutes for Lutris to synchronize your GoG game library.
You can use Lutris to install and run any of the games. It will automatically handle running games through Steam Deck’s Proton compatibility layer.
Adding Lutris to the Steam Deck Library
13. Our next step is to add the Lutris to the Steam Deck library as a non-steam game.
Adding Lutris to your library will allow you to access it while you are in gaming mode.
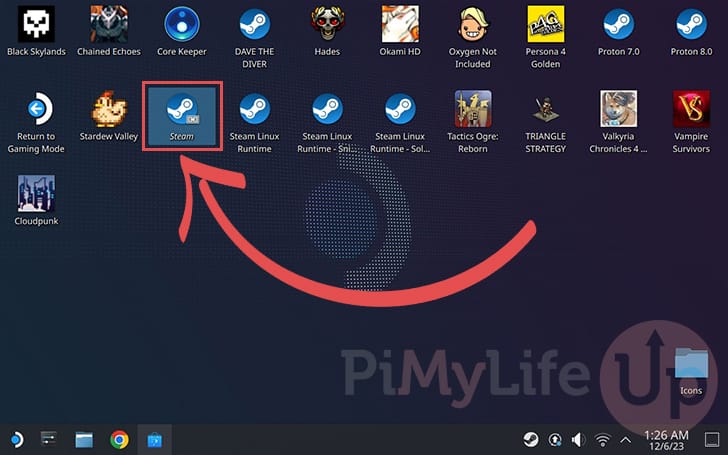
Return to the desktop and double-click the “Steam” icon to begin this process. You can also press the STEAM button on your Deck to bring up the client.
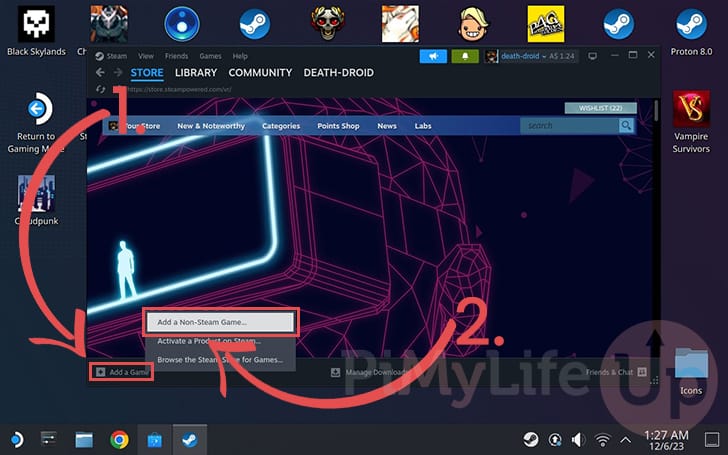
14. After opening the Steam desktop client, click the “Add a Game” button (1.) in the bottom-left corner.
In the pop-up menu that appears, click the “Add a Non-Steam Game...” option (2.).
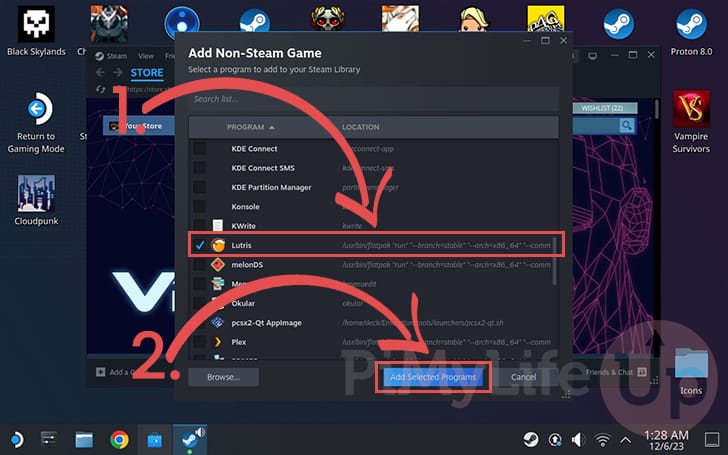
15. With the “Add Non-Steam Game” dialog open on your screen, scroll down till you see “Lutris” and tick the checkbox next to it (1.).
Once you have Lutris selected, click the “Add Selected Programs” button (2.).
Returning to Gaming Mode
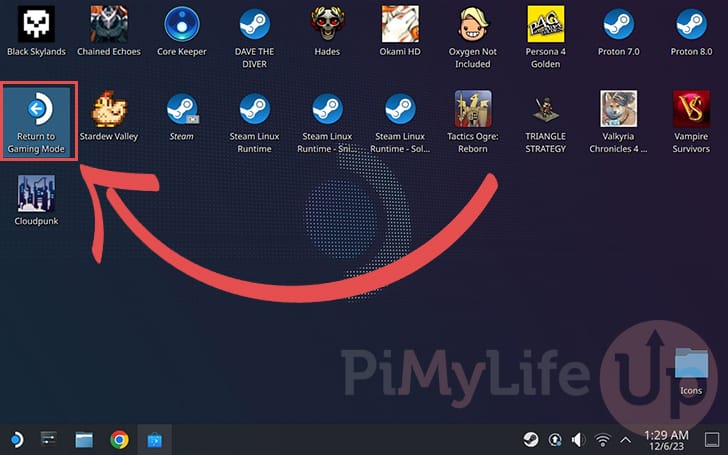
16. Now, you can return to the Steam Deck’s gaming mode.
The easiest way is to double-click the “Return to gaming mode” icon on your desktop.
Loading Lutris in Steam Deck Gaming Mode
17. Now that you are back in gaming mode, let us show you where to find Lutris on your Steam Deck.
With the Steam Menu open, navigate to your Library.

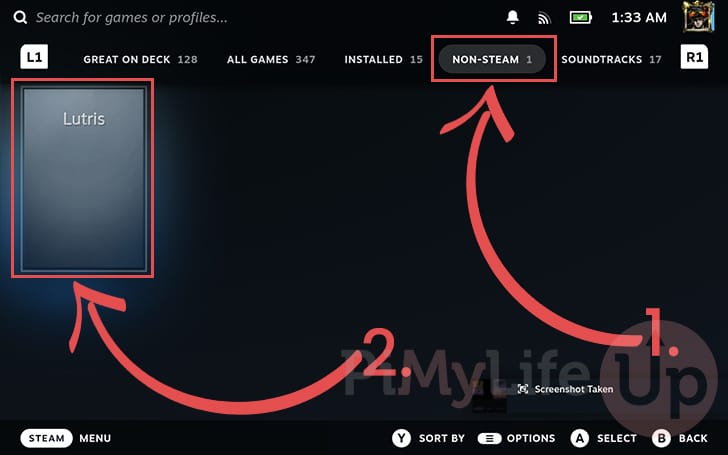
18. Once in your Steam Deck library, change to the “NON-STEAM” tab (1.).
Once in this tab, you should see Lutris as an entry (2.). Select this entry to continue.
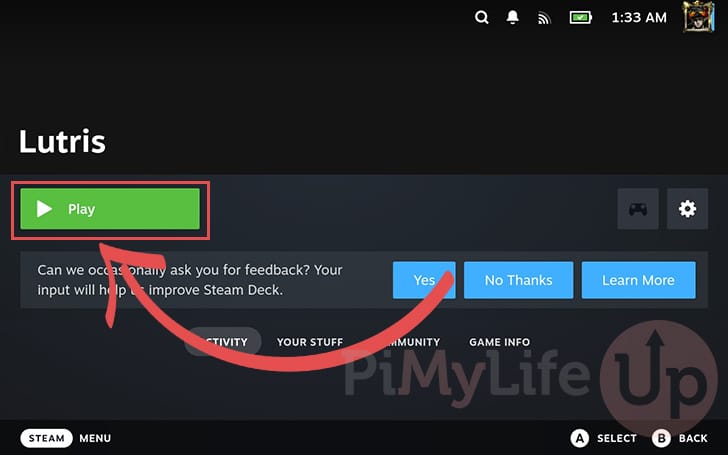
19. Now, all you need to do to launch Lutris on your Steam Deck is to click the “Play” button.
20. Below you can see we now have Lutris running within gaming mode.
We can now use this game manager without returning to desktop mode.

Conclusion
At this stage, you should hopefully have the Lutris game manager up and running on your Steam Deck.
This game manager allows you to handle games from various sources easily in one easy-to-use interface. Being built for Linux, it will also try to help Windows-based games run fine on your Deck.
Please feel free to leave a comment below if you have any issues with getting this game manager to work on your Deck.
If you found this tutorial to be helpful, we highly recommend checking out our other Steam Deck tutorials.