In this tutorial, we will show you how to install the Epic Games Store Launcher onto the Steam Deck.
The Epic Game Launcher has its fair share of exclusive games that aren’t available directly through the Steam store.
While this store client doesn’t have a Linux port, you can run the Epic Games Store Launcher through the Steam Deck’s Proton compatibility layer.
As the Epic Games Store Launcher has had a wealth of giveaways over the years, there is a high chance you have something that you would want to play on your Steam Deck.
By the end of the following section, we will install the Epic Games Launcher to your device and run it within Steam Deck’s game mode.
Please note that we highly recommend that you use the Heroic Games Launcher instead. It offers full support for your whole Epic Games library without the random issues that you will get when attempting to install the Epic Games Launcher. Best of all, it features native builds for the Steam Deck.
We still have our steps below, but be warned that the Launcher can just randomly refuse to install properly.
How to Install the Epic Games Store Launcher on the Steam Deck
Over the following sections, you will learn how to install the official Epic Games Store Launcher onto your Steam Deck.
These steps are relatively straightforward and mainly involve navigating folders on your Steam Deck. This process can be made a little quicker using a keyboard and mouse, but it is fully completable using the Steam Deck’s controls.
Changing to Desktop Mode
1. To install the Epic Games Store Launcher on the Steam Deck, you must swap from gaming mode to desktop mode.
The desktop mode allows us to install additional software that is unavailable through the Steam store.
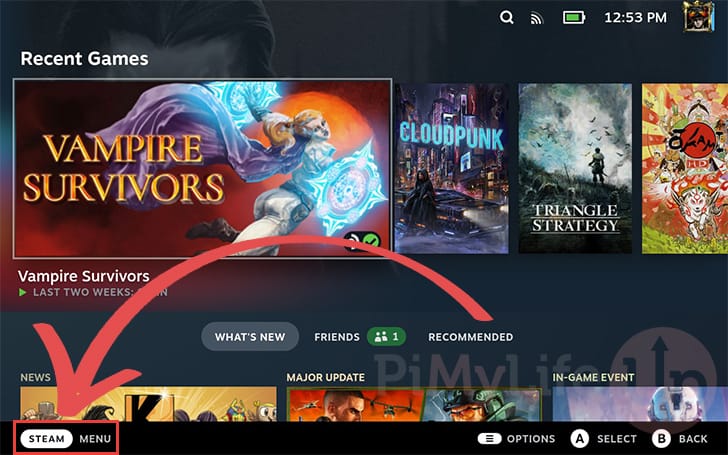
To get to desktop mode, you must first open the STEAM menu. You can open this menu by pressing the deck’s STEAM button or tapping the “STEAM menu” option in the bottom-left corner.
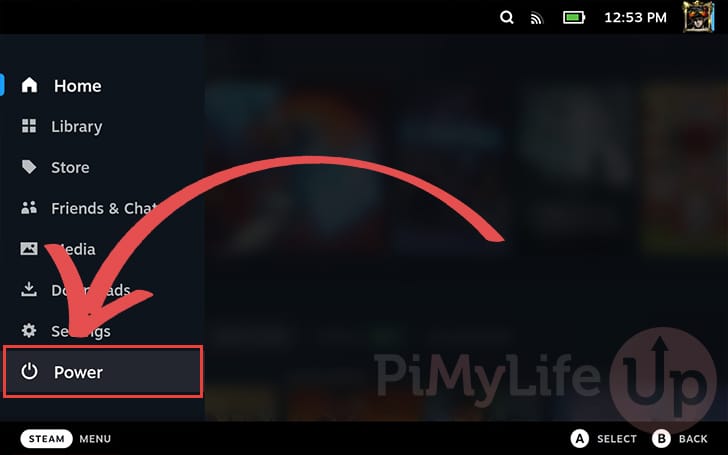
2. With the Steam menu open, navigate to the “Power” option. Despite its name, this is also how you switch to desktop mode.
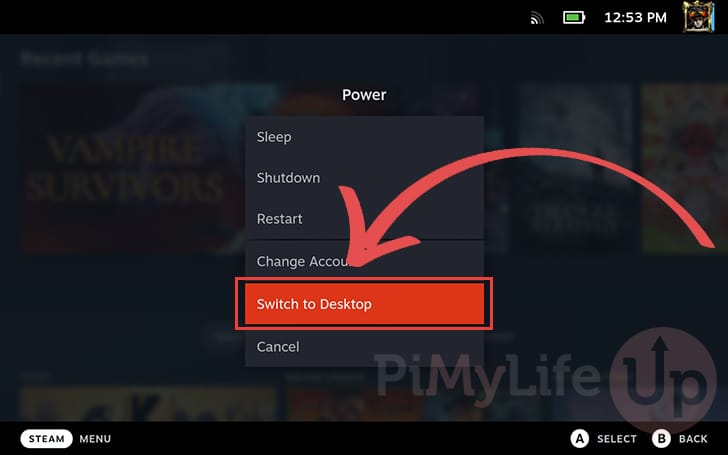
3. Finally select the “Switch to desktop” option to swap from gaming to desktop mode.
Downloading the Epic Games Store Installer to the Steam Deck
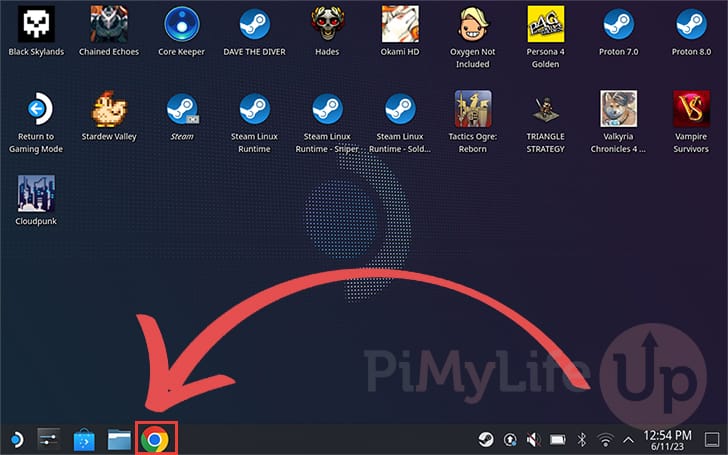
4. Now that you are in desktop mode, you will want to open a web browser.
In our case, we have the Google Chrome web browser.
5. With the browser open, you must go to the following URL to download the Epic Games Store Launcher.
This URL is a redirect to the download URL for the Epic Games Launcher. We need this redirect as the website itself will refuse to show the download link when using the Steam Deck.
https://0g.pimylifeup.com/UNLyL0Adding the Epic Games Store Launcher Installer to Steam
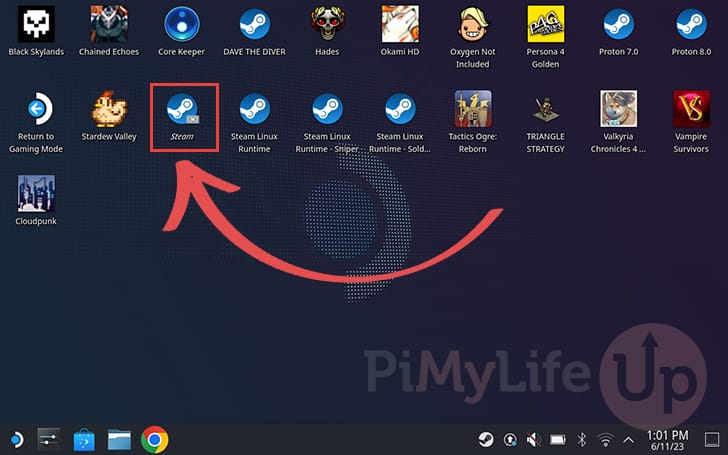
6. With the Epic Games Store installer downloaded, we must add it to the Steam Deck desktop client to launch it using Proton.
Start by returning to the desktop and opening the Steam desktop client by double-clicking/tapping the Steam icon.
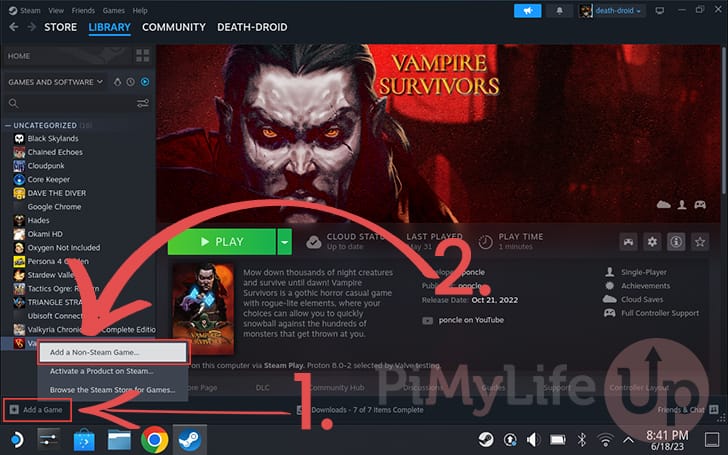
7. With the Steam desktop client open, click the “ADD A GAME” option (1.) in the bottom-left corner.
In the context menu that appears, tap the “Add a Non-Steam Game...” option (2.).
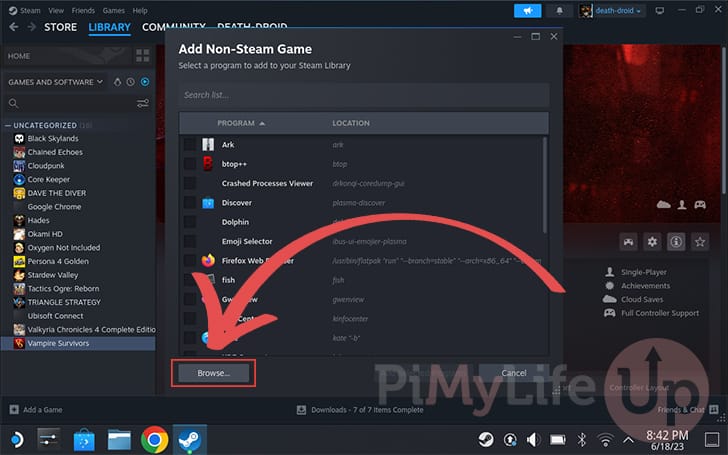
8. With the “Add a Game” dialog open, click the “BROWSE” button at the bottom of the window.
This dialog box will allow us to find and select the Epic Games Store installer we downloaded earlier to our Steam Deck.
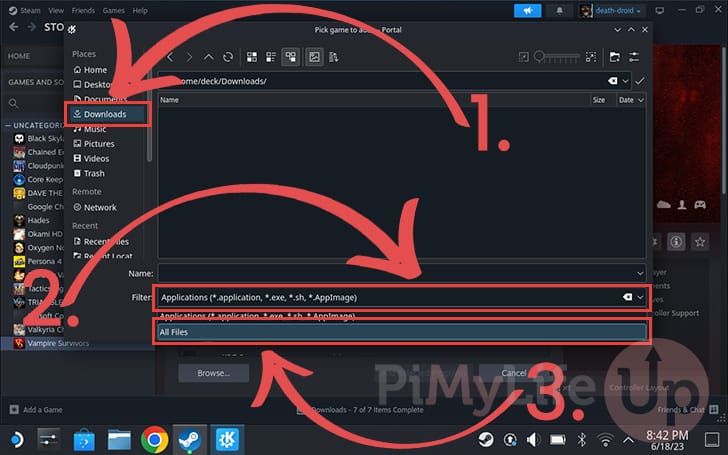
9. We can now find where we downloaded the Epic Games Store Launcher installer to on our Steam Deck. The first step is to change to the “Downloads” directory by clicking “Downloads” in the sidebar (1.).
Next, click the “Filter” select box at the bottom of the dialog to bring up several options (2.).
The option you want to select is “All Files” (3.). We must use this as the installer is a “.msi” file and not a “.exe” (3.).
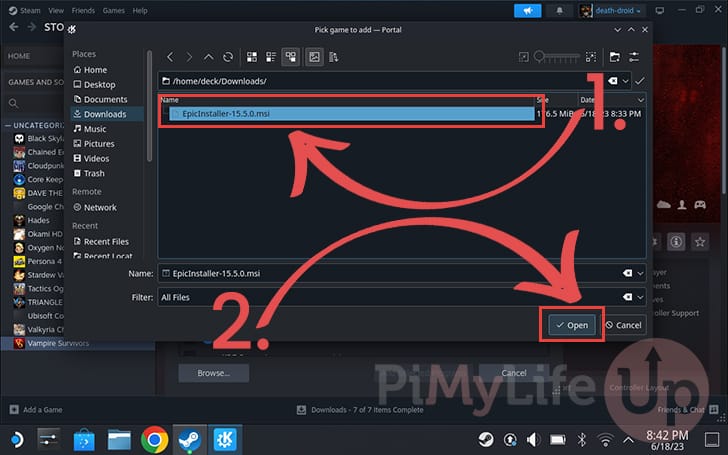
10. Within your downloads folder, look for the file that starts with “EpicInstaller” and ends with “.msi” and select it (1.) On our Steam Deck, the Epic Games Store Launcher Installer was called “EpicInstaller-15.5.0.msi“.
Once the installer is selected, click the “OPEN” button (2.).
11. Now that we are back in the “Add a Game” dialog box, ensure that the Epic Installer has a tick next to it (1.).
Once you are sure the installer is selected, click the “ADD SELECTED PROGRAMS” button (2.).

Enabling Proton Compatibility for the Epic Games Store Launcher
12. Our next step is to enforce Proton compatibility for the Epic Games Store on our Steam Deck. This compatibility layer allows us to run a Windows-based installer on our Linux device.
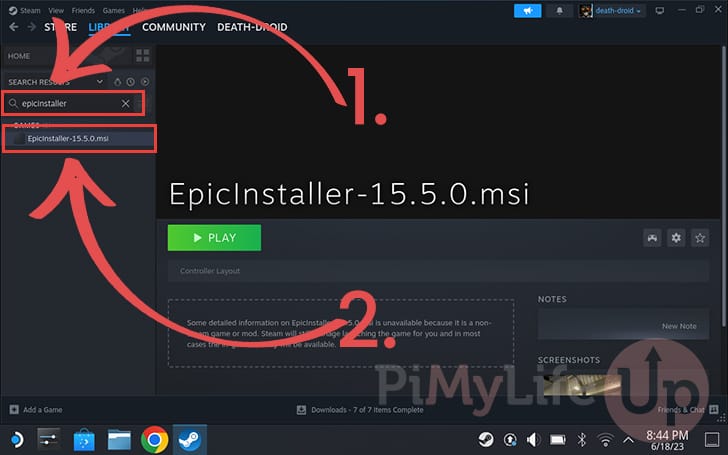
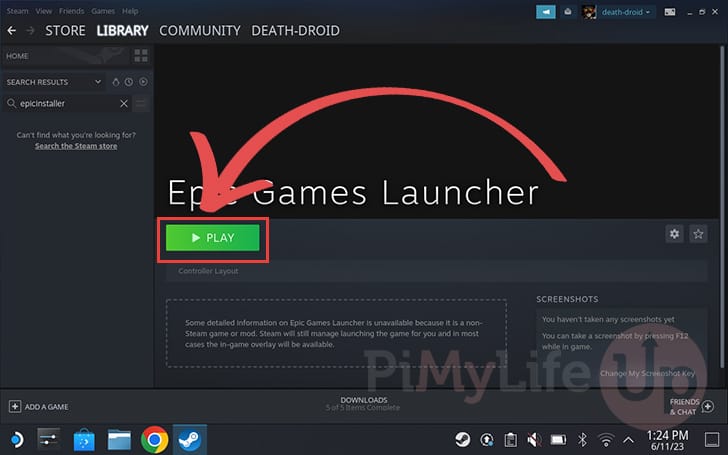
You must find the launcher within your Steam library to change the compatibility mode. The easiest way to do this is to use the search box and search for “epicinstaller” (1.).
You should eventually see an entry labeled something like “EpicInstaller-15.5.0.msi” (2.). Once found, click it to open it’s steam entry.
13. With the Epic Games Launcher entry open, click the COG icon on the right side of the screen (1.).
In the context menu, select the “Properties” option (2.).

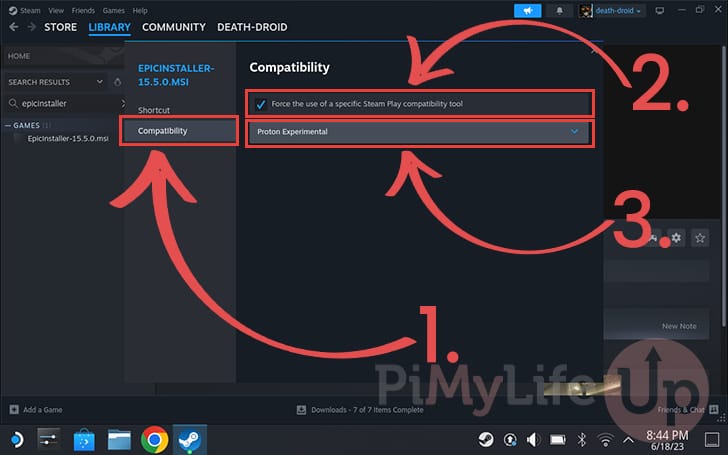
14. With the properties screen open, change to the “Compatibility” tab (1.).
Once on the compatibility tab, ensure the “Force the use of a specific Steam Play compatibility tool” option is enabled (2.).
With the option enabled, you will must that the Proton version is set to “Proton Experimental” (3.).
Running the Epic Games Store Launcher Installer on the Steam Deck
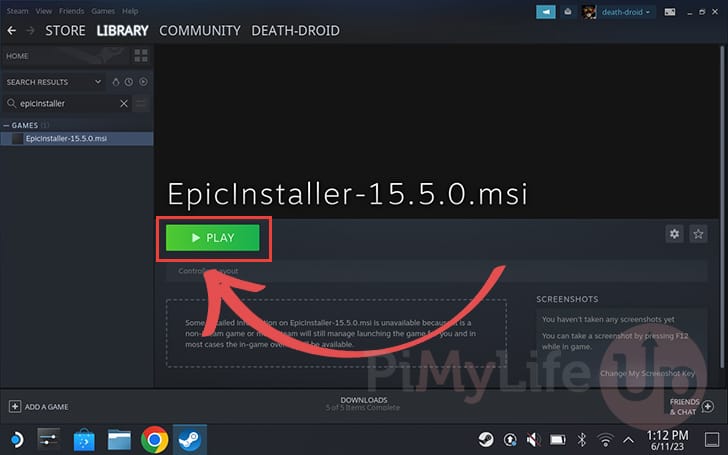
15. At this point, you can finally run the installer for the Epic Games Store Launcher on your Steam Deck.
Back in your Steam library, click the “PLAY” button to continue.
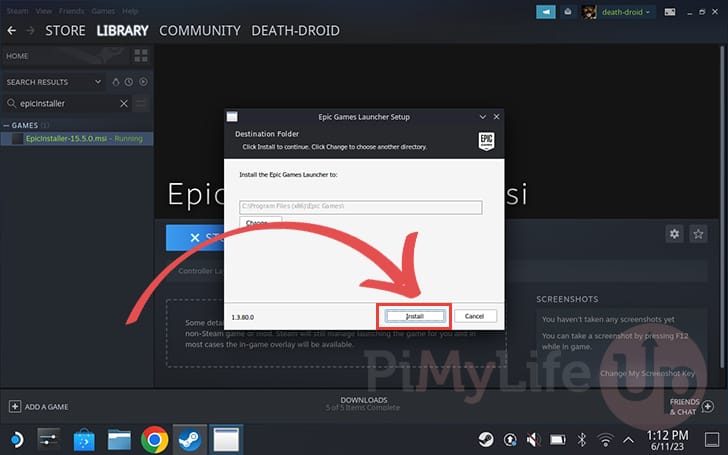
16. With the installer open, click the “Install” button to continue. This will install the Epic Games Store Launcher to the default location.
You can activate the mouse within this screen by holding the STEAM button on your Steam Deck.
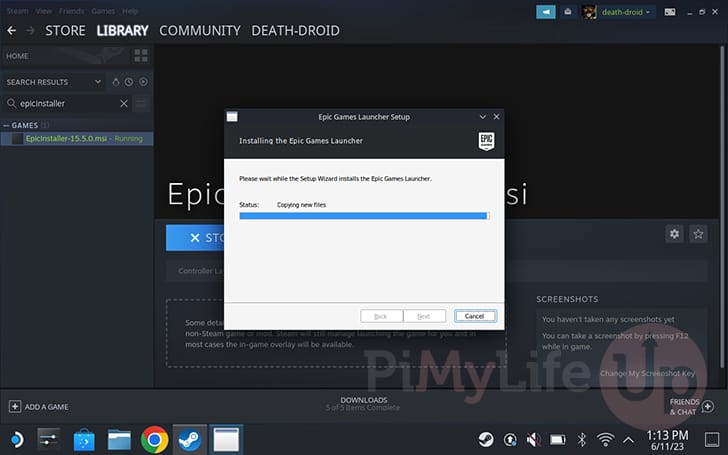
17. The Epic Games Store Launcher will now be installed to your Steam Deck. This process can take a couple of minutes to complete.
In our experience, once the installer completed, it disappeared without any prompts.
Correcting the Launch and Start Target for the Epic Games Store Launcher
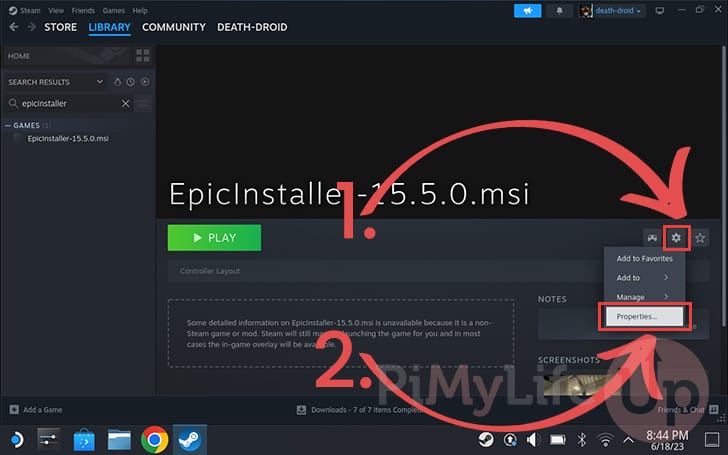
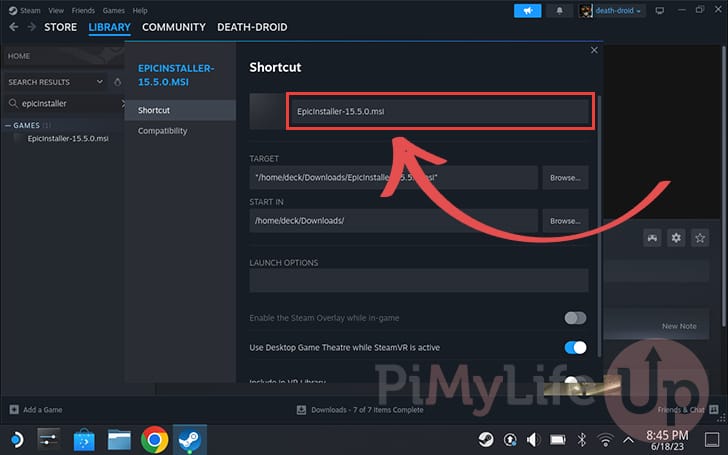
18. Once the installation process is complete, we need to open the Steam properties page for the launcher.
Bring up the context menu by clicking the COG icon on the right-side of the screen (1.).
Within the menu, click the “Properties” page to continue (2.).
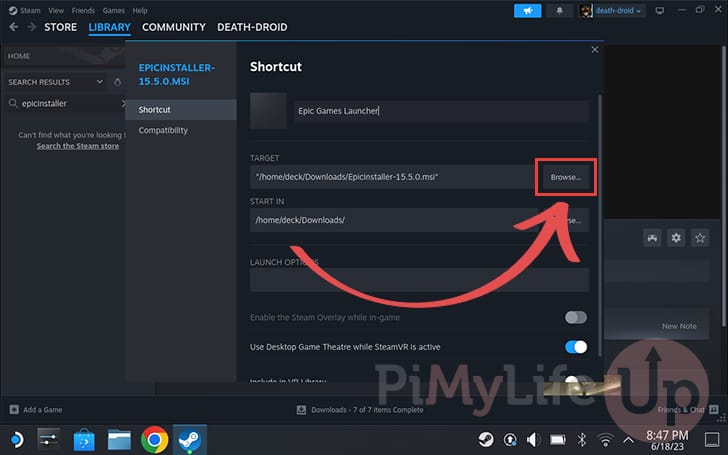
19. With the properties page open, you will want to start by renaming the shortcut from “EpicInstaller” to something like “Epic Games Launcher” or “Epic Games Store“. Renaming the launcher will make finding the Epic Games Store Launcher in your Steam Deck library easier.
You can bring up the keyboard on your device by pressing the STEAM and X buttons at the same time.
20. We now need to change the launch target for the Epic Games Store Launcher, as it is currently pointed at the installer.
To change the launch target, click the “Browse...” button.
Browsing to the Epic Games Store Launcher Executable
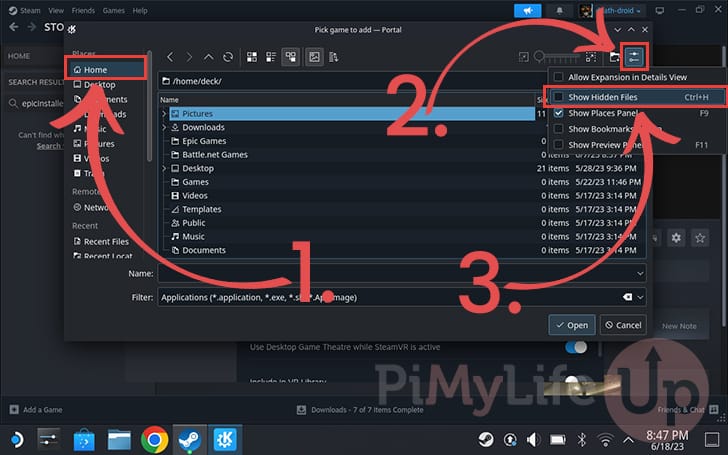
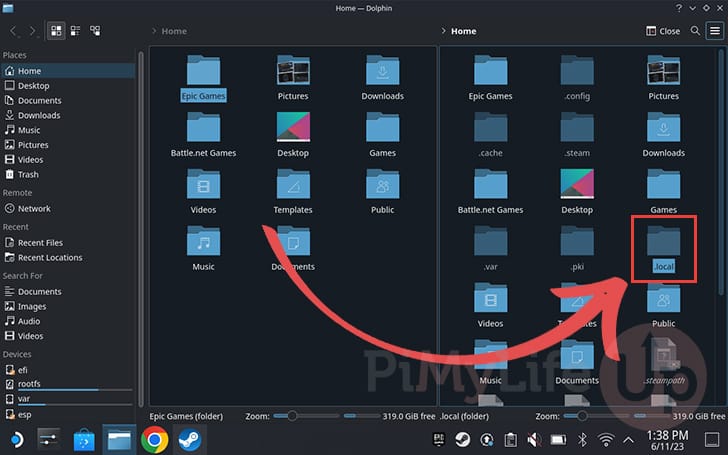
21. With the file browser open, we need to change back to the home directory. You can do this by clicking “Home” in the left sidebar (1.).
Once you are back in home, click the settings icon in the top-right corner (2.).
Next, ensure that the “Show Hidden Files” option is ticked (3.).
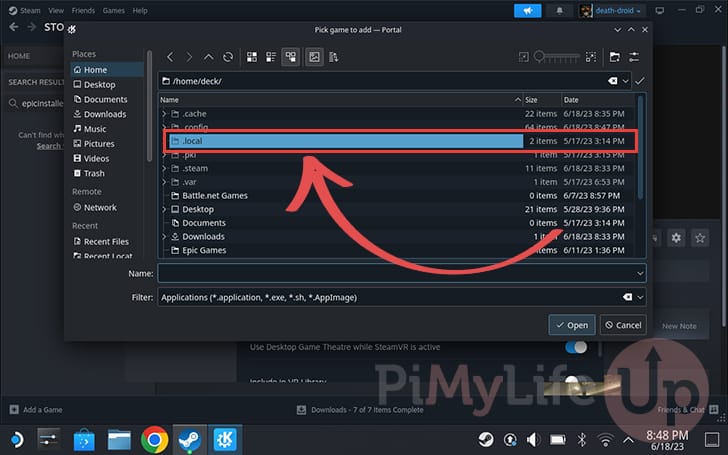
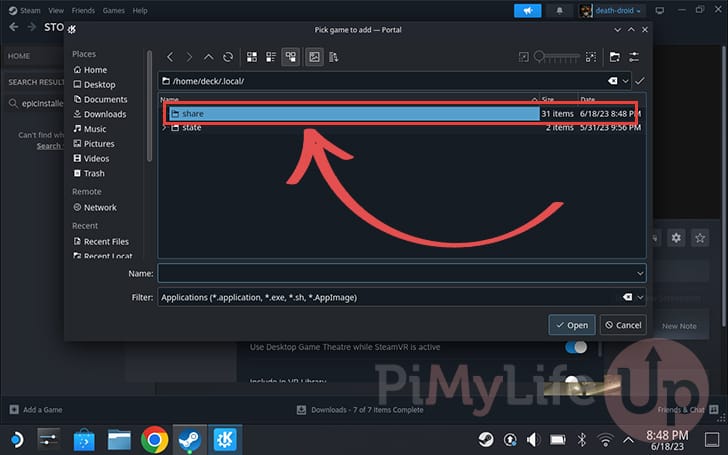
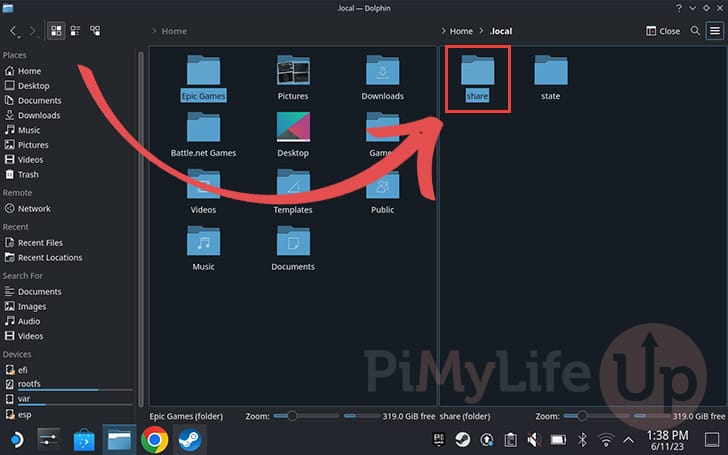
22. You will now want to browse to the “.local” directory.
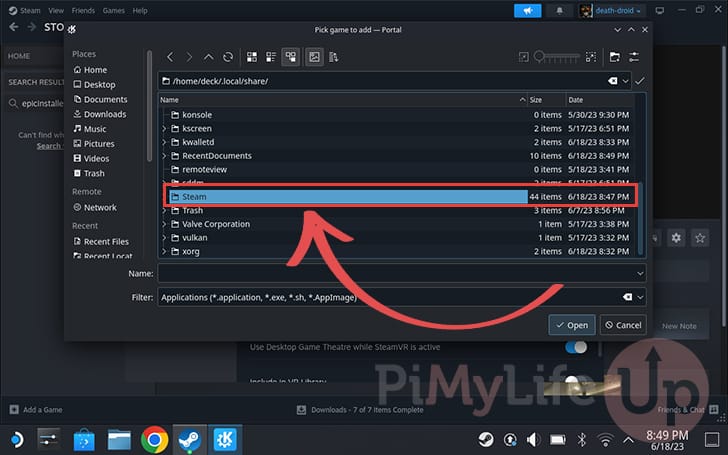
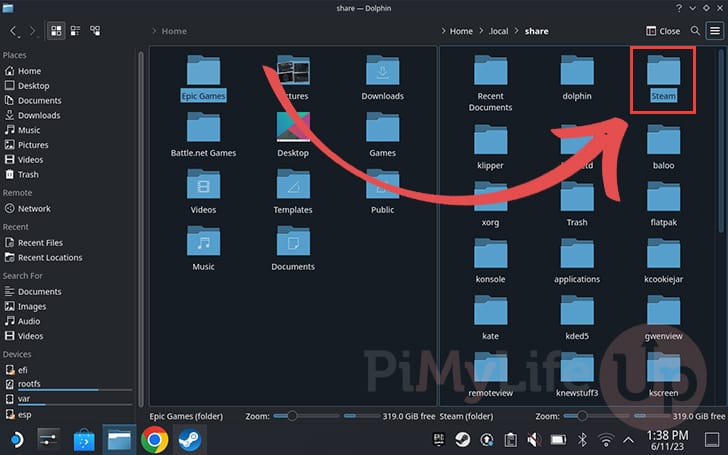
23. The next directory you must open is the “share” folder.
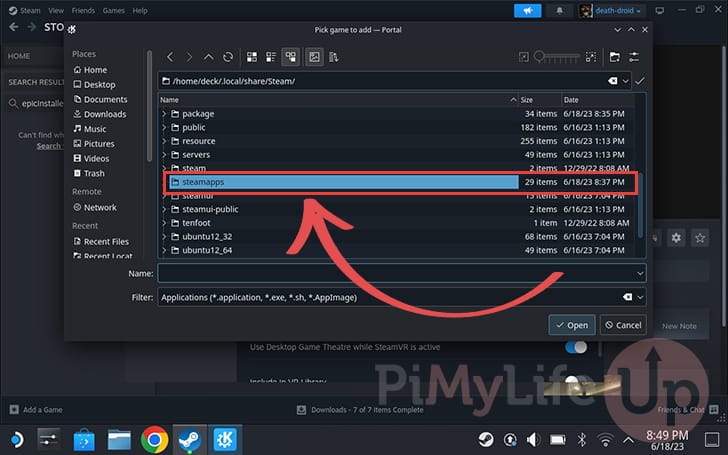
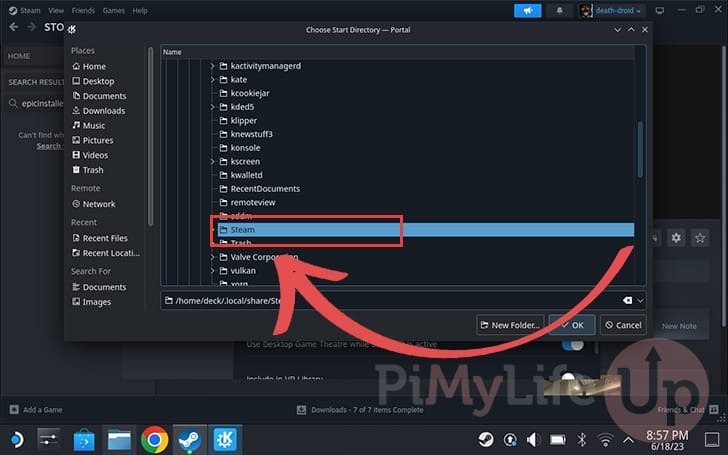
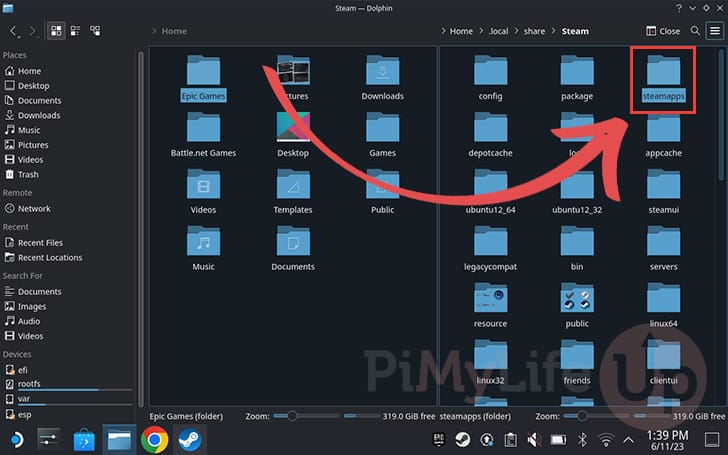
24. Our next step is to scroll down and open the directory with the name “Steam“.
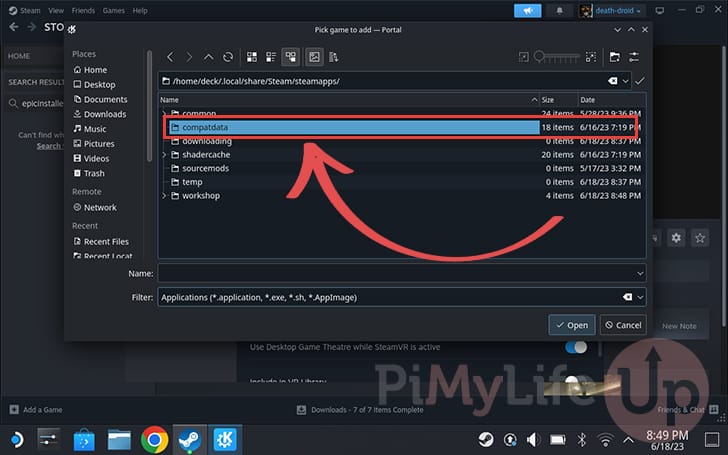
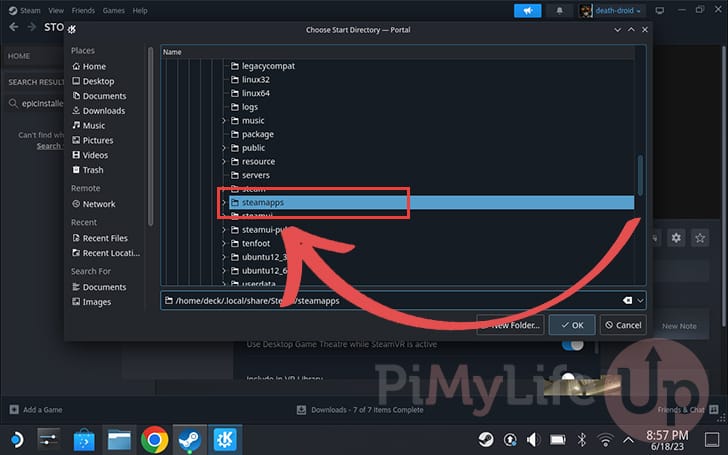
25. We can now enter the directory named “steamapps“.
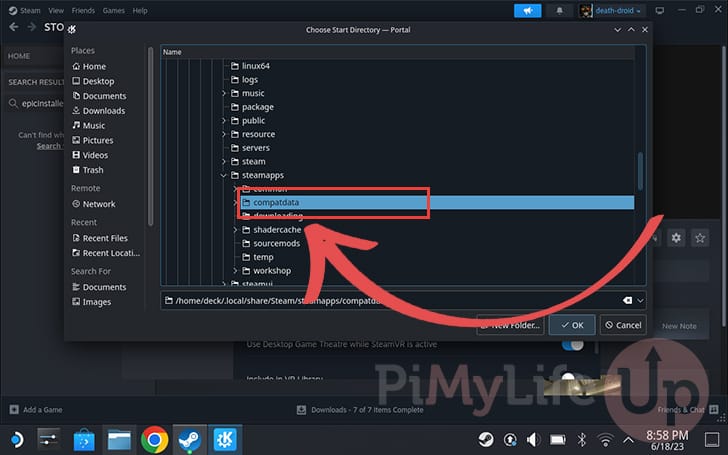
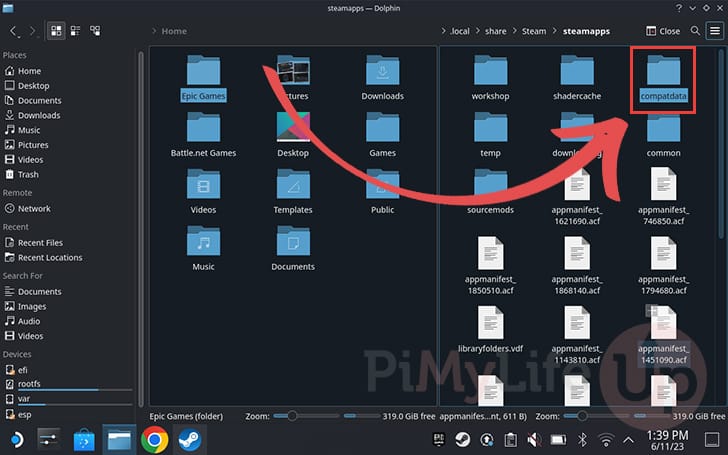
26. The next folder we need to open is the “compatdata” directory. This directory is where applications handled by Proton are stored on your Steam Deck. This includes the Epic Games Store Launcher.
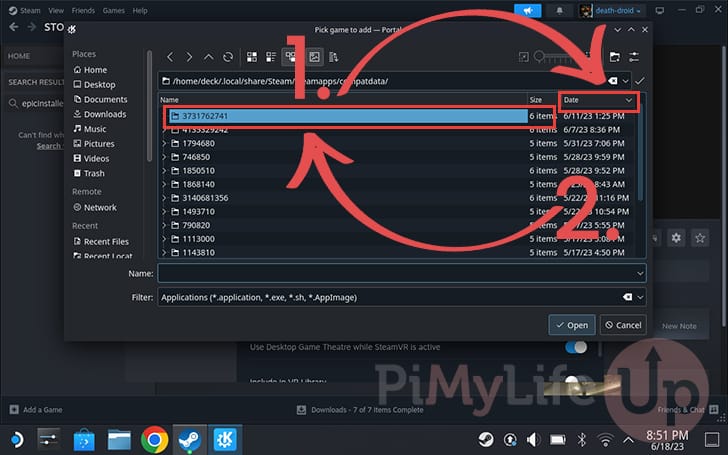
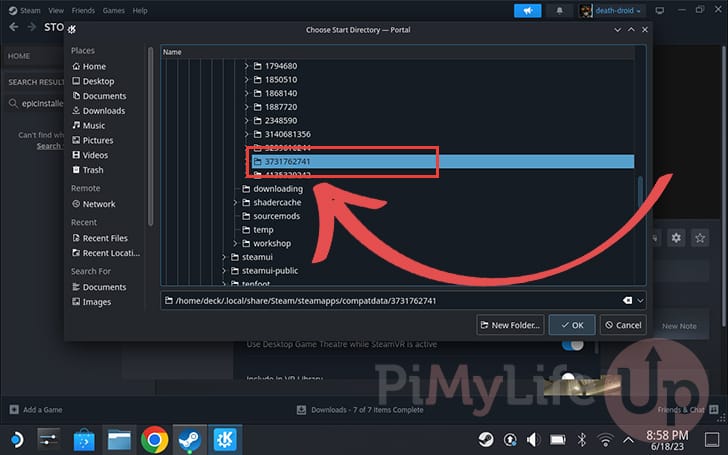
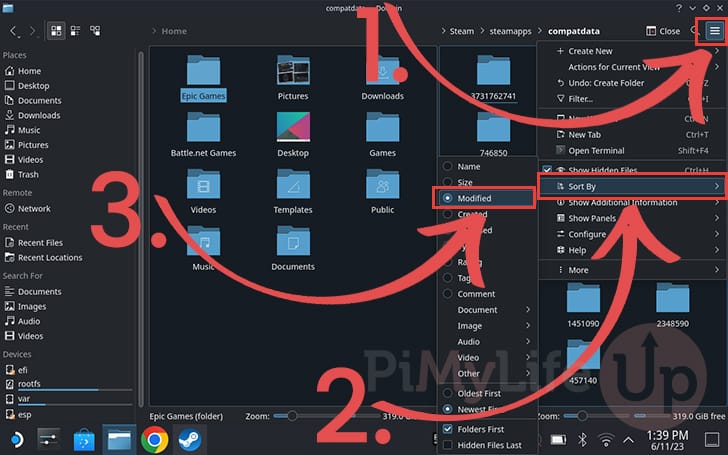
27. Now that we are in the correct directory, ensure that the folders are sorted by “DATE” (1.). The arrow next to the heading should be pointing downwards.
Once the folders are ordered, select the one with the latest modified date (2.). Typically, this should be the folder at the top of the list.
Remember the name of this folder as you will need it for the next section.
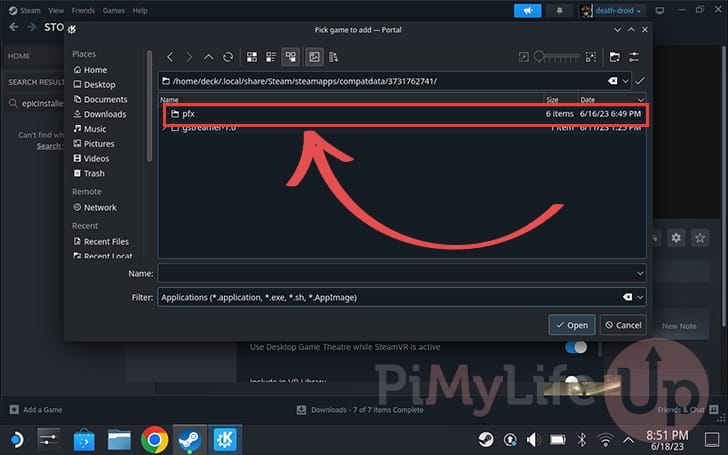
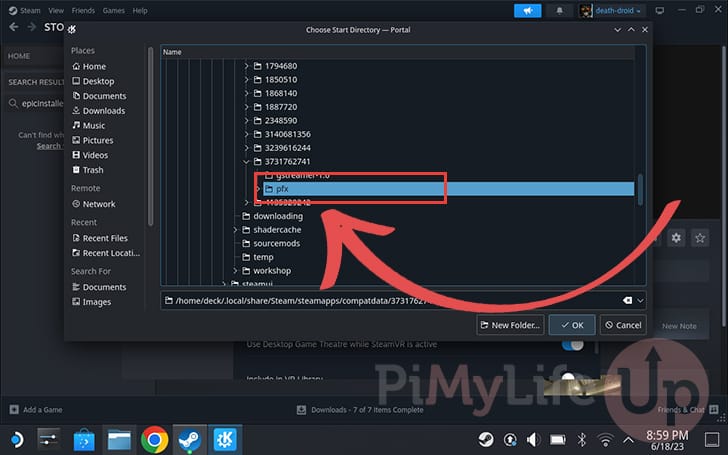
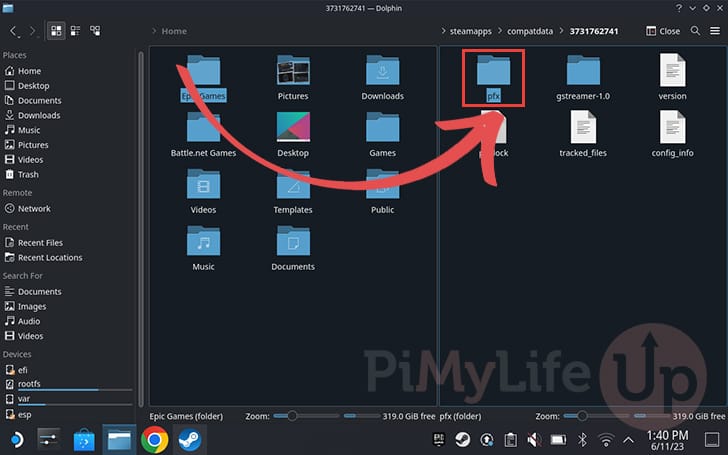
28. Next, open up the directory named “pfx“.
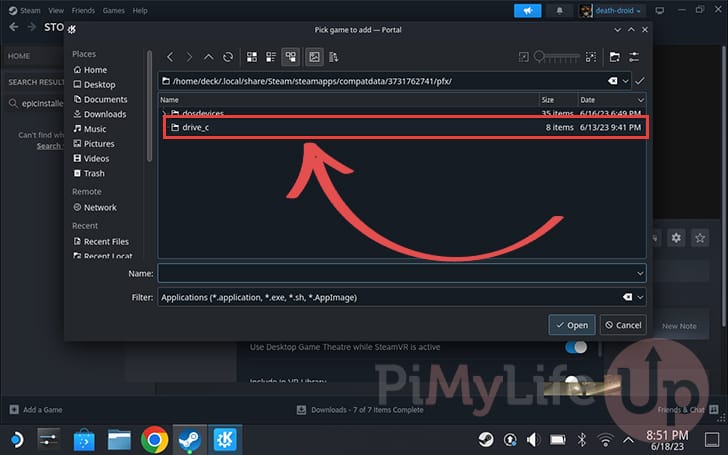
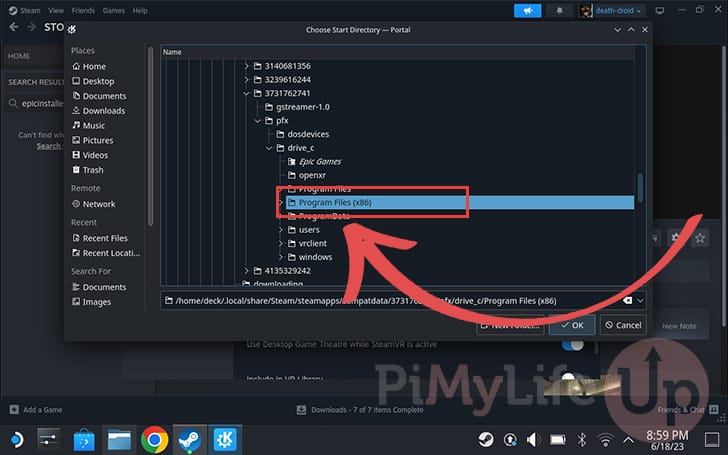
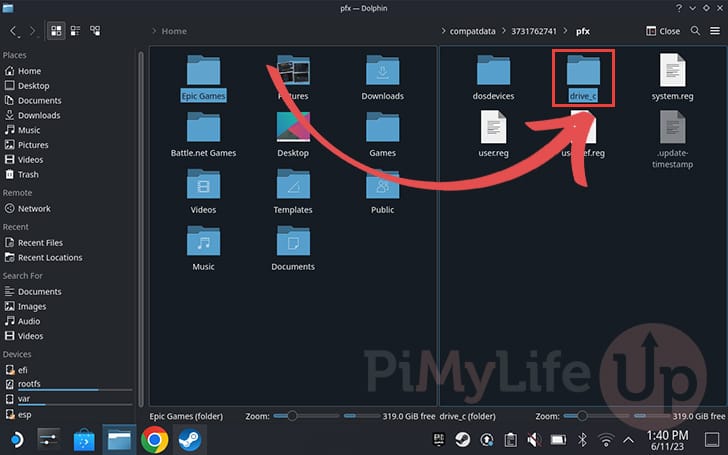
29. Now, navigate into the “drive_c” directory. This directory is where Proton simulates the Windows folder structure.
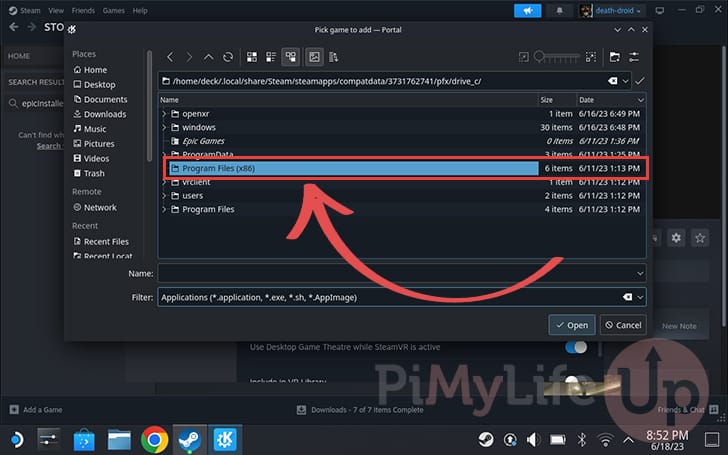
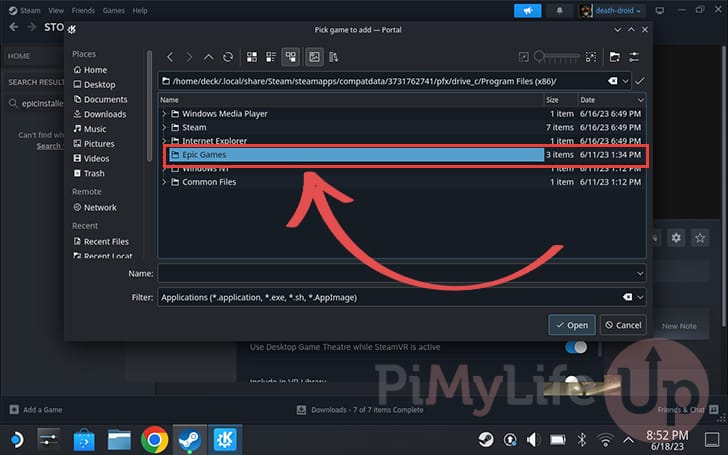
30. We can now move into the “Program Files (x86)” folder. This directory is where the Epic Games Store Launcher was installed to the Steam Deck earlier in this guide.
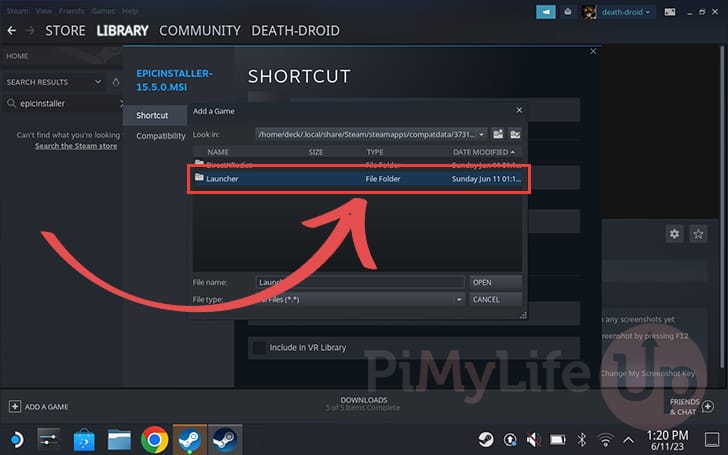
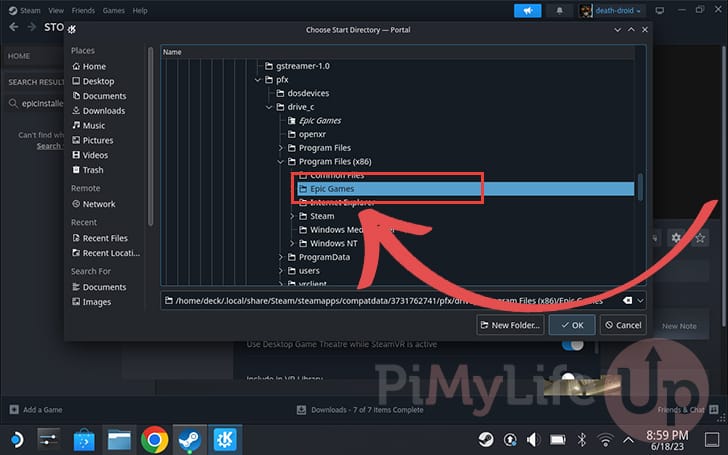
31. You now must open the directory named “Epic Games“.
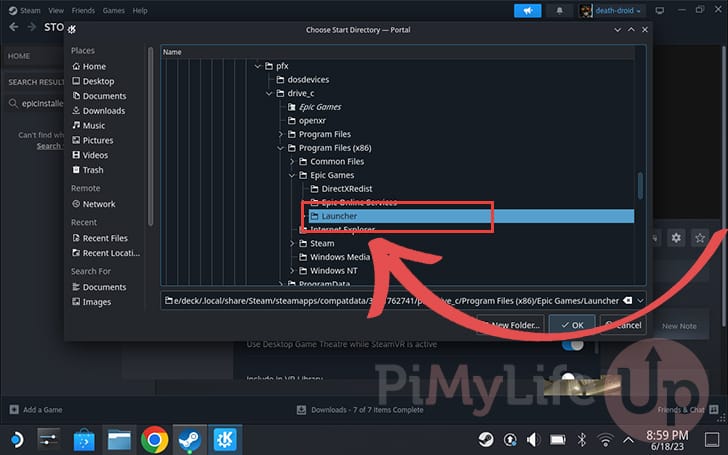
32. Navigate into the “Launcher” directory.
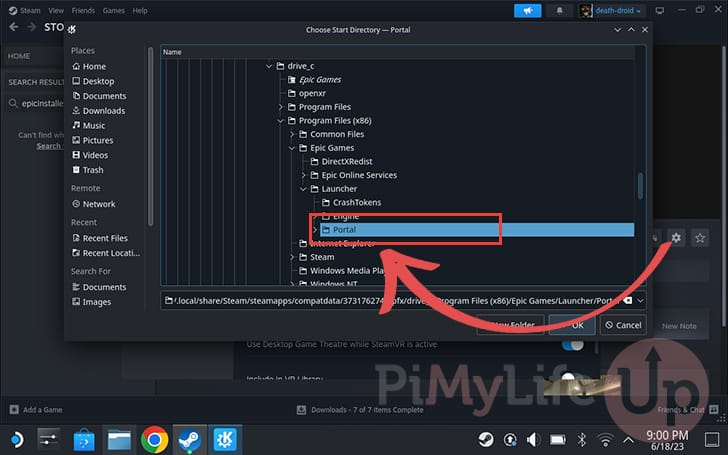
33. For the next step, we need to open the “Portal” directory.
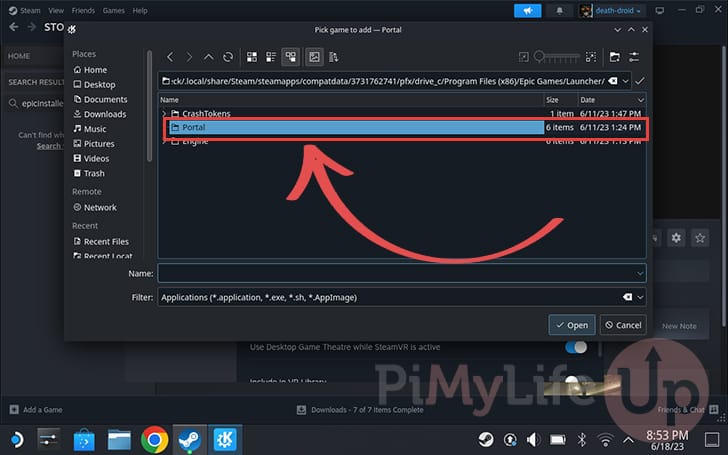
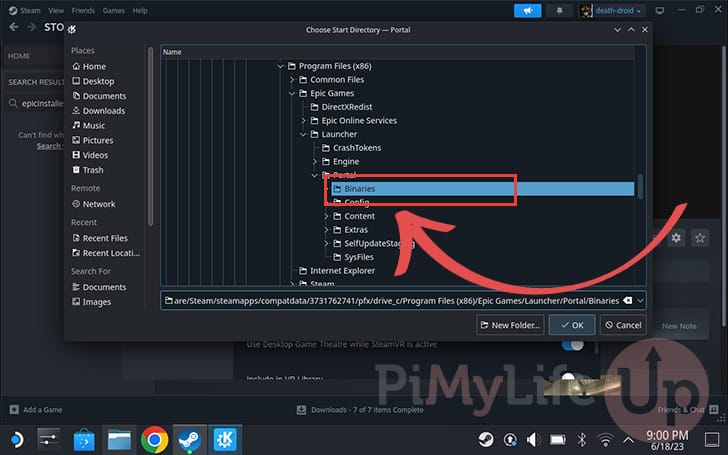
34. Now switch to the directory called “Binaries“.

35. We can now open up the directory named “Win32“.
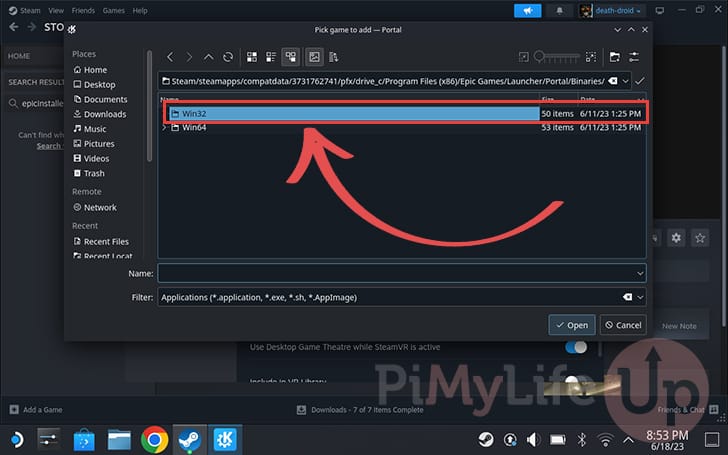
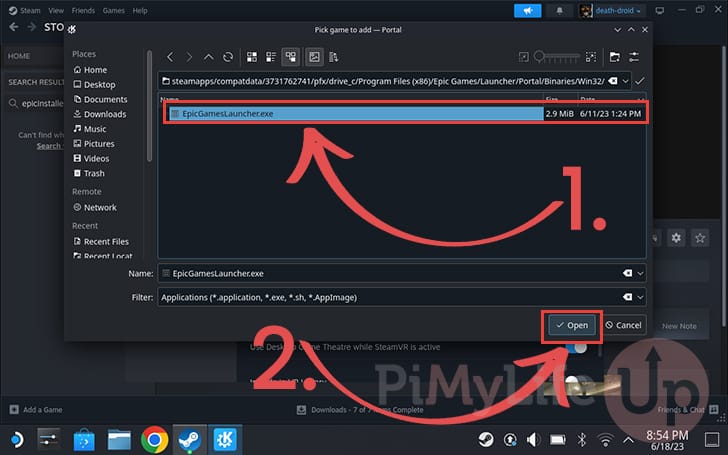
36. Since we are finally in the correct directory, scroll down until you find the executable named “EpicGamesLauncher.exe” (1.).
With the launcher selected, click the “OPEN” button (2.).
Setting the Start In Target for the Epic Games Store on the Steam Deck
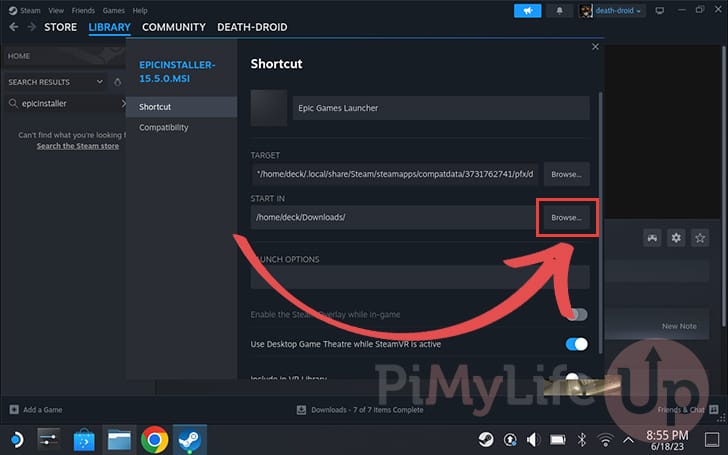
37. If your “Start In” field is still set to the default value then we will also need to set that value. If the value looks correct you can skip to the next section.
To begin selecting the Start In directory, click the “Browse” button as shown below.
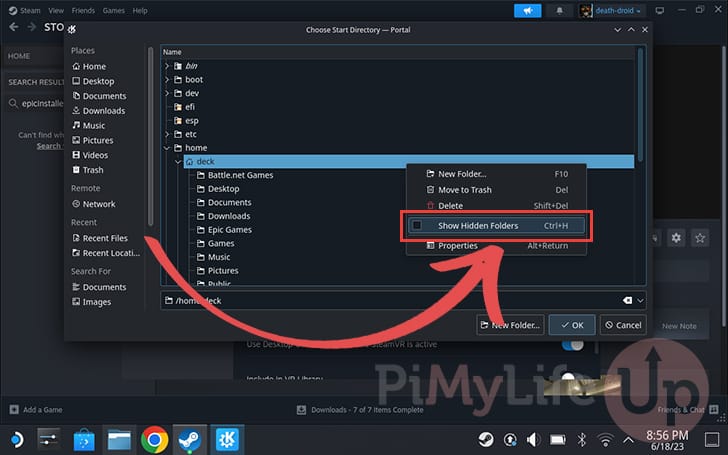
38. With the browse dialog box now open on your Steam Deck you will want to enable hidden folders.
To do this, you will need to right-click and then select the “Show Hidden Folders” option. You can right click using the Steam Deck by pressing the L2 trigger.
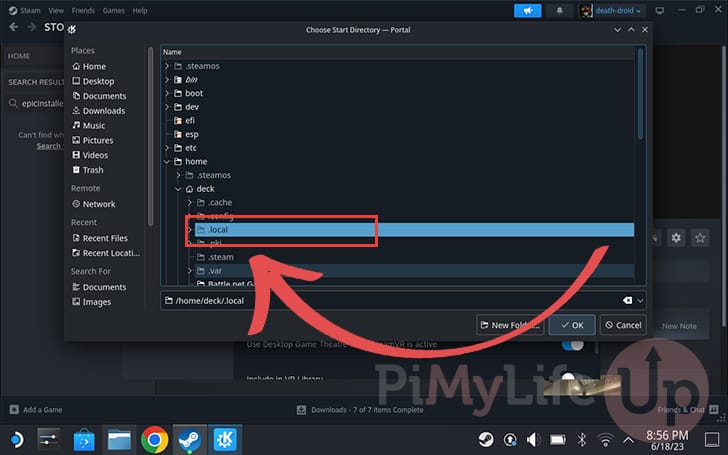
39. We next need to browse to the “.local” directory.
You can navigate this dialog faster by using the D-PAD on your Steam Deck.
40. Once on the “.local” directory you will next needf to navigate to the “share” folder.

41. Next, change to the directory named “Steam“.
42. Now, open the directory named “steamapps“.
43. Once you are in the “steamapps” folder you will need to navigate down to the “compatdata” directory.
44. Now here is where you need to remember the name of the folder you entered earlier in this guide. This is the directory where the Epic Games Store launcher was installed to the Steam Deck.
45. The next folder you will need to navigate to is named “pfx“.
46. Now look for the directory with the name “Program Files (x86)” and change in to it.
47. Once within the program files directory, look for and enter the directory named “Epic Games“.
48. As we are after the Epic Games Store Launcher we now want to move to the “Launcher” directory.
49. Now navigate into the directory labeled “Portal“.
50. Finally, we are almost at the correct place, the last folder we need to change into is the one named “Binaries“.
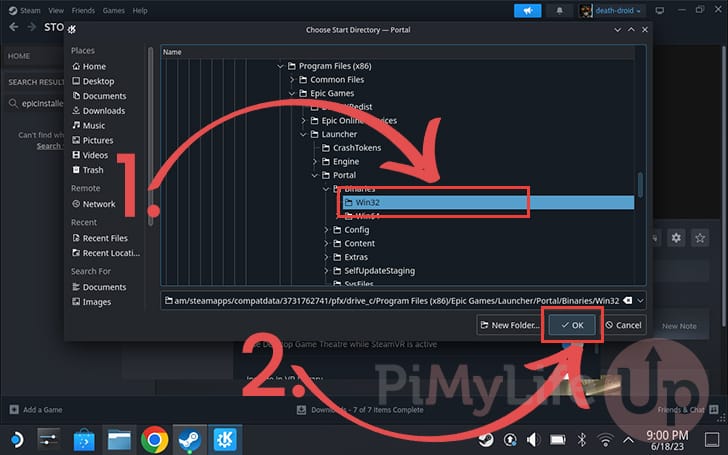
51. Once you are finally in the “Binaries” directory, click the directory named “win32” (1.).
With the “win32” directory selected, click the “OK” button (2.) to proceed.
Ensure Both fields have Double Quotes
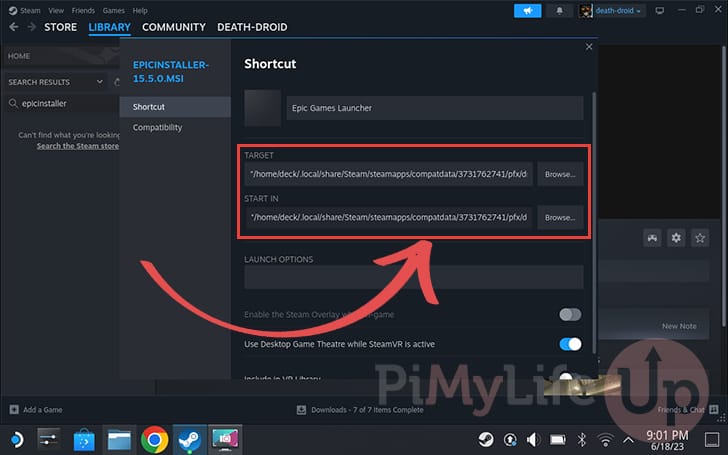
52. Back in the properties screen, you should see both the shortcut name and the launch target have been updated.
Before you continue, you should ensure that the “TARGET” and “START IN” fields both start and end with a double-quote ("). Some builds of Steam for some reason don’t add these required elements.
Creating a Directory to Store Your Epic Games
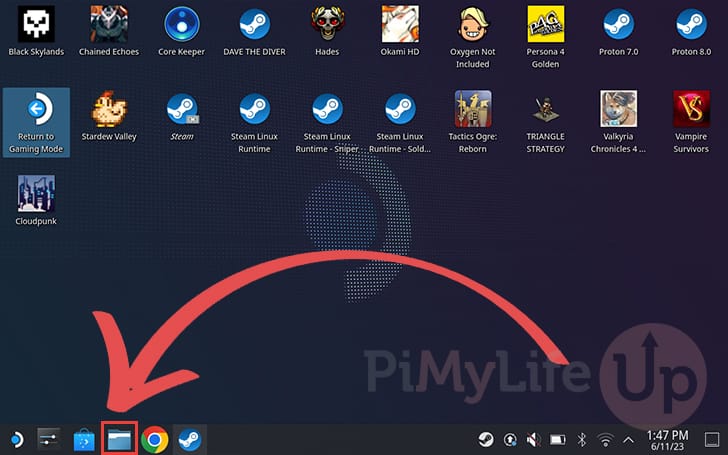
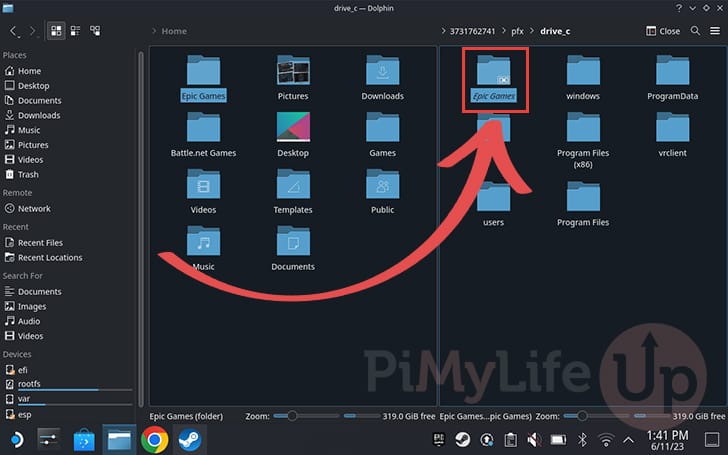
53. Back on the desktop, you will want to open the Dolphin file explorer. You can do this by clicking the Folder icon on the taskbar.
We will use the file explorer to create a directory within your home folder. We will then create a symbolic link between this and the Proton folder the Epic Games Store Launcher is installed in on your Steam Deck.
54. With the file explorer open, ensure that you are currently in your home directory (1.).
Once you are in the right location, right click anywhere within the folder to bring up the context menu. You can right-click by pressing L1 (left trigger) on your Steam Deck.
With the context menu open, select the “Folder...” option (2.).
Next, select the “Create New” option (3.).

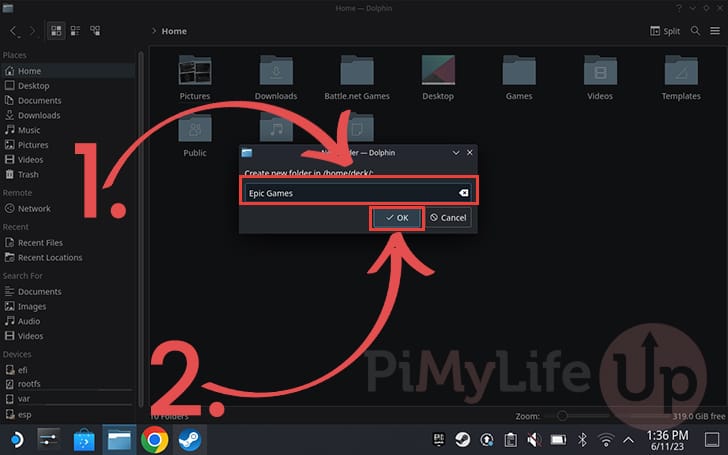
55. You can now give a name to your new folder. In our example, we will be naming this directory “Epic Games” (1.).
Once you have named the folder, click the “OK” button (2.) to proceed.
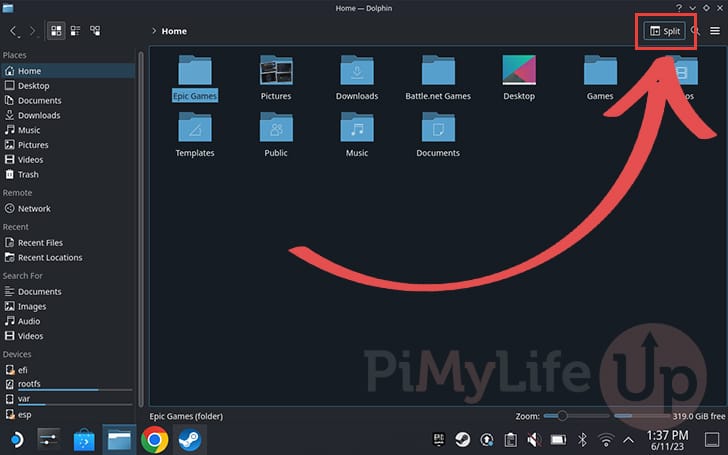
56. We now need to split the Dolphin file explorer so we can easily navigate to where we installed the Epic Games Store Launcher on the Steam Deck.
You can split the file explorer by clicking the “Split” button in the top-right corner.
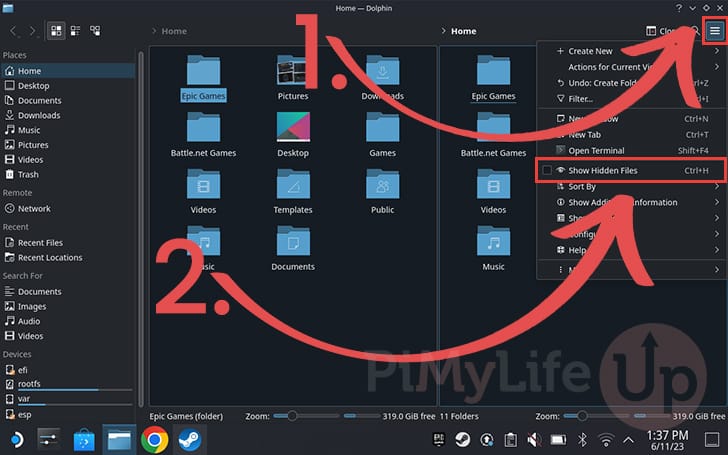
57. Once split, click the hamburger icon in the window’s top-right corner (1.).
In the context menu that appears, you will want to ensure that the “Show Hidden Files” checkbox is ticked (2.).
58. With hidden files now shown, you will want to start by navigating into the “.local” folder.
59. Within the Dolphin file explorer, you will now want to change to the “share” directory.
60. You will now want to navigate to the “Steam” directory.
61. The next directory that you need to open is the one labelled “steamapps“.
62. We are now almost there. We can now move into the folder labelled “compatdata“.
63. Our next step is to change how the file browser sorts the directory. To do this, open the hamburger icon again (1.).
Next, hover over the “Sort By” option (2.).
Now, make sure that the “Modified” setting (3.) is selected and that the order type is set to “Newest First“,
64. With the directory now ordered. Open the first directory in the list. This should be where you installed the Epic Games Store Launcher on your Steam Deck.
The directory should have the same name as the one you browsed to earlier when changing the launch target.

65. Finally, navigate into the directory labeled “pfx“.
66. Now browse into the “drive_c” directory. This directory is simulated within the Epic Games Store Launcher and will appear as your “C” drive.
67. Now that we are in the correct location, click and drag the folder “Epic Games” (1.) to the right side of the screen. You can left-click by pressing the R1 trigger.
In the context menu, click the “Link Here” option (2.).

68. You should now have a folder named “Epic Games” with a link icon.
Running the Epic Games Store Launcher on your Steam Deck
69. Back in the Steam desktop client, launch the Epic Games Store Launcher by clicking the “PLAY” button.
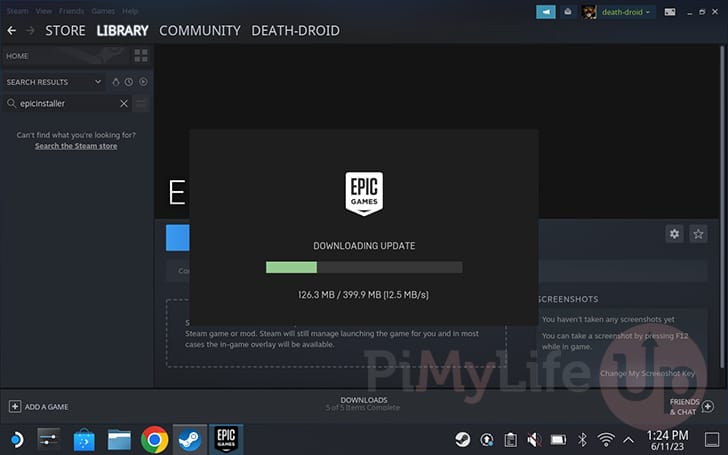
70. As the launcher we installed earlier is only a stub, it will now download the latest version of the client to your Steam Deck.
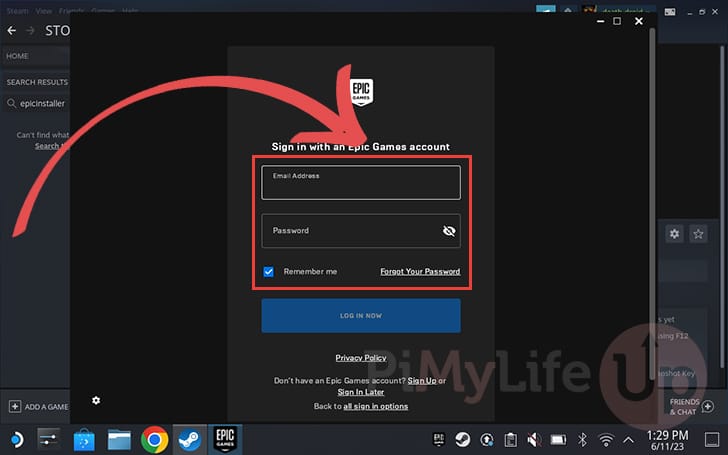
71. The first time you run the Epic Games Store Launcher on your Steam Deck, you must log in to your account.
When logging in, we recommend ticking the “Remember me” checkbox. Additionally, you can activate the mouse within this window by pressing the STEAM button.
You can also open the virtual keyboard by pressing the STEAM and X buttons simultaneously.
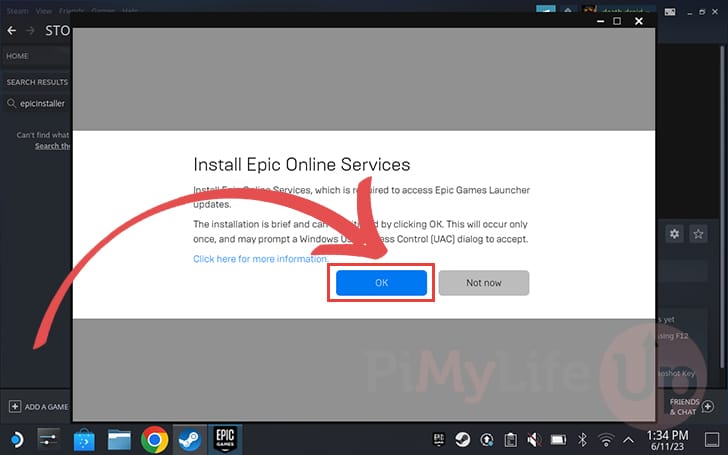
72. Next, you will be asked if you want to install the Epic Online Services.
To proceed, you will need to click the “OK” button.
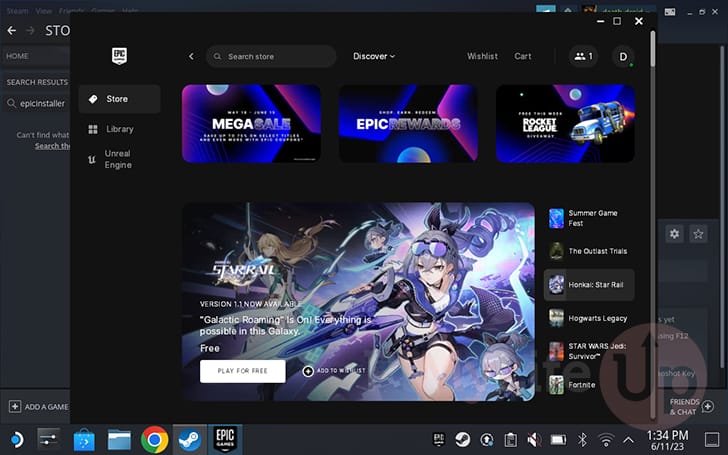
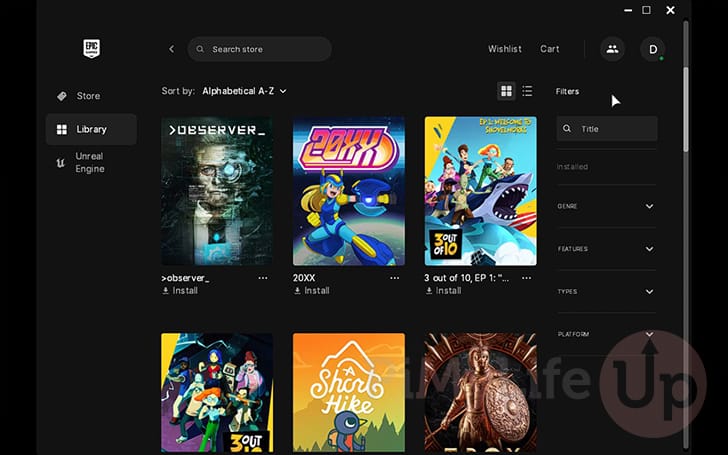
73. At this point, you now have the Epic Games Store Launcher running on your Steam Deck.
Choosing your Install Location
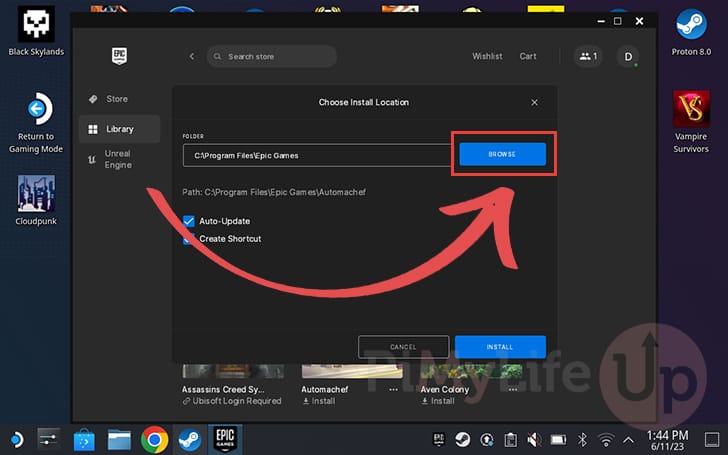
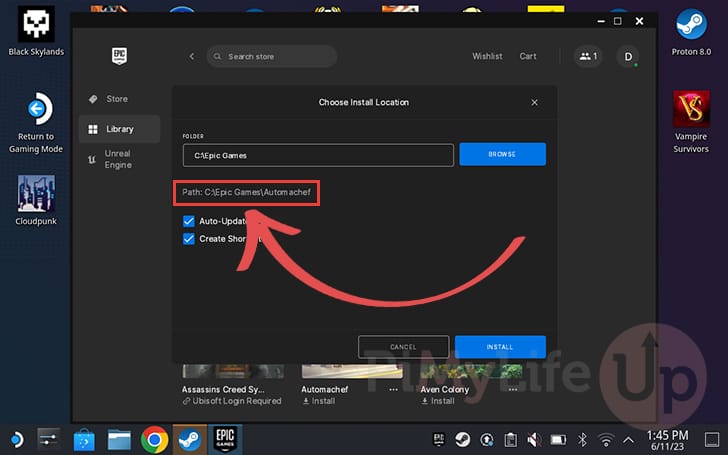
74. When you go to install the game through the Epic Games Store Launcher, you can choose the installation location. It doesn’t allow you to set a default location.
To choose the location, click the “BROWSE” button.
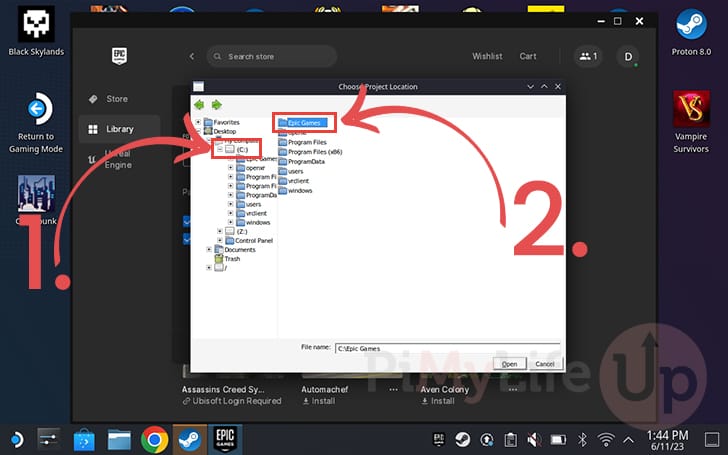
75. Within this dialog box, you can choose where to install your games. If you want to install these games to your Steam Deck itself, start by navigating to the “C” drive (1.).
Next, you will want to select the “Epic Games” folder (2.) that we created earlier in this guide.
76. After selecting a new installation location, you will see that the “Path:” option has now been updated.
Return to Gaming Mode
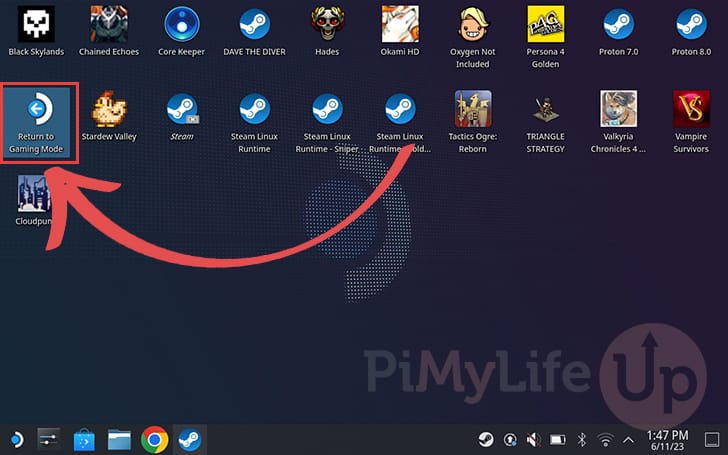
77. With everything now set up, you can return to the Steam Deck gaming mode.
The easiest way to do this is to click the “Return to Gaming Mode” icon on the desktop.
Finding the Epic Games Store Launcher on the Steam Deck
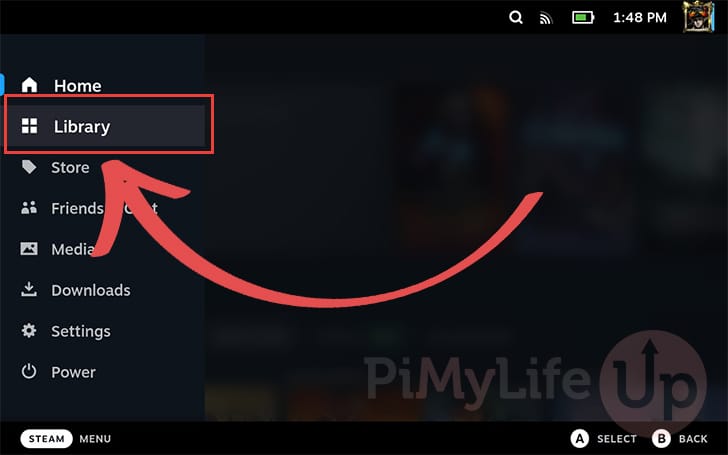
78. Now that you are back in gaming mode, you can start by opening the library on your Steam Deck.
You can open the library by bringing up the STEAM menu and selecting the “Library” option.
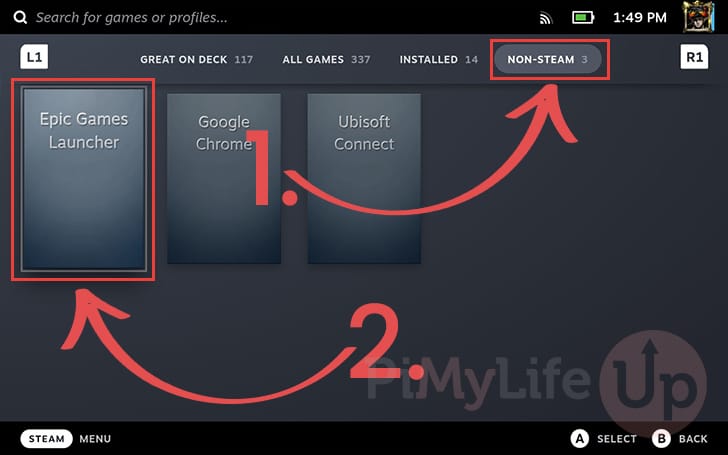
79. Once you are within the library, change to the “NON-STEAM” tab (1.).
When you have changed over to this tab, you should now have an option labeled “Epic Games Launcher” (2.). Select this to continue.
Adjusting the Input Controls for the Epic Games Store Launcher
80. The default input controls on your Steam Deck don’t work the best for the Epic Games Store Launcher.
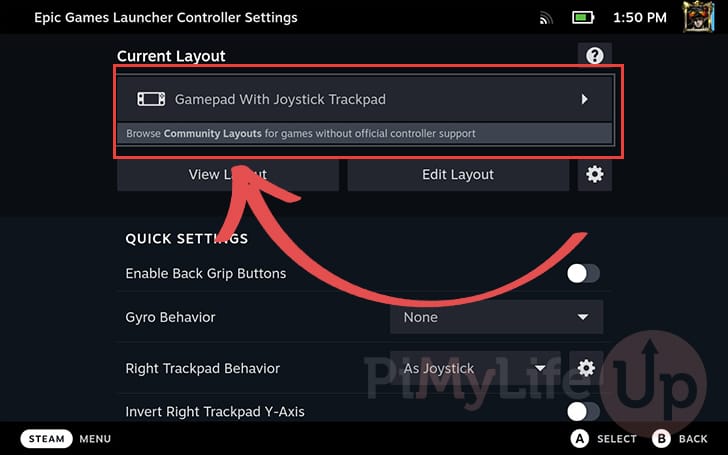
To adjust this, you will want to select the controller icon on the right-side of the screen.

81. On this screen, you must select your current layout so we can adjust it.
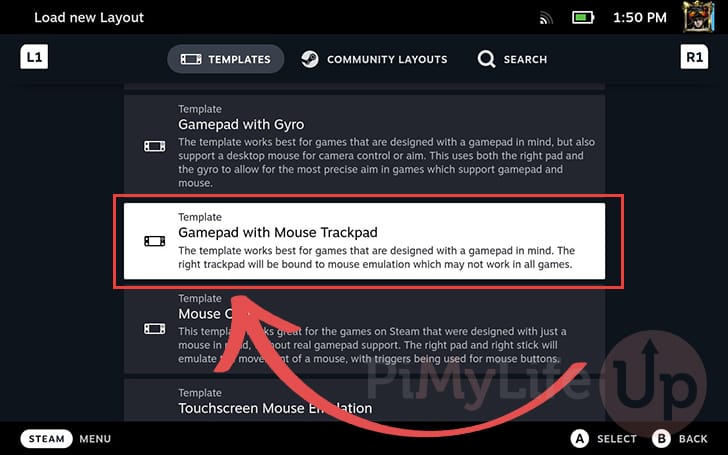
82. Scroll down this list until you find the option labeled “Gamepad with Mouse Trackpad” and select it.
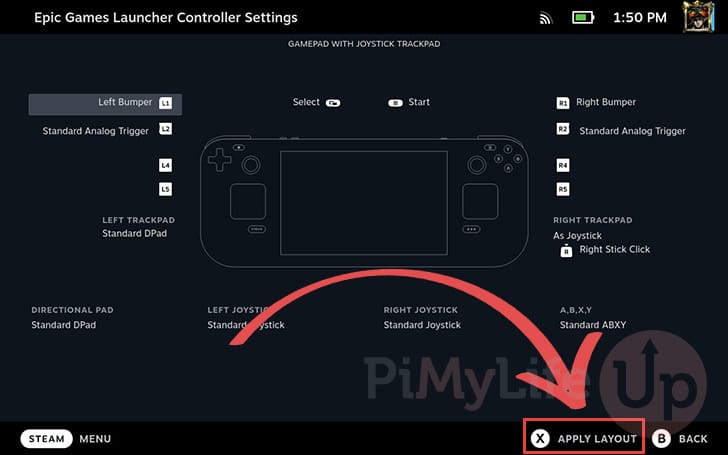
83. You can now apply these changes by pressing the X button on your Steam Deck.
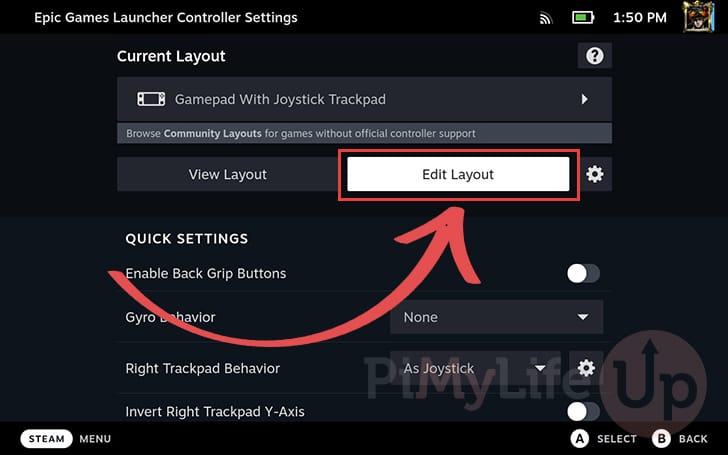
84. With the new layout applied, we will want to make some minor adjustments to improve your experience using the Epic Games Store Launcher on your Steam Deck.
To begin editing the layout, click the “Edit Layout” button.
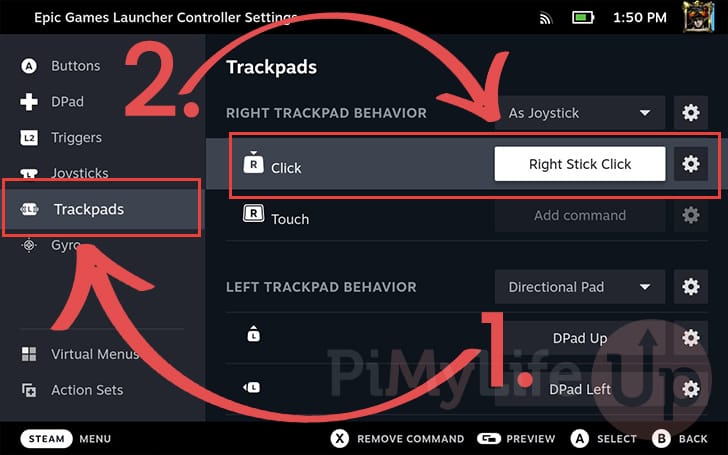
85. Within the edit screen, change to the “Trackpads” screen (1.) using the sidebar.
Now that we are within the Trackpads screen select the “R” click option (2.) under the “RIGHT TRACKPAD BEHAVIOR” heading.
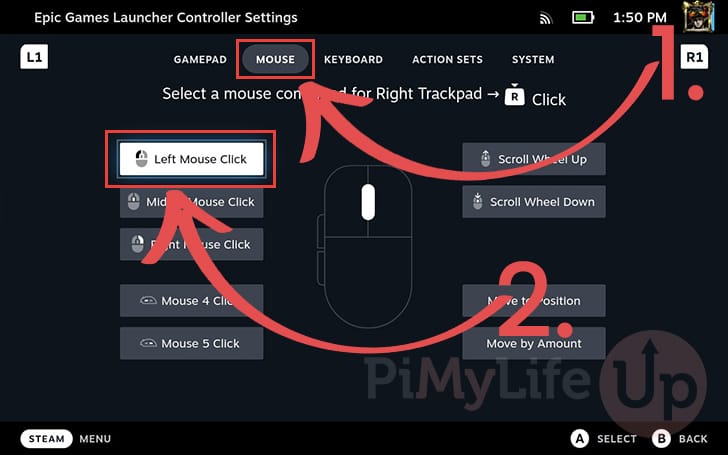
86. Now, you will want to switch to the “MOUSE” tab (1.).
Once on this tab, you will want to select the “Left Mouse Click” option (2.).
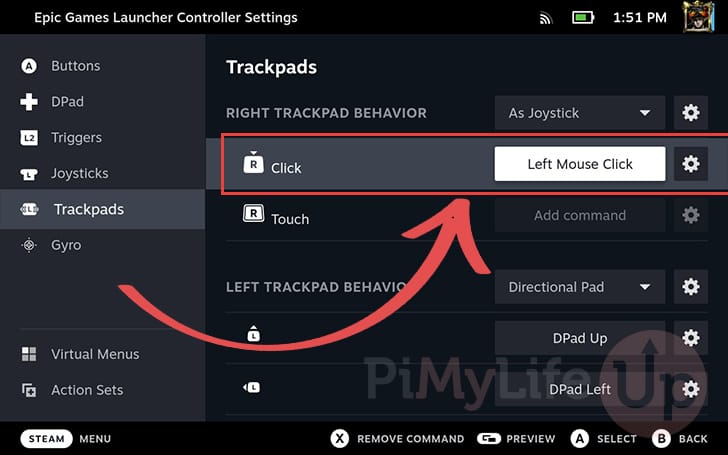
87. Once the setting says “Left Mouse Click” you can safely exit out of the input options screen.
Launching the Epic Games Store Launcher on the Steam Deck
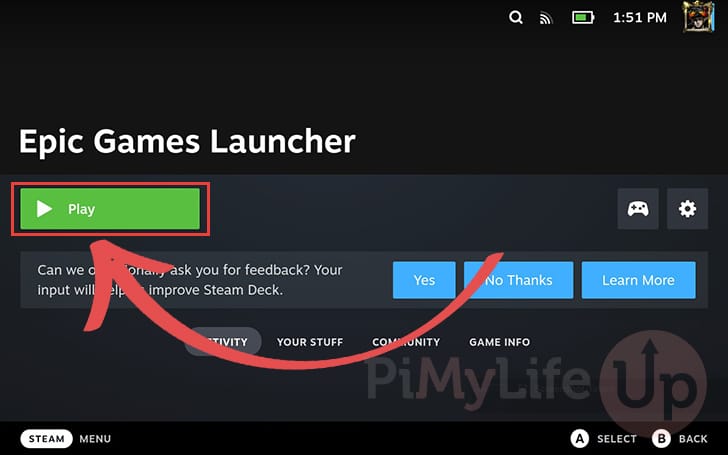
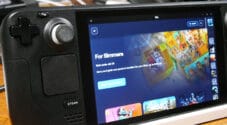
88. At this point, you can start the Epic Games Store Launcher on your Steam Deck while in gaming mode.
To start the launcher, press the “Play” button.
89. You can now access the Epic Games Store Launcher on your Steam Deck. Use this launcher to install and run any games through its store.
Conclusion
At this point in the tutorial, you should have successfully installed the Epic Games Store Launcher on your Steam Deck.
Installing this launcher gives you access to any game exclusive to the Epic Games Store and a wealth of free games.
Please comment below if you have any issues getting this launcher to work on your device.
If you found this tutorial helpful, be sure to check out our many other Steam Deck tutorials.


1. EGS launch is caught in a loop of updating but never displays the application. Have to clear out a folder to resolve. (Example: /home/deck/.local/share/Steam/steamapps/compatdata/2974804738/pfx/dosdevices/c:/Program Files (x86)/Epic Games/Launcher/Portal/Binaries/Win32/) of everything but the launcher executable to resolve the issue. References: https://www.reddit.com/r/SteamDeck/comments/1jd05c6/issues_installing_epic_games_launcher/
https://github.com/moraroy/NonSteamLaunchers-On-Steam-Deck/issues/513#issuecomment-2726463065
2. The Online Services display an error message on install. I have not found out how to install, but 2 of 3 games run fine, so I’m not concerned at this point.
Thanks for clear instructions. I have installed EGS and Electronic Arts app
The launcher download isn’t available when browsing from Linux but using Heroic (using the appimage requires no installation) you can visit the store and the download is then accessible. However there is no progress indicator so keep refreshing your download folder until launcher shows 200mb+ and doesn’t increase
the guide worked very well!
at55
Can i create a folder on an SD Card and link it the same way?
and at point 74 i pick the SD Card?
Hi Marsl,
Yes, you definitely should be able to! Let me know if you run into any issues.
Cheers,
Emmet