In this tutorial we will be showing you how to use GeForce Now on your Steam Deck.
For those who do not know, GeForce Now is a game streaming service that can run on your Steam Deck.
This game streaming service allows you to run games that wouldn’t typically be able to run on your Deck.
One of the best parts of this streaming service is that it supports a large number of games that you already own. All you need to do is pay for the subscription, and you get access to NVIDIA’s powerful computers in the cloud.
Unfortunately, GeForce NOW does not have a native Linux application. However, it does offer a web browser version of its client that we can utilize to our advantage.
We will be getting GeForce Now to work on the Steam Deck by using the Chrome Web browser. This is the same method we use for Xbox Cloud Gaming on the Steam Deck.
There are two different ways that you can install and use GeForce NOW on your Steam Deck. The first is the easiest method and that is to use the install script provided by NVIDIA. The alternative method is to manually set everything up.
Installing GeForce Now on the Steam Deck using the Official Setup Script
In this section, we will show you how to use the setup script to install and run GeForce NOW on your Steam Deck. This script handles the entire setup process, saving you from performing many tasks manually.
The setup script is the easiest way to access GeForce NOW on your Steam Deck. While you can manually set up this streaming service, you are basically just performing all of the tasks that the script does for you in a couple of clicks.
Swap to Desktop Mode
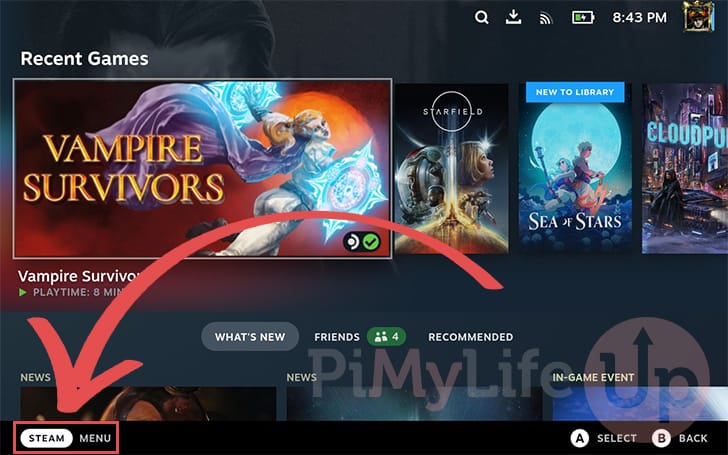
1. Before we can run the GeForce NOW setup script on our Steam Deck, we must swap to desktop mode.
To get to desktop mode, you will first need to open the STEAM Menu by tapping the bottom-left corner.
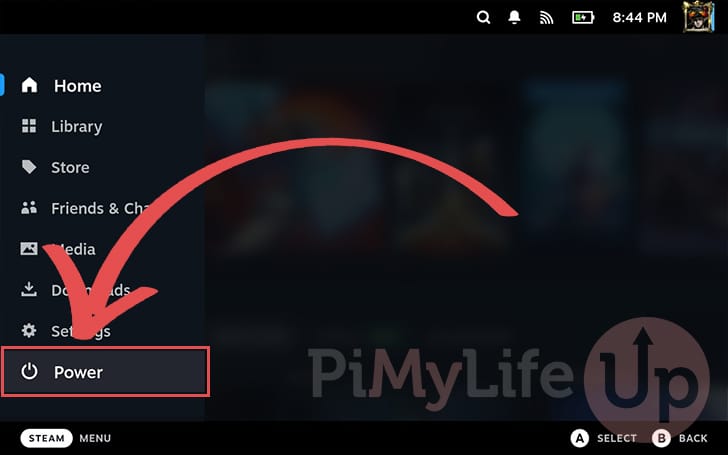
2. With the STEAM Menu now open on your device, select the “Power” option.
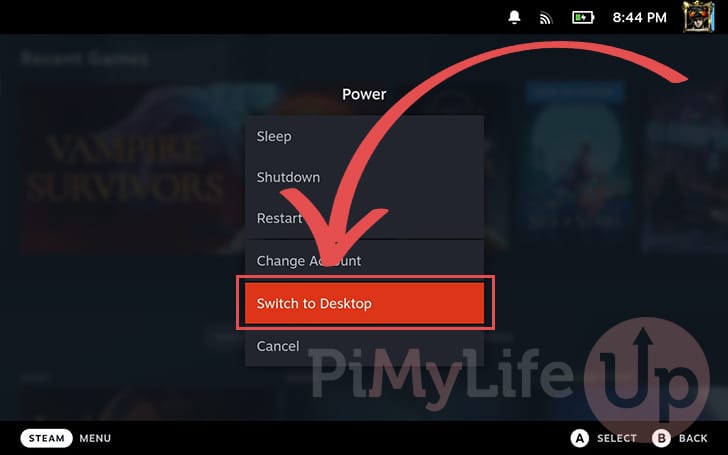
3. Within the “Power” menu, find and select the option labeled “Switch to Desktop“.
Downloading the GeForce NOW Install Script to the Steam Deck
4. Now that you are in desktop mode, we can download the GeForce NOW setup script to the Steam Deck.
To begin this process, open a web browser on your Deck. In our case, we are opening the Chrome web browser.
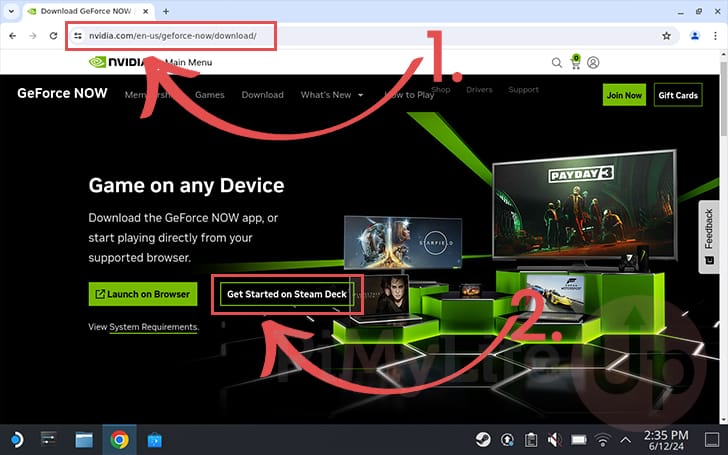
5. With the web browser open on your Deck, you must go to the NVIDIA GeForce NOW download page (1.).
https://www.nvidia.com/en-us/geforce-now/download/Once on this page, you should see a big button labeled “Get Started on Steam Deck” (2.). Click this button to continue.
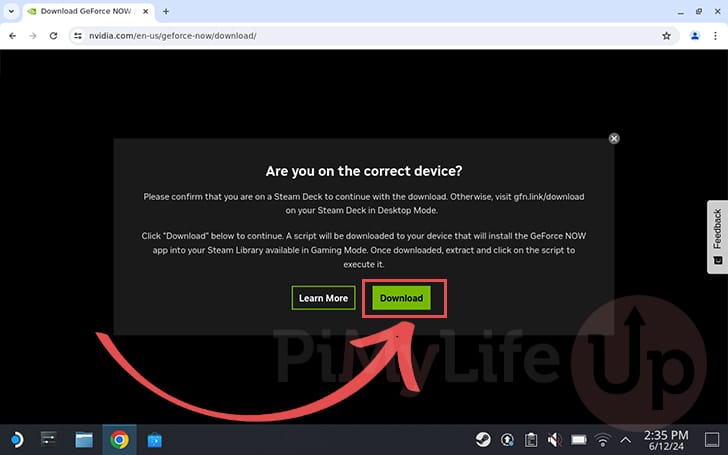
6. You will now get a message asking you to confirm you are on the correct device. Since we know you are running a Steam Deck, click the “Download” button to proceed.
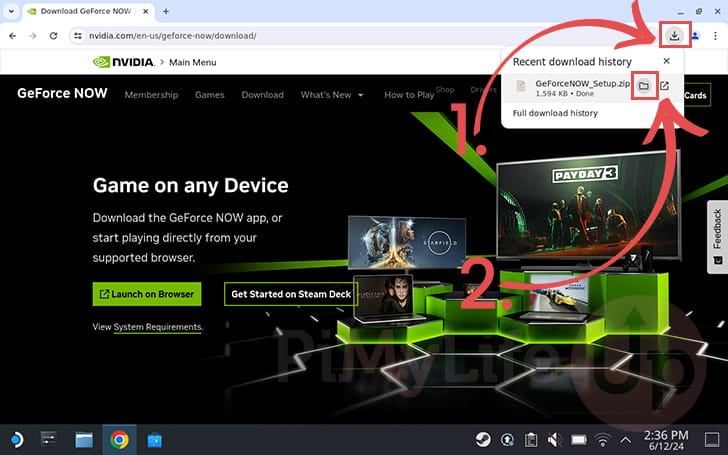
7. Once the GeForce NOW install script has been downloaded on your Steam Deck, you must open the folder where it was downloaded.
The easiest way to do this is to bring up the download menu (1.), and then click the “Folder” icon (2.).
Extracting and Running the GeForce NOW Setup Script
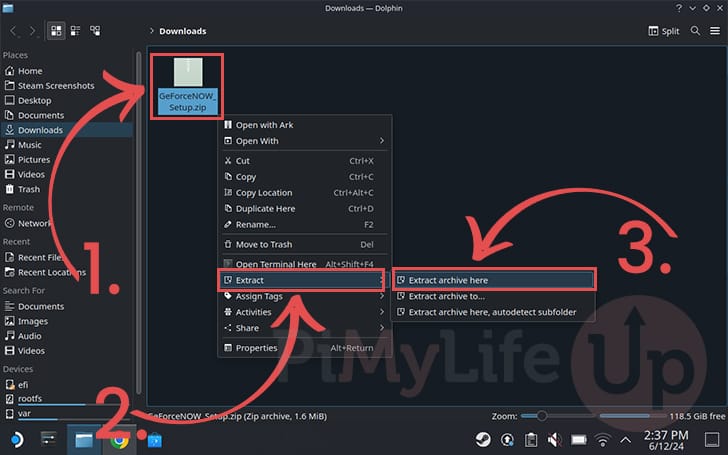
8. The install script comes in a zip file, so we must extract it before we continue any further. To extract this archive, right-click (Left trigger) the file named “GeForceNOW_Setup.zip” (1.)
With the context menu open, hover over the option labeled “Extract” (2.). You will see three additional options. Click the “Extract archive here” option (3.).
9. Now enter the newly extracted directory.
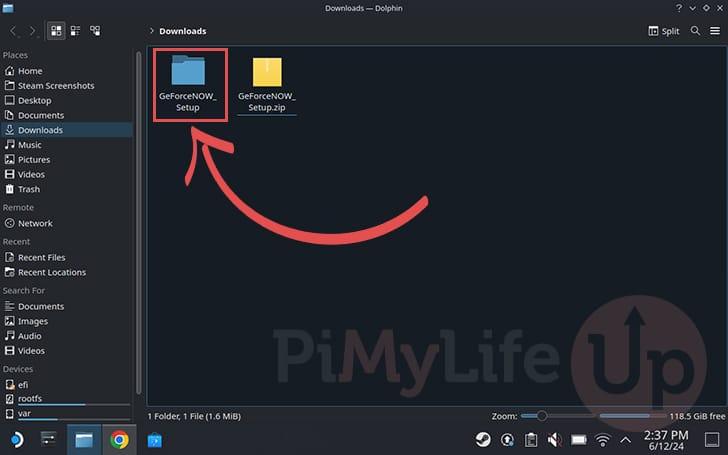
10. Within this directory, you will find the “GeForceNow_Setup” script. Double-click this script to begin installing GeForce NOW to your Steam Deck.

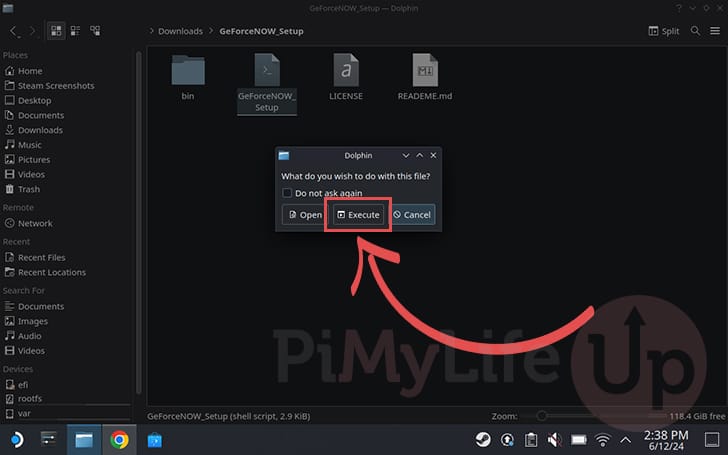
11. Before this install script begins to run, you will be asked what you want to do with this file. Click the “Execute” button to proceed.
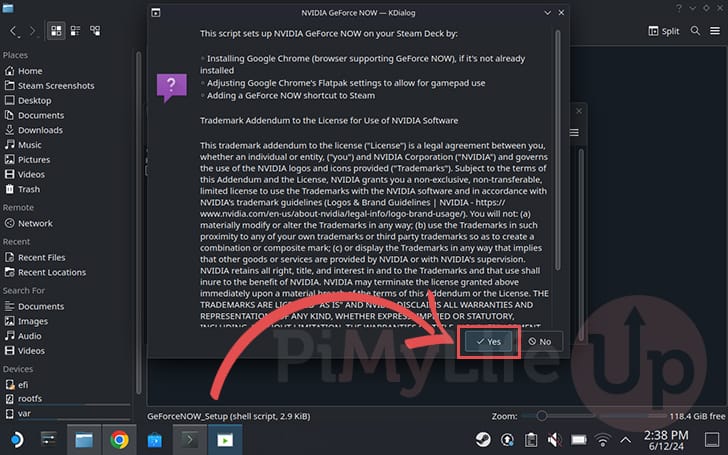
12. This next big message box will explain what this install script intends to do on your Steam Deck. Basically, it will install the Chrome browser if it isn’t already installed, adjust its settings to allow gamepad use, and then add the GeForce NOW shortcut to your Steam Library.
Click the “Yes” button to begin installing NVIDIA GeForce NOW on your Steam Deck.
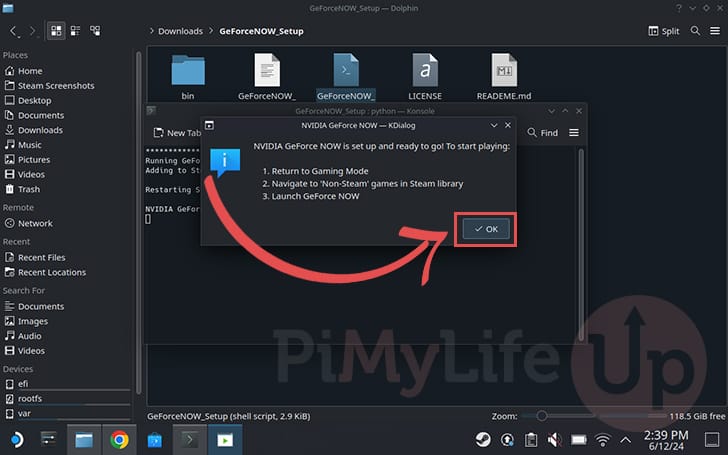
13. Once you see the message below, you have successfully set up NVIDIA GeForce NOW to your Steam Deck.
You can safely click the “OK” button.
Returning to Gaming Mode
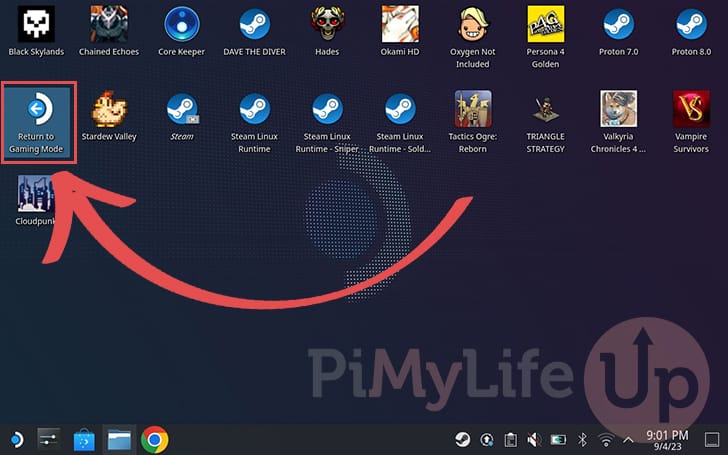
14. With the GeForce NOW client now set up, return to your Steam Deck’s gaming mode by double-clicking the “Return to Gaming Mode” icon on your desktop.
Launching GeForce NOW on the Steam Deck
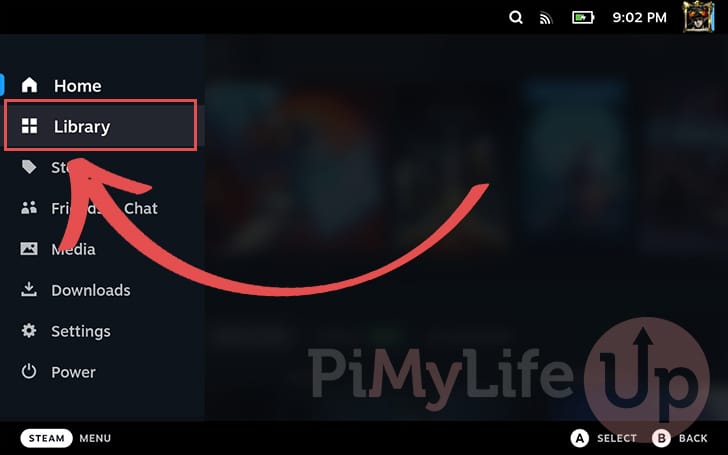
15. Now that you are back in gaming mode, you will want to change to your library to access GeForce NOW.
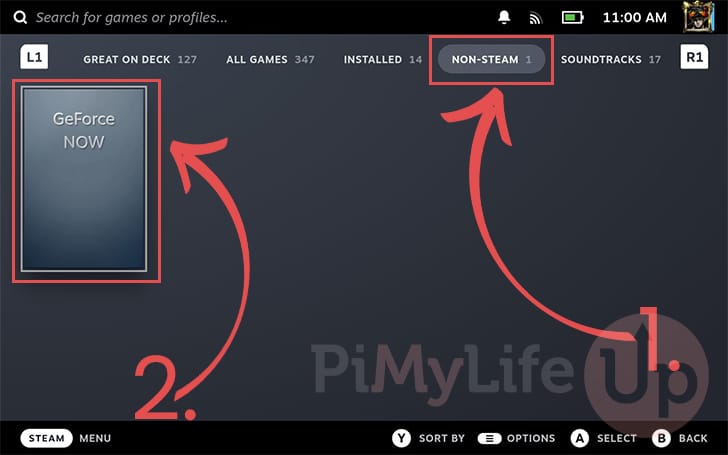
16. In your library, swap to the “NON-STEAM” tab (1.) using the L1 and R2 buttons on your Deck.
Within this library, you should now see an entry for NVIDIA GeForce NOW (2.).
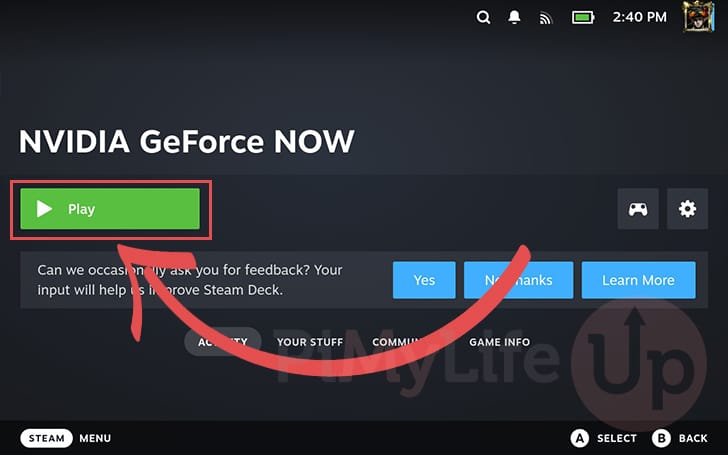
17. At this point, all we need to do to launch GeForce NOW on our Steam Deck is to tap the big “Play” button.
Depending on the game you are streaming, you may need to play around and re-adjust control settings through the Steam Deck’s input settings.
How to Manually Install GeForce NOW on the Steam Deck
Over the following steps, we will be walking you through the whole process of getting GeForce NOW to work on your Steam Deck. These steps are useful if you want to avoid relying on the automated script that NVIDIA provides.
By the end of this, you should have a GeForce NOW entry in your Steam library from which you can launch the game streaming service.
Changing to Desktop Mode
1. To be able to set your Steam Deck up to run GeForce NOW, you will first need to swap to desktop mode.
You can’t install and add non-steam applications through Steam’s gaming mode. To change to desktop mode you will first need to open the STEAM Menu.
You can open this menu by clicking “STEAM MENU” in the bottom-left corner or pressing the STEAM Button on your Deck.
2. With the STEAM Menu open, select the “Power” option near the bottom of the menu.
3. You will see a variety of options here. The one you want to pick is “Switch to Desktop“.
Installing the Chromium Web Browser
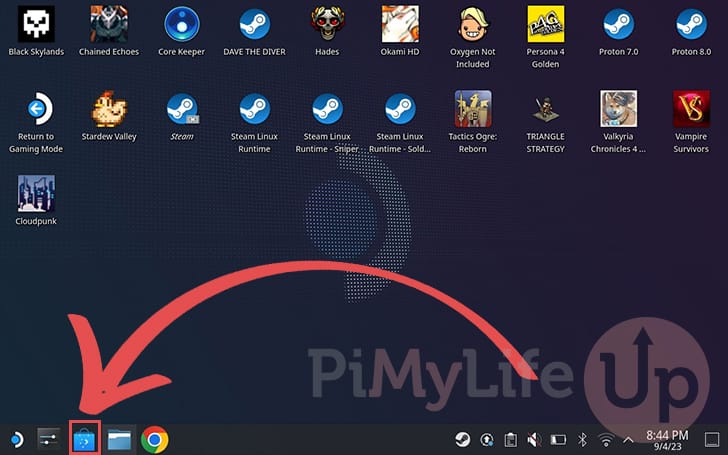
4. Now that you are on the desktop, you must install the Chromium web browser. This web browser will allow you to access GeForce NOW on the Steam Deck.
The easiest way to install this is by using the Discover application. You can open Discover by clicking the little bag icon in the taskbar.
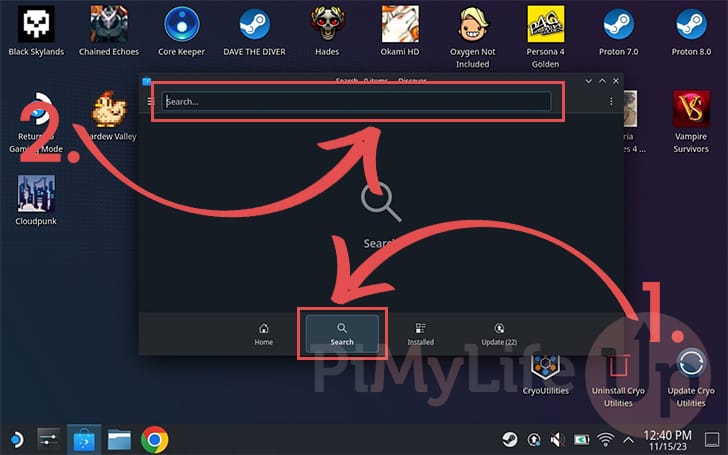
5. With Discover open, change to search screen (1.).
Once you are on the search screen, use the search bar to look for “Chrome” (2.).
If you use your Deck without a keyboard, you can bring up the virtual one by pressing STEAM + X.
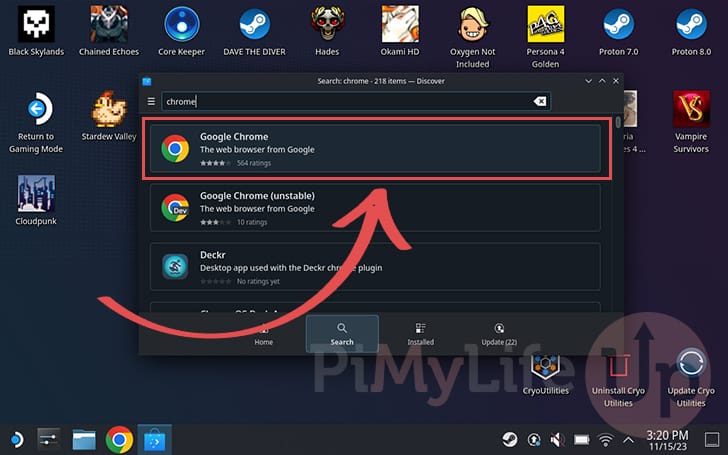
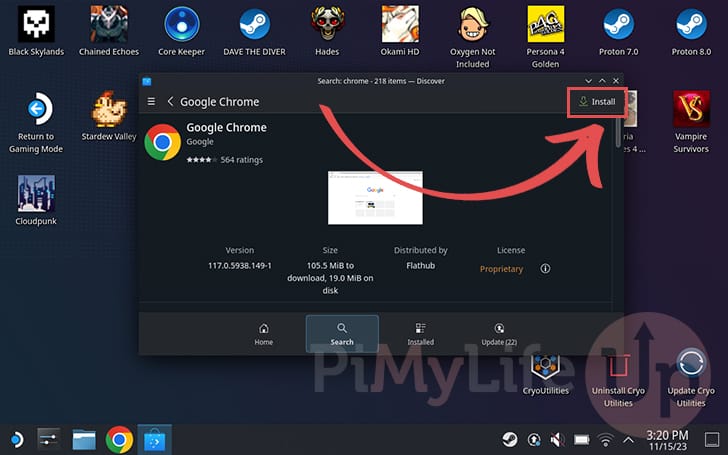
6. After searching for “Chrome“, you should see a list of available applications, including “Google Chrome“.
Once you have found “Google Chrome” double-click it to open its Discover entry.
7. Now that you on the Discover page, click the “Install” button in the top-right corner to install Chrome to your Steam Deck.
Adjusting the Chrome Flatpak Settings for GeForce NOW
8. With Chrome now installed on our Steam Deck, we must make some changes for it to work fine with GeForce NOW. The problem is that Chrome doesn’t have access to the Deck’s controls at the moment.
To correct this issue, we must use the terminal on your Steam Deck.
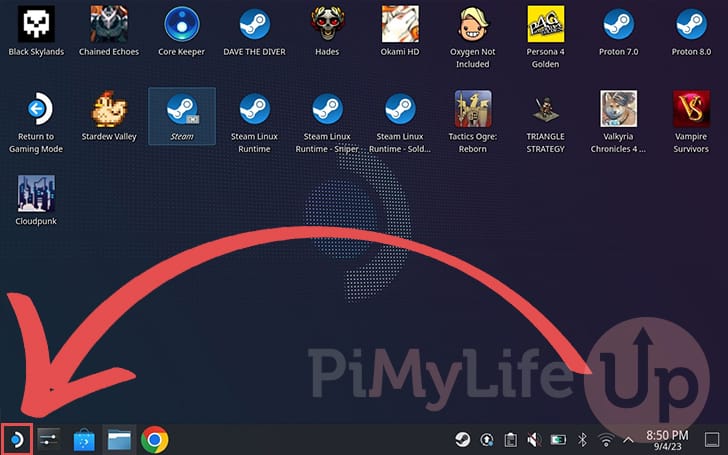
Begin by opening the start menu by clicking the icon in the bottom-left corner of the screen.
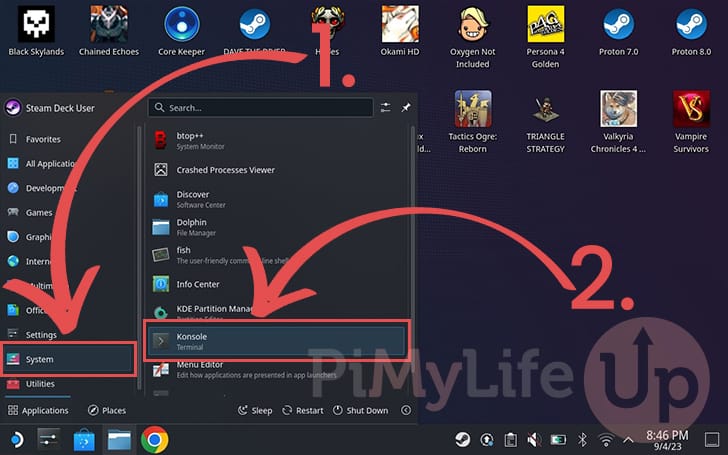
9. With the start menu open, click the “System” option (1.).
You should see a list of applications open. The one you are after is called “Konsole” (2.).
10. With the Konsole application open, you must type in and run the following command.
This command allows Chrome access to the Deck’s physical controls, meaning you will be able to use your joysticks and buttons within GeForce NOW.
Remember, you can bring up the Steam Deck virtual keyboard by pressing STEAM + X.
flatpak --user override --filesystem=/run/udev:ro com.google.ChromeCopy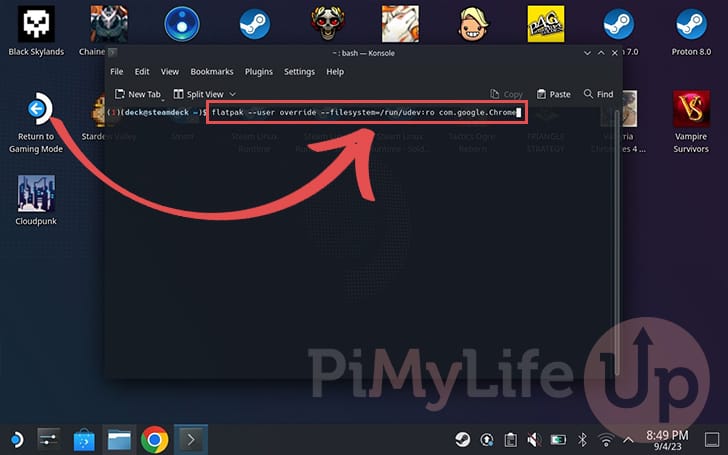
Adding GeForce NOW to your Steam Deck Library
11. We are finally at the point where we can now get GeForce NOW added to your Steam Deck game library. By adding it to the library, we can use this game streaming service from within Gaming Mode.
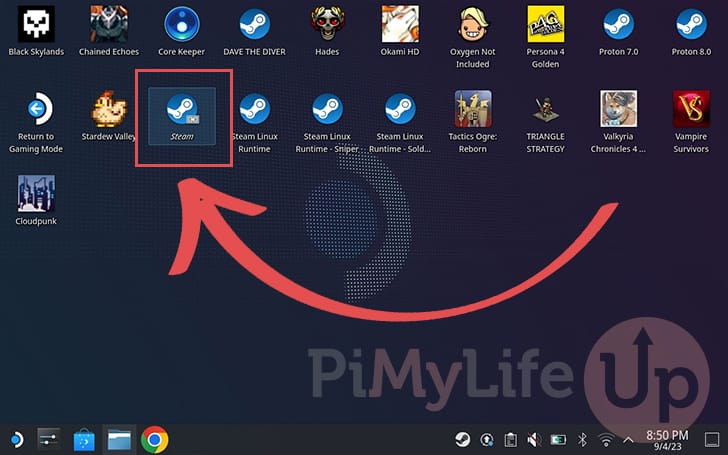
To start this process, open the desktop version of Steam by double-clicking the “Steam” icon on the desktop.
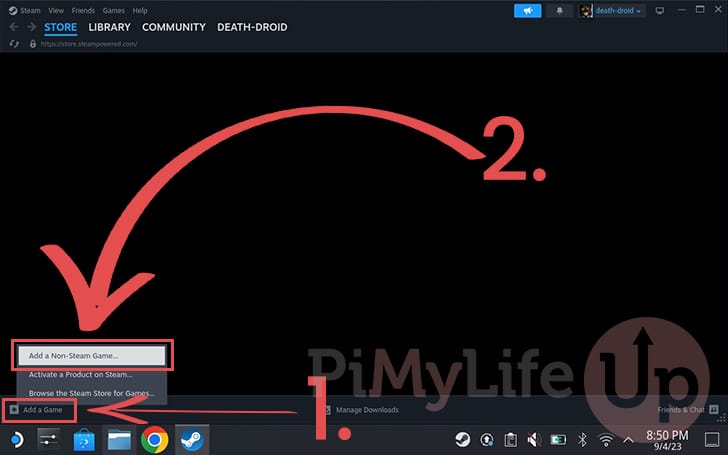
12. With Steam now open, click the “Add a Game” button in the bottom-left corner (1.).
Next, click the “Add a Non-Steam Game...” option (2.).
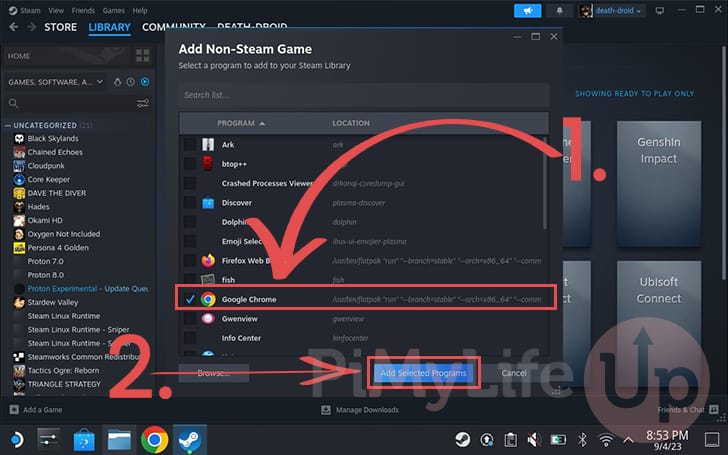
13. Within the list of applications, scroll till you find “Google Chrome” (1.) and tick the checkbox next to it.
Once the application is selected, click the “Add Selected Programs” button (2.).
Adjusting Chrome to Launch GeForce Now
14. At the moment, Chrome will still only launch Chrome when used within your Steam Library.
Luckily, we can utilize Chrome’s kiosk mode so that it will launch directly into GeForce now when you open it on your Steam Deck.
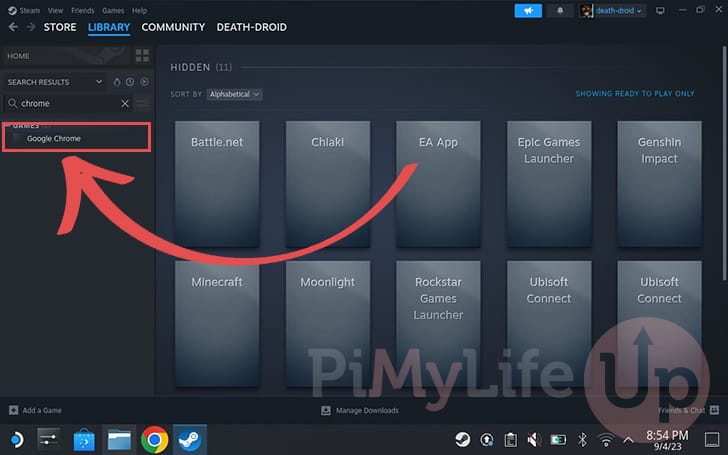
To do this, change to your Steam library and search for “Chrome” or “Google Chrome” and select the entry.
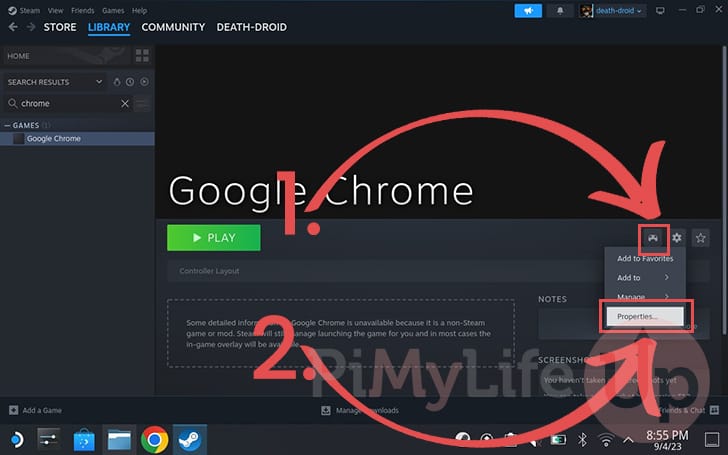
15. Once on the Google Chrome Steam entry, click the “Cog” icon (1.) on the right side of the screen.
In the context menu that appears, click the “Properties...” option (2.).
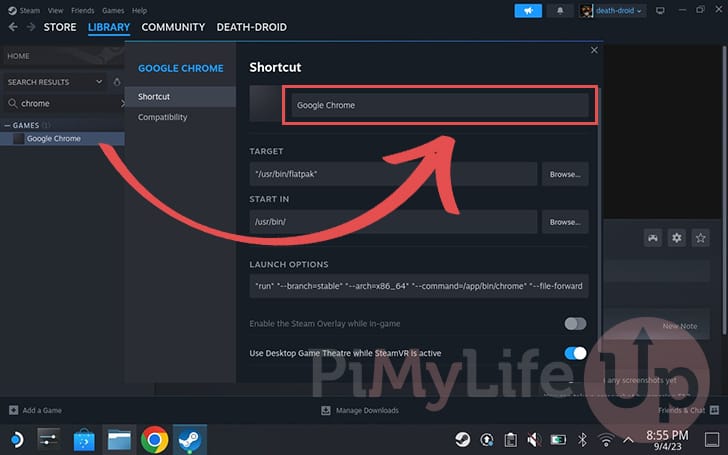
16. You can take this chance to change the name of this shortcut from “Google Chrome” to “GeForce NOW“. This will make it easier to find in your Steam Deck library later.
17. Now is the crucial part where we update the launch options. By adjusting these options, we can tell Chrome to launch directly into GeForce NOW when we open it on our Steam Deck.
To the end of the launch options line, you will want to add the following. Ensure you have a space between the “"@@u" "@@"” text at the end of the existing line.
--window-size=1024,640 --force-device-scale-factor=1.25 --device-scale-factor=1.25 --kiosk "https://play.geforcenow.com"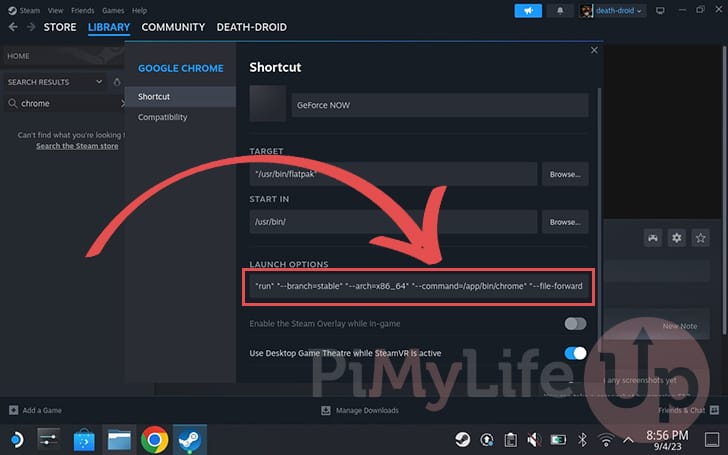
Return to Gaming Mode
18. We finally have everything set up and can return to gaming mode.
One of the easiest ways to do this is to double-click the “Return to Gaming Mode” icon.
Launch GeForce NOW in Steam Deck’s Gaming Mode
19. To launch GeForce NOW on your Steam Deck, you must first go to your game library.
You can access your library by clicking “Library” within the STEAM Menu.
20. Once in your Steam Deck library, change to the “NON-STEAM” tab (1.).
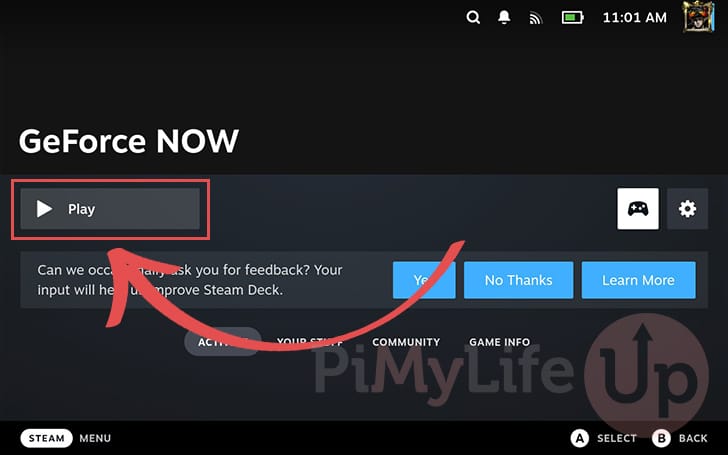
Once on this tab, you will see all non-steam games you have added to your Steam Deck, including GeForce NOW. Click the “GeForce NOW” entry to continue (2.).
21. All we need to do now to launch GeForce NOW is to click the “Play” button.
22. You finally have GeForce NOW open on your Steam Deck.
You can use this service to easily stream games from the cloud to your Deck, including games that can’t be run on the Deck.
Conclusion
Hopefully, at this point, you will now have GeForce NOW working on your Steam Deck.
While GeForce NOW unfortunately does not have a native Linux client, we were able to work around this by using Chrome.
By using Chrome’s kiosk mode, you can use GeForce NOW’s web client on your Steam Deck as if it were an actual application. While not the best solution, it is a fully working workaround.
Please comment below if you have had any issues with getting this game streaming service to work on your Deck.
If you found this tutorial to be useful, we highly recommend checking out our many other Steam Deck guides.


I followed the steps and it opens it up just fine but the steam deck controls don’t work 🙁 should I try that first command again?
Hi Shmitty,
That is strange, I would try running that command again. And if that doesn’t work you might have try remapping the controls for the app (The little controller icon when you are on a game page in your library)
Kind Regards,
Emmet