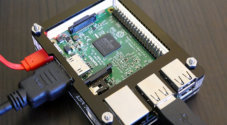
In this project, we will be showing you how to run Windows 11 on your Raspberry Pi by using a virtual machine.

There are a couple of ways that you can run Windows 11 on your Raspberry Pi. The first step is to install the entire Windows operating system on your SD card. This method is full of problems, from a lack of proper hardware support as well as an incredibly slow build process and numerous performance issues. It verges on entirely useless, not to mention you lose access to all the benefits of running Linux. Another problem with this method is that it is no longer actively developed, and there is no support for new Raspberry Pi’s.
The second method that we will be covering in this guide is setting up a Windows 11 VM on your Raspberry Pi. We will be achieving this by using Botspot’s virtual machine. This virtual machine offers a huge range of advantages if you intend to run Windows 11 on your Pi.
For example, you get an actual working network thanks to Botspot’s virtual machine passing through the full Linux network stack, meaning both Ethernet and Wi-Fi will actually work. Audio playback also works thanks to the full audio stack being passed through as well.
You can even make use of USB passthrough, enabling you to use any USB device plugged into your Raspberry Pi within Windows, something that doesn’t work well if you try to install the normal version of Windows.
Best of all, this doesn’t consume a huge amount of resources; in fact, it’s been set up to use less than 1GB of RAM and minimal use whenever it’s not in use, allowing you to continue to use a Linux operating system on your Raspberry Pi.
This can be way more useful than trying to use Wine on your Raspberry Pi, as not everything can run properly within this translation layer; however, it will run perfectly within Windows itself and its Prism ARM emulation that handles x86 and x64 translation.
For the best experience of using the Botspot virtual machine to run Windows 11, you will want to use at least a Raspberry Pi 5.
Additionally, you will also want to be running a 64-bit operating system. We highly recommend the 64-bit version of Raspberry Pi OS. This OS already has all the pieces to ensure you get the best experience.
Equipment
Below is a list of equipment we used when setting up the Windows 11 VM on the Raspberry Pi.
Recommended
Optional
We last tested this tutorial on a Raspberry Pi 5 running the latest version of Raspberry Pi OS Bookworm.
Installing the Windows 11 VM on a Raspberry Pi
Over the following sections, we will walk you through installing and running a Windows 11 VM on a Raspberry Pi.
One of the best things about using Botspot’s virtual machine is that it has simplified the installation process. In fact, we only need to run a couple of commands, and everything will be up and running.
Preparing your Pi
1. The first thing we need to do is ensure our Raspberry Pi’s operating system is up to date. To update our Raspberry Pi, we will need to use the following two commands.
The first command will update the package list cache so that you can find the latest available packages. With the second command, we will upgrade any out-of-date packages.
sudo apt update
sudo apt upgrade -yCopy
2. Once the packages have been upgraded, you will next want to install the “git” package. We will be using git in the next few steps to download the latest version of the BVM software that will set up the Windows 11 VM on your Raspberry Pi.
You can install this package by using the following command within the terminal.
sudo apt install gitCopyInstalling BVM to your Pi
3. To ensure that we clone the BVM software to the correct place, we must change to the home directory by using the cd command.
This helps ensure we have a consistent place to clone the code and will help with steps later on in this guide.
cd ~Copy4. Once in your current user’s home directory, use git to clone the latest version of the BVM code to your Raspberry Pi.
You can clone this code to your home directory by using the following command. This repository isn’t very large, so this process should only take a second or two to complete.
git clone https://github.com/Botspot/bvmCopy5. Once the cloning process is complete, you will want to change to the “bvm” directory that was created during the cloning process.
You can change into this folder by running the following command.
cd bvmCopy6. The first time we run the Botspot virtual machine software, it will automatically install the tools required to set up the Windows 11 virtual machine on your Raspberry Pi. It won’t yet install the operating system itself.
Starting up BVM is as simple as running the command below within the terminal.
./bvmCopyUsing BVM to Install the Windows 11 VM on your Raspberry Pi
7. Now that we have BVM downloaded, we will want to open up its GUI interface. While you can use the command line to complete the whole setup process, the interface makes it significantly simpler.
You can open up the interface by running the command below within the terminal.
./bvm guiCopy8. This interface will walk you through the entire process of setting up the Windows 11 virtual machine on your Raspberry Pi.
Simply start with number one and then continue through each step. Each step will run some commands that will slowly set up Windows 11. The tool will walk you through the whole process. Once a step is completed, you must close the window it opened for the setup process to continue.
Please note that installing Windows 11 will take some considerable time. You should be prepared to wait for over an hour for this whole process to complete. There are various moments where you must interact with the screen for the installation to proceed.

9. The first time that the script requires more of your attention is when it asks you to edit the configuration file. We highly recommend that you take your time to explore this config file.
The main options that you will probably want to configure are “vm_username” and “vm_password“. These control the username and password for your Windows 11 VM user.
Once you have finished making your changes to the configuration files, hit the save button (1.) and then close out of the dialog (2.).

10. Now, continue on with the next few steps, and you will eventually get to the Installing Windows 11 screen.
This process will take a minimum of an hour to complete our experience. So, now is a good time to take a break. The next time you might need to interact with your Raspberry Pi is when the debloat script runs.

11. Once Windows 11 finishes installing to the VM on your Raspberry Pi, it will run a few additional scripts to help make it run better and integrate with your host operating system.
One of these scripts is the Win11Debloat script. This script is basically designed to strip out a whole range of unneeded applications. You can disable this from running by editing the configuration file we discussed earlier.
In our case, the script hung on us until we clicked into the Windows and pressed the ENTER key. For others, it may function properly without any issues.

12. Once all the initial setup steps have been completed, your Raspberry Pi will automatically shut down the initial Windows 11 VM.
From now on, to launch your Windows 11 VM on your Raspberry Pi, you will need to load up NVM and then click the “Run Windows 11” button (2.).
If you have any issues with the remote desktop connection to your VM, you can always try adjusting the viewing mode (2.). Remmina is usually really good, but it doesn’t always work properly. If you intend to use”USB Passthrough” you will need to use the “Direct” mode.

13. By this point, you should have successfully got the Windows 11 VM up and running on your Raspberry Pi.
You will quickly see how this is the best way to run Windows on your system, and best of all, you don’t lose out on access to the stable and much more performant Linux system. Best of all, the VM actually passes through things like networking so you do actually end up with a somewhat usable version of Windows.

Conclusion
Hopefully, at this point in the guide, you will have successfully managed to get a Windows 11 VM running on your Raspberry Pi.
Botspot’s work has managed to make this the best way to run Windows on a Raspberry Pi. The virtual machine allows you to keep your Linux operating system while being able to run any Windows application you need. Best of all, it is incredibly simple to get up and running.
Please feel free to drop a comment below if you have had any issues with using BVM.
If you liked this project, be sure to check out our many other Raspberry Pi projects. We have a wealth of guides that cover almost everything you need to know about the Pi.


Hello, this is a great tutorial but when I get to the step ./bvm. My pi throws up the following error: “Error: Unable to locate package freerdp2-wayland”. I have Error: Unable to locate package freerdp3-wayland installed. How can I get around this?