In this tutorial, we will show you how to change the computer name or local hostname on your Mac.
The computer name or local hostname on your Mac is how other devices will see your device on the local network.
Setting these names can be incredibly useful for identifying your Mac amongst other devices within your local network. For example, having a device called “PiMyLifeUp Macbook” is much easier to identify than just “Macbook“.
If two devices have the same computer name, then the local hostname will automatically have a number appended to it. This is to help separate devices and prevent conflicts.
The local hostname is, by default, set to be the same as your computer name with “.local” added to it, and all spaces are replaced with hyphens (-). For example, with the computer name on our Mac being “PiMyLifeUp Macbook” the local hostname would be “pimylifeup-macbook.local“.
Over the next couple of sections, we will show you how to set the computer name and local hostname on your macOS-powered device. We will be covering how to do this using the GUI or terminal.
The desktop interface actually makes adjusting your computer name a very simple process.
Using the GUI to Change the Computer Name and Local Hostname on Mac
Over the following two sections, we will be showing you how you can use the desktop interface to set the computer name and local hostname on your Mac.
These steps were written based on a Mac running macOS Sonoma (14.0). These steps should be relevant for most recent versions of macOS.
1. Both the computer name and local hostname settings are contained within the settings application.
Let us start by showing you how to access the settings tab. On your Mac, click the Apple icon in the top-left corner of the screen (1.).
Clicking this icon will bring up a drop-down menu. You must now click the “System settings” option (2.).

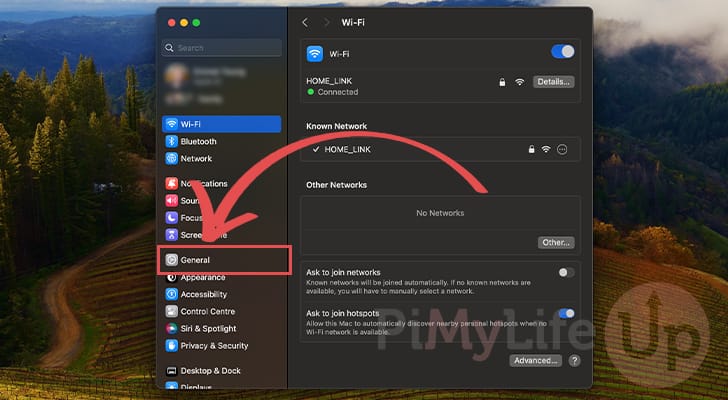
2. With the system settings screen open, change to the “General” tab using the sidebar.
3. Now that you are on the right screen, we will split this guide into two different sections. These sections differ depending on if you want to set the computer name or local hostname.
Changing the Computer Name on macOS
In this first section, we will show you exactly how to change the computer name on your Mac. The computer name is how other devices on your local network will identify you.
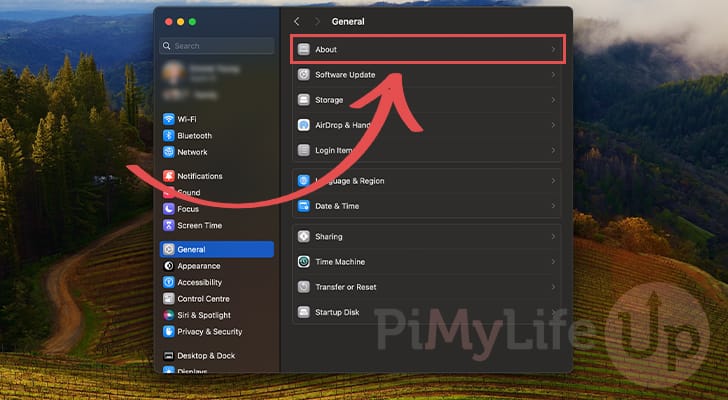
4. While you have the general settings page open, you must now swap to the “About” screen.
This screen is where you can set the computer name.
5. Now that you are on the “About” screen on your Mac, you can change the computer name.
To change the name, all you need to do is click the “Name” textbox and type in your new name.
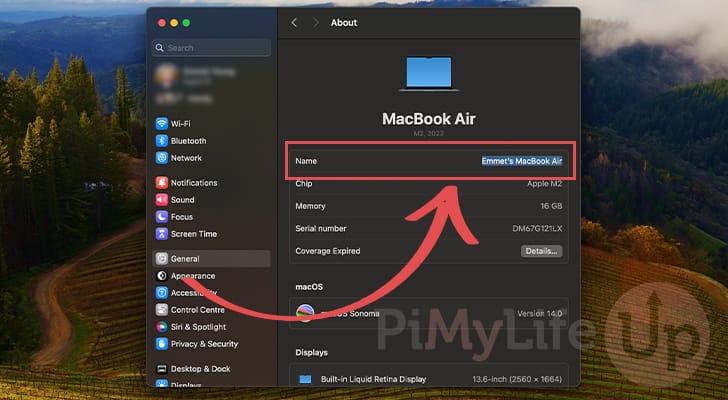
macOS will automatically save your new name after you finish typing and press the ENTER key. If you haven’t manually set your local hostname, this will be automatically updated to reflect your new computer name.
Using the GUI to Change the Local Hostname on Mac
Within this section, you will learn how to change the local hostname on your Mac. The local hostname, as mentioned earlier, is set by default to your computer name.
Luckily, your Mac allows you to manually set the local hostname if the automatically generated one doesn’t quite work for you.
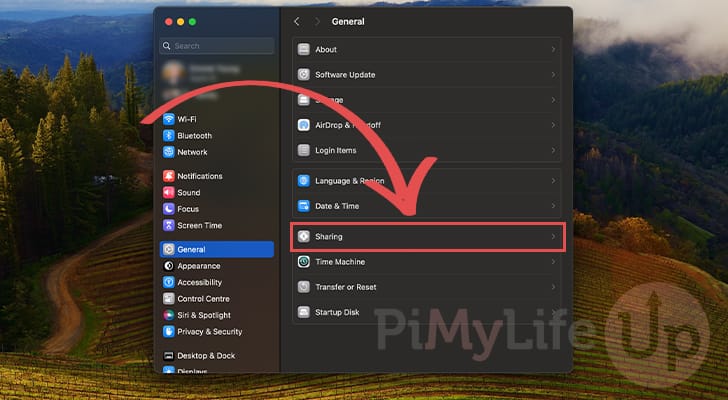
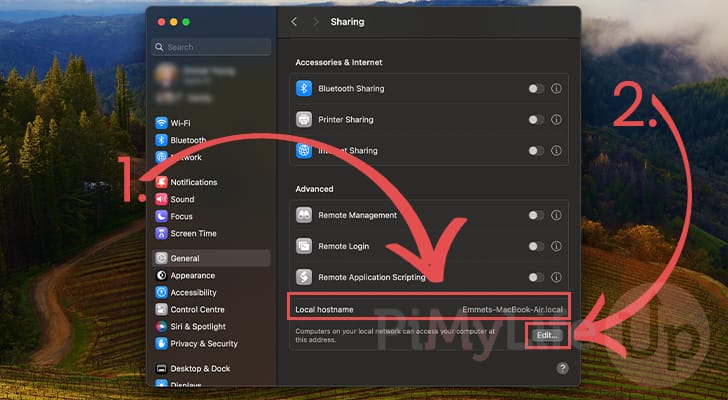
4. On the general settings screen page, scroll down and select the “Sharing” option.
5. Now that you are on the “Sharing” page, scroll down until you see the “Local hostname” option (1.).
Here you will see the current local hostname alongside an “Edit” button. Click the “Edit” button (2.) to continue.
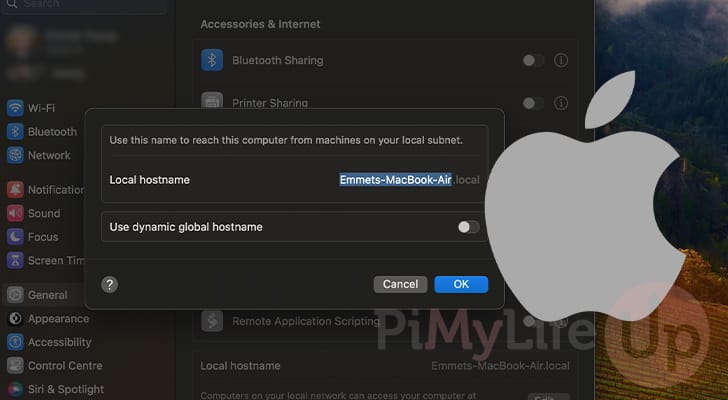
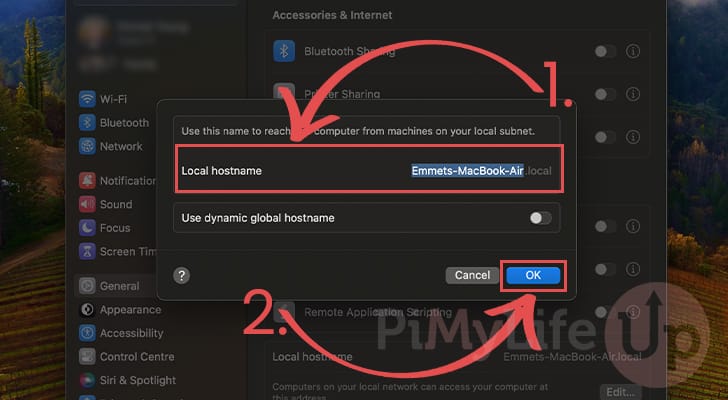
6. Using the pop-up dialog box, type in the new local hostname for your Mac (1.). This new local hostname must always end with “.local“. The operating system will now let you change the domain name.
To confirm your changes to the local hostname, click the “OK” button (2.).
How to Use the Terminal to Change the Computer Name and Local Hostname on a Mac
If you prefer not to rely on the macOS GUI, it is possible to change the computer name and local hostname using the terminal.
Some might find the terminal a more efficient way to update these values. Additionally, the terminal way of doing things tends to be more resilient to updates. GUI updates often move options around.
Before proceeding, you must open the terminal on your Mac. The quickest way to do this is to open “Spotlight” by pressing COMMAND + SPACEBAR, then typing in “Terminal” and pressing ENTER.
Using the Terminal to Set the Computer Name
Let us start by exploring how you can use the terminal to set the Mac computer name. The computer name is the name other devices will see on your local network.
macOS has a command line tool that makes setting the computer name a super simple process. This tool is called “scutil“. scutil stands for system configuration utility.
1. To set the computer name using scutil on your Mac, you will want to use the following command.
Ensure that you replace “<COMPUTER NAME>” with the name you want to set.
scutil --set ComputerName "<COMPUTER NAME>"Copy2. For example, if we wanted to set the computer name to “PiMyLifeUp Mac” we would use the command below.
scutil --set ComputerName "PiMyLifeUp Mac"CopyChange the Local Hostname using the Terminal on macOS
The tool we use to set the computer name also lets us set the local hostname on our Mac device. The local hostname on a Mac is sometimes referenced to as the “Bonjour hostname”.
1. To use “scutil” to set the local hostname on your Mac, you will need to use the following syntax.
You must replace “<LOCAL HOSTNAME>” with your chosen hostname. When specifying a new hostname, you must only use letters, numbers, and hyphens. It can not contain spaces and must start with a letter.
The “.local” domain name will automatically be added to the local hostname. You are not required to specify it yourself.
sudo scutil --set LocalHostName "<LOCAL HOSTNAME>"Copy2. For example, to change our local hostname to “mac-pimylifeup“, we would run the command below within the terminal.
sudo scutil --set LocalHostName "mac-pimylifeup"CopyFinishing up with the Terminal
3. After using the terminal to change your local hostname or computer name, you need to perform a few additional tasks.
First, let us clear the DNS cache by using the following command.
dscacheutil -flushcacheCopy4. Next, for the changes to properly take effect, you must restart your Mac device using the following command.
sudo shutdown -r nowCopyConclusion
Hopefully at this point in the tutorial, you will now have an idea of how to change the computer name and local hostname on a Mac.
You can change either of these values easily using the desktop GUI or through the terminal.
Please feel free to leave a comment below if you have any questions about updating the computer name, or the local hostname.
If you found this tutorial to be helpful, we recommend you check out our other macOS guides.