A Raspberry Pi Wi-Fi bridge is one of the best ways of providing internet access to a device that only supports an Ethernet connection.
In this tutorial, we will show you how to setup a Wi-Fi bridge using network manager on your Raspberry Pi. Network Manager is a useful tool that makes managing connections a straightforward process.
You will need to keep in mind that you will not see speeds as good as what you would with a direct connection to your router. As there is some overhead with the connection having to run through the Raspberry Pi.
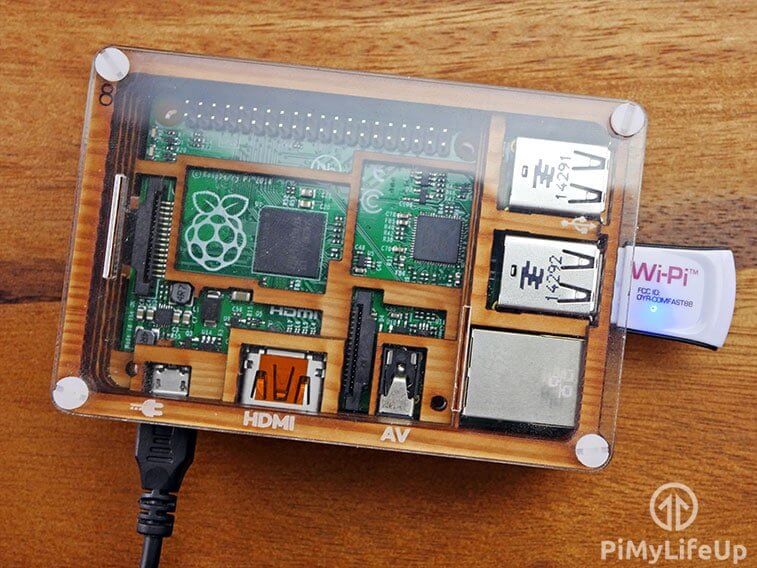
Remember to do this tutorial you will need either a Wi-Fi dongle or a Raspberry Pi 3 with the inbuilt Wi-Fi module.
This tutorial can be combined with our basic VPN access point, you can find the tutorial on how to set that up directly after this tutorial. Basically, it will show how to setup a OpenVPN client and redirect all traffic through that client.
Please note: This tutorial will require some slight changes if you decide to go down the VPN route, we will explain the necessary changes needed at the end of this tutorial.
Equipment List
Below are all the bits and pieces that I used for this Raspberry Pi Wi-Fi bridge tutorial, you will need A Wireless internet connection to be able to complete this tutorial.
Recommended
Optional
- Raspberry Pi Case Amazon
Setting up the Wi-Fi Bridge using your Raspberry Pi
In this section, we will show you how easy it is to set up a Wi-Fi bridge on your Raspberry Pi.
This bridge allows you to easily share your Wi-Fi connection with any connected ethernet device. Thanks to Network Manager, this whole process is made relatively easy.
Since Bookworm, all versions of Raspberry Pi OS have Network Manager installed by default. If you are using an older release of Pi OS, follow our guide on installing Network Manager.
Preparing your Raspberry Pi
1. Before setting your Raspberry Pi to act as a Wi-Fi bridge, we will want to ensure that the operating system is up-to-date.
You can update the package list and upgrade any out-of-date packages by running the following commands.
sudo apt update
sudo apt upgradeCopy
2. Once your Raspberry Pi is up-to-date, the only other thing you will need to set up is a Wi-Fi connection.
If you haven’t connected to your Wi-Fi yet be sure to follow guide.
Finding your Ethernet Device Name
3. Once you have a Wi-Fi connection set up on your Raspberry Pi, we will need to get the name of your ethernet adapter.
Typically, the Ethernet device is called “eth0” but this isn’t always the case. Luckily, we can double-check by using the “ifconfig” command.
ifconfigCopyYou will get a list of devices like we have shown below using this command. Look for your ethernet connection, then continue. In our example, this Ethernet device has the name “eth0” as expected.
eth0: flags=4099<UP,BROADCAST,MULTICAST>  mtu 1500
        ether d8:3a:dd:a2:06:0f  txqueuelen 1000  (Ethernet)
        RX packets 0  bytes 0 (0.0 B)
        RX errors 0  dropped 0  overruns 0  frame 0
        TX packets 0  bytes 0 (0.0 B)
        TX errors 0  dropped 0 overruns 0  carrier 0  collisions 0
        device interrupt 106

lo: flags=73<UP,LOOPBACK,RUNNING>  mtu 65536
        inet 127.0.0.1  netmask 255.0.0.0
        inet6 ::1  prefixlen 128  scopeid 0x10<host>
        loop  txqueuelen 1000  (Local Loopback)
        RX packets 16  bytes 2038 (1.9 KiB)
        RX errors 0  dropped 0  overruns 0  frame 0
        TX packets 16  bytes 2038 (1.9 KiB)
        TX errors 0  dropped 0 overruns 0  carrier 0  collisions 0

wlan0: flags=4163<UP,BROADCAST,RUNNING,MULTICAST>  mtu 1500
        inet 192.168.0.34  netmask 255.255.255.0  broadcast 192.168.0.255
        inet6 fe80::f0de:cd26:d200:e53f  prefixlen 64  scopeid 0x20<link>
        inet6 2406:2d40:4114:f200:9f3e:4293:b1f:8d94  prefixlen 64  scopeid 0x0<global>
        inet6 fd0b:3f38:7421:cd40:aa94:eed9:534f:b056  prefixlen 64  scopeid 0x0<global>
        ether d8:3a:dd:a2:06:10  txqueuelen 1000  (Ethernet)
        RX packets 634  bytes 205247 (200.4 KiB)
        RX errors 0  dropped 0  overruns 0  frame 0
        TX packets 288  bytes 40214 (39.2 KiB)
        TX errors 0  dropped 0 overruns 0  carrier 0  collisions 0
Creating the Wi-Fi to Ethernet Bridge on your Raspberry Pi
4. Once you know the name of your Raspberry Pi’s ethernet device you can continue with setting up a Wi-Fi bridge. Thanks to use using the Network Manager, creating the Wi-Fi bridge is as simple as using the following command within the terminal.
<INTERFACE>: You must replace this with the device name for your ethernet connection. Typically, this will be “eth0“.
sudo nmcli c add con-name wifibridge type ethernet ifname <INTERFACE> ipv4.method shared ipv6.method ignoreCopy5. Once you have created the new connection, you must turn it on by using the following command in the terminal.
After enabling this bridge, your Raspberry Pi’s Wi-Fi will immediately begin to be shared through the ethernet connection. If you have a device connected, you should now have access to the internet. The device will also have a local IP address handed to it by the Pi.
sudo nmcli con up wifibridgeCopy6. You can check that the Wi-Fi bridge is active from your Pi by using the following command.
nmcli con showCopyThis command will show you a list of connections on your Pi. You should see a connection labeled “wifibridge” and that it is using the “eth0” device.
NAME                UUID                                  TYPE      DEVICE
wifibridge          0120ca82-63e9-403d-aa45-c31ed08bec53  ethernet  eth0
preconfigured       6e07c33c-9764-4145-af3f-49875c8a9342  wifi      wlan0
lo                  a54edcc4-0ffa-4090-a2b3-081905aee1c5  loopback  lo
Wired connection 1  9d27eb3e-7657-3a54-ad8a-344cb4bb56e3  ethernet  --
Setting up the Raspberry Pi Wi-Fi Bridge with a VPN
This tutorial is fully compatible with the basic VPN router tutorial.
However, there is one small change you will have to make in step 13, rather than using the commands showcased there, run the commands below.
Basically, the main change you will see here is that instead of redirecting the traffic from wlan0 through the tunnel we will be redirecting the traffic from our eth0 connection to the tunnel.
sudo iptables -t nat -A POSTROUTING -o tun0 -j MASQUERADE
sudo iptables -A FORWARD -i tun0 -o eth0 -m state --state RELATED,ESTABLISHED -j ACCEPT
sudo iptables -A FORWARD -i eth0 -o tun0 -j ACCEPT
The rest of the VPN Access Point tutorial can be done without any other changes.
Conclusion
Hopefully by now you should have a fully operational Raspberry Pi Wi-Fi Bridge.
If you come across any issues or have some feedback related to this tutorial, then please don’t hesitate to leave a comment below.
If you found this tutorial to be helpful, please check out our many other Raspberry Pi projects.


Per my previous question, I had to manually assign the proper listening address to my ethernet port with
ifconfig eth0 10.10.10.50 netmask 255.255.255.255
After I did this it appears to work great. Thank you!
This is exactly what I am looking for, so I duplicated your steps but alas when I plug a PC into the ethernet port it sees it as “unknown network – no internet”.
When I run ifconfig on the pi I see that eth0 has no ip address assigned.
when I run sudo systemctl status -l dnsmasq I get the following:
● dnsmasq.service – dnsmasq – A lightweight DHCP and caching DNS server
Loaded: loaded (/lib/systemd/system/dnsmasq.service; enabled; vendor preset: enabled)
Active: failed (Result: exit-code) since Mon 2020-06-22 13:16:33 CDT; 7min ago
Process: 443 ExecStartPre=/usr/sbin/dnsmasq –test (code=exited, status=0/SUCCESS)
Process: 455 ExecStart=/etc/init.d/dnsmasq systemd-exec (code=exited, status=2)
Jun 22 13:16:25 raspberrypi systemd[1]: Starting dnsmasq – A lightweight DHCP and caching DNS server…
Jun 22 13:16:25 raspberrypi dnsmasq[443]: dnsmasq: syntax check OK.
Jun 22 13:16:33 raspberrypi dnsmasq[455]: dnsmasq: failed to create listening socket for 192.168.220.1: Cannot assign requested address
Jun 22 13:16:33 raspberrypi dnsmasq[455]: failed to create listening socket for 192.168.220.1: Cannot assign requested address
Jun 22 13:16:33 raspberrypi dnsmasq[455]: FAILED to start up
Jun 22 13:16:33 raspberrypi systemd[1]: dnsmasq.service: Control process exited, code=exited, status=2/INVALIDARGUMENT
Jun 22 13:16:33 raspberrypi systemd[1]: dnsmasq.service: Failed with result ‘exit-code’.
Jun 22 13:16:33 raspberrypi systemd[1]: Failed to start dnsmasq – A lightweight DHCP and caching DNS server.
Also, I double checked /etc/dhcpcd.conf and it does not have eth0 listed twice
thanks for lettting ppl know about this command “sudo systemctl status -l dnsmasq” it HELPED so much it helps me find out whats happening also make sure you PC is connected and it will tell you whats on the ethernet and i tried setting the listen adress to the pc address
Brilliant, it has taken me months to find an (almost) complete solution. Point to note, when 2 default routes are shown (both as Destination of 0.0.0.0) in the command “netstat -rn”, you must a “metric” value in /etc/dhcpcd.conf to favour wlan0 over eth0.
eg.
interface eth0
static ip_address=192.168.20.1/24
static domain_name_servers=192.168.20.0
metric 300
interface wlan0
metric 200
This fixed it for me thanks a lot!
I have followed 6 different tutorials on wifi bridge, including this one 3 times, and this bit was the missing information i needed! Thank you!
adding this made it work, without this even the pi internet didnt work when i plugged a machine in via LAN, let alone it bridging the internet. Now it works though, sending this message through my desktop to Pi3B+ and phones wifi hot spot 😀
Time to take it home and plug in my home network as we havent had internet all week due to outages
Thanks a lot 🙂 Thats exactly what I was looking for. working prefect on Pi Zero used usb0 interface instead of eth0
Hi Guys,
I had a lot of issues getting this working, every time I restarted the PI I was unable to access it.
In the end I changed step 6 from
interface=eth0
static ip_address=192.168.220.1/24
static routers=192.168.220.0
To
interface eth0
static ip_address=192.168.220.1/24
static routers=192.168.220.0
and then everything worked as expected.
I hope this helps
Hi Dave,
Thank you for pointing out that mistake, we have now corrected it in the tutorial.
Cheers,
Emmet
This definitely indeed helpled. I just got this build working to bridge my Starlink Wifi only router to my LAN. No thanks Starlink. I’ll manage it from here. PiHole blocks all my ads!
Mine is working well, but I need to set a delay to when the PI is fully booted and the wifi connected to the internet before starting dnsmasq otherwise my wifi is not ready (im using a wifi dongle in the PI and suspect the drivers need time to load after the OS is booted).
Also every now and again the USB Wifi disappears so i lose my internet connection and i have to reboot and then restart dnsmasq .
After my delayed start issue, Is there some way to make the pi auto reboot if it loses its internet connection?
Thanks!
Hi
By doing using the Raspberry Pi as a Wi-Fi Bridge will it still be free to other purposes or will only work as a WiFi bridge and nothing else?
Yeah you can do other things with it
Update:
The “sudo iwlist wlan0 scan” does see the two closest wifi ssid’s.
I can not get this to work on a Pi3 with built in wifi. wlan0 will not “see” any ssid’s (three wifi routers running). Tried twice with fresh Jessie 2017-06-21 image –> update –> upgrade.
ifconfig -a does show the wlan0. eth0 does show static ip.
How exactly does one go about changing the text in step 11? I have tried both the write out function and the cut text function and have not gotten any results.
Same question as Hugh. I want to be able to connect a BluRay with an ethernet connection to the Rpi then via WiFi to my router which has my NAS drive plugged in to one of its ports… Hopefully someone can help.
Not bothered about connecting my Blu Ray to the internet – just want it to be able to play stuff on my NAS drive which has DLNA on it.
I can confirm the above tutorial works with the original 256MB RPi B.
Great tutorial. It works like a charm. The only thing that is missing is a description of what to do on the machine that you want to connect to the wifi through the Pi. 😉 On Windows you should leave it at “Obtain IP address” (the IPv4 properties of the connection once you connect both devices through Ethernet). On Linux you should have your connection set at “Automatic (DHCP) for you IPv4 settings.
So I looked into this project and it looks amazing but before I dive in I’m wondering if it is compatible with the original Pi + a wifi dongle. Thanks!
As long as the dongle is compatible with the Pi – yes.
Should step 13 read “-i wlan0” instead of “-i wlan”?
Also, important to note that this setup is a wifi client NAT router, not technically a bridge. It is not possible for clients on the wifi side of the raspberry Pi to directly connect to clients connected to the Pi’s eth0.
I can confirm the NAT config you’ve detailed does work on a Pi2 w/ Jessie though, so thanks for the writeup!
Hi Marcus,
Yep you are correct, it should be wlan0, thanks for pointing that out.
How much of a hit did your connection speed take when using this setup? I have a 92Mbps down connection normally on my pc wired directly to my router, but when testing with the Rpi3 I’m only getting 4Mbps down. And my wireless router is just in the next room. Any ideas why that might be? I’m not sure what to troubleshoot.
Hello. Is there any way to bridge the raspberry pi wifi bridge to my home network? I have the raspberry pi wifi bridge connected to a switch and would like to talk to the other devices from my 192.168.1.x network to the pi’s 192.168.220.x network.
This tutorial doesn’t make the pi a dhcp server. If you want to use it on 192.168.1.*, you’ll need to make it’s fixed ip 192.168.1.*, preferably not in the range handed out by your dhcp server or things get interesting.
actually I am also getting the same error, please give the pic of the ipv4 file, also dns config
following is errors
Jun 27 01:53:34 raspberrypi dnsmasq[1255]: dnsmasq: failed to create listening socket for 192.168.1.1: Cannot assign requested addressJun 27 01:53:34 raspberrypi systemd[1]: dnsmasq.service: control process exited, code=exited status=2
Jun 27 01:53:34 raspberrypi systemd[1]: Failed to start dnsmasq - A lightweight DHCP and caching DNS server.
Jun 27 01:53:34 raspberrypi systemd[1]: Unit dnsmasq.service entered failed state.
Make sure you have not defined eth0 twice in the interfaces file. This will cause an error like this to appear.
Got this when starting dnsmasq.
Job for dnsmasq.service failed. See 'systemctl status dnsmasq.service' and 'journalctl -xn' for details.and journalctl shows no journals
Not sure what’s happened here, did you receive any errors earlier on in the tutorial ?
Step 6 to 9 configure eth0 instead of wlan0 interface. DHCP/DNS services should run on wlan0 interface, which requires static IP.
Sorry. I read too fast. It’s a bridge for Ethernet device. You’re right.
I got up to step 13 and threw an error
modprobe: ERROR: ../libkmod/libkmod.c:557 kmod_search_moddep() could not open moddep file ‘/lib/modules/4.4.21-v7+/modules.dep.bin’
iptables v1.4.21: can’t initialize iptables table `nat’: Table does not exist (do you need to insmod?)
Perhaps iptables or your kernel needs to be upgraded.
I rebooted and it lost it’s IP
Same result..
I’m looking into this issue, rebooting will fix the issue but you shouldn’t lose your IP.
Ho una smart TV con connessione wifi e LAN.
Essendo posizionata lontana dal router la utilizzo solitamente con il wifi.
Utilizzando il suo Pi Wifi Bridge avrei una velocità di connessione migliore o peggiore del wifi?
Grazie
—————————————————————————————————————
I have a smart TV with wifi and LAN.
Being positioned far from the router, I usually use it with wifi.
Using your Pi Wifi Bridge would I have a connection speed better or worse than wifi?
Thank you
Hey Luigi,
The Raspberry Pi hasn’t got the fastest WiFi chip or ethernet chip, plus the overhead in it having to run through the Raspberry Pi.
I personally reckon you would be getting a worse connection then connecting straight to your WiFi.
Cheers,
Gus