A Raspberry Pi Wi-Fi bridge is one of the best ways of providing internet access to a device that only supports an Ethernet connection.
In this tutorial, we will show you how to setup a Wi-Fi bridge using network manager on your Raspberry Pi. Network Manager is a useful tool that makes managing connections a straightforward process.
You will need to keep in mind that you will not see speeds as good as what you would with a direct connection to your router. As there is some overhead with the connection having to run through the Raspberry Pi.
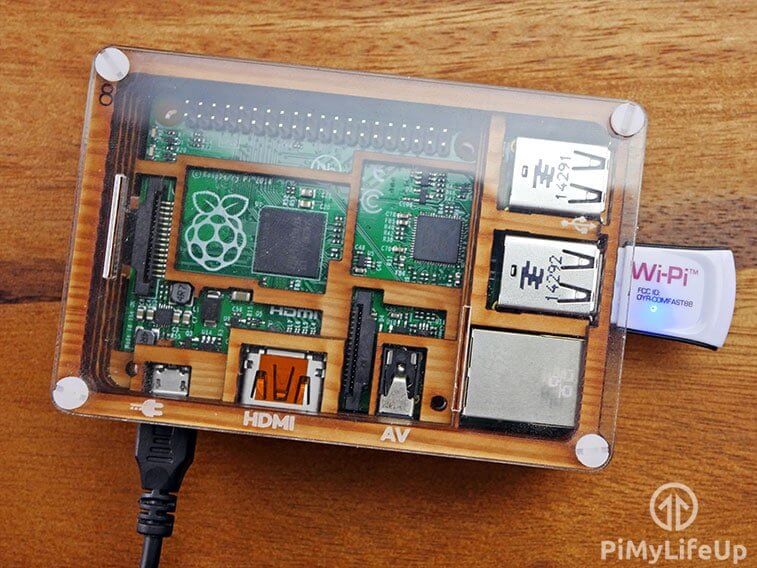
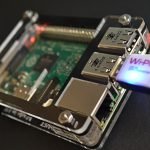
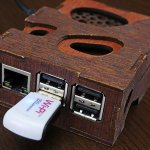
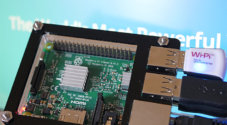
Remember to do this tutorial you will need either a Wi-Fi dongle or a Raspberry Pi 3 with the inbuilt Wi-Fi module.
This tutorial can be combined with our basic VPN access point, you can find the tutorial on how to set that up directly after this tutorial. Basically, it will show how to setup a OpenVPN client and redirect all traffic through that client.
Please note: This tutorial will require some slight changes if you decide to go down the VPN route, we will explain the necessary changes needed at the end of this tutorial.

Equipment List
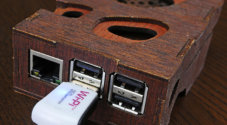
Below are all the bits and pieces that I used for this Raspberry Pi Wi-Fi bridge tutorial, you will need A Wireless internet connection to be able to complete this tutorial.
Recommended
Optional
- Raspberry Pi Case Amazon
Setting up the Wi-Fi Bridge using your Raspberry Pi
In this section, we will show you how easy it is to set up a Wi-Fi bridge on your Raspberry Pi.
This bridge allows you to easily share your Wi-Fi connection with any connected ethernet device. Thanks to Network Manager, this whole process is made relatively easy.
Since Bookworm, all versions of Raspberry Pi OS have Network Manager installed by default. If you are using an older release of Pi OS, follow our guide on installing Network Manager.
Preparing your Raspberry Pi
1. Before setting your Raspberry Pi to act as a Wi-Fi bridge, we will want to ensure that the operating system is up-to-date.
You can update the package list and upgrade any out-of-date packages by running the following commands.
sudo apt update
sudo apt upgradeCopy
2. Once your Raspberry Pi is up-to-date, the only other thing you will need to set up is a Wi-Fi connection.
If you haven’t connected to your Wi-Fi yet be sure to follow guide.
Finding your Ethernet Device Name
3. Once you have a Wi-Fi connection set up on your Raspberry Pi, we will need to get the name of your ethernet adapter.
Typically, the Ethernet device is called “eth0” but this isn’t always the case. Luckily, we can double-check by using the “ifconfig” command.
ifconfigCopyYou will get a list of devices like we have shown below using this command. Look for your ethernet connection, then continue. In our example, this Ethernet device has the name “eth0” as expected.
eth0: flags=4099<UP,BROADCAST,MULTICAST>  mtu 1500
        ether d8:3a:dd:a2:06:0f  txqueuelen 1000  (Ethernet)
        RX packets 0  bytes 0 (0.0 B)
        RX errors 0  dropped 0  overruns 0  frame 0
        TX packets 0  bytes 0 (0.0 B)
        TX errors 0  dropped 0 overruns 0  carrier 0  collisions 0
        device interrupt 106

lo: flags=73<UP,LOOPBACK,RUNNING>  mtu 65536
        inet 127.0.0.1  netmask 255.0.0.0
        inet6 ::1  prefixlen 128  scopeid 0x10<host>
        loop  txqueuelen 1000  (Local Loopback)
        RX packets 16  bytes 2038 (1.9 KiB)
        RX errors 0  dropped 0  overruns 0  frame 0
        TX packets 16  bytes 2038 (1.9 KiB)
        TX errors 0  dropped 0 overruns 0  carrier 0  collisions 0

wlan0: flags=4163<UP,BROADCAST,RUNNING,MULTICAST>  mtu 1500
        inet 192.168.0.34  netmask 255.255.255.0  broadcast 192.168.0.255
        inet6 fe80::f0de:cd26:d200:e53f  prefixlen 64  scopeid 0x20<link>
        inet6 2406:2d40:4114:f200:9f3e:4293:b1f:8d94  prefixlen 64  scopeid 0x0<global>
        inet6 fd0b:3f38:7421:cd40:aa94:eed9:534f:b056  prefixlen 64  scopeid 0x0<global>
        ether d8:3a:dd:a2:06:10  txqueuelen 1000  (Ethernet)
        RX packets 634  bytes 205247 (200.4 KiB)
        RX errors 0  dropped 0  overruns 0  frame 0
        TX packets 288  bytes 40214 (39.2 KiB)
        TX errors 0  dropped 0 overruns 0  carrier 0  collisions 0
Creating the Wi-Fi to Ethernet Bridge on your Raspberry Pi
4. Once you know the name of your Raspberry Pi’s ethernet device you can continue with setting up a Wi-Fi bridge. Thanks to use using the Network Manager, creating the Wi-Fi bridge is as simple as using the following command within the terminal.
<INTERFACE>: You must replace this with the device name for your ethernet connection. Typically, this will be “eth0“.
sudo nmcli c add con-name wifibridge type ethernet ifname <INTERFACE> ipv4.method shared ipv6.method ignoreCopy5. Once you have created the new connection, you must turn it on by using the following command in the terminal.
After enabling this bridge, your Raspberry Pi’s Wi-Fi will immediately begin to be shared through the ethernet connection. If you have a device connected, you should now have access to the internet. The device will also have a local IP address handed to it by the Pi.
sudo nmcli con up wifibridgeCopy6. You can check that the Wi-Fi bridge is active from your Pi by using the following command.
nmcli con showCopyThis command will show you a list of connections on your Pi. You should see a connection labeled “wifibridge” and that it is using the “eth0” device.
NAME                UUID                                  TYPE      DEVICE
wifibridge          0120ca82-63e9-403d-aa45-c31ed08bec53  ethernet  eth0
preconfigured       6e07c33c-9764-4145-af3f-49875c8a9342  wifi      wlan0
lo                  a54edcc4-0ffa-4090-a2b3-081905aee1c5  loopback  lo
Wired connection 1  9d27eb3e-7657-3a54-ad8a-344cb4bb56e3  ethernet  --
Setting up the Raspberry Pi Wi-Fi Bridge with a VPN
This tutorial is fully compatible with the basic VPN router tutorial.
However, there is one small change you will have to make in step 13, rather than using the commands showcased there, run the commands below.
Basically, the main change you will see here is that instead of redirecting the traffic from wlan0 through the tunnel we will be redirecting the traffic from our eth0 connection to the tunnel.
sudo iptables -t nat -A POSTROUTING -o tun0 -j MASQUERADE
sudo iptables -A FORWARD -i tun0 -o eth0 -m state --state RELATED,ESTABLISHED -j ACCEPT
sudo iptables -A FORWARD -i eth0 -o tun0 -j ACCEPT
The rest of the VPN Access Point tutorial can be done without any other changes.
Conclusion
Hopefully by now you should have a fully operational Raspberry Pi Wi-Fi Bridge.
If you come across any issues or have some feedback related to this tutorial, then please don’t hesitate to leave a comment below.
If you found this tutorial to be helpful, please check out our many other Raspberry Pi projects.


Thanks for this solution, works fine on RaspiOS.
I added “save no” to keep my system unchanged after reboot.
sudo nmcli c add save no con-name wifibridge type ethernet ifname eth0 ipv4.method shared ipv6.method ignore
Thank you – Your guide is truly outstanding! I can’t thank you enough—this solved my WiFi-to-Ethernet challenge effortlessly.
Additionally, for those interested, you can substitute the WiFi WAN connection with a USB/Ethernet dongle. Just a heads-up: if you’re using a Realtek chip on a Raspberry Pi, it might be best to avoid it due to some known issues with Raspberry Pi’s Debian OS. But otherwise, this solution can be easily adapted.
I needed to add `nogateway` after `interface eth0` in /etc/dhcpcd.conf so that packets meant for the internet don’t get sent to eth0
Same with me. Before that, I had an ethernet connection but without internet access. This ‘nogateway’ line should be added in the (as usual excellent 🙂 main article
Love this! Thank you – created a link between Starlink and my home network as the new dishes only come with wifi and the ethernet thing I ordered at the same time isn’t shipping for 6 weeks.
Excellent tutorial!
Using Bullseye Lite OS I had to install iptables: “sudo apt-get install iptables”.
Hey this may seem a silly question but what distro are we using here?
Hi Kev,
For most of our tutorials we use Raspberry Pi OS unless we state otherwise.
Cheers,
Emmet
i had a problem where i did the iptables and it said “Sudo:iptables command not found”
the fix is “sudo apt-get install iptables” works like a charm!
Everything seems to work and I got no errors but when I plug in my laptop or PC it always fails to make a connection. D I need a certain type of Ethernet cable?
Okay nevermind I found out that i had a 192.128 in the address range by accident
Thank you for this,
Is there anyway I can bring this into my network? I prefer to use my internet router as DNS then I can use local assets as this is the link between tv and network.
Thanks again
Mick
Solved this
Commented out the line “server=8.8.8.8 # Use Google DNS ” in dnsmasq.conf
Mick
thx so much! my optiplex 780 lost internet and this has solved it!
Had a few problems myself, just wanted to pass this on. Dnsmasq seems to have some problems after boot, seems it won’t start. I fixed this by changing the following in /etc/dnsmasq.conf:
Change “bind-interfaces” to “bind-dynamic”
(don’t include the quotes)
BTW just though I’d point out that this does not produce a bridge, this configuration produces a router at the Rpi, so pick whatever IP address scheme you want for the Ethernet port on the pi. In fact if I choose the same address scheme on the Rpi Ehthernet as that used on the WiFi I get problems accessing devices on the WiFi local network. If I choose a different network on the Ethernet as that on the WiFi, everything works perfectly.
Thank you.
I had the same issue. This change resolved the issue.
Saved my life with this – please change the main article to “bind-dynamic”. I wasted hours on this before I scrolled to the comments. Whew!