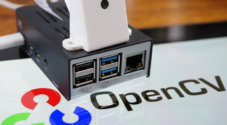
In this guide, we will be showing you how to install TensorFlow Lite on the Raspberry Pi.

TensorFlow is an open-source framework developed by Google for machine learning and artificial intelligence. You can use this for various tasks such as classifying an image, detecting the bounding box of objects in an image, or even estimating the pose of people.
TensorFlow Lite is a lightweight version of “TensorFlow” designed for low-powered devices such as the Raspberry Pi.
You can not use the Lite version of TensorFlow to train models. You can only use it to run pre-trained models that have been made compatible with the “Lite” version.
Models designed for TensorFlow Lite need to be lightweight and less computationally expensive.
To show you how this all works, we will also show you how to use the example “Image Classification” model with your Pi camera or webcam.
Equipment
Below is the equipment we used when installing the TensorFlow Lite software onto the Raspberry Pi.
Recommended
- Raspberry Pi Amazon
- Micro SD Card Amazon
- Power Supply Amazon
- Ethernet Cable Amazon or Wi-Fi Amazon
- Raspberry Pi Camera Amazon or USB Webcam Amazon
Optional
This tutorial was tested on a Raspberry Pi 400 running the desktop version of Raspberry Pi OS Bullseye.
Preparing your Raspberry Pi for TensorFlow
Before you can install TensorFlow, we need to complete some preparation work. Unfortunately, TensorFlow Lite isn’t available through the included repositories. Instead, we must rely on Google’s package repository.
1. Our first step is to perform an update of our Raspberry Pi’s package list and upgrade any existing package on your system.
To perform both of these updates, you will need to run the following two commands within the terminal.
sudo apt update
sudo apt upgrade -yCopy
2. Once the update completes, we will need to add the Google package repository containing TensorFlow Lite to our Raspberry Pi.
We can start this process by adding the repository to our sources list by using the following command.
echo "deb [signed-by=/usr/share/keyrings/coral-edgetpu-archive-keyring.gpg] https://packages.cloud.google.com/apt coral-edgetpu-stable main" | sudo tee /etc/apt/sources.list.d/coral-edgetpu.listCopy3. Although we have added the repository, we still need to add its GPG key into our keychains directory.
The package manager will use this key to help ensure that the file did, in fact, come from this repository.
Download and save the GPG key to our keyrings directory by using the following command on your Raspberry Pi.
curl https://packages.cloud.google.com/apt/doc/apt-key.gpg | sudo tee /usr/share/keyrings/coral-edgetpu-archive-keyring.gpg >/dev/nullCopy4. Since we modified our Raspberry Pi’s package sources, we need to update our package list to scan the newly added repository.
Perform an update of the package list by using the command below.
sudo apt updateCopyInstalling TensorFlow Lite to your Raspberry Pi
Now that we have prepared the Raspberry Pi, we can install the TensorFlow Lite runtime to our Raspberry Pi.
1. To install Tensorflow Lite, all you need to do is run the command below on your device.
This will install the latest TensorFlow Lite runtime from Google’s package repository as well as some additional packages you may require.
sudo apt install python3-tflite-runtime libatlas-base-devCopy2. Now that we have installed the package, we can verify that TensorFlow Lite is now working by importing it.
You can start the Python command-line interface (CLI) on your Raspberry Pi by typing in the command below.
python3Copy3. Within the Python CLI, it is straightforward to verify that TensorFlow Lite is installed.
All we need to do is use the following line within the interface. All this line is doing is importing the interpreter library.
from tflite_runtime.interpreter import InterpreterCopyIf everything has worked so far, you should see no further messages within the command line. You can now run your TensorFlow Lite models on your Raspberry Pi.
Running a TensorFlow Lite Model on the Raspberry Pi
There are various pre-trained TensorFlow Lite example models on the official TensorFlow website.
You can find examples with guides for the Raspberry Pi by looking for the “Try it on Raspberry Pi” text.
We will be using the “Image Classification” model for this example. First, make sure you have a camera connected to your Raspberry Pi. This camera can either the the Pi Camera or a USB webcam.
1. To start this off, we will be cloning the examples directly from the TensorFlow GitHub.
However, to clone the software, we will need to install the “git” software to our Raspberry Pi.
sudo apt install gitCopy2. With “git” installed, clone the example repository using the following command.
Using the “--depth 1” option ensures we don’t clone any other repositories referenced by the one we are cloning.
git clone https://github.com/tensorflow/examples --depth 1Copy3. We can now change into the “image_classification” example directory.
This is where the Python script sits as well as a setup script that will download the model that we need.
cd examples/lite/examples/image_classification/raspberry_piCopy4. To run this script, we need to modify the file’s permissions to give us execute privileges.
Use the chmod command below in your Raspberry Pi’s terminal.
sudo chmod +x setup.shCopy5. We can run the included setup script with everything now ready.
Using this script will install any dependencies required by Python and download the pre-trained TensorFlow model.
./setup.shCopy6. Now, run the image classifier using the following command on your Raspberry Pi.
Upon running the script, it will open a window on your device. You will see a video feed from your camera displayed here.
In the top-left of the window, you will see some text. It offers three guesses on what that image could be. Each guess has a probability associated with it. All probability values will add up to “1” in total.
If you see an even spread across these values, it indicates that the model can’t confidently recognize the image.
python3 classify.pyCopyConclusion
At this point, you should now have successfully installed TensorFlow Lite to your Raspberry Pi.
During this tutorial, you will also have had a chance to test a pre-trained image classification model.
If you have run into any issues with getting TensorFlow Lite installed and running on your device.
Be sure to check out some of our IoT projects or some of our great Raspberry Pi projects.


On google I asked “how to install tensorflow on raspberry pi zero 2 w”. I received many answers from people that got the same error message that I got. Also there were some fixes that are supposed to work, that do not understand. Could you take a look and see if there is a solution? Thanks.
Hi Barry,
I will try and look further into this but not a huge amount I can do without having a Raspberry Pi Zero 2 W on hand to test things myself. I will attempt to buy one but they are very poorly stocked at the moment like the rest of the Pi’s.
In the meantime, hopefully someone will provide steps they took to fix the issue on the Zero 2 W.
Cheers,
Emmet
I am running a 32 bit OS. I also have found that legacy for the camera is required. Has anyone tried to use a raspberry pi zero 2 w? Thanks.
This is what I get when installing on raspberry pi zero 2 w. Step 3 python: from tflite_runtime …… I get: ” Illegal instruction” Step 2 git git clone https:….. I get: fatal: destination path “examples” already exists and is not empty Step 5 ./setup.sh I get in RED ERROR: could not find a version that satisfies the requirement tflite-support>=0.4.2 and more. Step 6 I get lots of stuff ending with: Module Not Found Error: No module named “cv2” I hope this is clear and helps Thanks
Hi Barry,
An illegal instruction error could indicate that the versions of tflite that was installed is incompatible with your system. Sadly as I don’t have a Pi Zero 2 W on hand I can’t investigate this any further.
One thing, are you running a 64-bit version of Raspberry Pi OS or the standard 32-bit?
A user below has suggested that possibly enabling “Legacy Camera” mode within Raspberry Pi OS might solve the issues you are running into.
You can enable that option by opening up the Raspberry Pi Configuration tool using the command below.
Next navigate to “Interface Options” -> “Legacy Camera” and select the “Yes” option.
After setting that option restart your Raspberry Pi and try again.
Cheers,
Emmet
This works on my raspberry pi 4. I can not make it work on my raspberry pi zero 2 w.
Hi Barry,
Is there any specific error that you are running into when attempting this on a Raspberry Pi Zero 2 W.
Sadly, I don’t actually have one on hand so can’t test this for myself.
Cheers,
Emmet
Barry, I managed to get it working on Raspi Zero2 W. Please try this..
https://www.youtube.com/watch?v=E7KPSc_Xr24
This works. You need to have your camera in legacy mode. I do not know what means
Brilliant tutorial, thank you. For anyone running into issues running this on OS 11 Bullseye I had to enable the Legacy Camera Support in raspi-config as apparently it requires the stack to function.
This updated version works. work like to know how to save so I do not have to down load it time I want to use it. Thanks
Hi Barry,
I have been trying to replicate the issues that you are having and can’t seem to.
If you are referencing the example we use within this tutorial you should only have to re-run the “classify.py” script again within the directory.
Otherwise, could you please be specific with what point the tutorial begins to break for you.
Cheers,
Emmet
I get to ” setup.sh” then the error message I get is ” command not found.
Hi Barry,
All you need to do is include “./” in front of “setup.sh”. I have updated the tutorial to reflect this.
By adding the “./” you are telling the terminal to run a file within the current directory.
Cheers,
Emmet
Everything seems to work until I get to. Thin I get an error message that states command not found.
Help. Thanks
Hi Barry,
Please let us know the error that you received as it was output within the terminal.
Cheers,
Emmet
Thanks so much for your tutorial! It doesn’t get any easier than that! Lucky me.