In this project, we will show you how to set up an SSH honeypot on your Raspberry Pi using sshesame.
An SSH honeypot is a fake SSH server that you can run on your Raspberry Pi to capture bad actors. A user or bot attempting to access your network would get stuck in the honeypot.
One of the cool things about this honeypot is that you can quickly get an idea of how an attacker might approach your system and the commands they might issue over SSH once they gain access.
Since this is a honeypot, any command an attacker uses never actually occurs, and the sshesame daemon fakes the responses.
A Raspberry Pi can be a great device for setting up an SSH honeypot. It is relatively cheap to run, and you can easily set up a device to purely act as a honeypot without having anything critical running on it.
The software we are using supports both 32-bit and 64-bit Raspberry Pi operating systems. The one caveat is that the 32-bit builds are for ARMv7 meaning only Raspberry Pi 3’s and newer will work.
Equipment
Below is a list of the equipment we used when setting up an SSH honeypot on our Pi.
Recommended
Optional
This tutorial was last tested on a Raspberry Pi 5, running the latest version of Raspberry Pi OS Bookworm.
Installing and Running the SSH Honeypot on your Raspberry Pi
In the following sections, we will walk you through setting up an SSH honeypot on your Raspberry Pi.
Preparing your Raspberry Pi to Run sshesame
1. Before we begin installing and running sshesame on our Raspberry Pi there is a few tasks we must do first.
The first step is to ensure our operating system is up-to-date. You can update the package list cache and upgrade any out-of-date packages by running the following commands.
sudo apt update
sudo apt upgradeCopy
2. Once the update has completed, you must install the Docker runtime. This runtime makes setting up and running the SSH honeypot a very easy process.
Follow our guide on installing Docker to the Raspberry Pi so that you will have the latest available version.
https://pimylifeup.com/raspberry-pi-docker/3. Our next step is to create a directory to store the Docker Compose file for our SSH honeypot on our Raspberry Pi.
We can use the mkdir tool to create this directory by running the following command. The “-p” option tells the command to create any missing directory.
sudo mkdir -p /opt/stacks/sshesameCopy4. With the directory created, you can change into it by utilizing the cd command.
cd /opt/stacks/sshesameCopyWriting your Docker Compose File for your Raspberry Pi SSH Honeypot
5. We can now begin writing the Docker Compose file that will set up the SSH honeypot on our Raspberry Pi.
We will use the nano text editor to make writing this file easier. It is one of the easiest editors for beginners to use
sudo nano compose.yamlCopy6. Within this file, enter the following lines. These lines tell Docker where to get the sshesame container from, and how to set it up.
With this guide, we are sticking with the default sshesame configuration. However, you can find out more about how you can configure this software through the official GitHub.
Additionally, with this setup, we are exposing the SSH server on port 2022. However, if you aren’t running a standard SSH server locally, you could swap the port on the left-hand side with “22“.
services:
  sshesame:
    image: ghcr.io/jaksi/sshesame
    ports:
      - "2022:2022"
    volumes:
      - sshesame-data:/data
volumes:
  sshesame-data: {}Copy
7. After filling out this file, you can save and quit by pressing CTRL + X, Y, and then ENTER.
Launching sshesame on the Raspberry Pi
8. With the Docker Compose file now written, you can start the SSH honeypot on your Raspberry Pi by using the following command.
This should start in just a few short moments once your Pi has downloaded the sshesame container.
docker compose up -dCopy9. Now, you can watch when users are connecting to your SSH honeypot by following your Docker Compose logs.
docker compose logs -fCopyTesting your SSH Honeypot
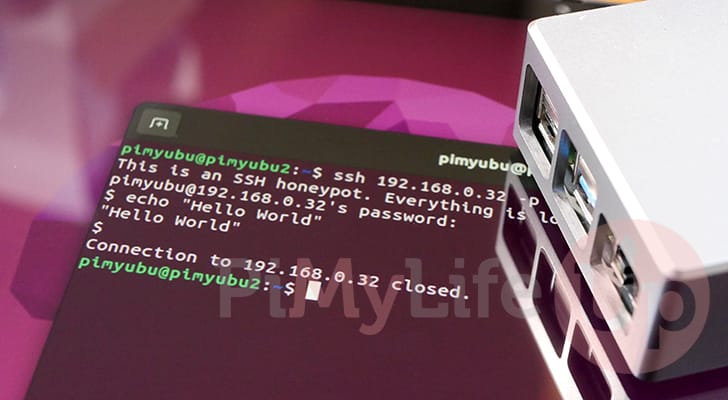
10. Using the following command, you can test your SSH honeypot directly from your Raspberry Pi.
When prompted, you can type in any password you like. As this is a fake SSH server, it will always pretend that the login attempt was successful.
ssh 127.0.0.1 -p 2022Copy11. After logging in to your SSH honeypot, you can see every action that is triggered in your logs.
Below is a small example of the data reported by the honeypot. You can see the password and username used to complete this connection. Additionally, you can see every command that this user attempts to run.
sshesame-1  | 2024/07/16 04:09:07 [192.168.0.9:37368] authentication for user "pimyubu" without credentials rejected
sshesame-1  | 2024/07/16 04:09:11 [192.168.0.9:37368] authentication for user "pimyubu" with password "pimylifeup" accepted
sshesame-1  | 2024/07/16 04:09:11 [192.168.0.9:37368] connection with client version "SSH-2.0-OpenSSH_8.9p1 Ubuntu-3ubuntu0.10" established
sshesame-1  | 2024/07/16 04:09:11 [192.168.0.9:37368] [channel 0] session requested
sshesame-1  | 2024/07/16 04:09:11 [192.168.0.9:37368] [channel 0] PTY using terminal "xterm-256color" (size 80x24) requested
sshesame-1  | 2024/07/16 04:09:11 [192.168.0.9:37368] [channel 0] environment variable "LANG" with value "en_AU.UTF-8" requested
sshesame-1  | 2024/07/16 04:09:11 [192.168.0.9:37368] [channel 0] shell requested
sshesame-1  | 2024/07/16 04:09:11 [192.168.0.9:37368] proof of ownership of host keys "host_rsa_key" requested
sshesame-1  | 2024/07/16 04:10:22 [192.168.0.9:37368] [channel 0] input: "echo \"This is a honeypot\""
sshesame-1  | 2024/07/16 04:10:27 [192.168.0.9:37368] [channel 0] input: "passwd"
sshesame-1  | 2024/07/16 04:10:43 [192.168.0.9:37368] [channel 0] input: "cd /"
sshesame-1  | 2024/07/16 04:10:51 [192.168.0.9:37368] [channel 0] input: "exit"
sshesame-1  | 2024/07/16 04:10:51 [192.168.0.9:37368] [channel 0] closed
sshesame-1  | 2024/07/16 04:10:51 [192.168.0.9:37368] connection closed
Conclusion
By this point in the project, you should have a good idea of how you can set up and run an SSH honeypot on your Raspberry Pi.
A honeypot allows you to trap and observe users who are attempting to attack your server using SSH. You can investigate what commands an intruder attempts to use and log the username and IP address they used to connect.
Please feel free to comment below if you have had any issues with getting this honeypot set up on your system.
If you liked this tutorial, we highly recommend that you explore our many other Raspberry Pi projects.


Doesn’t it defeat the purpose if the script warns that it’s a honeypot when you sign in? At least mine did
Hi Jm,
If it’s an automated/scripted attack, then it will probably be completely mindless to the banner message.
However, this SSH honeypot is actually fairly configurable, and you can modify the message displayed or disable it altogether.
Kind regards,
Emmet
Thank you for the response, and thank you for the tutorial! You raise an excellent point about the scripted attack aspect.
The command “docker compose up -d” results in “no matching manifest for linux/arm/v6 in the manifest list entries”.
Hi Ronald,
I’ve made a slight mistake and forgot that older Raspberry Pi’s older than the Pi 3 (And also the original Raspberry Pi Zero) feature an older CPU that only supports ARMv6.
I have corrected this tutorial to mention that you must be running a Pi 3 or newer for the tutorial to work as the 32-bit builds are for ARMv7.
Kind regards,
Emmet
I would say keeping the port in such container as 22 should be encouraged, to trick every potential attacker that everything is “normal”. And then change our real SSH port to something else.
Thanks for the info Emmet! I will consider trying this on one of my more modern Pi’s.
Or just dont ever ever EVER open SSH to anything externally. Ever. Ever Ever.
VPN or bust if you must access SSH remotely.