In this Raspberry Pi quiz game project, we will be showing you how you can utilize a PlayStation Buzz controller with your Raspberry Pi to run a simple quiz.
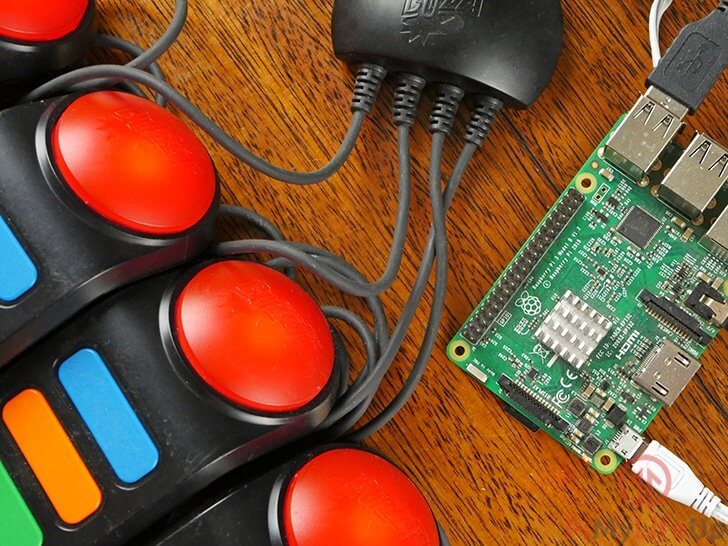
Throughout this tutorial, we will walk you through the process of interacting with the Buzz controllers by utilizing the hidapi library for Python.
The hidapi library will allow us to communicate directly with the Buzz controllers, including retrieving data back from them and writing data to them to switch on and off their red LEDs.
By the end of this tutorial, you will of learned how to read information about all your USB devices. Learned how to read data that the devices are sending back and also how to write a library that will act as a simple wrapper to dealing with the device.
All of this will conclude in writing a simple quiz game that will make use of all the functionality that we programmed into our Buzz Controller library.
You can find the full tutorial on how to use your PlayStation Buzz Controllers on the Raspberry Pi below. It’s one of our longer Raspberry Pi projects, so grab a cup of coffee.
Equipment List
Below is the full list of equipment that you will need to complete our tutorial on how to use your Buzz controllers on the Raspberry Pi and set up a quiz game.
Recommended
- Raspberry Pi Amazon
- Micro SD Card Amazon
- Ethernet Cable Amazon or Wi-Fi Amazon
- Power Supply Amazon
- Buzz Controllers Amazon
Optional
Getting your Pi Ready to Interact with a Buzz Controller
1. Before we get started, we need first to ensure that the Raspbian operating system is entirely up to date.
We can do this by running the following two commands on the Raspberry Pi.
sudo apt update
sudo apt upgradeCopy
2. We will now install some packages that we need for the hidapi package that we will be installing later on in the tutorial. These packages contain the code for accessing USB devices.
Run the command below to install the required packages
sudo apt install python3-venv python3-pip python3-dev python3 libusb-1.0-0-dev libudev-devCopySetting up the Python Virtual Environment
3. Newer versions of Raspberry Pi OS expects us to work within a Python virtual environment.
For that reason, we need to create a directory where we will be storing all of our code. Create a directory called “buzz” in your user’s home directory by using the command below.
mkdir ~/buzzCopy4. After creating the directory, we must switch to it by running the following command.
cd ~/buzzCopy5. Now that we are in our newly made directory, we must generate the Python virtual environment.
Generating this environment is as simple as running the command below. This process can take a little bit to complete.
python3 -m venv envCopy6. Once the virtual environment has generated, we must now use it by using the command below.
You must run this command to enter the environment every time you want to run any of the scripts we use within this guide.
source env/bin/activateCopyWhen you are within the virtual environment you will see “(env)” at the start of the terminal prompt.
Installing the Required Python Packages
7. Now that we are in the Python virtual environment let’s use pip to install a particular package named Cython.
For those who do not know what Cython is, it is a version of Python that is compiled to try and achieve C like performance. We mainly need this for a package that we will be using to interface with the USB device.
Now run the following code to install Cython through pip on your Raspberry Pi.
python3 -m pip install cythonCopyPlease note that Cython can take considerable time to install, so now is a good time to grab another coffee.
8. Let’s now go ahead and install the final Python package that we need, that being the hidapi package.
This hidapi package requires Cython that we installed in the previous step. Cython allows the hidapi code to get near C-like performance meaning USB interactions can happen speedily.
Install this package by running the following command on your Raspberry Pi.
python3 -m pip install hidapiCopy9. Now that we have all the required packages installed to the system, we can now proceed to our next section.
The next section will go into how we can read data back from the buzz controller and get an idea of the values that we can expect to have to deal with.
If you would prefer to go straight into writing the buzz controller library and the quiz game logic you can skip to the end of the next section.
Finding your Buzz Controllers through Python
1. In this section, we will be exploring how we can retrieve the raw data from the Buzz Controllers.
To do this, we will be writing two small Python scripts that utilize the hidapi package that we installed earlier.
One of these scripts will enumerate all connected USB devices so we can pick out our Buzz controller and grab its vendor id and product id.
The second script that we are writing will read back the raw data from the Buzz controller by accessing it through the vendor id and product id that we retrieve from the enumeration.
Let’s begin writing our enumeration script by running the following command on our Raspberry Pi.
nano enumerate.pyCopy2. Within this file write the following lines of code. We will explain each vital line of code to give you an understanding of this all works.
a. This line tells the command line interpreter that it should use the environment path to find and utilize Python to run the following script.
It’s always handy to have the shebang (#!) line at the start of a script as it makes it easier to run without having to specify the program to run it every time.
#!/usr/bin/env python3Copyb. Our second line imports the hid library that we installed earlier on in this tutorial, this will allow us to interact with our USB devices, and for this script will let us enumerate all available USB devices.
import hidCopyc. This block of code is the critical part of our short script. It will retrieve an enumeration of all the currently available USB devices by utilizing the USB library.
It will then loop through all the devices provided to it from the hid library, creating a list of the keys from each device.
We then sort these keys so that they should print out in a better format.
Finally, we loop through all the keys provided to us and print them back out. The print out will allow us to find some crucial information about our device.
for d in hid.enumerate():
keys = list(d.keys())
keys.sort()
for key in keys:
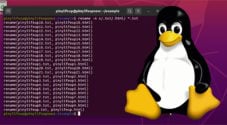
print("%s : %s" % (key, d[key]))Copy3. Once you have finished writing out the code, it should look like what we have displayed below.
If you are happy that the code is correct, save the file by pressing CTRL + X then Y and finally ENTER.
#!/usr/bin/env python3
import hid
for d in hid.enumerate():
keys = list(d.keys())
keys.sort()
for key in keys:
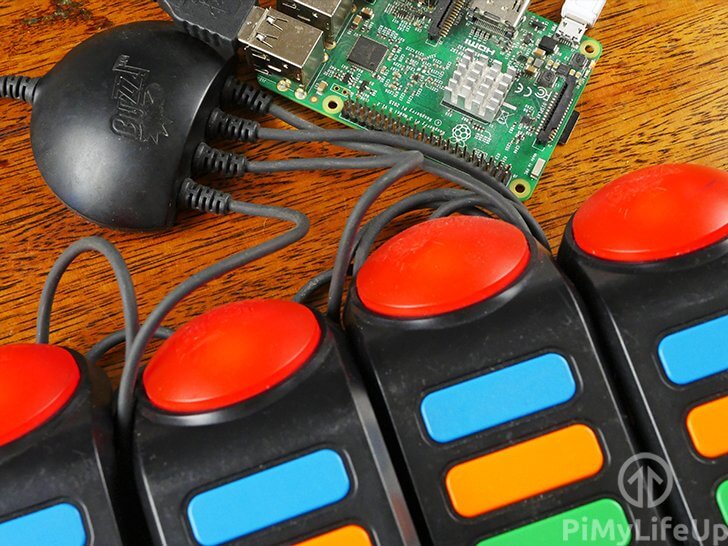
print("%s : %s" % (key, d[key]))Copy4. Before we run the Python script that we just wrote you will need first to plug your Buzz controllers into your Raspberry Pi.
We also recommend that you take out any other USB devices to make it easier to find the details for your Buzz Controller.
With your Buzz Controller plugged into your Raspberry Pi you can now run the script by running the following command. Make sure you use sudo for this as it needs access to the USB interface.
sudo env/bin/python enumerate.pyCopy5. From that script you should see an output similar to what we have showcased below, you should see the manufacturer appear as “Logitech” and the “product_string” as “Logitech Buzz(tm) controller“.
The two values you want to pay attention to here is both the “product_id” and the “vendor_id” as we will need those in the next section to begin talking with the device.
interface_number : 0
manufacturer_string : Logitech
path : 0001:0004:00
product_id : 2
product_string : Logitech Buzz(tm) Controller V1
release_number : 4353
serial_number :
usage : 0
usage_page : 0
vendor_id : 1356Copy
6. In the next section, we will be showing you how you can use both the “vendor_id” and the “product_id” to communicate with the Buzz Controllers.
If the “vendor_id” and “product_id” differ to the values, we have in the example above make sure you write them down.
Retrieving Data from the Buzz Controllers through Python
1. Now thanks to retrieving the “product_id“ and the “vendor_id” from the previous section we can now move onto learning how to read data back from the buzz controller.
Let’s begin by writing the script that we will use to read back all the data from the Buzz controller. Enter the following command on the Raspberry Pi.
nano read_controller.pyCopy2. Within this file enter the following lines of code, we will explain the lines that are important as we go along.
a. This line is called a shebang (the #! character sequence in, particular, is the shebang), the command line interpreter reads this and uses the specified application to interpret the file.
#!/usr/bin/env pythonCopyb. Here we are importing the two significant packages that we need to get our script up and running, and so we can read from our Buzz Controller.
The first package is called hid and is utilized so that we can interact with USB devices easier through Python. This package will allow us to retrieve input data from the Buzz controller.
In addition to the hid package we are also importing the time package. We utilize the time package so we can put the Python script to sleep for a half a second to stop flooding the command line with messages.
import hid
import timeCopy
c. We begin by creating an object from the hid library that we imported earlier in the tutorial. This will allow us to access the library and open up an actual USB device using the “vendor_id” and “product_id” that we got earlier in this tutorial.
Now using the “h.open()” function we can specify both the “vendor_id” and “product_id” and the library will attempt to make a connection to the device with those specific values.
If you have noticed in our example, we are using the hexadecimal versions of the numbers that we retrieved with “0x54c” being equal to “1356” and “0x002” being equal to “2“.
Once the connection has been successfully made we proceed to enable non-blocking mode for it. This mode is important to keep the script running smoothly and not having to pause for reads.
Non-blocking mode makes it so that any read calls that do not return immediately will return a value of 0 rather than waiting on data to be returned.
h = hid.device()

h.open(0x54c, 0x002)

h.set_nonblocking(1)Copy
d. In this block of code, we run a while loop that runs infinitely.
On each loop of the while loop we read 5 bytes of data back from the device, if we have data, we print it out. Otherwise, we continue with the loop until the user terminates the script or data is retrieved.
While we should technically run “h.close()” after the loop, there is no way it can reach that thanks to our infinite loop.
while True:
        d = h.read(5)
        if d:
            print(d)Copy
3. Once you have finished typing out all the code, it should look something like what we have displayed below.
Once you are happy with the code, save the file by pressing CTRL + X then Y and finally ENTER.
#!/usr/bin/env python
import hid
import time

h = hid.device()

h.open(0x54c, 0x002)

h.set_nonblocking(1)

while True:
        d = h.read(5)
        if d:
            print(d)
        time.sleep(0.5)Copy
4. Now while your Buzz controllers are plugged into your Raspberry Pi run the following command to run the script that we just wrote. Make sure you use sudo as it is needed to access the hid interface.
sudo env/bin/python read_controller.pyCopy5. While running the script, you will notice when you press a button you will see a byte array containing 5 different values. You can ignore the first two of these as they will never change, the last 3 values contain our button presses.
For instance, if you press the red buzz button on the first controller, released it then pressed the blue button you will receive back the following data.
[127, 127, 1, 0, 240]
[127, 127, 0, 0, 240]
[127, 127, 16, 0, 240]
[127, 127, 0, 0, 240]Copy
6. By pressing each button and making a note of the values and the position that it appears in we can work out the values we need to look out for when detecting buttons in Python.
If you write down all the values, you should end up with a table as we have below. We will use this table to work out what we need to utilize to detect each different controller’s button presses.
For the last position, we subtract 240 from any result to get the true value as 240 is the resting value. For example, if we get the value 241, we would subtract 240 from that number to get the value of 1.
| Buttons | Controller 1 | Controller 2 | Controller 3 | Controller 4 |
|---|---|---|---|---|
| Red | Pos 3 Value 1 | Pos 3 Value 32 | Pos 4 Value 4 | Pos 4 Value 128 |
| Yellow | Pos 3 Value 2 | Pos 3 Value 64 | Pos 4 Value 8 | Pos 5 Value 1 |
| Green | Pos 3 Value 4 | Pos 3 Value 128 | Pos 4 Value 16 | Pos 5 Value 2 |
| Orange | Pos 3 Value 8 | Pos 4 Value 1 | Pos 4 Value 32 | Pos 5 Value 4 |
| Blue | Pos 3 Value 16 | Pos 4 Value 2 | Pos 4 Value 64 | Pos 5 Value 8 |
7. Now that we have this data table we will move onto the next section of our tutorial.
In the next section, we will begin writing our library that will provide an easily usable point to access the Buzz controllers button presses and also will touch on turning on and off the Buzz Controllers LEDs.
Writing a Python Library for the Buzz Controller
1. In this section of our Raspberry Pi quiz game tutorial, we will be writing a library that will interact with the Buzz controller using our Pi.
This library will make it easier for us to program our small quiz game later on in the tutorial. It will allow us to easily modify and improve the way we talk with the Buzz controllers.
To begin writing our Python script that will act as our library run the following command on your Pi.
nano BuzzController.pyCopy2. Within this file enter the following lines of code.
As we go along, we will explain each important section of the code to try and give you an idea on how everything works so you can modify it for your use.
a. We have explained these imports several times throughout this tutorial so we will go into the basics of what we use them for now.
We import the hid library so that we can access the USB interface and in turn talk with the Buzz Controllers.
Then we import the time library so that we can utilize it to pause the script for any reason, in particular, we will be using this for a controller blink functionality.
import hid
import timeCopy
b. This line defines our class name and all the code below it is tabbed as it’s part of that class. We will be able to access the variables and functions from this class by referencing its name “BuzzController“.
You will see examples of how we access this class later on in the tutorial.
class BuzzController:Copyc. We define a variable named “light_array” that contains an 8-byte array all set to 0x00. We define this so that we can keep track of what LED’s should be switched on or off at any moment in time.
light_array = [0x00, 0x00, 0x00, 0x00, 0x00, 0x00, 0x00, 0x00]Copyd. This “light_blinking” variable is used to keep track of whether we should be continuing our light blinking loop or not. The only way for it to exit out of its loop is that if this variable is set to “False“.
light_blinking = FalseCopye. Our final major variable is our “buttonState” array, this array contains four sets, with each set representing a controller.
Each set contains a variable for each possible button which can either be “True” for pressed or “False” for not pressed.
    buttonState = [
        {"red": False, "blue": False, "orange": False, "green": False, "yellow": False},
        {"red": False, "blue": False, "orange": False, "green": False, "yellow": False},
        {"red": False, "blue": False, "orange": False, "green": False, "yellow": False},
        {"red": False, "blue": False, "orange": False, "green": False, "yellow": False}
    ] Copy
f. Here we define our “__init__” function. This function is called by Python when we initialize our class.
In this function, we set up everything we need to read and write to the Buzz controller. We first initialize the hid class, then we make a connection to the Buzz controller using the details we retrieved earlier.
Then we proceed to set the “nonblocking” mode so that reads are returned instantly regardless of whether there is any data to read.
Finally, we write some data to our device. This data is just our blanked out light array, this is to ensure all of the Buzz Controllers LED’s are switched off.
    def __init__(self):
        #instantiate the device class
        self.hid = hid.device()

        #Open up the device
        self.hid.open(0x54c, 0x02)

        #Set the non blocking mode
        self.hid.set_nonblocking(1)

        #Clear the Buzz Controller LEDs
        self.hid.write(self.light_array)Copy
g. Here we define our “light_blink” function. This function will run a loop that will continually switch the LED on and off on our specified controllers.
This code works by first looping through the specified controllers that are handed to it. For each controller we specify, we change a value in our “blink_lights_on” array from “0x00” (Off) to “0xFF” (On).
Next, we go into the “self.light_blinking” loop only if we aren’t already running it. We next toggle our blink variable to know whether we need to write “blink_lights_on” or “blink_lights_off” to the buzz controller.
    def light_blink(self, controller):
        blink_lights_off = [0x00, 0x00, 0x00, 0x00, 0x00, 0x00, 0x00, 0x00]
        self.blink_lights_on = [0x00, 0x00, 0x00, 0x00, 0x00, 0x00, 0x00, 0x00]

        for i in controller:
            self.blink_lights_on[i + 2] = 0xFF

        if (not self.light_blinking):
            self.light_blinking = True
            blink = True
            while self.light_blinking:
                if (blink):
                    self.hid.write(self.blink_lights_on)
                else:
                    self.hid.write(blink_lights_off)
                blink = not blink
                time.sleep(0.5)

            self.hid.write(self.light_array)Copy
h. Here is one of our most important functions, this reads the button data from the Buzz controller. Every read we make from the controller will be 5 bytes as that is all we require to know the current state of all the controller’s buttons.
We then proceed to interpret the data that we just read in from the Buzz controller. To interpret this date, we will be utilizing information that we wrote down in a table in the previous section of this tutorial.
If you take a look at our handling of the first controller (self.buttonState[0]), you will notice that we are using the array position from the table (“data[2]” is the 3rd position in the array we printed out earlier in the tutorial). Each button is also using the value that we obtained from that position in the array (e.g. data[2] & 0x01 )
To the data value that we grabbed in the last section, we utilize a bitwise and ( & ) operator. If the result of the data value and the bitwise operator is not equal to 0 then we set the value to True, but if it does, we set the value for that button to False.
Simply put the bitwise “and” operation ensures that value is actually within the returned data by comparing the individual bits of the number. This is, of course, a bit more complicated than that but for now, we will stick with the simple explanation.
We then proceed to handle the read-in data for all four controllers. You should note with each of them that we are using all the data that we retrieved in the previous section.
    def get_button_status(self):
        data = self.hid.read(5)
        if data:
            self.buttonState[0]["red"] = ((data[2] & 0x01) != 0) #red
            self.buttonState[0]["yellow"] = ((data[2] & 0x02) != 0) #yellow
            self.buttonState[0]["green"] = ((data[2] & 0x04) != 0) #green
            self.buttonState[0]["orange"] = ((data[2] & 0x08) != 0) #orange
            self.buttonState[0]["blue"] = ((data[2] & 0x10) != 0) #blue

            self.buttonState[1]["red"] = ((data[2] & 0x20) != 0) #red
            self.buttonState[1]["yellow"] = ((data[2] & 0x40) != 0) #yellow
            self.buttonState[1]["green"] = ((data[2] & 0x80) != 0) #green
            self.buttonState[1]["orange"] = ((data[3] & 0x01) != 0) #orange
            self.buttonState[1]["blue"] = ((data[3] & 0x02) != 0) #blue

            self.buttonState[2]["red"] = ((data[3] & 0x04) != 0) #red
            self.buttonState[2]["yellow"] = ((data[3] & 0x08) != 0) #yellow
            self.buttonState[2]["green"] = ((data[3] & 0x10) != 0) #green
            self.buttonState[2]["orange"] = ((data[3] & 0x20) != 0) #orange
            self.buttonState[2]["blue"] = ((data[3] & 0x40) != 0) #blue

            self.buttonState[3]["red"] = ((data[3] & 0x80) != 0) #red
            self.buttonState[3]["yellow"] = ((data[4] & 0x01) != 0) #yellow
            self.buttonState[3]["green"] = ((data[4] & 0x02) != 0) #green
            self.buttonState[3]["orange"] = ((data[4] & 0x04) != 0) #orange
            self.buttonState[3]["blue"] = ((data[4] & 0x08) != 0) #blue
        return self.buttonStateCopy
i. The “get_button_pressed()” function acts as a bit of a helper for interpreting the data we retrieve back using the “get_button_status()” function we wrote earlier.
Within this function, we retrieve the result from the “get_button_status()” function and loop through it for the values of the specified controller.
Once we have found a value that is not False or empty, we return the data immediately otherwise if nothing is found we return nothing at all.
    def get_button_pressed(self, controller):
        buttons = self.get_button_status()
        for key, value in buttons[controller].items():
            if (value):
                return keyCopy
j. The “controller_get_first_pressed()” function is very much like the “get_button_pressed()” function.
Instead of reporting back the buttons pressed by a particular controller the function listens to the controllers to see if they have pressed a specified button.
It will wait until it receives a response, once it does it returns the id of the controller that pressed the specified button.
You will see how this can be used when we write the quiz game in the next section of this Raspberry Pi quiz game tutorial.
    def controller_get_first_pressed(self, buzzButton, controllers = [0, 1, 2, 3]):
        while True:
            buttons = self.get_button_status()
            for i in controllers:
                if (buttons[i][buzzButton]):
                    return iCopy
k. The “light_blink_stop” function changes the “light_blinking” variable to “False” which stops the loop started by the “light_blink” function. This function needs to be run before “light_blink” can be used again.
    def light_blink_stop(self):
        self.light_blinking = FalseCopy
l. The “light_set” function takes a specified controller and sets its value in our “light_array” to either “0xFF” or “0x00” depending on the value of “status“.
Once we set the value within “light_array“, we proceed to write that data back to the controller.
    def light_set(self, controller, status):
        self.light_array[controller+2] = 0xFF if status else 0x00
        self.hid.write(self.light_array)Copy
3. Once you have written all the code, you can verify that you have entered in everything correctly by looking at our code shown below. If you want to download the code, then you can find it at our GitHub.
Once you are happy that the code is correct, you can save the file by pressing CTRL + X then Y and finally ENTER.
import hid
import time

class BuzzController:
   light_array     = [0x00, 0x00, 0x00, 0x00, 0x00, 0x00, 0x00, 0x00]
   light_blinking = False
   buttonState = [
        {"red": False, "blue": False, "orange": False, "green": False, "yellow": False},
        {"red": False, "blue": False, "orange": False, "green": False, "yellow": False},
        {"red": False, "blue": False, "orange": False, "green": False, "yellow": False},
        {"red": False, "blue": False, "orange": False, "green": False, "yellow": False}
    ]

   def __init__(self):
        #instantiate the device class
        self.hid = hid.device()

        #Open up the device
        self.hid.open(0x54c, 0x02)

        #Set the non blocking mode
        self.hid.set_nonblocking(1)

        #Clear the Buzz Controller LEDs
        self.hid.write(self.light_array)

   def light_blink(self, controller):
        blink_lights_off = [0x00, 0x00, 0x00, 0x00, 0x00, 0x00, 0x00, 0x00]
        self.blink_lights_on = [0x00, 0x00, 0x00, 0x00, 0x00, 0x00, 0x00, 0x00]

        for i in controller:
            self.blink_lights_on[i + 2] = 0xFF

        if (not self.light_blinking):
            self.light_blinking = True
            blink = True
            while self.light_blinking:
                if (blink):
                    self.hid.write(self.blink_lights_on)
                else:
                    self.hid.write(blink_lights_off)
                blink = not blink
                time.sleep(0.5)

            self.hid.write(self.light_array)
   def get_button_status(self):
        data = self.hid.read(5)
        if data:
            self.buttonState[0]["red"] = ((data[2] & 0x01) != 0) #red
            self.buttonState[0]["yellow"] = ((data[2] & 0x02) != 0) #yellow
            self.buttonState[0]["green"] = ((data[2] & 0x04) != 0) #green
            self.buttonState[0]["orange"] = ((data[2] & 0x08) != 0) #orange
            self.buttonState[0]["blue"] = ((data[2] & 0x10) != 0) #blue

            self.buttonState[1]["red"] = ((data[2] & 0x20) != 0) #red
            self.buttonState[1]["yellow"] = ((data[2] & 0x40) != 0) #yellow
            self.buttonState[1]["green"] = ((data[2] & 0x80) != 0) #green
            self.buttonState[1]["orange"] = ((data[3] & 0x01) != 0) #orange
            self.buttonState[1]["blue"] = ((data[3] & 0x02) != 0) #blue

            self.buttonState[2]["red"] = ((data[3] & 0x04) != 0) #red
            self.buttonState[2]["yellow"] = ((data[3] & 0x08) != 0) #yellow
            self.buttonState[2]["green"] = ((data[3] & 0x10) != 0) #green
            self.buttonState[2]["orange"] = ((data[3] & 0x20) != 0) #orange
            self.buttonState[2]["blue"] = ((data[3] & 0x40) != 0) #blue

            self.buttonState[3]["red"] = ((data[3] & 0x80) != 0) #red
            self.buttonState[3]["yellow"] = ((data[4] & 0x01) != 0) #yellow
            self.buttonState[3]["green"] = ((data[4] & 0x02) != 0) #green
            self.buttonState[3]["orange"] = ((data[4] & 0x04) != 0) #orange
            self.buttonState[3]["blue"] = ((data[4] & 0x08) != 0) #blue
        return self.buttonState
   def get_button_pressed(self, controller):
        buttons = self.get_button_status()
        for key, value in buttons[controller].items():
            if (value):
                return key
   def controller_get_first_pressed(self, buzzButton, controllers = [0, 1, 2, 3]):
        while True:
            buttons = self.get_button_status()
            for i in controllers:
                if (buttons[i][buzzButton]):
                    return i
   def light_blink_stop(self):
        self.light_blinking = False
   def light_set(self, controller, status):
        self.light_array[controller+2] = 0xFF if status else 0x00
        self.hid.write(self.light_array)Copy
4. Now that we have finished writing our Buzz Controller library we will move onto showing you how you can use this library in practice.
To show the library off we will be writing a short quiz game that implements the controller library. This little game will read questions from a set, randomize the buttons the answers are assigned to and implement a simple scoring system.
Utilizing our Buzz Controller Library in a Raspberry Pi Quiz Game
1. In this final section of our Raspberry Pi quiz game using the Buzz controllers tutorial, we will be showing you how to put everything that we have done over the past two sections together to create a simple quiz game.
To begin writing the quiz game script run the following command on your Raspberry Pi.
nano quiz_game.pyCopy2. Within this file, you will need to enter the following lines of code, after each important block of code we will try and explain how it works.
a. Here we import the library that we just wrote. This import will allow us to access the “buzzcontroller” class we created in the previous section.
import BuzzControllerCopyb. The time library is imported just so that we can pause the script for a fraction of a second.
import timeCopyc. We utilize the thread library so that we can start blinking the controllers LED’s without holding up the entire script by having it start on its own separate thread.
import threadCopyd. Our last import for the script loads in the shuffle functionality. This will allow us to shake up the possible answers so that the correct answer is not always assigned to the same button.
from random import shuffleCopye. Here we start by defining our “import_questions” array, each element of this array will be a new question and set of answers.
Each set needs to have “question” and an “answers” array defined for it. For the “answers” array the first element must be the correct answer with the other three answers meant to be an incorrect alternative.
For example, in our first question, we define “question” as “What is the capital of Australia” and set the “answers” variable to “["Canberra, "Sydney", "Hobart", "Melbourne"]” with “Canberra” being the correct answer to the question.
We then define an empty array named questions, to this array we will append a processed version of our “import_questions” array. These prepared questions will make it easier for game logic to operate.
Finally, we create an array named score that will keep track of all the user’s correct answers.
import_questions = [
    {"question":"What is the capital of Australia", "answers" : ["Canberra", "Sydney", "Hobart", "Melbourne"]},
    {"question":"What is the capital of Japan", "answers" : ["Tokyo", "Hiroshima", "Osaka", "Kyoto"]},
]
questions = []
score = [0, 0, 0, 0]Copy
f. This block of code loops through our imported questions and converts it to something more manageable for our program to handle.
We start by defining an array of possible buttons, these being, blue, orange, green, yellow.
Then we define an empty set that will contain our modified question.
for question in import_questions:
    buttons = ["blue", "orange", "green", "yellow"]
    new_answer = {}Copy
g. After we define our buttons array, we finally put the shuffle library to use by utilizing it to shuffle our buttons array.
By shuffling the array, we ensure that the correct answer can be set to any of the possible buttons and remove the ability for someone to memorize the right button for each answer.
Once we have shuffled the array, we then proceed to copy our actual question to the “new_answer” variable. Our quiz game logic will output this question alongside the possible answers.
    shuffle(buttons)
    new_answer['question'] = question['question']Copy
h. Finally, we utilize a for loop to loop through our “imported_questions” ‘answers‘ array.
As we know that the first element in the array is the correct answer, we check to see if we are on the first loop then set the “correct” element of the “new_answer” set to the button value for position 0 in the array.
Thanks to our shuffling earlier this value could either be, “blue“, “orange“, “green” or “yellow“.
We then again assign another value to the “new_answer” set, this time we set the answer value to the button value for that iteration. For example, “new_questions["blue"]” would have a specific answer set to it.
We continue to do this until all four possible buttons have an answer set to it.
Finally, we append our formatted “new_answer” value to our “questions” variable.
    for i in range(4):
        if i == 0:
            new_answer["correct"] = buttons[i]
        new_answer[buttons[i]] = question["answers"][i]
    questions.append(new_answer)Copy
i. Here we fire up our Buzz controller library by instantiating it to our buzz variable. By doing this, we are calling the “__init__” function that we defined within our library.
If you recall, the “__init__” function is what initializes the hid library and makes the connection with the Buzz Controller. This will allow us to access various elements of our BuzzController library in our game logic loop.
buzz = BuzzController.BuzzController()Copyj. Here we begin a loop that goes through all our available questions. This loop can run for as long as you want as we are just relying on Pythons “for” to iterate through the array.
For each loop we set a few values, “question_answered” we utilize to know whether a question has been answered correctly.
Next, we set the “available_answers“, the value for this on every loop should be all possible buttons on the Buzz controller. We use this variable to track what answers are still available to choose from.
Finally, we set our “available_controllers” array. This array contains the ids of each possible controller that is allowed to answer.
for question in questions:
    question_answered = False
    available_answers = ["Blue", "Orange", "Green", "Yellow"]
    available_controllers = [0, 1, 2, 3]Copy
k. Here we start another while loop. This loop will keep running until one of the four possible controllers gets the correct answer.
On each loop we print the question being asked to the user, then we proceed to loop through the available buttons and print out each of the possible answers alongside the buttons color.
    while not question_answered:
        print(question["question"])

        for i in available_answers:
            print(i + " " + question[i.lower()])Copy
l. In this code block, we utilize the thread library that we imported at the start of the script to start a new thread that runs our “light_blink()” function from our Buzz controller library. To this, we also pass in the available controllers.
What this does is allow only the users who can answer the questions controllers to flash, while not affecting the current scripts loop.
We then utilize the “controller_get_first_pressed()” function to check for which of the available controllers is the first to press the flashing red Buzz button on their controller. We then store the returned controllers id in our controller variable.
Once a user has pressed their red button we stop all the controllers from blinking continually by setting the “light_blinking” variable in the Buzz Controller library to “False“. In turn, this also ends the thread we spun up.
        thread.start_new_thread(buzz.light_blink, (available_controllers,))
        controller = buzz.controller_get_first_pressed("red", available_controllers)
        buzz.light_blinking = FalseCopy
m. Now that a controller has been chosen we switch the red light on their controller to signal that it is their turn to answer the question.
        buzz.light_set(controller, True)
        time.sleep(0.5)Copy
n. Now we enter yet another while loop. This loop will run until that controller either selects the correct answer or an incorrect one.
On every loop, we utilize our buzz controller libraries “get_button_pressed()” function to retrieve any buttons being pressed by the specified controller.
        while True:
            button = buzz.get_button_pressed(controller)Copy
o. We then proceed to check if a button has been returned and ensure that it isn’t the red button to stop the user accidentally pressing the red button too long and automatically triggering an “Incorrect Answer” response.
We check if the button the user pressed on the controller matches our correct answer button.
If the user selected the right button we first print our a message notifying them of this, then we set our “question_answered” variable to “True“, increase the controllers “score” by 1 and then utilize “break” to exit out of the current while loop.
            if button and button != "red":
                if button == question["correct"]:
                    print("Controller " + str(controller) + " was correct")
                    question_answered = True
                    score[controller] += 1
                    breakCopy
p. Now, if the user did not select the correct answer, we see if that button is in our “available_answers” array.
If the value is in the array we notify the user that they have selected a wrong answer, we then remove this controller from the “available_controllers” array, and also remove this answer from the “available_answers” array so another user cannot select it.
                elif button.capitalize() in available_answers:
                    print("Sorry incorrect answer")
                    available_controllers.remove(controller)
                    available_answers.remove(button.capitalize())
                    breakCopy
q. Once the user has selected an answer, we go ahead and switch off their light by using the buzz controller libraries “light_set()” function.
Next, we sleep the script for a second before it continues looping through all available questions.
Now if the game has run out of questions to ask the users, it will print out the text “Final Score” followed by the score array that we set up earlier in the script.
        buzz.light_set(controller, False)
    time.sleep(1)

print("Final score")
print(score)Copy
3. With our quiz game script now written, you can verify that you have entered the code correctly. You can also find the full code for this tutorial over at our GitHub.
If you are happy the code is correct you can save the file by pressing CTRL + X then Y and finally ENTER.
from __future__ import print_function
import BuzzController
import time
import thread
from random import shuffle

import_questions = [
    {"question":"What is the capital of Australia", "answers" : ["Canberra", "Sydney", "Hobart", "Melbourne"]},
    {"question":"What is the capital of Japan", "answers" : ["Tokyo", "Hiroshima", "Osaka", "Kyoto"]},
]
questions = []
score = [0, 0, 0, 0]

for question in import_questions:
    buttons = ["blue", "orange", "green", "yellow"]
    new_answer = {}
    shuffle(buttons)
    new_answer['question'] = question['question']
    for i in range(4):
        if i == 0:
             new_answer["correct"] = buttons[i]
        new_answer[buttons[i]] = question["answers"][i]
    questions.append(new_answer)

buzz = BuzzController.BuzzController()

for question in questions:
    question_answered = False
    available_answers = ["Blue", "Orange", "Green", "Yellow"]
    available_controllers = [0, 1, 2, 3]

    while not question_answered:
        print(question["question"])

        for i in available_answers:
            print(i + " " + question[i.lower()])

        thread.start_new_thread(buzz.light_blink, (available_controllers,))
        controller = buzz.controller_get_first_pressed("red", available_controllers)
        buzz.light_blinking = False
        buzz.light_set(controller, True)
        time.sleep(0.5)

        while True:
            button = buzz.get_button_pressed(controller)
            if button and button != "red":
                if button == question["correct"]:
                    print("Controller " + str(controller) + " was correct")
                    question_answered = True
                    score[controller] += 1
                    break
                elif button.capitalize() in available_answers:
                    print("Sorry incorrect answer")
                    available_controllers.remove(controller)
                    available_answers.remove(button.capitalize())
                    break
        buzz.light_set(controller, False)
    time.sleep(1)

print("Final score")
print(score)Copy
4. Now that we have written our script let’s go ahead and start it by running the following command on your Raspberry Pi.
Remember to have your Buzz Controllers connected to your Raspberry Pi before you do this otherwise you will run into errors.
sudo env/bin/python quiz_game.pyCopy5. You should now be able to play through the Raspberry Pi quiz game. If you are using the sample questions, you should end up with a result similar to what we have shown below.
What is the capital of Australia
Blue Sydney
Orange Melbourne
Green Hobart
Yellow Canberra
Sorry incorrect answer
What is the capital of Australia
Blue Sydney
Green Hobart
Yellow Canberra
Controller 3 was correct
What is the capital of Japan
Blue Hiroshima
Orange Kyoto
Green Osaka
Yellow Tokyo
Controller 2 was correct
Final score
[0, 0, 1, 1]
6. By now you should have the script running successfully and talking with your Buzz Controllers without any issues. Hopefully, you now have some understanding of how everything works and be able to expand on this yourself.
Conclusion
You can challenge yourself by expanding this script further. The First improvement will be to make the questions imported via a text file. The second will be to give better feedback on scores and incorrect answers.
I hope by the end of this tutorial you will now have learned a bit about interacting with USB controllers. As well as learning how to interpret the data they send back and how to write a library that acts as an interface to that controller.
If you have any feedback on this Raspberry Pi Quiz Game using the Buzz controllers tutorial, then please feel free to leave us a comment below.


any chance of an update?
i’m stuck at the very beginning, everything installs find but when running enumerate.py it says “ImportError: no module name hid”
Hi Samuel,
I have re-adjusted the tutorial to reflect some changes that came in Raspberry Pi OS Bullseye. If you are still having trouble feel free to comment again and I’ll look into this more.
Kind regards,
Emmet
I stumbled across site and thought I’d try this on my RPi4, but have same issue: after the step to create and run enumerate.py script, I get ModuleNotFoundError No module named ‘hid’
Am a novice so not sure where to look to try and fix
Hey G D,
I made some additional quick changes to the tutorial. We need superuser access to be able to get usable data back from the HIDAPI. The problem with this is that the Python packages are only installed in the virtual environment.
The workaround to this is to use sudo to run the Python executable within the virtual environment and then use that to execute the scripts.
Please let me know if that resolves the issues for you.
Kind Regards,
Emmet
Hi Emmet, used the sudo env/bin/python enumerate.py command and now it errors the script on the import hid line with ImportError, unable to load any of the following libraries: libhidapi-hidraw.so libhidapi-hidraw.so.0 libhidapi-Linus’s.so linhidapi-libusb.so.0 libhidapi-iohidmanager.so libhidapi.iohidmanager.so.0 libhidapi.dylib hidapi.dll libhidapi-0.dll
Emmet, fixed… Inhad to uninstall hid first, then reinstalled hidapi, then the script worked fine.
Hello, Can I realize this project with the wireless PS3 buzzers? Thank you
Hi Jura39,
I believe it should be possible, the “product_id” and “vendor_id” will differ slightly but the bulk of the code should work.
I don’t own them myself so I can’t verify this for myself.
Cheers,
Emmet
I just got it run on my Orange Pi Zero – thanks for that great manual!
Very helpful article. Of all the options using these devices, this was the most useful.
I used it to make a keyboard HID output to use it for a web based quiz system. Also got a hack together to have this quiz controll the lights.
Much appreciated.
Hello mister guide guy or girl.
In the quizgame.py you cannot call a module that shares the same name as a filename. So you have to call it like “buzz = BuzzController.BuzzController()” and also you spelled Hiroshima wrong.
Hi Carson,
Thank you for pointing out those mistakes. They have now been corrected.
Cheers,
Emmet