This guide will show you how to set up and self-host Pixelfed on your Raspberry Pi.
Pixelfed is a free and open-source image-sharing social network service that you can self-host on your Raspberry Pi. With its image sharing functionality it is very much a self-hosted alternative to Instagram.
It works similar to Mastodon in that it operates using the ActivityPub protocol. This allows multiple Pixelfed servers to talk with each other and create a much larger social network.
Please note that you must have a domain name that you can use for your Pixelfed installation. Additionally, you will need to be able to open ports 80 and 443 on your router to allow access to Pixelfed. This is required for Pixelfed to work properly and for the SSL certificates to be generated for your domain name.
Additionally, you must be running a 64-bit version of Raspberry Pi OS. This tutorial will not function on a 32-bit operating system.
You Might Also Like


Equipment
Below is a list of equipment we used when setting up Pixelfed on our Raspberry Pi.
Recommended
- Raspberry Pi Amazon
- Micro SD Card Amazon
- Power Supply Amazon
- Domain Name Namecheap
- Ethernet Cable Amazon or Wi-Fi Amazon
Optional
We last tested this tutorial on a Raspberry Pi 5 running the latest version of Raspberry Pi OS Bookworm 64-bit.
Self-hosting Pixelfed on your Raspberry Pi
In the following sections, we will walk you through how to self-host Pixelfed on your Raspberry Pi.
This process isn’t the longest, but it requires you to configure several things and be knowledgeable enough to open up ports. Also, as mentioned at the start of this guide, you must have a domain name pointed to your Pi’s public IP address.
A publicly accessible domain name is a key part of how Pixelfed and the Fediverse works.
Preparing your Raspberry Pi
1. Before installing and setting up Pixelfed on our Raspberry Pi, we will want to update it to ensure everything is up-to-date.
You can update the package list cache and upgrade any out-of-date packages using the following two commands.
sudo apt update
sudo apt upgradeCopy
2. Once our Pi is updated, we will want to download and install the “git” package by running the command below.
This tool will allow us to clone the Pixelfed source code easily.
sudo apt install gitCopy3. To make running Pixelfed an easier process, we will rely on a Docker container. This saves us the hassle of setting up and configuring multiple different services.
If you don’t have Docker installed on your Raspberry Pi, be sure to follow our guide.
https://pimylifeup.com/raspberry-pi-docker/4. After installing Docker, we can create a folder to store Pixelfed and all its data. We will keep this software in the “/opt/pixelfed” directory.
To create this folder, use the mkdir command within your terminal.
sudo mkdir -p /opt/pixelfed/Copy5. Now that the directory has been created, use the cd command to change into it. The rest of this tutorial will expect you to be located in this folder.
cd /opt/pixelfedCopyCloning Pixelfed to the Raspberry Pi
6. Our next step is to get our Raspberry Pi to clone the Pixelfed repository that we will be utilizing. We are using the Docker compose containers put together by Jippi. This user provides pre-built containers as well as some very useful scripts that make getting the software to run on the Pi a much simpler process.
Thanks to us installing Git earlier on in this tutorial, cloning the repository is as simple as running the command below.
Ensure that you keep the dot (.) at the end of the command. This dot is crucial as it tells Git to clone the Pixelfed code base to the current directory.
sudo git clone https://github.com/jippi/docker-pixelfed.git .CopyConfiguring your Raspberry Pi Pixelfed Installation
8. We can now begin to configure Pixefed. To make setting up Pixelfed on our Raspberry Pi significantly simpler, we will use the bundled setup script from the repository we just cloned.
To start this setup script, run the command below within the terminal.
sudo scripts/setupCopya. When you first run this script, you will be prompted to enter a title for your Pixelfed installation. This title can be anything.
For example, you might use something like “Pixelfed PiMyLifeUp“.
⚙️ The name/title for your site: b. With that defined, you must now specify a domain name that you want to use to access your Pixelfed installation.
This software requires a domain name to function, and that domain name must be pointed to your IP address or through something like a Cloudflare Tunnel or Pangolin.
⚙️ Application domain used for routing. (e.g., pixelfed.org): c. You must now specify an email address that users can contact you about your installation.
⚙️ The public e-mail address people can use to contact you by:d. Up next, the setup script will automatically generate a password that will be used for Pixelfed to talk to its own database.
If you are happy with the generated password, press ENTER to continue the setup.
⚙️ The password to your databasee. Pixelfed allows both external and local accounts. To enable accounts to be registered with your Raspberry Pi installation of Pixelfed you will want to select the “Yes” option.
Additionally, to set up your first account, you will need this enabled.
⚙️ Enable new local account registrations:
 'Yes' to enable and 'No' to disable
f. You will next be prompted if you want to require email verification for any new account.
Since this requires a proper SMTP setup, we personally recommend selecting “No” unless you want to go to the effort of configuring that later.
⚙️ Require email verification before a new user can do anything (you need to setup SMTP outside of this guide for it to work!):
 'Yes' to enable and 'No' to disable
g. Your Raspberry Pi Pixelfed installation also has the functionality to support OAuth. If you plan on using any of the mobile apps to access Pixelfed, select the “Yes” option.
⚙️ Enable OAuth? (required for using mobile apps):
 'Yes' to enable and 'No' to disable
h. Next, you must decide if you want to use the included HTTPS proxy, or use your own. If you are using a different proxy like Pangolin or NGINX proxy manager, select “No“.
However, if you are like us, and aren’t currently using a proxy, select “Yes” to enable the included one.
⚙️ Do you want to use the included HTTP(S) proxy?:
 'Yes' to enable and 'No' to disable

    Yes        No
i. The final question is if you want to enable a LetsEncrypt sidecar. This will make getting an SSL certificate for your chosen domain name incredibly easy.
Unless you want to manage the certificates yourself, we recommend that you select the “Yes” option.
⚙️ Do you want to use the included HTTP(S) LetsEncrypt side-car?:
 'Yes' to enable and 'No' to disable

    Yes        No
Starting up Pixelfed on your Raspberry Pi
7. We are now finally at the point where we can start up Pixelfed on our Raspberry Pi.
To get Docker to build and start-up Pixelfed, you will want to run the following command within the terminal.
Be prepared to wait a while for the initial setup process to complete. Docker needs to download and set up several containers and then run all Pixelfeds start-up commands that prepare stuff such as the database.
docker compose up -dCopyAccessing the Pixelfed Web Interface
8. If everything has gone correctly, you should now be able to access the web interface for Pixelfed by going to your domain name in your favorite web interface.
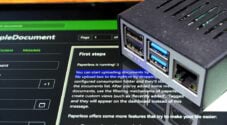
https://<DOMAINNAME>9. You should now be greeted by the following screen welcoming you to your Pixelfed installation.
What you will want to do now is create your own account by clicking the “Sign up” button in the top-right corner.
10. On this screen, fill out the information for your user (1.). Since we have email verification disabled, the email doesn’t necessarily have to be valid.
After filling out all the required information, click the “Register” button (2.).
11. You have successfully set up Pixelfed on your Raspberry Pi. Take some time to explore the web interface and familiarize yourself with how to post your images on the platform.
Changing your New User to be an Admin
12. Now that you have created your first Pixelfed user you will want to return to your Raspberry Pi to turn that user into an admin.
Once you are back on your Pi, change to the directory where we set up Pixelfed.
cd /opt/pixelfedCopy13. Our next step requires us to interact with the “web” Docker container directly.
We can launch bash within this container by running the following command.
docker compose exec web bash -itCopy14. Now that the Pixelfed web container is open on your Raspberry Pi, use the following command to elevate your user to admin.
Ensure that you replace “<USERNAME>” with the username you used when creating your user.
php artisan user:admin <USERNAME>Copy15. Before your user is given admin privileges, you will be asked whether you want to give the found user admin rights.
If you are happy to proceed, type in “yes” and then press the ENTER key.
Found username: pimylifeup

 Add admin privileges to this user? (yes/no) [no]: yes
If everything works correctly, you should see the following message.
Successfully changed permissions!16. We are now done with our Web container and can exit using the “exit” command.
exitCopy17. Using your user, you should now have full access to the Admin dashboard. We recommend exploring and adjusting the settings available to you within this interface.
You can access this dashboard by going to the following URL. Ensure that you replace “<YOURDOMINAME>” with your domain name.
https://<YOURDOMAIN>/i/admin/dashboardTurning Off User Sign Ups
18. By default, your installation of Pixelfed on your Raspberry Pi is set to allow any user to register.
To change this behavior, we must edit the ".env” file again by running the command below.
sudo nano .envCopy19. Once you have the ".env” file open in nano, look for the following option.
#OPEN_REGISTRATION="true"CopyAfter finding the “OPEN_REGISTRATION” option you will need to remove the hashtag from in front of it. Additionally, you must also change “true” to “false“.
OPEN_REGISTRATION="false"Copy20. After making this change, save and quit by pressing CTRL + X, Y, and then ENTER.
21. Since we changed our configuration, Pixelfed needs to update its config cache.
You can do that by using the following command in the terminal.
docker compose exec web php artisan config:cacheCopyIf the cache was updated successfully, you should see the following message.
INFO Configuration cached successfully.22. Even though we turned off user registration through the “.env” file, we must also do so through the Pixelfed admin panel.
You can open this panel by going to the following URL. Remember you must replace “<YOURDOMAIN>” with the domain name you use for Pixelfed.
https://<YOURDOMAIN>/i/admin/settings23. Once you are on the settings page, you should see an option labeled “Registration Status” (1.). You will want to change this option to “Filtered” or “Closed“.
After deciding what to do, click the “Save” button (2.).
Conclusion
Hopefully, by this stage, you will have successfully set up Pixelfed on your Raspberry Pi.
The Raspberry Pi is a great place to host your own Pixelfed installation. It is relatively cheap to keep running 24/7 and has enough processing power to deal with light traffic.
Please feel free to leave a comment below if you have had any issues with getting this software up and running on your Pi.
If you liked this project, we highly recommend exploring our many other Raspberry Pi projects.


Hello. I’m following along up until point 15. Do I need to have a reverse proxy installed, like nginx, for the domain to point to the Pixelfed docker container?
I use Cloudflare tunnels, have set up the routing there, have an SSL certificate installed, etc. Normally (eg. for Mastodon) I would then use nginx to point the domain to the correct root, but there is no mention of needing that in this guide. Does Docker handle the routing?
Thanks in advance.
(Big fan of your guides!)
Hi Rob,
The Docker Compose stack that we are using for Pixelfed (the official one) actually already has a Proxy included It will handle the whole process of fetching an SSL certificate etc for you but it does force you to have to be able to open ports 80 and 443.
However, if you are using Cloudflare tunnel there is a good chance this functionality might become more of a pain (One heads up with Cloudflare tunnels is that there is a limit on the upload size that can prove to be a bit of a hinderance).
You can disable the Proxy parts of the Docker stack by modifying the “
.env” file and finding the following line.You would this change that to something like “disabled” to stop the container from starting up the proxy.
You would then set up your Cloudflare tunnel to route Pixelfed running on port 8080 to your desired domain name.
Hope that helps, I can try and explain things a bit better if you need.
Kind regards,
Emmet
Update: I tried following the above instructions with nginx already installed and it failed at point 11 (failed to bind host port, address already in use) so it seems fair to assume that the domain routing is handled by Docker and a separate reverse proxy is not needed. Hence you didn’t put this in your guide. This means I’m back to being stuck at point 15. Is having the APP_DOMAIN in the .env file all that is required for serving the web front end? Thanks!
Hi Rob,
Hmm I didn’t think about this when I responded to you last night. But there is a good chance the default port that Pixelfed uses is already in use since port 8080 is quite common.
What you willl want to do next is open the “.env” file for editing again but this time look for the following line.