In this project, we will show you how to install a desktop interface to Raspberry Pi OS Lite.
The lite release of Raspberry Pi OS is a fantastic starting point for any lightweight projects since it is completely free of any potential bloat.
While the primary focus of Raspberry Pi OS Lite is for applications where you don’t require a display, such as a headless Plex server, it also works as a good base to work off in general.
You may want to set it up this way rather than just using the full Pi OS image for a wide variety of reasons. One reason is that you have a very slim operating system and don’t have to worry about numerous packages you simply don’t require.
Secondly, having fewer packages means there is less to go wrong if you are setting up your Raspberry Pi as a kiosk for software like Home Assistant
Adding a desktop interface to Raspberry Pi OS Lite is a much easier process than you will probably expect. Installing a couple of packages will give you the desktop experience you expect from the full version, minus any unneeded applications.
Please note that the one caveat to our tutorial is that we will be installing XServer and not Wayland. For most users this is probably not something you will ever notice, plus more software tends to be compatible with XServer than Wayland.

Equipment
Below is a list of equipment we used when adding a desktop environment to Raspberry Pi OS Lite.
Recommended
- Raspberry Pi Amazon
- Monitor Amazon
- Micro SD Card Amazon
- Power Supply Amazon
- Ethernet Cable Amazon or Wi-Fi Amazon
Optional
This tutorial was last tested on a Raspberry Pi 5 running the latest version of Raspberry Pi OS Bookworm Lite.
Installing a Desktop Interface on Raspberry Pi OS Lite
Over the following sections, we will walk you through installing a desktop interface on Raspberry Pi OS Lite.
While these steps assume you are using Pi OS Lite, they will also work on the full version of the OS if you have somehow managed to remove the desktop environment
Preparing your Pi
1. Your first step is to ensure your current system is completely up-to-date before continuing.
You must run the following two commands to update the package list cache and upgrade any out-of-date packages.
sudo apt update
sudo apt upgrade -yCopy
Installing The Desktop Environment on Raspberry Pi OS Lite
2. With Raspberry Pi OS Lite now up to date, we can install the desktop interface by installing the following four packages.
Each of these packages makes up a critical part of the desktop environment on a Pi, so let us quickly go over what they are.
lightdm: This first package is the lightweight display manager that the Pi uses. It is known for its speed and is what is used to handle windows on your screen.xserver-xorg: The next package we require is what provides the xsever display server. This server is what LightDM talks with to display windows on your screen.raspberrypi-ui-mods: This package is one provided by the Raspberry Pi foundation. It has a bunch of modifications that help LightDM and XServer work better on your Pi and is also what will give you the more native desktop feel.arandr: You will want this package as it provides all the tools you need to control the screen resolution of your Raspberry Pi. Without this, it can be kind of painful to control the resolution when using Raspberry Pi OS Lite and a desktop environment.
Please note that installing these packages will take a while. It is about a 422MB download and will consume 1.3GB on your SD Card.
sudo apt install lightdm xserver-xorg raspberrypi-ui-mods arandrCopySetting Pi OS Lite to Boot to Desktop
3. Even though you have added a desktop interface to Raspberry Pi OS Lite, your Pi will still boot straight to the terminal.
Luckily, all we need to resolve your Pi doing this is to run the following command. With this command, we are changing the default “start” target for the Pi to “graphical“. Changing the target means the system manager will start anything that uses “graphical” as its target, including our desktop environment.
sudo systemctl --quiet set-default graphical.targetCopy4. All we need to do now is restart your Raspberry Pi by running the following command in the terminal.
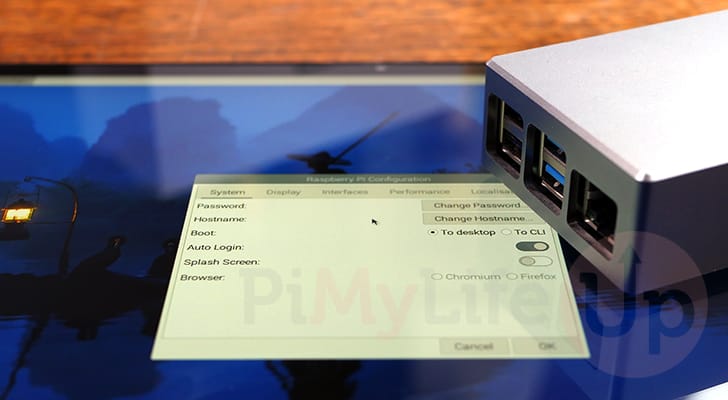
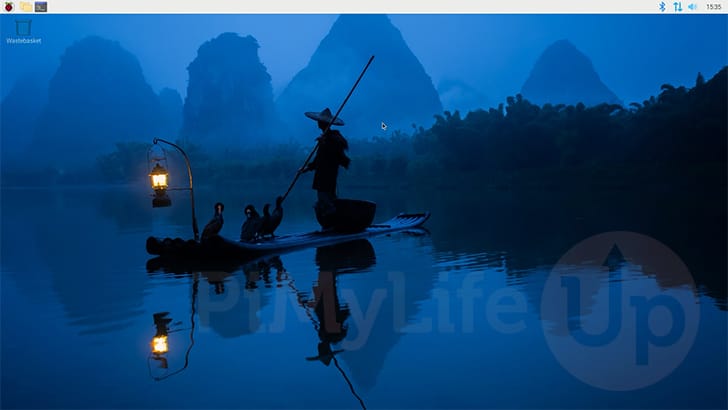
sudo rebootCopy5. Once your Raspberry Pi finishes booting, you should successfully have a desktop environment up and running, as we have shown below.
Conclusion
By this point in the guide, you will hopefully have successfully installed a desktop environment to Raspberry Pi OS Lite.
Installing a desktop interface to the lite version gives you a super clean and lightweight operating system to work off of.
Please feel free to leave a comment below if you have had any issues with getting a desktop interface to work on the Lite version of the OS.
If you found this tutorial to be helpful, we highly recommend taking some time to explore our many other Raspberry Pi projects.


Hello, I am running Open Media Vault on my Pi 4 . I do understand that it is supposed to run on a headless PI with the LITE. Would you know if running a desktop as per your instructions would mess this up?
The reason I ask is sometimes when I have issues with the PI I would rather have a desktop than a command line
Hi Jeff,
It’s not something I have personally ever tried.
While I can’t see how exactly it would mess things up, the OpenMediaVault installer does make quite a lot of changes to the underlying system that might break things.
Kind regards,
Emmet
Hi Emmet, I tried this today on a PI with OMV and it blows away all the OMV files so it does not work . At least I now know
Thats super unfortunate, thank you for coming back to let us know. Hopefully you had a backup before that.
I knew the OpenMediaVault installer did some weird changes to the operating system but wouldn’t have thought that it would stop the desktop stuff from working out right.
Kind regards,
Emmet
Emmet
Thanks for this guide. I have tried some of the other guides and could never get this to work.
Followed all the steps you listed and it worked fine.
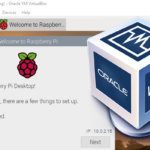
When I logged in via VNC I got a pop up suggesting I enable LabWC. Did that and the GUI is now not working. Please Help. Thanks in Advance.
Hi Tiwo,
I haven’t yet got around to testing this out with the latest Raspberry Pi OS changes.
I’m fairly sure the problem is here is that you simply need to install LabWC. I think the OS is mindlessly asking you to switch to it without any regards on whether it is present on your OS.
You should be able to install labwc by running the following command.
Please let me know if that solves your issues.
Kind regards,
Emmet