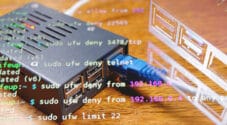
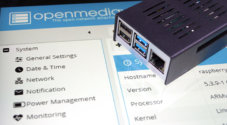
In this article, we will quickly explore some of the different ways you can turn your Raspberry Pi into an affordable and power-efficient NAS.

There are many different solutions for converting your Raspberry Pi into a NAS. These range from super simple solutions such as setting up Samba shares to some more extensive projects like dedicating your Pi to operating as a NAS with software like OpenMediaVault.
Each of these solutions has pros and cons that we will explore throughout this article. What you really need to decide is whether you want this to be dedicated to operating as a NAS or whether you want to be able to run other software as well.
One thing to be mindful of is that even though the Raspberry Pi can operate as a decent NAS, it can struggle if you put it under a large load due to a limitation of both the Pi’s IO and CPU.
Getting Prepared to Run a Raspberry Pi as a NAS
Let us start by quickly exploring what Raspberry Pi is a good match for a NAS, as well as the sort of storage you will probably want to invest in for the best experience.
Best Raspberry Pi to use for a NAS
Before you even start with the software you want to use to set up a NAS on your Raspberry Pi, you should select the Pi itself.
As a general rule of thumb, the newer the Raspberry Pi, the better your experience. This is due to both the increase in performance and the general improvements that come with connectivity.
A good example of this is the Raspberry Pi 3 compared to the Raspberry Pi 4. While the three is still a decent device, it does suffer a lot with it’s Ethernet connection, which is quite important to a good NAS. The Pi 4 is capable of a gigabit connection; the Pi 3, however, is not.
Selecting Storage to use for your NAS
No matter your direction, you must pick how to store your data on your Raspberry Pi NAS. While you could get away with just using your Pi’s SD Card, it is not recommended. SD Cards typically aren’t that resilient and can suddenly corrupt.
The most affordable way for the vast majority of users is to invest in a couple of large external hard drives and plug them into the USB 3.0 ports on your Pi.
Whichever hard drive you decide to go with, we highly recommend that you get ones that use an external power supply. Overloading the Pi’s USB power can cause several issues you don’t want when setting up a NAS.
If you are using a Raspberry Pi 5 you could even take this a step further by getting an NVME HAT and connecting NVME storage. This can be quite expensive, especially if you need to store a large amount of data on your NAS.
Projects to turn your Raspberry Pi into a NAS
Now that you have a rough idea of what sort of hardware you need to set up your Raspberry Pi as a NAS let us explore some of the software you can use to complete this project.
We will be splitting this down into three separate sections.
- Build your own: These projects show you how to set up your Raspberry Pi as a NAS by setting up particular networking protocols. These are a great solution if you don’t necessarily want to dedicate your Pi to storage.
- Complete Solution: In this section, we will explore projects that convert your Raspberry Pi into a dedicated NAS. These packages typically contain software that makes managing a NAS a breeze.
- Cloud Software Packages: These projects differ from the others in that they are more there to turn your Raspberry Pi into a cloud storage solution. You won’t connect to these like you would a normal NAS, and they are more like setting up a cloud storage provider like Google Drive.
Build your Own Raspberry Pi NAS
If you want to build out your own NAS on your Raspberry Pi without relying on heavier software, then below are some of the best solutions.
We have ranked these from our most recommended to our least. For most users, Samba offers one of the best protocols for setting up your NAS.
Samba
Samba is possibly one of the most popular solutions for turning your Raspberry Pi into an affordable NAS. It is incredibly well supported by almost every operating system, and in particular, it plays very well with both Windows and Linux.

This same protocol can even enable you to connect a device like a printer to your Raspberry Pi and share it alongside your NAS.
If you are after a protocol that is very easy to set up and well-supported, it is very hard to go past setting up Samba.
The downside of using Samba to set up your Raspberry Pi as a NAS is that it can be slower when it comes to transferring due to some overheads.
Network FIle System (NFS)
If you only have to worry about Unix devices connecting to your Raspberry Pi NAS, then you can use the Network File System protocol instead.

The big advantage of using NFS is that it can be significantly faster and more secure than NFS due to how its protocol works. Additionally, it is built with the Linux permission system in mind, so you, in theory, should run into fewer permissions with your NAS.
The huge downside is that it simply isn’t an option if you have any Windows operating systems on your network. The NFS protocol is just not supported within Windows, making it a poor choice if you want your NAS to be usable by Windows.
File Transfer Protocol (FTP)
FTP and SFTP are some of the most widely used protocols when you want to transfer protocols remotely. If you want to be able to access your NAS files from outside of your home, it is definitely something you should consider setting up.

If you are using FTP on your Raspberry Pi NAS, you will probably want to also set up another protocol for local connections such as SMB or NFS.
It isn’t quite the same as the other three protocols in that you won’t mount the files behind the FTP protocol to a drive; you would instead have to use an FTP client like Filezilla to connect to it and transfer files.
Complete NAS Solutions for the Raspberry Pi
Sometimes, you just want something that has everything you need in one great package; that is where the solutions below come into play. The software we cover in these next sections will show you how to convert your Raspberry Pi into a NAS in some of the simplest ways possible.
OpenMediaVault
The most popular solution for turning your Raspberry Pi into a NAS has to be the OpenMediaVault software. It’s one of the few all-in-one NAS software packages that support ARM hardware like the Pi.

This software package has everything you need to get a NAS up and running in minutes. With its web interface, you can create network shares with just a few clicks. It supports every major sharing protocol that you could want.
The one big drawback of using OpenMedaVault is that you sacrifice your Raspberry Pi to work as a NAS. While it can support things like Docker, it makes running other software alongside it more risky, as you can accidentally break your installation.
Cloud Software Packages
This last list of NAS solutions for the Raspberry Pi we will be exploring is what you can use to set up a more Google Drive, OwnCloud, and Dropbox experience.
These are perfect if you don’t need to attach your files as a network drive, but want to be able to easily access them through an awesome web interface.
You can still use NAS protocols like Samba or NFS with all of these solutions.
Nextcloud
Nextcloud is one of the most popular projects for converting your Raspberry Pi into a very usable storage device. It as a huge range of features that make it very similar to some of the cloud service providers you might be familiar with.

It gives you a very fancy web interface that you can use to upload and download files to and from your Raspberry Pi.
This is a great solution if you need something a bit more modern and are not really after setting up a traditional NAS on your Pi. If you want the best of both worlds, you can still manually set up a protocol like Samba.
Owncloud
Owncloud was one of the first pieces of software that could allow you to set up your Raspberry Pi as a cloud-like device, and still remains a popular choice amongst users. Nextcloud was actually developed as a fork of this project

It offers a huge range of features on top of the ability to upload and download files directly from your Pi. This incldues the ability to collaborate with others.
Just like Nextcloud, this is not a normal NAS solution for your Raspberry Pi, and if you want local access without needing to use a web browser or app you will still want to set up something like Samba.
Conclusion
If you have reached this point in the guide, we hope you know how to convert the Raspberry Pi into an effective NAS.
Please feel free to leave a comment below if you have any questions about setting up your Raspberry Pi as a NAS. There is a wealth of different solutions that can be a bit overwhelming for newcomers.
If you want to see what else you can set up, we highly recommend exploring our many other Raspberry Pi projects.


the link under Network File System (NFS) points to https://pimylifeup.com/raspberry-pi-ntfs/ instead of https://pimylifeup.com/raspberry-pi-nfs/
easy mistake to make 🙂
thanks for the great articles, they have been more than helpful
Thank you, we have updated the link, so it points to the correct place!