In this tutorial, you will learn how to use both the nice command and renice command on a Linux system.
Both the nice and renice commands are used to control the scheduling priority of a process on a Linux-based system.
Every process on a Linux system has a priority assigned to it. You can either higher or lower priority by adjusting a process’s “nice” value. The lower a nice value, the higher its priority, meaning it will be processed by the operating system faster.
Please note that the scheduler can still ignore the nice value, as it is more advice on how to deal with that process than a strict rule.
You can easily observe the priority of a process and its nice value by utilizing the top command within the terminal.
The nice command allows you to configure the nice value of a process before it is started. Unfortunately, this version of the tool can not change the nice value of a process while it is running.
The renice command is designed to allow you to change the nice value of a currently running process.
Over the next few sections, we will explore both the nice and renice commands.
Table of Contents
- Syntax of the nice Command
- Getting the Default Nice Value
- Syntax of the renice Command
- Change the Nice Value of a Running Process
- Conclusion
Syntax of the nice Command
The nice command has the more complicated syntax of the two commands we are exploring. This is because you need to pass the command you plan on running.
nice [OPTION] [COMMAND [ARG]...]The “[OPTION]” field is optional. However, you will use it to specify the nice value you want to assign the process.
Immediately after this field, you can specify the exact command you want to run with that nice value.
Getting the Default Nice Value
If you use the nice command without specifying an option, it will return the default nice value. The default nice value is what a process will be given when it is first started.
To retrieve the default nice value, run the following command within the terminal on your device.
niceOn most Linux distributions, the output will likely be 0 and would look like the following when output in the terminal.
0Using the nice Command to Set a Nice Value on a New Process
You can set a nice value for a new process by using the nice command. The new value can be anywhere between -20 and 20.
You are required to use the “-n ADJUSTMENT” option to set this value. Below, you can see the command’s syntax with this adjustment option.
nice -n ADJUSTMENT COMMAND [ARG]...The “ADJUSTMENT” parameter is where you specify the nice value you want to be set on your new process. Remember that a positive value will lower the priority of your process. A negative value will increase its priority.
This adjustment value will add or subtract from the default nice value.
After the adjustment value, you need to specify the command (“COMMAND [ARG]...“) that you want to use to run the process. Include any arguments that you would typically launch your process with.
Example of Decreasing a Processes Priority with the nice Command
Within this example, we will be using the nice command to increase the default nice value. As mentioned previously, a positive nice value will decrease the process’s priority.
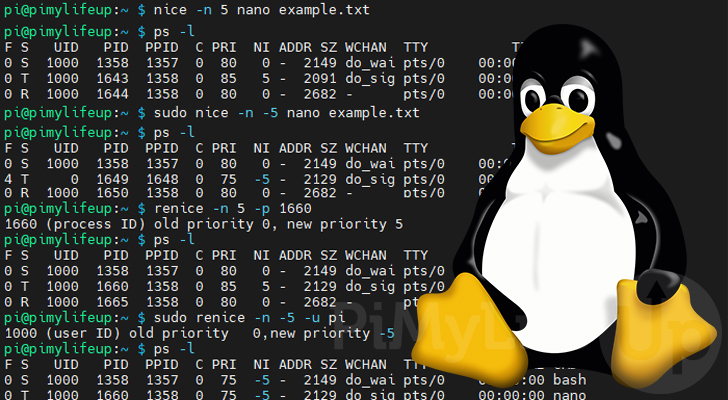
Let us run the nano text editor on a blank file called “example.txt” to show how this works, increasing its nice value by 5.
nice -n 5 nano example.txtUsing the command this way, nice will launch the provided nano command, increasing its nice value by 5. If the default is 0, the process will start with a nice value of 5.
Any process with a nice value lower than 5 will have a higher priority than this process. If a process has a value higher than 5, it will have a lower priority than the newly started process.
Using the ps command within our terminal, we can see our process with the new nice value and the adjusted priority.
F S   UID   PID  PPID  C PRI  NI ADDR SZ WCHAN  TTY          TIME CMD
0 S  1000  4730  4729  0  80   0 -  2149 do_wai pts/0    00:00:00 bash
0 T  1000 14570  4730  0  85   5 -  2522 do_sig pts/0    00:00:00 nano

0 R  1000 14575  4730  0  80   0 -  2682 -      pts/0    00:00:00 ps
Under the “NI” column, you can see that our nano command has a nice value of “5“.
Under the “PRI” column, you can see that the priority has now been increased by 5, thanks to our new nice value.
Example of Increasing a Processes Priority with the nice Command
You can also use the nice command to increase the process’s priority by setting a negative nice value. A negative value will increase the priority of the process.
For this example, we will be running the nano text editor on a blank file, this time decreasing its nice value by setting it to negative 5.
nice -n -5 nano example.txtThe default nice value will be subtracted when the nice command launches since we used a negative number. If the default value is 0, it will now be set to “-5“.
Thanks to this change, any process with a nice value more significant than “-5” will have a lower priority than our new process. Of course, Linux will still prioritize any process with a value less than “-5” over this process.
Using the ps command again, we can list our processes’ status, including their nice value and priority.
F S   UID   PID  PPID  C PRI  NI ADDR SZ WCHAN  TTY          TIME CMD
0 S  1000  4730  4729  0  80   0 -  2149 do_wai pts/0    00:00:00 bash
0 T     0 14594 14593  0  75  -5 -  2521 do_sig pts/0    00:00:00 nano

0 R  1000 14596  4730  0  80   0 -  2682 -      pts/0    00:00:00 ps
You can see that our nano command’s nice value has been set to -5. This change increases the process’s priority by reducing it to “75“.
Syntax of the renice Command
In this part of the guide, we will be showing you how to use the renice command on your Linux system. The renice command differs itself by letting you change the nice value of a running process.
The syntax for the renice command is shown below. The priority option must always come first.
renice [-n] PRIORITY [-g | -p | -u] IDENTIFIERTwo key parts make up the renice command.
The first part allows you to set the new nice value for your processes. If you want to modify the existing priority value, you can utilize the “-n” option.
The next part is what allows you to control which processes are selected. Three different options allow you to select what processes your changing the nice value of.
With this command, the three options that you can use to select a process are the following. You can also combine these options to select large groups of processes at once.
-gor--pgrp– Tells the renice command that it should select any processes belonging to the specified process group.-por--pid– Using this option, you can select processed by referencing their process ID.
You can find the ID of processes using the pidof, top, or ps command.-uor--user– It is possible to change the nice value of all processes belonging to a particular user.
You can either use the user’s name or their unique ID.
Change the Nice Value of a Running Process with the renice Command
Now that we know the syntax of the renice command, we can now walk through various ways of using this utility.
Example of Using renice on a Specific Process
For the following example, we will be adjusting the nice value of a running process with the ID “14678“.
To use renice by specifying a processes ID you must use the “-p” or “--pid” option.
1. To check out our current processes and see their current priority and nice value, we will use the following command.
ps -lBelow you can see that we launched our process with the ID “14678” with the default nice value of 0.
F S   UID   PID  PPID  C PRI  NI ADDR SZ WCHAN  TTY          TIME CMD
0 S  1000  4730  4729  0  80   0 -  2149 do_wai pts/0    00:00:00 bash
0 T  1000 14678  4730  0  80   0 -  2522 do_sig pts/0    00:00:00 nano
0 R  1000 14680  4730  0  80   0 -  2682 -      pts/0    00:00:00 ps
2. We can now use the renice command to change the nice value of a running process. The nice value that we will be assigning this process is 5.
Since we only want to change the nice value of a specific process, we will use the “-p” option.
After using that option, we can specify either single or multiple process IDs. In our case, this will be the id “14678“.
renice -n 5 -p 14678After running this command, you will get a message indicating what the old value was, and
14678 (process ID) old priority 0, new priority 3. Now that we have changed the nice value of our running process, let us use the ps utility to see its updated values.
ps -lBelow you can see that the nice value of our process has been changed to 5. With the priority value being increased from 80 to 85. As the priority value was increased, the process’s priority was reduced.
F S   UID   PID  PPID  C PRI  NI ADDR SZ WCHAN  TTY          TIME CMD
0 S  1000  4730  4729  0  80   0 -  2149 do_wai pts/0    00:00:00 bash
0 T  1000 14678  4730  0  85   5 -  2522 do_sig pts/0    00:00:00 nano
0 R  1000 14747  4730  0  80   0 -  2682 -      pts/0    00:00:00 ps
Example of Using renice on Processes Belonging to a Particular User
For this example, we will be adjusting the nice value on all processes started by our user called “pi“. The renice command allows you to use either the user’s name or ID.
Adjusting the priority like this is useful when a particular user consumes more CPU time than they should be.
To select a user’s processes, you will need to use the “-u USER” option alongside the renice command.
1. Let us start by running the following command to list all processes running under our “pi” user.
ps -lU piUsing this command we got the following result. You can see that all of our processes have the default nice value of 0.
F S   UID   PID  PPID  C PRI  NI ADDR SZ WCHAN  TTY          TIME CMD
0 S  1000  4789  4788  0  80   0 -  1128 -      ?        00:00:00 sftp-server
0 S  1000 14030  4767  0  80   0 -  1763 wait_w pts/1    00:00:02 info
0 T  1000 14760  4730  0  80   0 -  2202 -      pts/0    00:00:00 ping
0 T  1000 14762  4730  0  80   0 -  2522 do_sig pts/0    00:00:00 nano
0 T  1000 14764  4730  0  80   0 -  1657 do_sig pts/0    00:00:00 cat
0 R  1000 14769  4730  0  80   0 -  2715 -      pts/0    00:00:00 ps
2. Now that we have a baseline, we can show what happens when we use renice to change all processes running under our pi user.
To showcase this, let us give our user preference by setting a negative nice value of “-5“. Since lower is better, this will increase the priority of our user’s processes over the default.
As we are changing the nice value of all processes belonging to the pi user, we need to use the “-u” option, followed by the username “pi“.
renice -n -5 -u piYou will get the following confirmation that the priority has changed for all processes belonging to our user.
1000 (user ID) old priority 0, new priority -53. If we were to check the nice value of all processes owned by our pi user, we would see that the priority has been changed.
ps -lU piBelow you can see how our processes all have had their priority modified by their newly set nice value.
F S   UID   PID  PPID  C PRI  NI ADDR SZ WCHAN  TTY          TIME CMD
0 S  1000  4789  4788  0  75  -5 -  1128 -      ?        00:00:00 sftp-server
0 S  1000 14030  4767  0  75  -5 -  1763 wait_w pts/1    00:00:02 info
0 T  1000 14760  4730  0  75  -5 -  2202 -      pts/0    00:00:00 ping
0 T  1000 14762  4730  0  75  -5 -  2522 do_sig pts/0    00:00:00 nano
0 T  1000 14764  4730  0  75  -5 -  1657 do_sig pts/0    00:00:00 cat
0 R  1000 14769  4730  0  75  -5 -  2715 -      pts/0    00:00:00 ps
Example of Using renice on Processes Running Under a Certain Process Group
For our final example, we will be showing you how to use the renice command on processes owned by a particular process group.
We will need to use the “-g PGROUPID” option to achieve this. This option is used to specify the group or groups you want to adjust the nice value of.
1. For this example, we will be changing the renice value of all processes belonging to the process group with an ID of 1.
Using the following command, we will list all processes from our process group to see their nice value prior to using the renice command.
ps -ljg 1Below you can see a list of processes that belong to our group with the ID of “1“.
F S   UID   PID  PPID  PGID   SID  C PRI  NI ADDR SZ WCHAN  TTY          TIME CMD
4 S     0     1     0     1     1  0  80  0 -  8491 -      ?        00:00:31 systemd
2. Using the renice command on processes belonging to a particular process group is very simple. To show you how this works, let us set the processes belonging to our process group a nice value of 10.
All we need to do is use the “-g” option, followed by our process group id of “1“.
renice -n 10 -g 1After running the command, you will get a confirmation of the new priority that you set.
1 (process group ID) old priority 0, new priority 103. We can verify that the new nice value has been set, and the priority has been adjusted by running the command below.
ps -ljg 1From this, you can see that our process group now has a nice value of 10 and a priority of 90.
F S   UID   PID  PPID  PGID   SID  C PRI  NI ADDR SZ WCHAN  TTY          TIME CMD
4 S     0     1     0     1     1  0  90  10 -  8491 -      ?        00:00:31 systemd
Conclusion
We have shown you how to use both the nice command and the renice command within this guide. These tools are utilized to adjust the nice value of a process.
The nice value is what Linux uses to increase or decrease the priority of a specific process. When you set a positive nice value, you are lowering the priority of that process. A negative nice value, however, increases the priority of that process.
Both of these tools are incredibly powerful as they directly affect how the scheduler will prioritize particular processes.
If you have had any issues using either the nice or renice command, please comment below.
Be sure to check out our many other Linux command guides or our Linux tutorials.