In this tutorial, we will show you how to use Monit to monitor your Raspberry Pi.
Monit is a free and open-source monitoring software that significantly helps with maintaining your system. It is highly configurable.
One key feature of using Monit is that it can perform certain actions to help maintain or repair the services on your Raspberry Pi.
For example, you can monitor a process and have Monit automatically restart it if it crashes. You can even have it track a program’s memory or CPU usage and send an alert or perform a particular action.
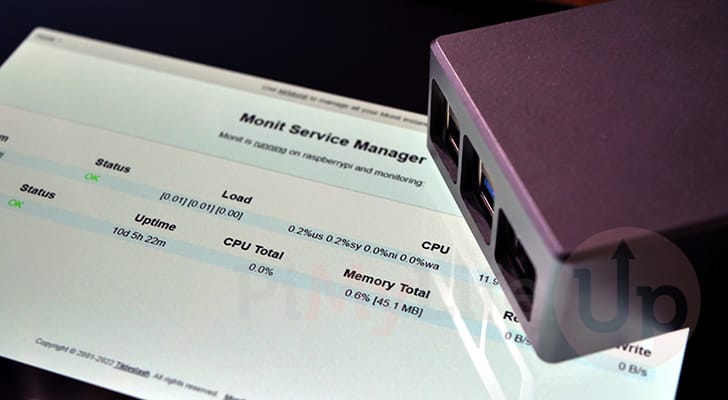
Monit boasts a simple yet effective web interface. This interface can be used to check the status of your device or services and perform actions such as restarting a problematic service on your Raspberry Pi.
You Might Also Like

Equipment
Below, is a list of equipment we used when setting up Monit on our Raspberry Pi.
Recommended
Optional
We tested this on a Raspberry Pi 5, running the latest version of Raspberry Pi OS Bookworm 64-bit.
Installing and Configuring Monit on the Raspberry Pi
Over the next couple of sections, we will show you how to easily install and configure the Monit tool on your Raspberry Pi.
The video below will take you through all the steps to setting up Monit. If you prefer text, the tutorial continues just below the video.
Quickly and Easily Installing Monit to your Raspberry Pi
1. Before we can install Monit on our Raspberry Pi, we must ensure that the operating system is up-to-date.
You can update the package list cache and upgrade any out-of-date packages by using the following two commands within the terminal.
sudo apt update
sudo apt upgradeCopy
2. Luckily for us, installing Monit is a super straightforward process on the Raspberry Pi and can be done using the following command.
The installation process is this simple, thanks to the Monit package being available through the official package repository.
sudo apt install monitCopyConfiguring Monit
3. To make the most of Monit on your Raspberry Pi, you will be required to make some adjustments to its configuration. We won’t be diving too deeply into configuring this software, but we will give you a quick overview.
You can begin editing the Monit configuration file using the nano text editor by running the following command within the terminal.
sudo nano /etc/monit/monitrcCopyEnabling the Web Service
The first thing you will probably want to do is enable the Monit web interface on your Raspberry Pi. This interface lets you easily monitor your Pi’s hardware and any process you configure Monit to monitor.
a. Within this configuration file, you should find the following block commented out. These lines are what set up the lightweight web server.
If you only want to access Monit directly from your Raspberry Pi, you can uncomment the lines by removing the hashtag (#). However, if you want to access it from another machine on your network, you will want to make some adjustments.
#set httpd port 2812 and
#    use address localhost
#    allow localhost
#    allow admin:monit
b. With the example below, we are doing a few different things.
- The first line defines the “
http” service and the port that it should listen on. We are sticking with the default “2812” that Monit is configured to use. - The next line defines the address that the HTTP service should bind to. By using “
0.0.0.0” we are binding Monit to all IP addresses.
However, if you only wanted Monit to be accessible from a particular IP Address such as “192.168.0.32“, you could specify that here instead. - The third line is used to allow anybody to connect to Monit. If you use this on a publicly accessible device, you will likely want to specify specific IP addresses instead.
- Finally, we specify the username and password that will be used to access the web interface. In our example, we are using the default username “
admin” and the default password “monit“.
We highly recommend you adjust both of these to prevent unwanted access. A user with access to Monit can access information about your Raspberry Pi. They can also potentially stop or start services that you have monitored by this software.
set httpd port 2812 and
    use address 0.0.0.0
    allow 0.0.0.0/0.0.0.0
    allow admin:monit
Monitoring a Service with monit
a. Now that you have the Monit web service enabled on your Raspberry Pi, you will want to have a rough idea of how to configure Monit to actually monitor processes on your device.
Please note that this is only a very rough example how you can use Monit. We highly recommend that you explore the official documentation to better understand how to use the software.
With this example, we will be monitoring the Apache web server on our Pi.
- We use the first line to tell Monit to check a service called “
apache2” using its PID file at the specified address. This file is created by Apache when it starts and allows Monit to easily get the information it requires - The following line is used to specify the command that should be executed to start the monitored process. In our case we are calling Apache2’s restart command to restart the service. If the web server isn’t running, it will be automatically started, and if it is running it will be restarted.
- After the start command, we specify the command to be used to stop the Apache2 server.
- Next, we can specify some basic rules that we want Monit to use when monitoring Apache on our Raspberry Pi. The first rule checks whether the CPU usage has been over 80% for over 5 cycles, and if it has, restart the service.
- Our other rule monitors the service’s total memory consumption. If it remains about 200 MB for 5 cycles, it will restart the server.
check process apache2 with pidfile /run/apache2/apache2.pid
    start program = "/etc/init.d/apache2 restart"
    stop program = "/etc/init.d/apache2 stop"
    if cpu > 80 % for 5 cycles then restart
    if totalmem > 200.0 MB for 5 cycles then restart
Saving and Restarting Monit on the Raspberry Pi
4. Once you have finished making changes to the Monit configuration file, you can save and quit by pressing CTRL + X, Y, and then ENTER.
5. Before we restart Monit, we should verify that all the configuration changes are valid. Luckily, the monitoring tool has a built-in command that allows you to test the configuration before actually using it.
All you need to do is use the “monit” command on your Raspberry Pi, followed by the “-t ” option.
sudo monit -tCopyIf the configuration file is valid, the following should appear in the terminal. If there are errors, you must correct them before proceeding.
Control file syntax OK6. With the configuration changes made, you can restart the “monit” service by running the following command.
sudo systemctl restart monitCopyAccessing the Monit Web Interface
7. Next, you will need to know the IP address of your Raspberry Pi so that you can access the Monit web interface.
One of the easiest ways to get this IP address is to use the hostname command within the terminal.
hostname -ICopy8. Within your favorite web browser, you will now want to go to the following address.
Ensure that you replace “<IPADDRESS>” with the IP of your Pi.
http://<IPADDRESS>:28129. You will now be prompted to enter the username and password you defined earlier when enabling the Monit web interface.
If you stuck with the insecure defaults, you would use “admin” for the username, and “monit” for the password.
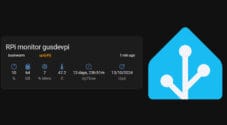
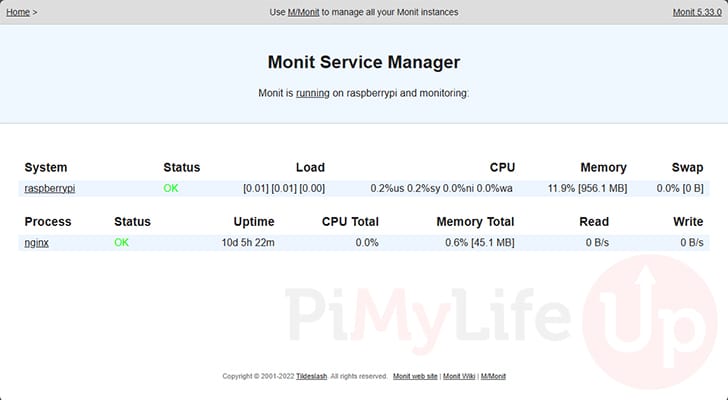
10. At this point you should now have access to the Monit web interface. You can use this web interface to monitor your Raspberry Pi and any programs you have configured Monit to monitor.
Conclusion
Hopefully, at this point, you will have successfully installed the Monit monitoring software on your Raspberry Pi.
This software allows you to monitor your Pi and the various services that you may have installed on it very easily. Its simple web interface allows you to get a wealth of information at a quick glance.
Please feel free to drop a comment below if you have any questions about installing and using Monit on your Pi.
If you liked this tutorial, we highly recommend exploring our many other Raspberry Pi projects.