This tutorial will show you how you can encode or decode a base64 string on Linux using the terminal.
Base64 is an encoding scheme often used for encoding binary data into text that can easily be transferred and stored in media without accidental modification.
Linux has a built-in command line utility that allows you to encode or decode a string using base64 easily.
Before continuing, we should mention that base64 is purely for encoding data, not encryption, as it is designed to be decoded back to its original data, so never use this in place of encryption for security purposes.
Over the following sections, we will show you how to encode or decode any text or file using base64.
Syntax of the base64 Command on Linux
Let us start by exploring the syntax of the base64 command on your Linux system.
Using this utility without specifying any options will encode any string that is piped into it using the base64 format. The result will be output to the terminal.
The base64 command then has three optional parameters that we can use to control the functionality
base64 [OPTIONS] [INFILE] [OUTFILE]Copy[OPTIONS]– The first optional parameter allows you to control the behavior of the base64 utility on Linux. For example, this is how you tell the tool to decode a string rather than encode it.
You can ignore this field if you like, as all options are prefaced with either a single (-) or double hyphen (--).[INFILE]– The second parameter allows you to specify a file to use as the tool’s input for either encoding or decoding.[OUTFILE]– The final parameter lets you specify a place where you want the resulting base64 string saved.
If you are encoding, then this will be a base64 encoded string. If you are decoding, then this string will be the original content.
If this parameter is not used, all results from the base64 command on Linux will be output to the standard output, which is typically the current terminal session.
Base64 Options
Below you can find a list of the options you can use to control the base64 command on Linux.
-eor--encode– The decode option tells the base64 command to encode any input data.
This option is the default behavior for the base64 command.-dor--decode– By using the decode option, the base64 tool will instead decode any base64 string that is passed into it.-nor--noerrcheck– When decoding data, base64 will check whether there are any encoding errors within the string.
By using this option, you can tell the base64 command on Linux to ignore checking for errors.-ior--ignore-garbage– The ignore garbage option tells the tool to ignore any character that isn’t a valid base64 character while decoding.
Encoding a String using Base64 on Linux
This section will show you an example of how to encode a string on Linux using base64.
Since we are encoding a string, we do not have to worry about passing in any options. By default, the base64 tool will encode any data that is passed to it.
Passing in a String to Encode
For our first example, we will be showing you how to encode a base64 string on Linux from the command line.
We will need to use the pipe symbol (|) to pass a string to the base64 terminal. Any input on the left side of the pipe will be passed on to the right side.
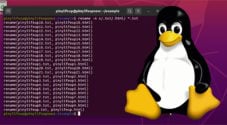
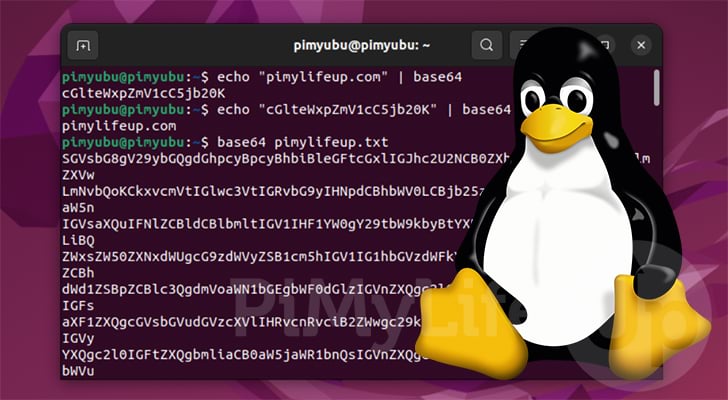
For example, to encode the text “pimylifeup.com“, we would use the following command.
echo "pimylifeup.com" | base64CopyBelow you can see the result that was returned by our Linux systems base64 utility. If you want to return the resulting string to its original data, all you need to do is decode it.
cGlteWxpZmV1cC5jb20KEncoding a File using Base64
It is also possible to use Linux’s base64 command line tool to encode the file’s contents.
For this example, we have a file called “pimylifeup.txt” with a single line of text.
To encode this file using base64, we need to reference the path to that file after the call to the base64 utility. Since we are encoding the file, we don’t have to worry about specifying any option.
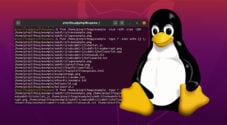
base64 pimylifeup.txtCopySince we aren’t specifying a file to save the output, you should see a base64 string output to the terminal like the one below.
SGVsbG8gV29ybGQgdGhpcyBpcyBhbiBleGFtcGxlIGJhc2U2NCB0ZXh0IGZvciBwaW15bGlmZXVwLmNvbQo=Decoding a String using Base64 on Linux
Now that we have shown you how to encode a string using base64 on Linux, let us move on to decoding the string.
To get the base64 tool to decode a string or file, you will need to pass in the “-d” or “--decode” option.
Passing in a Base64 String to Decode
For this example, we will use the command line tool to decode the base64 encoded string “cGlteWxpZmV1cC5jb20K“.
We can pass this string in through standard input using a pipe (|) like the one shown below. Using the “--decode” option, we are telling base64 it needs to decode the string we pass in.
echo "cGlteWxpZmV1cC5jb20K" | base64 -dCopyBelow you can see how the base64 command on Linux decoded the string back to its original content.
pimylifeup.comDecoding a Base64 Encoded File
You can also utilize the base64 command line tool on Linux to decode an encoded file. This behaves much like encoding a file, the only difference being the addition of the “-d” or “--decode” options.
For this example, we will decode a text file called “pimylifeup.encode” with a base64 encoded string.
All we need to do is reference “base64” followed by the “-d” option, then finally, the file we want to be decoded.
base64 -d pimylifeup.encodeCopyWith the following result, you can see how the base64 command on Linux decoded our file and returned the following string.
Hello World this is an example base64 text for pimylifeup.comConclusion
At this point in the guide, you should know how to use the base64 utility in Linux.
This utility can encode and decode any string or file using the base64 standard.
Please comment below if you have questions about using the base64 command on your Linux system.
If you found this tutorial helpful, we have several other Linux command tutorials and general Linux guides to follow.