In this tutorial, we cover the basics of using the scp command on a Linux-based distribution.
SCP is short for secure copy protocol and is used to copy files and directories between multiple Linux machines over a network. The data transferred using SCP is encrypted to protect your data against nefarious agents.
The SCP command uses SSH for data transfer and thus uses all the same usernames and passwords you would use for SSH. As a result, it is an extremely useful command for transferring files securely without too much added complexity.
You can use other tools to transfer files and directories over a network. For example, you can configure RSYNC, SFTP, NFS, and others to move files between multiple systems.
Table of Contents
- scp Command Syntax
- scp Command Options
- Using the scp Command
- More Help
- Conclusion
scp Command Syntax
The scp commands syntax is a little more complex than some other Linux commands we have covered. The complexity mainly comes from defining users, hosts, and files. We will cover all these topics so you will have a good understanding of how these work.
Below is a very fundamental example of the scp command syntax. Specific options and other requirements may alter the syntax slightly but should remain roughly the same.
scp [OPTIONS] [SOURCE] [DESTINATION]Copy- OPTIONS is where you specify any extra settings that you would like applied to the command. For example, using a different port or compressing data while transferring to the destination.
- SOURCE is the source file or directory. You can choose a local directory or file. Alternatively, you can set it to a location on a remote machine. Specifying a remote system will look similar to
user@192.168.0.100:/remote/directory. - DESTINATION is the destination for the source. You can set it to a location on a remote machine or your local machine. A location on a remote system should be in the following layout
user@192.168.0.100:/remote/directory.
scp Command Options
There are quite a few options you can use with the scp command. However, there is only a handful that you will likely need to use unless you are a power user. For a full list of all the options, you may need to locate the help documents.
-P portallows you to specify the port to use when connecting to a remote host.-pwill preserve the modification times, access times, and modes from the original file.-qdisables the output from the command. SCP will show no progress bar or warnings.-rwill recursively copy directories and their files. SCP will follow symbolic links as it traverses the directory structure.-Cenables compression for transferring files.-vwill enable the verbose mode. It will cause SCP and SSH to print debugging messages throughout their progress.
As I mentioned earlier, this is just a handful of options, and we go into a few of them in more detail below. For more options, I recommend reading the command manual.
Using the scp command
Using the scp command is pretty straightforward once you learn the overall basics. We will show you the most common uses of this command throughout the topics below.
You must have the SSH username and password for connecting to a remote machine. Depending on how your system is set up, you may also need SSH keys.
The scp command will not prompt when overwriting files, so be wary if you do not want certain files overwritten while you are copying.
You must ensure that you have the correct file permissions on both the local and remote systems. Otherwise, you will get errors when you try to copy. I recommend learning more about file permissions if you face any issues.
Connecting to a New Host
Upon connection to a new host, you may get an output similar to the one below. Enter yes, if you trust the host you are connecting to.
The authenticity of host '192.168.0.56 (192.168.0.56)' can't be established.
ECDSA key fingerprint is SHA256:2Fu7FMDl+lWWRoyTJwidLmA7cy31JaPvvKN0eNoq44M.
Are you sure you want to continue connecting (yes/no/[fingerprint])? yes
Warning: Permanently added '192.168.0.56' (ECDSA) to the list of known hosts.Copy
Copying a Local File to a Remote System
The following command will copy the example.txt file from our current working directory to the /home/dev/ directory on the remote host.
I will quickly explain the command below. First, the example.txt is our local file. dev is our remote user. Then, 192.168.0.56 is the IP of the remote computer. Lastly /home/dev is the remote folder where we create a copy of the files.
scp example.txt dev@192.168.0.56:/home/dev/CopyAfter entering the above command, you will see a password prompt. Enter the password for the remote user.
Next, the file will begin to copy, and you should see how it is progressing. Since I copied a tiny file, the transfer was almost instant.
gus@PC:~$ scp example.txt dev@192.168.0.56:/home/dev/
dev@192.168.0.56's password:
example.txt                        100%   25    29.1KB/s   00:00Copy
Renaming the File at the Destination
You can have the file copied as a new name on the remote server. Simply specify the name at the end of the remote directory. For example, /home/dev/newFileName.txt.
scp example.txt dev@192.168.0.56:/home/dev/newFileName.txtCopyUsing the ls command on the remote computer I can see that the file was copied using the new name.
dev@pimylifeup:~$ ls
newFileName.txtCopy
Copying a Remote File to a Local System
You can also use scp to copy from a remote location to your local system. Essentially, all you need to do is flip the command so that the source is remote and the destination is local, as shown in the example below.
scp dev@192.168.0.56:/home/dev/remoteFile.txt ./CopyThe scp command will fetch the file from the remote server and store it locally in the location specified, which is our current working directory.
gus@PC:~$ scp dev@192.168.0.56:/home/dev/remoteFile.txt ./
dev@192.168.0.56's password:
remoteFile.txt                        100%    5     6.0KB/s   00:00Copy
You can use the ls command to check whether the file has been transferred successfully.
gus@PC:~$ ls
remoteFile.txtCopy
Copying Files Between Two Remote Systems
You can use scp to copy files between two remote systems rather than to your local system. Simply define two remote systems in the command rather than just one. The example below demonstrates transferring between two remote machines.
scp gus@192.168.0.57:/home/gus/twoRemoteSystems.txt dev@192.168.0.56:/home/dev/CopyAfter entering the above command, you will be prompted twice for a password, once for each system.
gus@PC:~$ scp gus@192.168.0.57:/home/gus/twoRemoteSystems.txt dev@192.168.0.56:/home/dev/
dev@192.168.0.57's password:
dev@192.168.0.56's password:
twoRemoteSystems.txt                        100%    5     6.0KB/s   00:00Copy
To check whether the file was copied successfully, use the ls command inside the /home/dev/ directory.
dev@pimylifeup:~$ ls
twoRemoteSystems.txtCopy
Copying Multiple Files
It is possible to copy multiple files within a single scp command.
Our example below shows how you can specify multiple files to be copied to another system. We will copy three files over to the dev directory on the remote machine.
scp example1.txt example2.txt example3.txt dev@192.168.0.56:/home/dev/CopyAfter entering the remote users password, you should see the three files transfer. To confirm the files exist on the remote machine you can always use the ls command within the /home/dev/ directory.
gus@PC:$ scp example1.txt example2.txt example3.txt dev@192.168.0.56:/home/dev/
dev@192.168.0.56's password:
example1.txt            100%    5     7.1KB/s   00:00
example2.txt            100%    7    10.4KB/s   00:00
example3.txt            100%    7     7.1KB/s   00:00Copy
Copy Recursively
You can use the scp command to recursively copy files and directories to or from a remote destination. To do this, all you need to use is the -r option within the command.
In the example below, we have a folder named scp which we will recursively copy all the files and directories to our destination. If you want to use the current working directory, you will need to use $(pwd) and not ./.
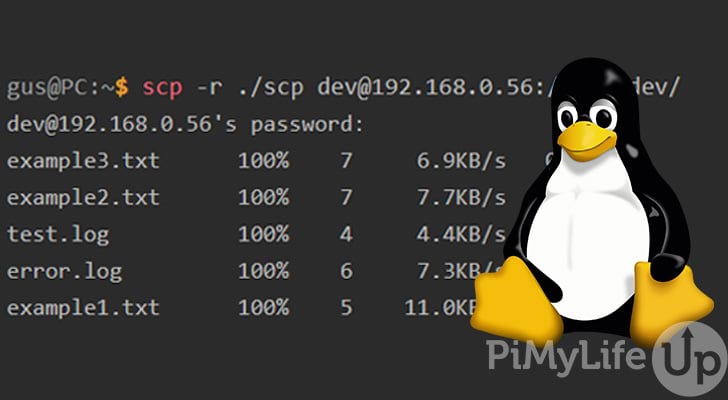
scp -r ./scp dev@192.168.0.56:/home/dev/CopyWhen you run the command, you should be prompted for a password before the files are copied. Below is an example of the expected output.
gus@PC:~$ scp -r ./scp dev@192.168.0.56:/home/dev/
dev@192.168.0.56's password:
example3.txt 100% 7 6.9KB/s 00:00
example2.txt 100% 7 7.7KB/s 00:00
test.log 100% 4 4.4KB/s 00:00
error.log 100% 6 7.3KB/s 00:00
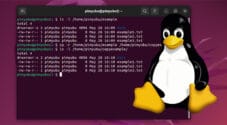
example1.txt 100% 5 11.0KB/s 00:00CopyTo confirm the files and directories have all been copied successfully onto the remote machine, you can use the tree command to view everything at once.
dev@pimylifeup:~$ tree
.
├── example1.txt
├── example2.txt
├── example3.txt
└── scp
    ├── example1.txt
    ├── example2.txt
    ├── example3.txt
    └── newDir
        ├── error.log
        └── test.log
Change Default scp Port
To change the default SCP port from port 22 to something else, you will need to use the -P PORT option. You will find this useful as many system administrators change the default port for SSH.
Below is an example of how you use the -P option. Simply specify -P followed by the port you wish to use. In our case, we are using port 8080.
scp -P 8080 example.txt dev@192.168.0.56:/home/dev/CopyLimit scp Bandwidth
If you plan on transferring large files or lots of files, you may want to limit the bandwidth of SCP. Limiting the bandwidth will prevent SCP from using up all the available bandwidth on the machine.
To do this, simply use the -l option followed by bandwidth limit in kilobits/s.
As we are working in kilobits, you need to do a simple conversion from kilobytes. Say we want a limit of 500 kilobytes, simply multiply the number by 8 to get kilobits. The answer should be 4000 (500 * 8 = 4000).
Suppose you wanted to convert from megabytes to kilobits. Simply multiply the value by 8000. For example, 1 megabyte equals 8000 kilobits.
In the example below, we limit the transfer to 4000 kilobits.
scp -l 4000 largefile.zip dev@192.168.0.56:/home/dev/CopyCompress File During scp Transfer Process
It might be worth turning on compression if you are transferring large files. During the transfer, scp will compress the file, but after the transfer, the file will be uncompressed and return to its normal size. Compressing the file is great for speeding up the transfer process.
To use compression, simply use the -C option.
scp -C largefile.zip dev@192.168.0.56:/home/dev/Copyscp Quiet Mode
Like most Linux commands, there is a way to silence the output of the SCP command. To silence all messages from SCP, simply use the -q option. This option is helpful if you do not require any extra information to be outputted.
scp -q largefile.zip dev@192.168.0.56:/home/dev/CopyMore Help
You can get more help on using the scp command and its options by using the inbuilt manual tool found on Linux distributions.
The manual has all the options that you can use with the command and extra information on using them. Some of the options will require having advanced knowledge of how SSH works.
Simply use the command below to bring up the manual documents.
man scpCopyIf you need to quit out of the manual page, simply press Q.
Conclusion
I hope by now you have a good understanding of how to use the scp command on Linux or Unix distributions. It is a handy command for moving files securely from one system to another.
There are plenty more Linux commands that I highly recommend taking the time to learn, especially if you plan on administrating a Linux distribution.
If you believe we can improve this tutorial, please let us know by leaving a comment at the bottom of this page.