In this tutorial, we cover the basics of using the last command on a Linux operating system.
The last command will allow you to search and list users that have logged in and out of a Linux system. Last will also display some system actions such as rebooting. This information may help investigate suspicious user behavior, login issues, and more.
By default, the last command will search through the var/log/wtmp file. The file contains all users that have logged in and out since it was created.
For bad login attempts, you can use the lastb command, which searches through the /var/log/btmp file. The btmp file contains all the bad login attempts since it was created.
This tutorial will touch on the basics of using the above two commands within a Linux operating system. We cover some of the options you will most likely use with the commands.
Table of Contents
- last command Syntax
- last command Options
- Accepted Time Formats
- The Command Output Layout
- Using the last Command
- More Help
- Conclusion
last Command Syntax
The syntax of the last command is relatively easy to understand. The command accepts up to three separate types of parameters. The first type is options, the second is username, and the last is tty.
last [options] [username...] [tty...]Copy- [options] is where you can specify any options that you would like applied to the command. You do not need to specify any options for this command to work.
- [username] allows you to limit the output of the last command to the specified usernames. This parameter is optional and will accept multiple usernames.
- [tty] is where you can limit the result to specific ttys (teletype terminals). This parameter is optional and will accept multiple ttys.
Command Options
You can use various options with the last command, each controlling the information that is available to you.
-aor--hostlastdisplays the hostname in the last column.-dor--dnsthis option will change the IP back into a hostname. Very useful for non-local logins.-for--filefileallows you to specify a file rather than using the default (/var/log/wtmp). You can use this option multiple times to search across several different files.-For--fulltimesprints the full login and logout times.-ior--ipwill display the host’s IP address.-nor--limitnumberallows you to limit the number of lines in the output.-por--presenttimedisplays the users logged in at the specified time.-Ror--nohostnamedisables the hostname field.-sor--sincetimedisplays the logins since the specified time. You can use this option with the--untiloption.-tor--untiltimedisplays the logins until the specified time.--time-formatformatallows you to change the time output to one of the following formats notime, short, full, or iso.-wor--fullnamesdisplays the full user names and domains.-xor--systemwill output the system shutdown entries and run level changes.
Accepted Time Formats
There are multiple different time formats that you can use for the options that accept the time argument. For example, --since, --until, and --present all accept time as an argument.
YYYYMMDDhhmmss
YYYY-MM-DD hh:mm:ss
YYYY-MM-DD hh:mm     (seconds will be set to 00)
YYYY-MM-DD           (time will be set to 00:00:00)
hh:mm:ss             (date will be set to today)
hh:mm                (date will be set to today, seconds to 00)
now
yesterday            (time is set to 00:00:00)
today                (time is set to 00:00:00)
tomorrow             (time is set to 00:00:00)
+5min
-5days
–time-format option
For the --time-format option, you can specify the format you wish to be outputted. Below are the options that you can specify.
- The
notimeargument will prevent the output of any timestamp. - By default, the last command is set to use
short. (Wed Jun 29 11:22) - Using
fullis the same as using the--fulltimesoption. (Wed Jun 29 11:22:49 2022) ISOwill display the timestamp in ISO-8601 format. (2022-06-29T11:22:49+00:00)
The Command Output Layout
Since the last command prints quite a few different columns, we will quickly go through each of them, starting from the left column.
- The first column displays the username of the user.
- The second column displays how the user is connected to the system via tty (teletype terminal) or pts (pseudo terminal). System activity may also be shown here, such as system boot.
- Our third column contains information about how the user connected. It is likely to be one of the following types of information.
- An IP address if the user is connected remotely. The hostname will appear if you use the
-doption. - The version of the kernel, if it was system activity.
- An empty value if the user connected via tty.
- An IP address if the user is connected remotely. The hostname will appear if you use the
- The fourth column displays the time when the activity occurred.
- Finally, the last column contains when the user logged out of the system. If the user has logged out, a timestamp will display; otherwise, information will be displayed indicating the user’s current status.
dev@pimylifeup:~$ last
dev      pts/0        192.168.0.39     Wed Jun 29 11:22   still logged in
dev      pts/0        192.168.0.39     Sun Jun 26 05:17 - 14:42  (09:25)Copy
Using the last Command
You can utilize the last command within a Linux operating system in several different ways. Below we will go through how you can use this tool and a few of the more popular options that you can use.
Basic Usage
The simplest way to use the last command is by entering it in the terminal with no options or parameters. However, you may get information overload if your system is heavily used.
lastCopyThe command will output a fair bit of information, as you can see below. We discuss the different columns earlier in this tutorial if you need more information on the output. In the next section, we discuss limiting the number of results.
dev@pimylifeup:~$ last
dev      pts/0        192.168.0.39     Thu Jun 30 04:11   still logged in
dev      pts/0        192.168.0.39     Wed Jun 29 11:22 - 13:04  (01:41)
dev      pts/0        192.168.0.39     Sun Jun 26 05:17 - 14:42  (09:25)
reboot   system boot  5.4.0-121-generi Sun Jun 26 05:16   still running
dev      pts/0        192.168.0.39     Wed Jun 22 05:25 - 05:16 (3+23:50)
reboot   system boot  5.4.0-120-generi Wed Jun 22 04:30 - 05:16 (4+00:45)
reboot   system boot  5.4.0-120-generi Wed Jun 22 03:58 - 05:16 (4+01:17)
reboot   system boot  5.4.0-117-generi Fri Jun 10 21:05 - 03:54 (11+06:49)
dev      pts/0        192.168.0.39     Wed Jun  8 04:37 - 19:52 (2+15:15)
dev      pts/0        192.168.0.39     Tue Jun  7 06:01 - 15:13  (09:12)
dev      pts/0        192.168.0.39     Sun May 29 05:10 - 04:17 (1+23:06)
reboot   system boot  5.4.0-113-generi Sat May 28 05:35 - 19:52 (13+14:17)
dev      pts/0        192.168.0.39     Fri May 27 11:20 - 05:30  (18:09)
reboot   system boot  5.4.0-113-generi Thu May 26 14:04 - 05:30 (1+15:26)
reboot   system boot  5.4.0-110-generi Thu May 19 12:09 - 14:00 (7+01:51)
dev      pts/0        192.168.0.39     Mon May 16 04:48 - 12:05 (3+07:16)
dev      pts/0        192.168.0.39     Fri May  6 04:58 - 01:10  (20:11)
dev      pts/0        192.168.0.39     Mon May  2 12:13 - 13:25 (2+01:11)
reboot   system boot  5.4.0-109-generi Mon May  2 10:54 - 12:05 (17+01:10)
dev      pts/1        192.168.0.39     Mon May  2 10:52 - 10:54  (00:01)
dev      pts/0        192.168.0.39     Sun Apr 24 04:37 - 10:54 (8+06:17)
dev      pts/0        192.168.0.39     Fri Apr  8 03:43 - 10:35 (1+06:51)Copy
Limit Number of Results
Using the -n or --limit options followed by a number will allow you to limit the results of the last command. You can also simply write a dash followed by a number (-5).
Below is an example where we set a limit of 5 results.
last --limit 5CopyThe output below shows that the --limit option limited our results to 5 lines.
dev@pimylifeup:~$ last --limit 5
dev      pts/0        192.168.0.39     Thu Jun 30 04:11   still logged in
dev      pts/0        192.168.0.39     Wed Jun 29 11:22 - 13:04  (01:41)
dev      pts/0        192.168.0.39     Sun Jun 26 05:17 - 14:42  (09:25)
reboot   system boot  5.4.0-121-generi Sun Jun 26 05:16   still running
dev      pts/0        192.168.0.39     Wed Jun 22 05:25 - 05:16 (3+23:50)Copy
Display Logins from Specific Users
You can limit the users that display in the results by simply writing the username at the end of the command.
We limit the results to 5, and the username dev in the example below.
last -n 5 devCopyThe output below contains our specified user dev and is limited to the last five events.
dev@pimylifeup:~$ last -n 5 dev
dev      pts/0        192.168.0.39     Thu Jun 30 04:11   still logged in
dev      pts/0        192.168.0.39     Wed Jun 29 11:22 - 13:04  (01:41)
dev      pts/0        192.168.0.39     Sun Jun 26 05:17 - 14:42  (09:25)
dev      pts/0        192.168.0.39     Wed Jun 22 05:25 - 05:16 (3+23:50)
dev      pts/0        192.168.0.39     Wed Jun  8 04:37 - 19:52 (2+15:15)Copy
Limit Results to a Specific Time Period
To limit the results to a specific time period, we can use the -s and -t options. We will quickly discuss each option.
-s or --since option allows you to set a start time for the period you wish to capture.
-t or --until will allow you to set the finish time for the time period you wish to capture.
There are quite a few different time formats that you can use with these options. However, for our example, we will be using YYYY-MM-DD.
In the example below, we wish to capture all the login information in April.
last -s 2022-04-01 -t 2022-04-30CopyBelow is the output from running the above line in the terminal. As you can see, all of our results are from April.
dev@pimylifeup:~$ last -s 2022-04-01 -t 2022-04-30
dev      pts/0        192.168.0.39     Sun Apr 24 04:37    gone - no logout
dev      pts/0        192.168.0.39     Fri Apr  8 03:43 - 10:35 (1+06:51)
dev      pts/0        192.168.0.39     Thu Apr  7 05:18 - 20:31  (15:12)
dev      pts/0        192.168.0.39     Wed Apr  6 11:27 - 16:40  (05:12)
dev      pts/0        192.168.0.39     Sat Apr  2 04:38 - 12:20 (2+07:42)Copy
Remove the IP Address/Hostname Column
If for some reason, you want to remove the column that contains the IP address or hostname of the user, you can do this by using the -R or --nohostname options.
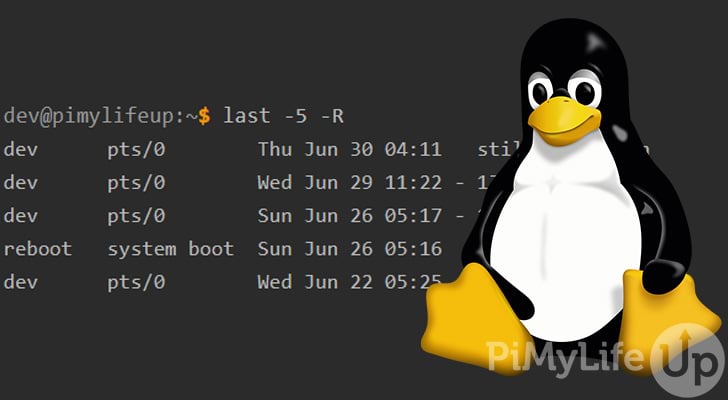
last -5 -RCopyThe output below does not contain the usual IP address or hostname column. We also limited the results to 5 rows.
dev@pimylifeup:~$ last -5 -R
dev      pts/0        Thu Jun 30 04:11   still logged in
dev      pts/0        Wed Jun 29 11:22 - 13:04  (01:41)
dev      pts/0        Sun Jun 26 05:17 - 14:42  (09:25)
reboot   system boot  Sun Jun 26 05:16   still running
dev      pts/0        Wed Jun 22 05:25 - 05:16 (3+23:50)Copy
Display Bad Login Attempts
If you wish to view all the bad login attempts, you must use a slightly different command. The lastb command is essentially the same as the last command but will only display bad login attempts from the /var/log/btmp file.
You will need to have super user (sudo) or root privileges to run the lastb command without issues.
The syntax of the lastb command is the same as the last command. Therefore, all the same options are also available to the lastb command.
lastb [options] [username...] [tty...]CopyThe line below will request the latest five results for bad login attempts.
sudo lastb -5CopyThe output of the above entry should look roughly similar to ours below. Nothing will be displayed if there haven’t been any bad login attempts.
dev@pimylifeup:~$ sudo lastb -5
admin    ssh:notty    192.168.0.39     Fri Jul  1 04:35 - 04:35  (00:00)
admin    ssh:notty    192.168.0.39     Fri Jul  1 04:35 - 04:35  (00:00)
admin    ssh:notty    192.168.0.39     Fri Jul  1 04:35 - 04:35  (00:00)
admin    ssh:notty    192.168.0.39     Fri Jul  1 04:35 - 04:35  (00:00)
admin    ssh:notty    192.168.0.39     Fri Jul  1 04:35 - 04:35  (00:00)
Copy
More Help
There are several methods that you can use to get more help with the last command. I will quickly cover the two easiest methods below.
You can quickly bring up the manual pages for this command using the inbuilt manual command in Linux. Below is an example of how easy you can do it.
man lastCopyTo exit the manual pages, simply press the q key.
For brief information on this command and its options, you can use the --help or -h options. Below is an example of how to use these options.
last --helpCopyThese methods should provide enough information to help you complete your task with this command. However, I hope this tutorial is good enough you do not need to use the above commands.
Conclusion
I hope this tutorial has shown you everything you need to know about using the last command on your Linux distribution. You will find the command very helpful if you administrate computers withs users logging in constantly.
We have plenty more Linux tutorials that you might find helpful. For example, useradd, groupadd, or usermod can be extremally useful for helping administrate a multi-user system.
Please let us know if you notice a mistake or an important topic is missing from this guide.