In this tutorial, we cover the basics of using the groupadd command on a Linux operating system.
The groupadd command is incredibly useful for creating new user groups on a Linux-based distribution. Groups are an effective tool for controlling permissions across a large set of users. You will likely have to manage groups if you administrate a multi-user system.
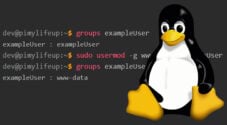
There are many other Linux commands that you can use for user administration. For example, you might also want to look at usermod, useradd, passwd, and userdel. They will all help with creating and modifying users.
This tutorial will take you through most of the basics of using the groupadd command. We touch on the syntax, options, and go through several examples of using the command to create new groups on a Linux distribution.
Table of Contents
groupadd Command Syntax
The syntax of the groupadd command is very straightforward. The command accepts two separate parameters, the first is options, and the second is the group name.
groupadd [OPTIONS] GROUPCopy- [OPTIONS] is where you will need to specify any additional options you want to be applied to the command. We touch on some of the options that you can use later in this tutorial.
- GROUP is the name of the group you wish to create
groupadd Command Options
There are a few different options that you can use with this command. It is unlikely that you will need to use most of them, but they may come in handy eventually.
-for--forcewill force the command to exit with success even when a group already exists. If you are using-gand the specified GID (group id) already exists, then the command will choose a unique GID instead.-gor--gidGIDis the number value for the group. The number must be positive and unique. If used alongside the-ooption, you can use a non-unique value.-oor--non-uniqueallows for a non-unique GID when used alongside the-gor--gidoptions.-Kor--keyKEY=VALUEallows you to override the/etc/login.defsdefaults. You can use multiple-Koptions to cover different settings. You can override settings such asGID_MIN,GID_MAX, andMAX_MEMBERS_PER_GROUP.-por--passwordPASSWORDwill create an encrypted password returned by crypt. This option is not recommended as the password will be visible by users listing processes.-ror--systemallows you to create a system group. The system group number is chosen within the range defined in thelogin.defs. (SYS_GID_MIN–SYS_GID_MAX)-Ror--rootapplies the changes in theCHROOT_DIRdirectory and uses configuration files from within the same directory.-Por--prefixapplies the changes in thePREFIX_DIRdirectory and uses configuration files from within the same directory. Does not support SELinux (Security-Enhanced Linux).
Command Exit Codes
The groupadd command has several exit codes that indicate either success or an issue. Below are the values that you might get when you run the command.
- 0 Success
- 2 Invalid command syntax
- 3 invalid argument to option
- 4 GID not unique
- 9 Group name not unique
- 10 Can’t update group file
Using the groupadd Command
This section will take you through a few examples of how you can use this command to create new groups. You will want to use the groupmod command to modify an existing group.
You must have sufficient user rights when you run the groupadd command; otherwise, you will see permission errors. So, you must have superuser rights (sudo) or be the root user.
Create a Group
In this example, we will create a group with the name testGroup. You will need to have super user privileges.
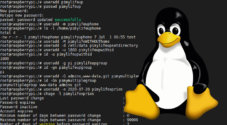
sudo groupadd testGroupCopyTo confirm that the command was successful, we can use echo $?. This command will provide an exit code that we can cross-reference with the command’s exit codes.
dev@pimylifeup:~$ echo $?
0Copy
Alternatively, you can search through the /etc/group file to see if groupadd created the group successfully. To search the file, we will use grep followed by our group name and the group file.
dev@pimylifeup:~$ grep "testGroup" /etc/group
testGroup:x:1003:Copy
Create a Group using a GID
If you want your new group to have a specific GID (group id), you can specify this in the command by using the -g or --gid options.
The value you specify needs to be unique and not already used as a GID. It will also need to be a positive number as you cannot have a negative GID.
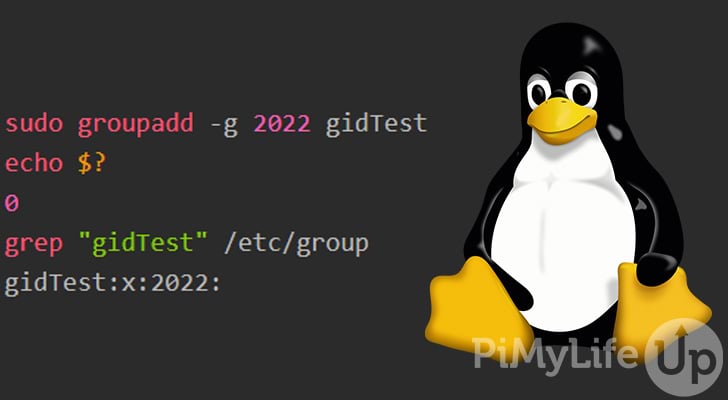
In the example below, we create a new group with the GID of 2022.
sudo groupadd -g 2022 gidTestCopyIn the output below, we check the command exit code by using echo $? and search the /etc/group file. The last line shows that our group has the correct GID.
sudo groupadd -g 2022 gidTest
echo $?
0
grep "gidTest" /etc/group
gidTest:x:2022:Copy
Using a Non-Unique GID
If you want to give the new group a GID already used by another group, you will need to use the -o or --non-unique options.
In the example below, we create a new group using the same id as the user we created above.
sudo groupadd -o -g 2022 gidNewTestCopyYou can see in the output below we now have two groups that share the same GID.
dev@pimylifeup:~$ echo $?
0
dev@pimylifeup:~$ grep "2022" /etc/group
gidTest:x:2022:
gidNewTest:x:2022:
Copy
Create a System Group
There is no difference between a regular group and a system group other than for administration purposes.
A system group will be assigned a GID within a different range from a regular group. These ranges are within the login.defs file and can be overridden.
To create a new system group, simply use the -r or --system options with the groupadd command.
sudo groupadd --system sysUserCopyOur output shows that our system group was created successfully and has a different GID than what you would get if you were to create a regular group.
dev@pimylifeup:~$ echo $?
0
dev@pimylifeup:~$ grep "sysUser" /etc/group
sysUser:x:998:Copy
Override the Default GID Ranges
If you want to temporally override the GID default ranges defined in the /etc/login.defs file, you can use the -K or --key options. You can use these options multiple times within the same command.
In the example below, we alter the range minimum GID range (GID_MIN) and maximum GID range (GID_MAX).
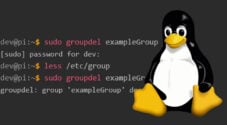
sudo groupadd -K GID_MIN=1050 -K GID_MAX=1060 exampleGroupCopyAs you can see in our output below, the exit code is 0, which means success, and our new group is within the range we defined using the -K option.
dev@pimylifeup:~$ echo $?
0
dev@pimylifeup:~$ grep "exampleGroup" /etc/group
exampleGroup:x:1050:
Copy
More Help
You can get additional help for using this command in a couple of different ways. We will touch on the two easiest methods, which are built into most Linux operating systems.
The first method is to use the man command. The man tool will bring up the manual pages for the given command.
man groupaddCopyTo exit the manual pages, simply press the q key.
The other method is to use the commands inbuilt help documentation. You can use the -h or --help option to load this information into the terminal.
groupadd --helpCopyI hope either of the above methods has the information that you require.
Conclusion
I hope by now, you have a decent understanding of how to use the groupadd command to create new groups on a Linux operating system. In addition, we have touched on several different options that you can use to alter the command’s behavior.
If you are new to Linux and want to learn more, I recommend checking out the many other Linux command tutorials. For example, you might want to learn about the useradd command for adding new users or the usermod command for editing existing users.
Please let us know if you notice a mistake or an important topic is missing from this guide.