This tutorial will take you through all the steps to setting up Visual Studio code on your Home Assistant installation.
Visual Studio Code, often shortened to VS Code, is an open-source free code editor developed and maintained by Microsoft. Its main features are lightweight, fast to load, highly customizable with plenty of third-party plugins, and contains plenty of features in the base version. You can run VS Code as an application on the desktop or a web application with a web browser like Chrome.
Using VS Code on Home Assistant allows you to edit config files, view error logs, and make other changes within the web user interface. Having it available for administrators provides quick and easy editing. However, ensure that your changes do not break your installation by running the check configuration tool within developer tools.
To complete this tutorial, you must have Home Assistant installed and ready to use. You will also need to run a version supporting add-ons, such as Supervised or OS versions.
Setting up the Visual Studio Code Add-on
Installing Visual Studio Code is straightforward, and you should not encounter any issues.
1. As I mentioned earlier, you must ensure that your Home Assistant installation will support add-ons. Both the operating system and supervised versions will have support for this feature.
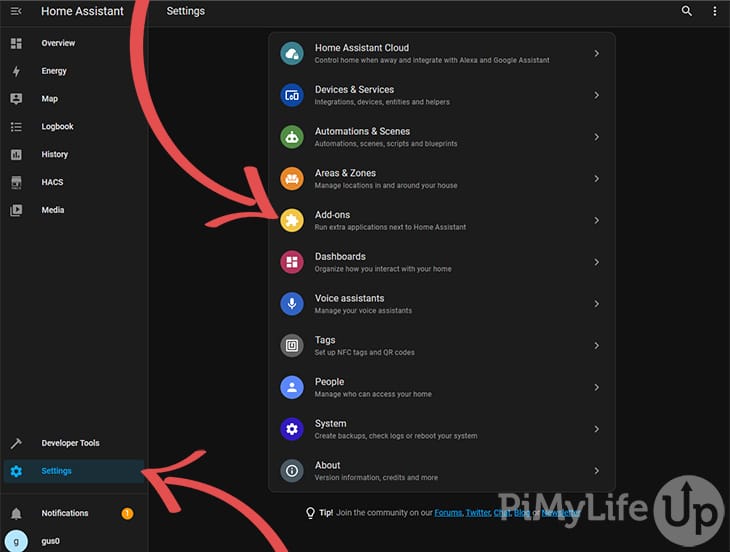
2. In your Home Assistant user interface, click on “Settings“, then “Add-ons“.
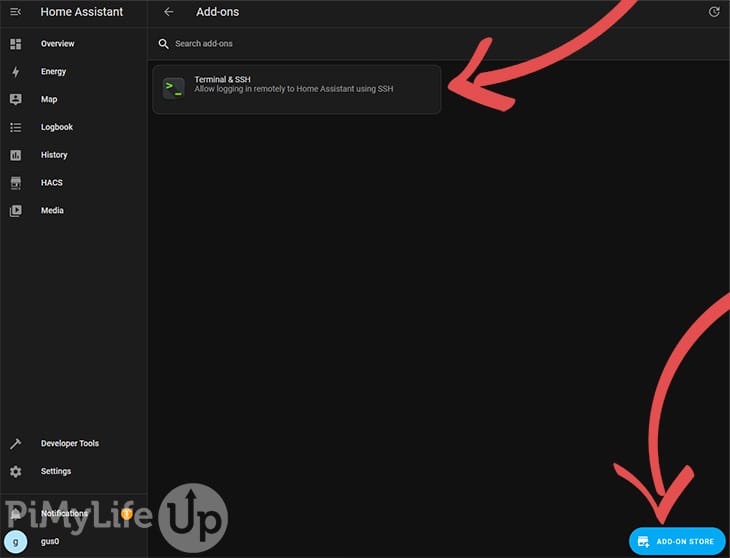
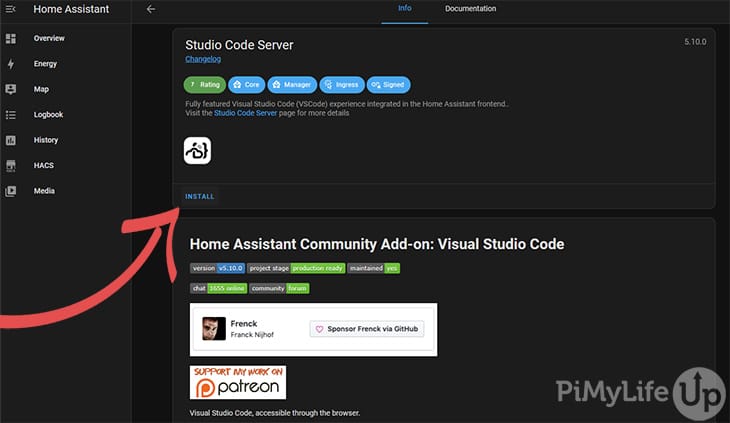
3. On the next screen, click on the “add-on store” button.
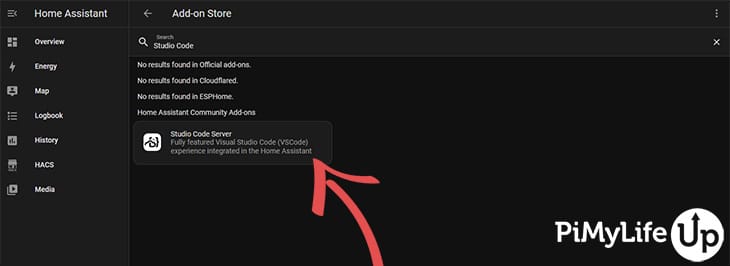
4. On this screen, search for “Studio Code“. Click on the Studio Code Server result.
5. You will now see all the details regarding the add-on. You can double-check the details to ensure it is the add-on you wish to install. Once you’re ready to install, click on the “install” text.
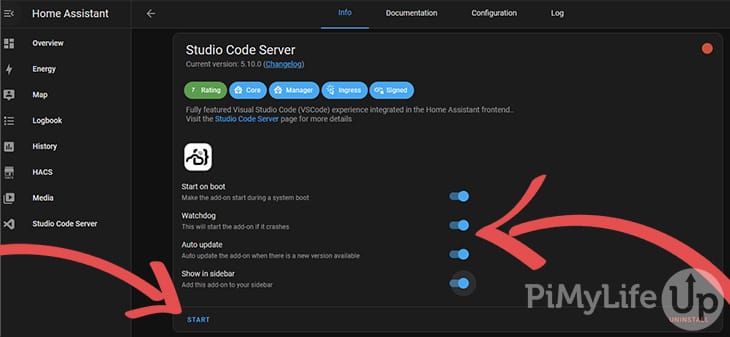
6. Once installed, you will likely want to select all the available options. For example, start on boot, watchdog, auto update, and show in sidebar. However, deactivate these if you do not require them. Once you are ready, you can start the server by clicking “Start”.
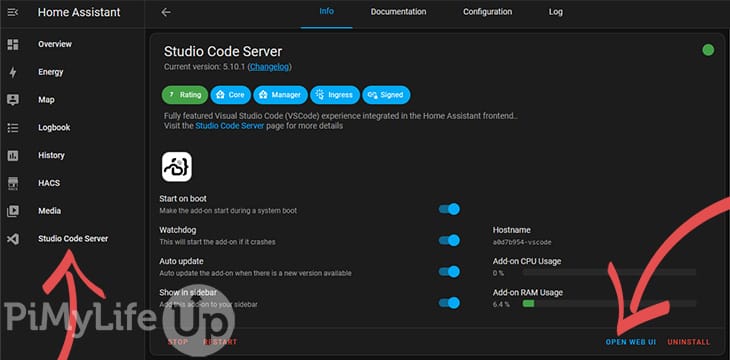
7. You can now either click on “Open Web UI” or “Studio Code Server” to load the code editor in your browser.
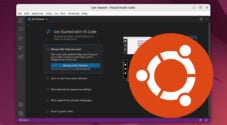
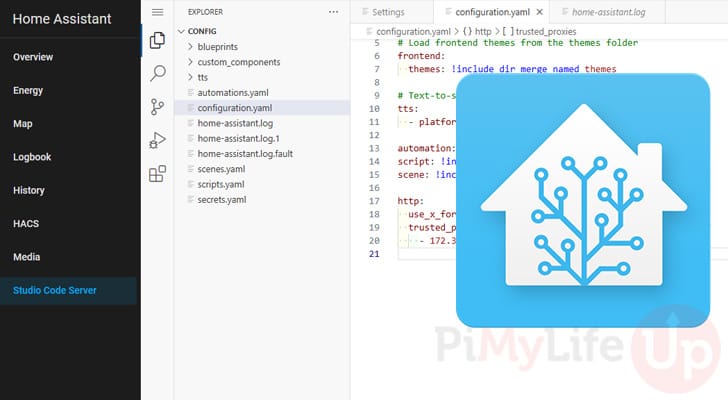
8. You should now see the code editor in your browser. On the left side of the screen is a range of files you can edit or view. You will likely mostly be viewing or editing the configuration.yaml file and the home-assistant.log files.
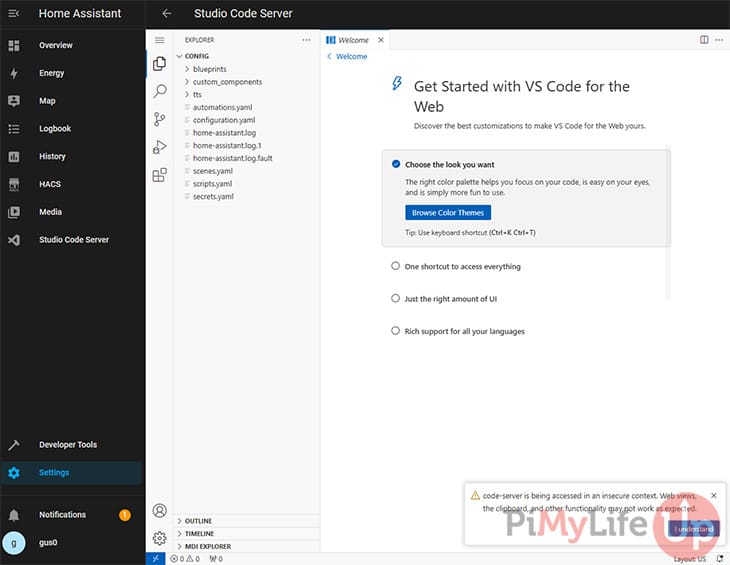
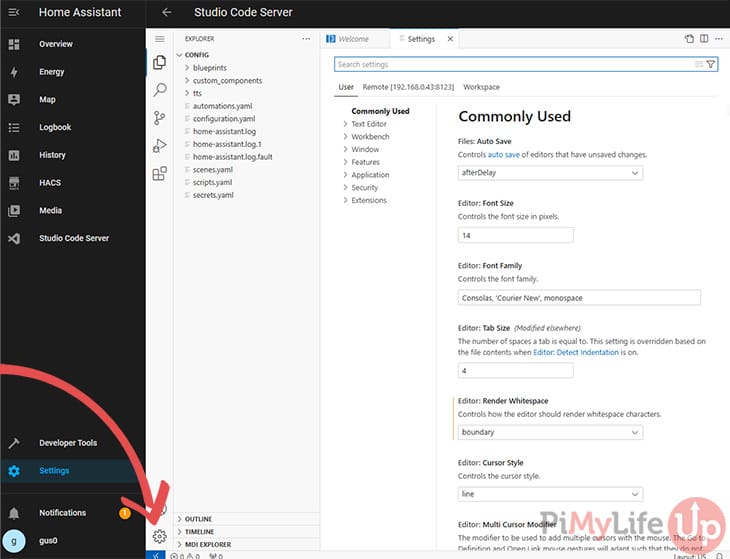
9. You can adjust the editor settings by clicking on the cog. Here, you can customize the editor more to your liking. For example, you can change format settings, cursor, font, and more. It is very similar to the desktop version of Visual Studio Code.
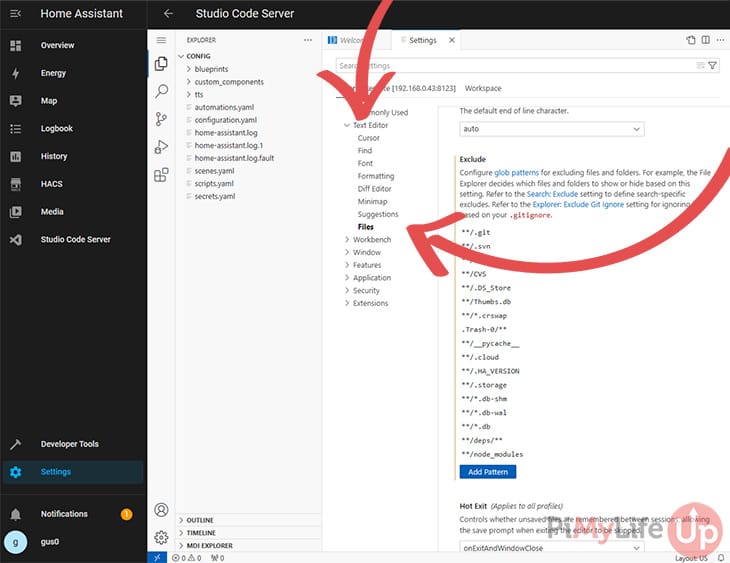
If you want to edit hidden files (we do not recommend that you do), you can remove .storage from the exclude list (Menu: Text Editor -> Files).
Conclusion
I hope you now have Visual Studio Code installed and configured to your liking. You will find it extremely useful for editing the configuration files. It is especially useful for integrations that require settings to be defined in the configuration.yaml file.
To learn more about Home Assistant, check out our ever-growing list of tutorials. They are great for learning the basics and finding new ideas for your next project.
If you have encountered any issues with this tutorial, please comment below.