In this tutorial, we will go through the different methods of setting up Tapo on your Home Assistant Installation.
Tapo is an offshoot of TP-Link that offers a range of smart home devices, including smart plugs, smart cameras, smart bulbs, and more. Most of their products are easy to use, affordable, and are relatively popular. Unfortunately, Tapo devices require an internet connection to work.
Integrating Tapo devices into Home Assistant allows you to monitor and control them without needing to use the Tapo app. It also allows you to create automations within Home Assistant to control these devices. For example, you can use automations or node-red to turn a switch on at a specific time or after a certain event has occurred.
This tutorial will cover two different methods of integrating your Tapo devices into Home Assistant. The first method uses the built-in TP-Link integration. The second method uses a custom integration that we install using HACs.
Using the Home Assistant Tapo Integration
This section will go through the steps of setting up the TP-Link Tapo integration. This method is the easiest, but you may find your device isn’t supported. If it isn’t supported, I recommend checking out the HACs integration instead.
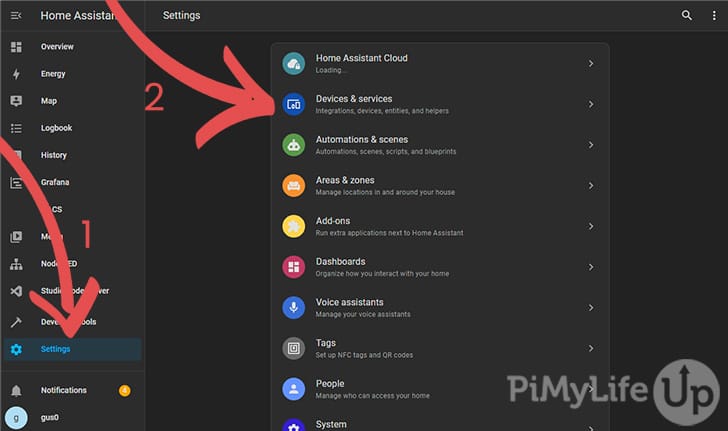
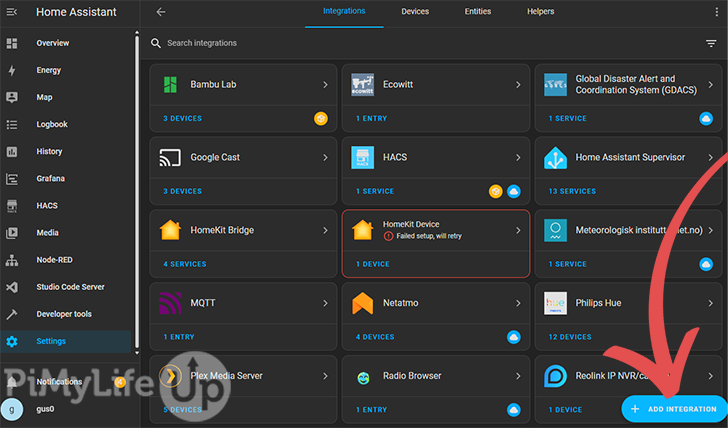
1. First, go to the Settings (1) page and click on Devices & Services (2).
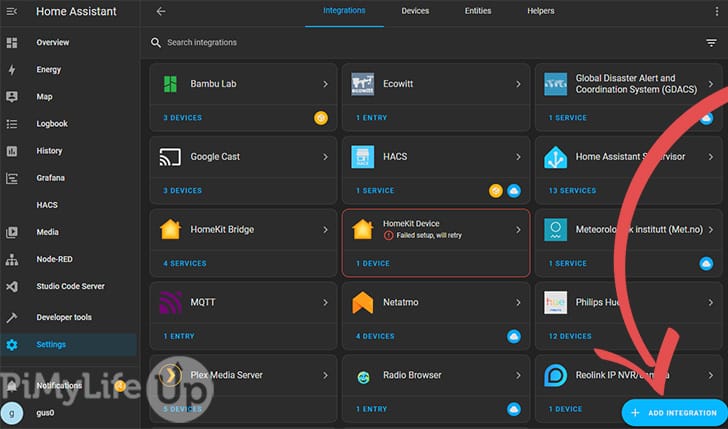
2. Now, click the Add Integration button in the bottom right corner.
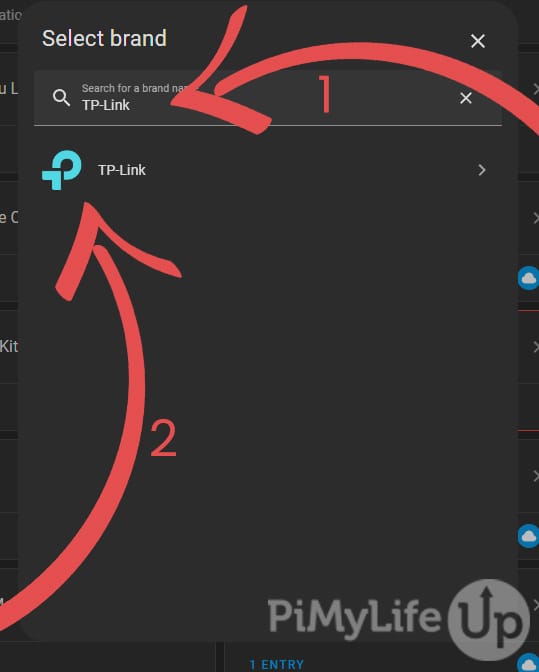
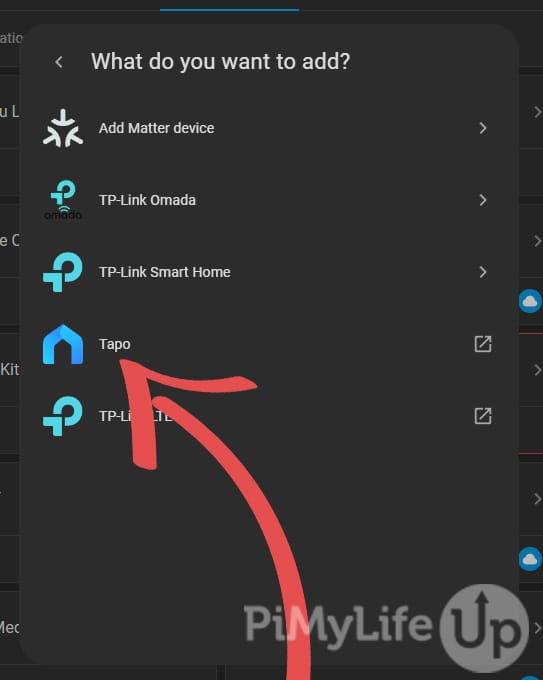
3. Search for TP-Link or Tapo in the search box (1) at the top of the pop-up. Alternatively, scroll through the different brands until you find TP-Link. Once you find TP-Link (2), click on it.
4. On the next screen, click on Tapo.
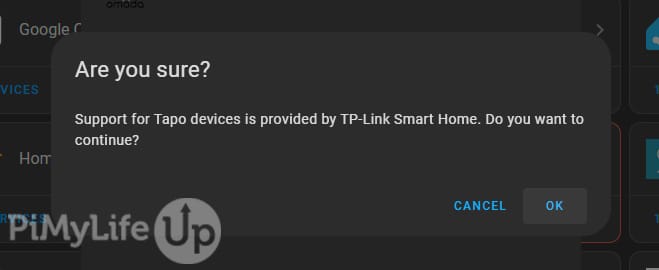
A prompt reminding you that TP-Link Smart Home provides Tapo devices will appear. Click OK.
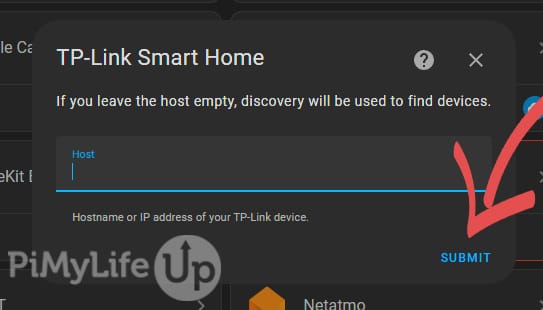
5. If you know your device’s IP address, you can input it into the host field. Alternatively, you can click SUBMIT, and the integration will search for your Tapo devices.
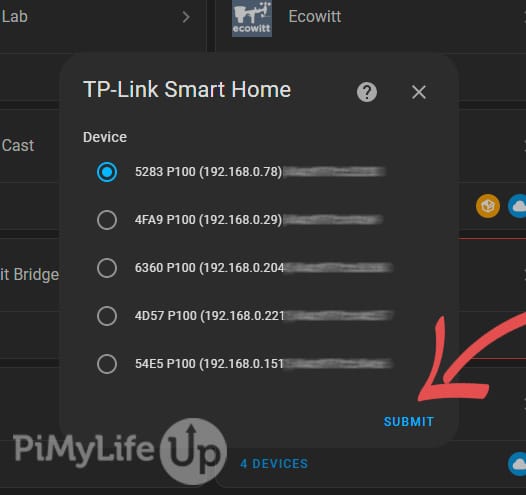
6. If you did not enter an IP address, a list of devices will appear. Click on the one you wish to add to Home Assistant and then click on SUBMIT.
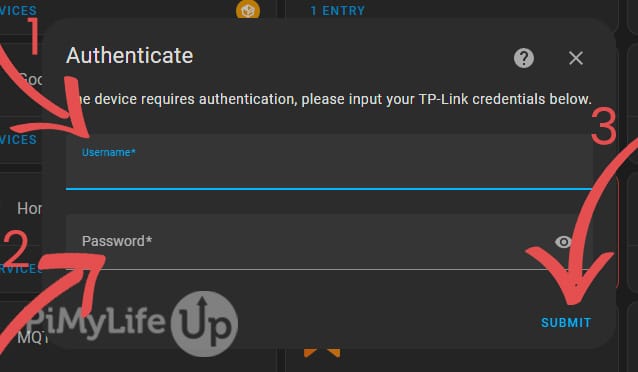
7. The following pop-up will ask you to enter your TP-Link credentials. You must be the main user for the devices you are adding to Home Assistant. If you are a sub-user, you will likely receive an authentication error.
To proceed, enter the username (1) and password (2) before pressing the SUBMIT (3) button.
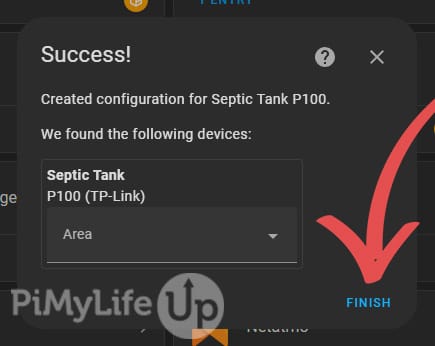
8. You should see a success message. You can add the new device to an area or click FINISH.
9. To find the device you added, go to the integrations page and click the TP-Link Smart Home integration.
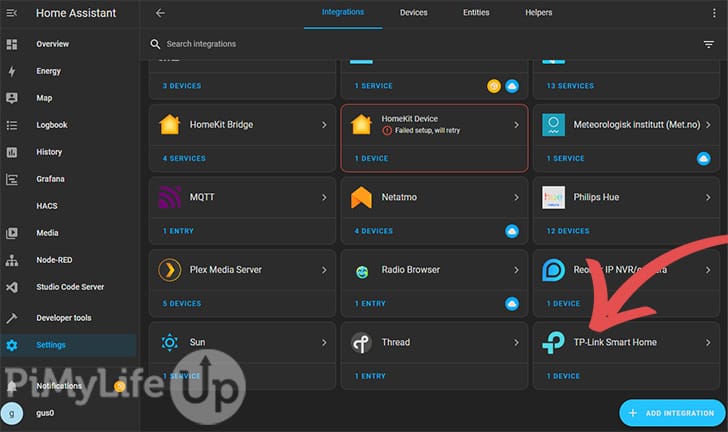
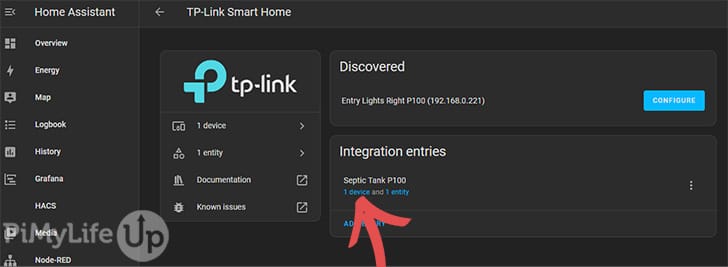
10. Here, you can see all the devices that you have added using the integration. You can also see devices that the integration has discovered on your network. You can configure them by clicking the CONFIGURE button.
To view more information on a specific device, click on the device link.
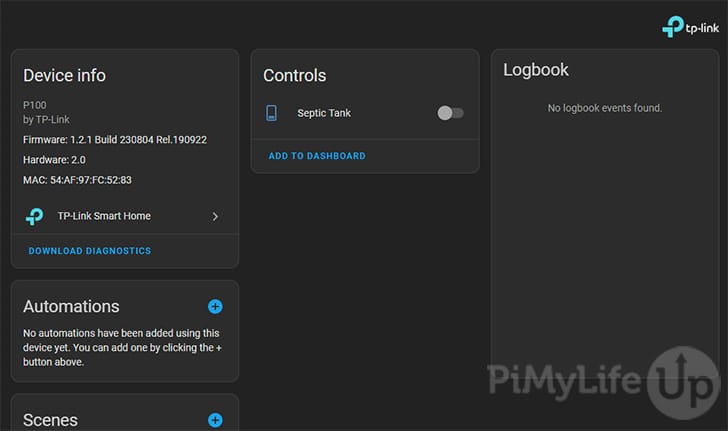
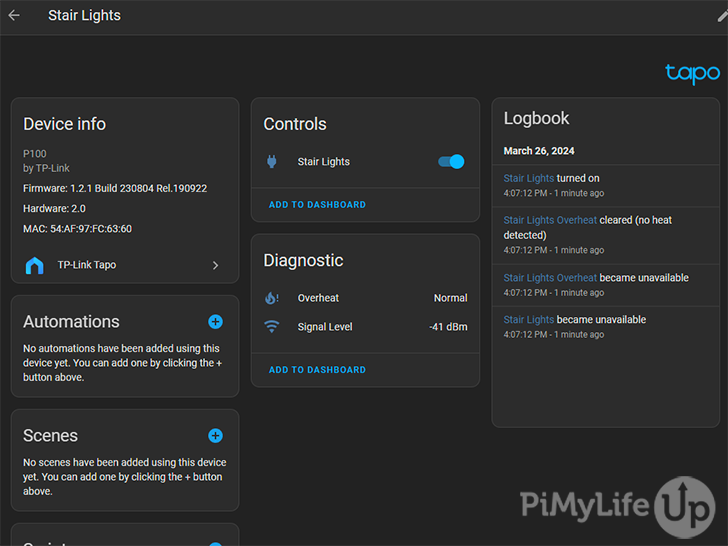
11. Inside the device page, you can see all the details the integration collects from the device. Our example below is a Tapo P100 smart switch. You can turn it on or off using the controls.
Using the Tapo HACS Custom Integration
The custom integration we will install is available on GitHub and has a list of all the Tapo devices it supports. This integration is an excellent alternative to the built-in version, especially if you are having difficulty adding your Tapo device. However, check that your device is supported before proceeding.
Before you start this section, you must ensure that the HACs add-on is installed on your Home Assistant installation.
Installing the Tapo HACS Integration
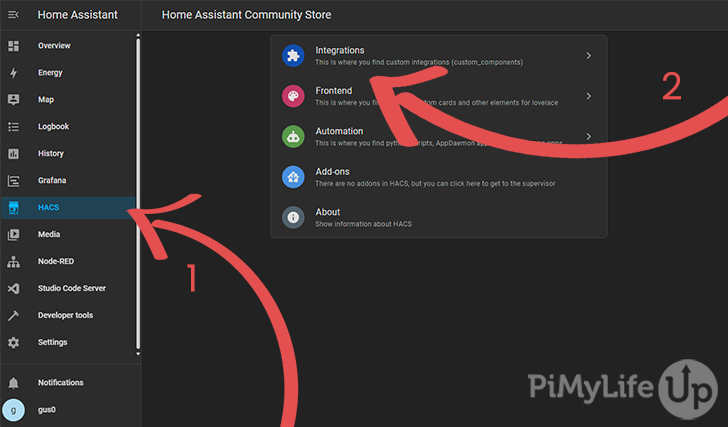
1. Go to the HACS (1) page in your Home Assistant web interface and click on Integrations (2).
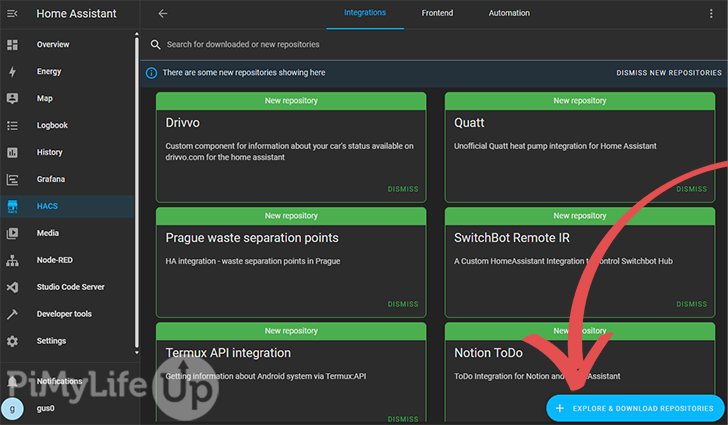
2. Click the Explore & Download Repositories button in the bottom right corner of the screen.
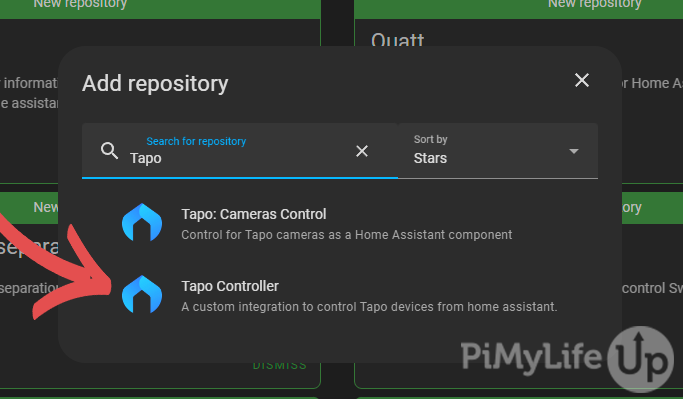
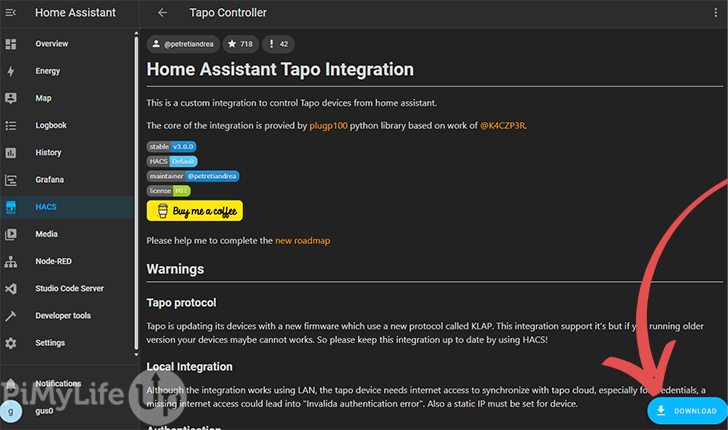
3. Now search for Tapo in the search box. You should see two repositories; we will install the second one (Tapo Controller).
4. You should now see a screen explaining the integration and its capabilities in Home Assistant. Further down the page, you can also view the Tapo devices the integration will support.
Once you are ready, click on the Download button.
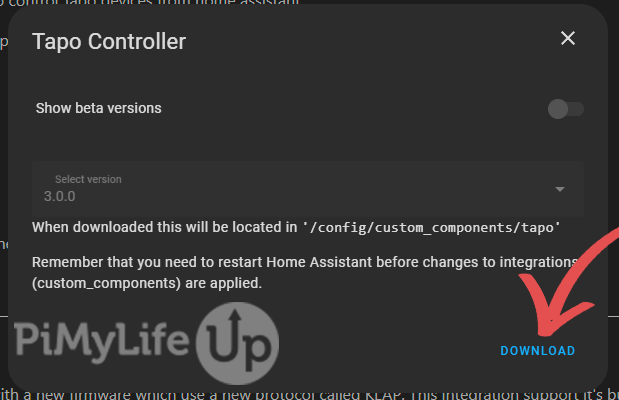
5. A pop-up will appear. Change these values if you need a different version installed. Otherwise, click on Download.
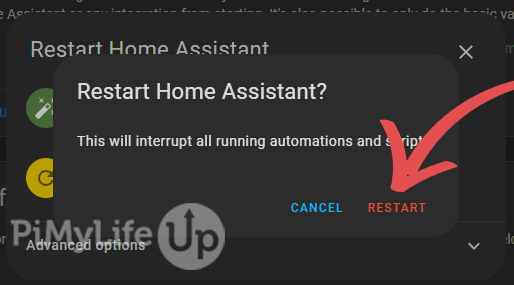
6. A restart is typically required to activate a HACS integration. To do this, go to the Developer Tools (1) screen and click Restart (2) on this page.

7. In the pop-up, click on Restart Home Assistant (1) and Restart (2) in the following pop-up. It may take a few minutes to restart the software, depending on your setup and hardware.

Adding your Devices
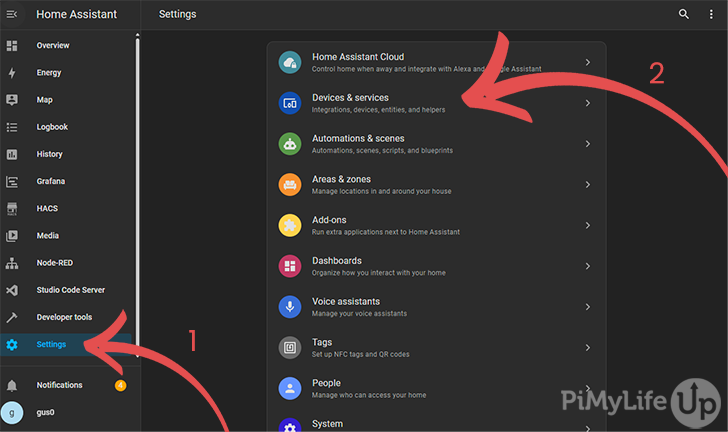
9. Now the integration is installed, go to the Settings (1) page and click on Devices & Services (2).
10. On the integrations page, click on the Add Integration button in the bottom right corner.
11. In the pop-up search for Tapo (1). Click on the TP-Link Tapo (2) option. The package icon (3) means that it is a custom integration.

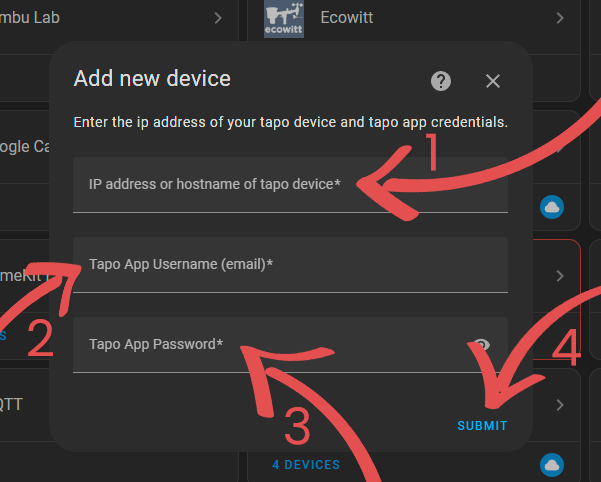
12. Now, you will need to enter the IP address (1) for your Tapo device and the username (2) and password (3) of your TP-Link Smart Home account. Ensure you are the primary user and not a sub-user for your devices; otherwise, you may receive an authentication error.
Once you are ready, click on Submit (4).
13. If everything is correct, you should see a success pop-up box. You can assign the device to an area (1) or click FINISH (2).

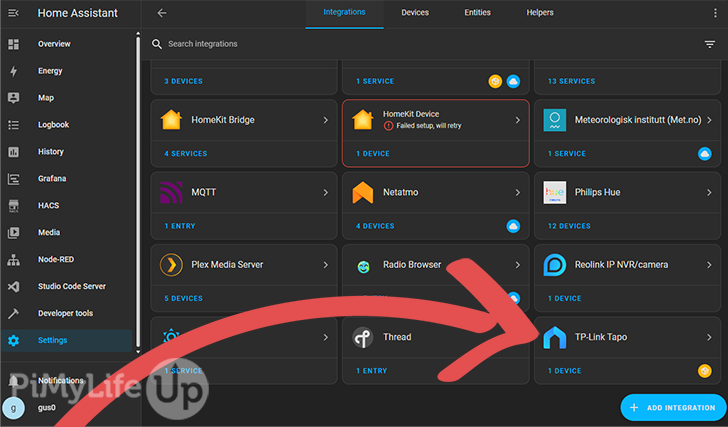
14. To view the device we just added to Home Assistant, go to the Settings page and click on Devices & Services.
On this page, scroll to the bottom, and you should see TP-Link Tapo, click on it.
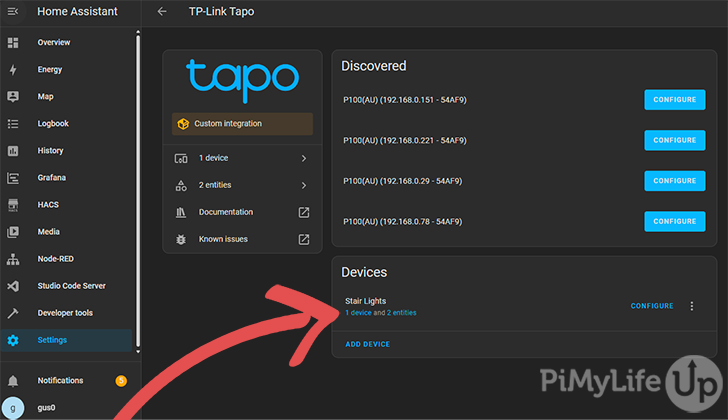
15. The next page should show all the discovered devices you can add to the integration. You can also see your devices that are already set up with Home Assistant.
To view more details on the device we just added, click the 1 device link underneath the device name.
16. You should now see a page that contains all the details of the Tapo device. As you can see in the screenshot below, the device provides us with a switch that we can turn on or off. It also shows the Wi-Fi signal level and whether the device is overheating.
17. You can now add the rest of your Tapo devices. Depending on how many you have to set up, it may take a while, but it is worth it.
Conclusion
I hope you now have your Tapo devices integrated into Home Assistant. If you still have problems, consider alternatives or try another custom integration via HACs. For example, using the Frigate software is a great way to integrate your camera feeds into Home Assistant.
We have many Home Assistant tutorials that I recommend checking out if you want to expand your smart home functionality.
Please let us know if you have any feedback, questions, or anything else.


Any idea how to get the Tapo P400M dual outdoor smart plug to add to HA?
Many thanks!