In this tutorial, we go through the steps of setting up Tuya devices on Home Assistant using the built-in integration.
Tuya is a brand of IoT (Internet of Things) devices commonly used in smart homes. These devices include smart plugs, lights, thermostats, appliances, and more. There are many branded goods that use the Tuya platform, for example, Grid Connect.
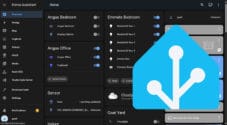
Integrating your Tuya devices into Home Assistant, allows you to display their status on dashboards. You can also control the device using automations, toggles, Node-Red, and more. Home Assistant allows for much better control and integration than the default Tuya app.
This tutorial will cover retrieving the user code and using it to integrate Tuya into Home Assistant. We will also look at basic configurations, such as enabling sensor data. It’s important to note that the method described in this tutorial relies on access to the Tuya cloud.
If you prefer to keep things local, take a look at localtuya. Adding your devices is slightly more complicated, but you can control devices locally rather than via the cloud. It is important to note that localtuya may only work with some Tuya devices.
Setting up the Official Tuya Integration
Setting up Tuya is relatively simple, thanks to the built-in integration. As I mentioned earlier, this integration relies on the Cloud. If you prefer, you can look into localtuya which uses a local connection to control a device rather than via the Cloud.
Accessing the Required Data in the Tuya App
1. To begin, you must open the Tuya application on your phone. You will need to download it and add your Tuya devices if you haven’t already done so.
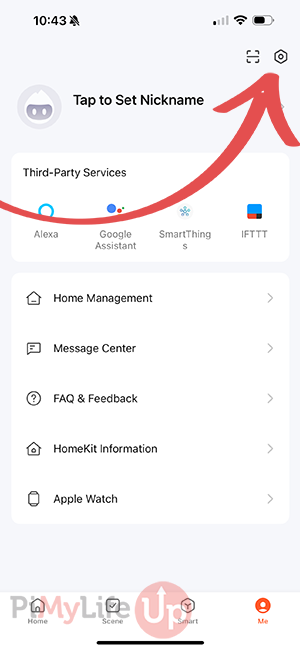
2. First, tap on the Me tab in the bottom right corner.

3. Within the Me tab, click the cog-like icon in the top right corner.
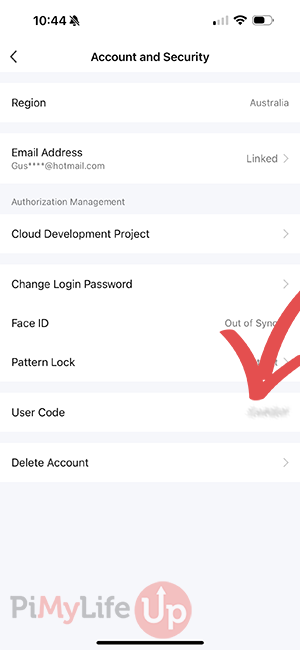
4. You should now be on the Settings page. On this page, find and tap on the Account and Security option.
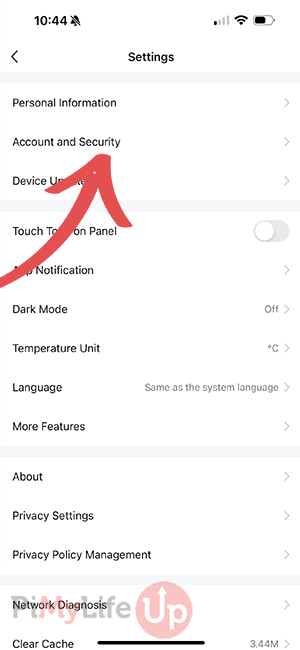
5. On the Account and Security page, you should see a section called User Code. Copy the code next to this section for use in a later step.
Configuring Home Assistant
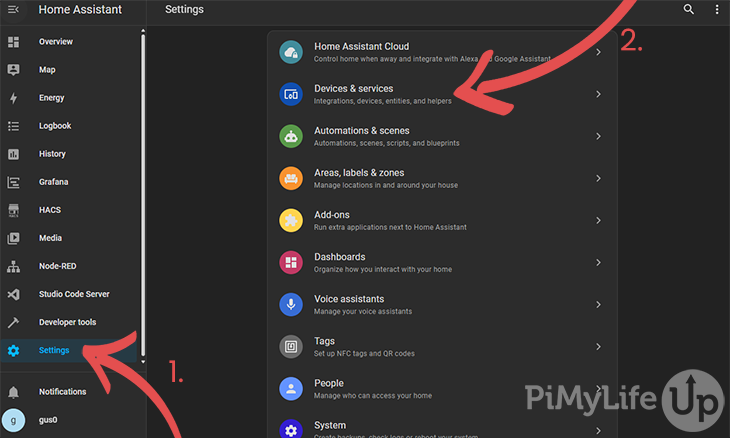
6. In Home Assistant, click the Settings (1) menu item and select Devices & Services (2).
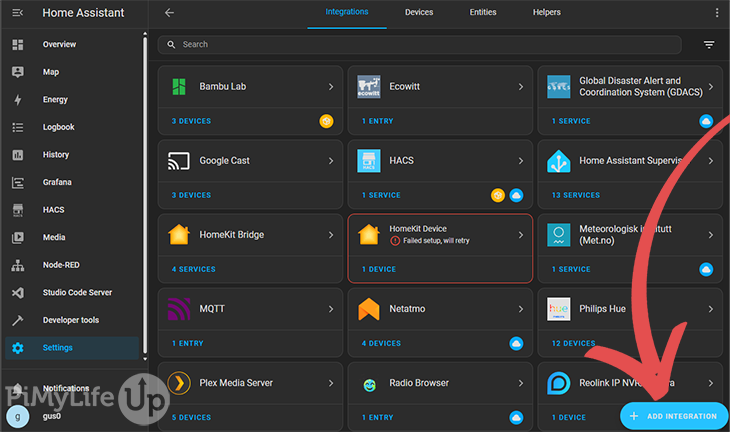
7. Click Add Integration in the bottom right corner of the Integrations page.
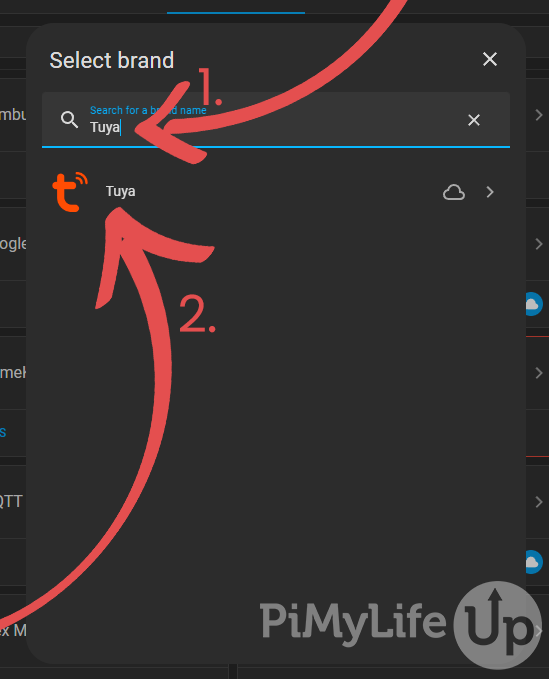
8. In the pop-up box, search for Tuya (1) or scroll until you find it. Next, click on the Tuya option (2).
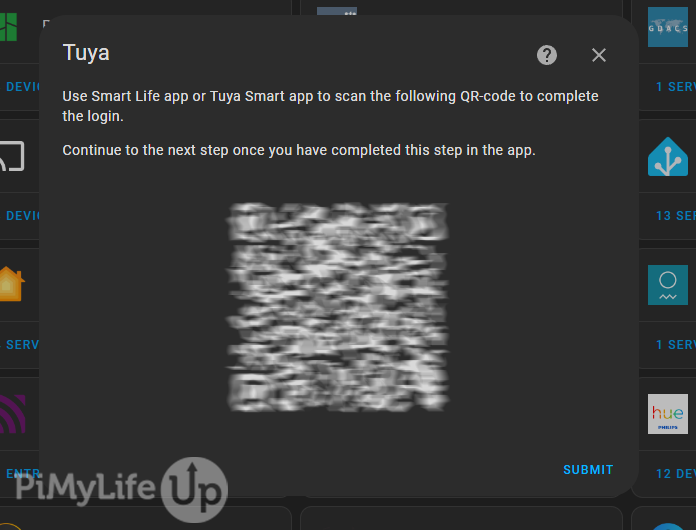
9. You must now enter the code (1) that we copied earlier in this tutorial. Once entered, click on Submit (2).

10. A QR code will appear on the screen. You must scan this code within the Tuya app, the next few steps will show you how to do this.
11. In the Tuya app on your phone, click the plus (1) button in the top right corner of the home page. Next, tap on the scan (2) option.
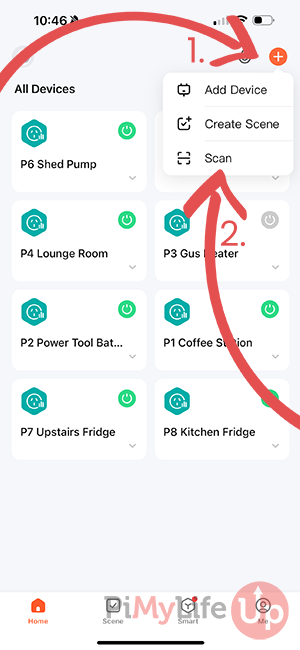
12. You should see a prompt requesting you to confirm that you want to log in to Home Assistant. Tap the Confirm Login button to link your Tuya account to Home Assistant.

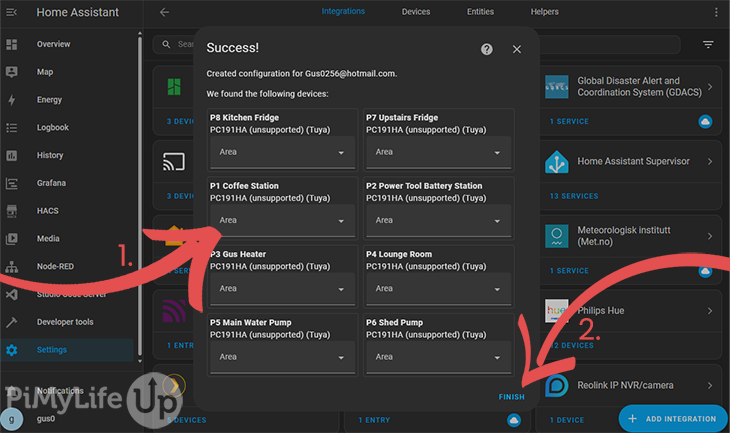
13. If successful, you will now see all the devices from your Tuya account added to Home Assistant. You can take your time to assign these to specific areas (1), or you can click Finish (2).
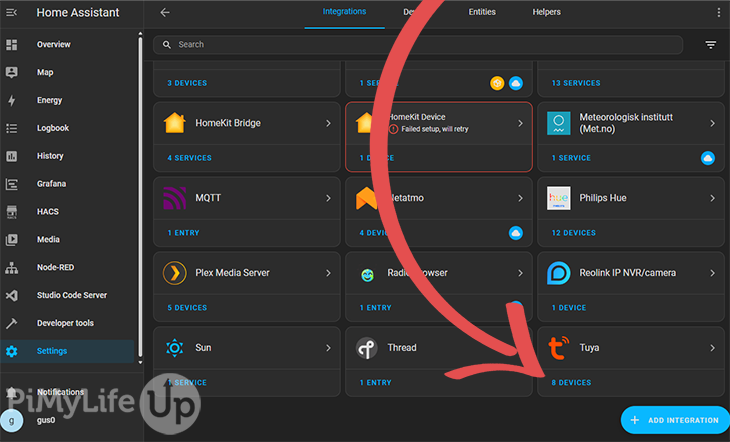
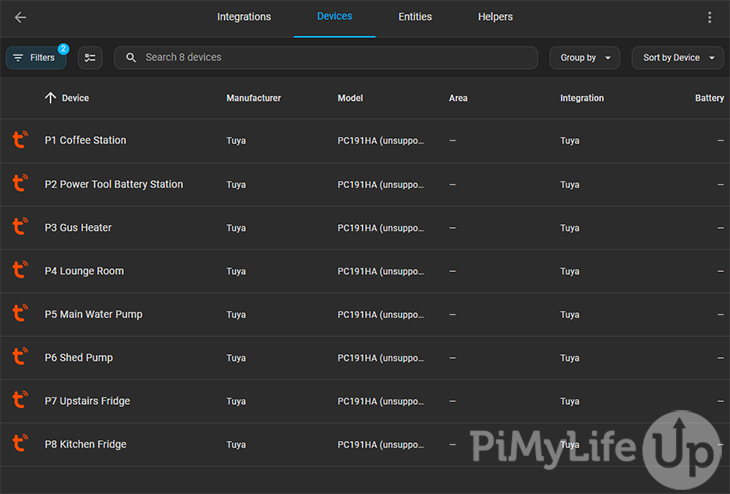
14. To see all your devices, scroll down to the Tuya integration on the integrations page and click the devices link.
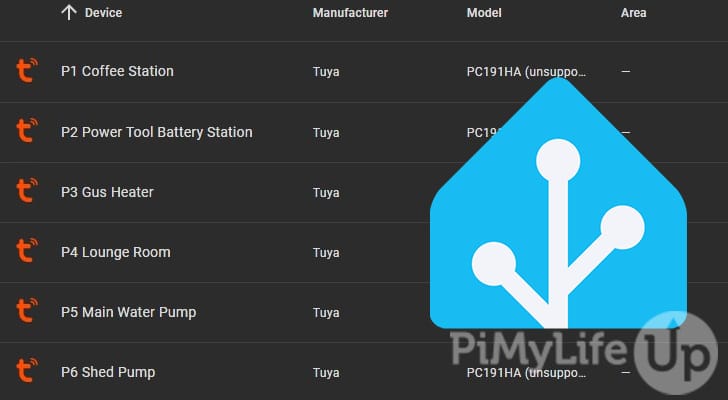
15. You should now see all the Tuya devices added to Home Assistant. Click on one to bring up more information on that device.
Enabling Sensor Data
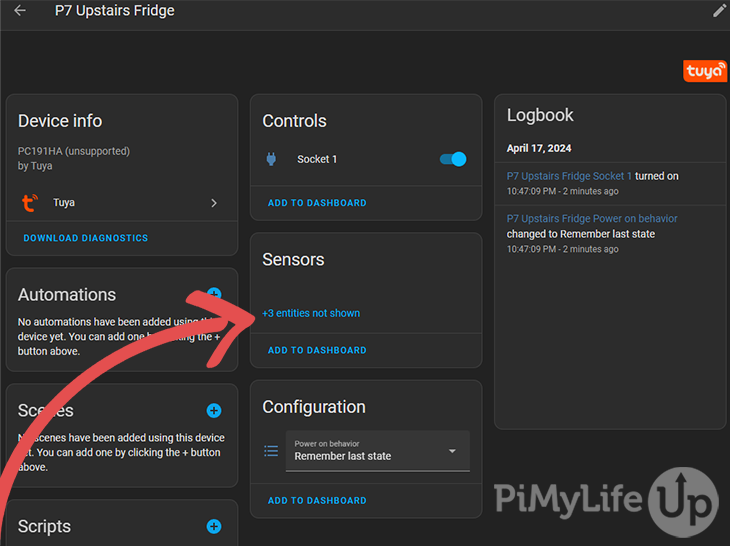
16. On this page you can see all the details about the Tuya device. However, you may notice some data is not being stored. To view these sensors, click on the entities not shown link.
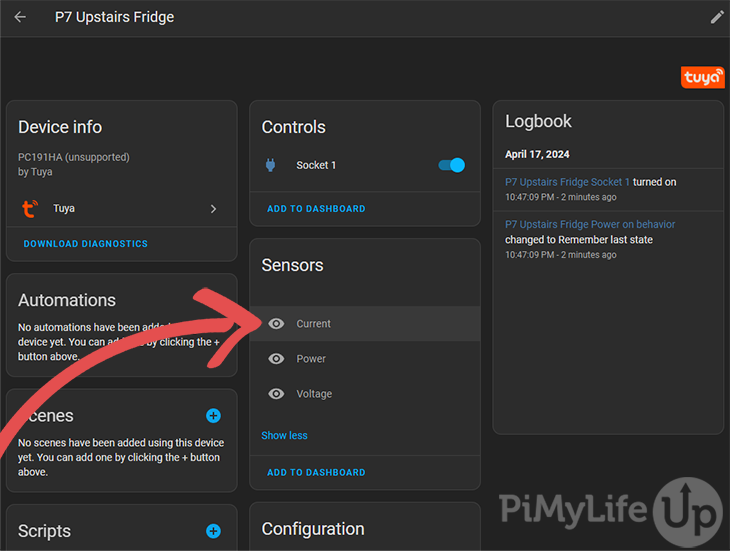
17. Click on one of the sensors to bring up more information. In this example, we will click on the current sensor.
18. Within the pop-up, click on the cog icon in the top right corner.
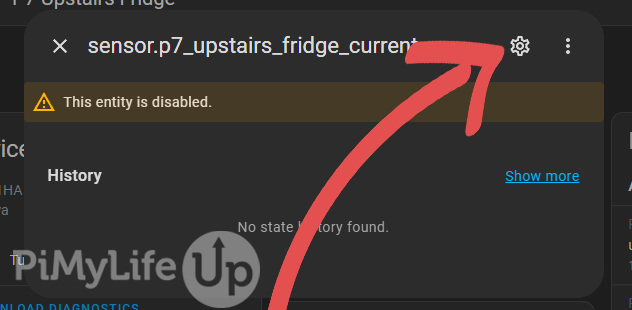
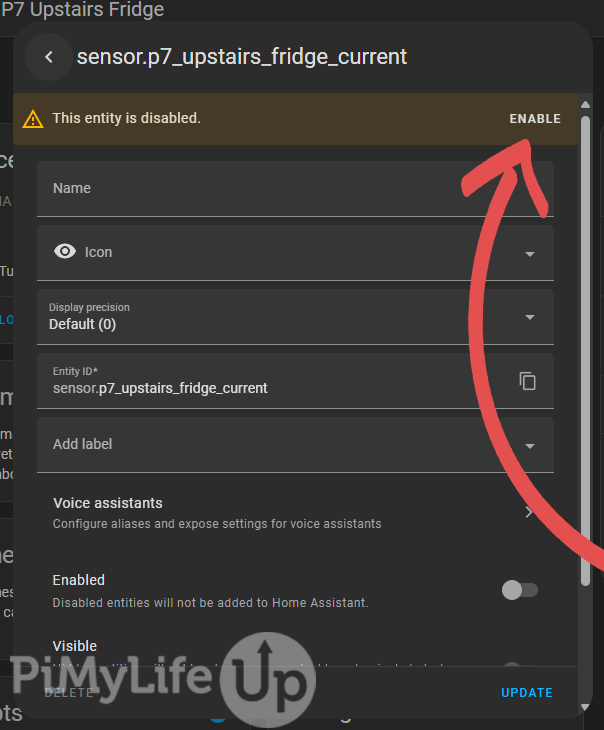
19. You should see a message at the top of the pop-up stating that the entity is disabled. Click on Enable to enable the sensor.
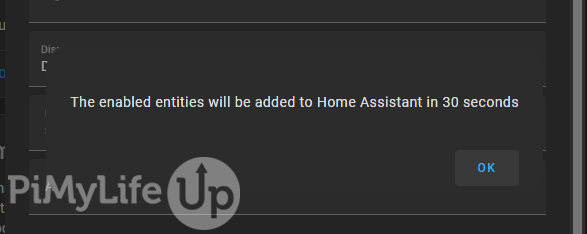
You should see a message like the one below appear. Click on OK.
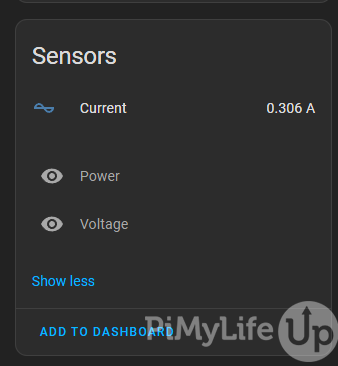
20. You should now start to see data appear in the user interface next to the sensor that has been enabled.
Conclusion
You should now have access to your Tuya devices within Home Assistant. I recommend adding the devices to a dashboard so you can monitor and control them. You can also use automations to control the devices.
If you want to build out your Home Assistant with more integrations and features, check out our other Home Assistant tutorials. We are constantly working on more, so I recommend checking back later.
Please let us know if you have any feedback, questions, or anything else.