In this tutorial, we will be showing you how to set up HomeKit on Home Assistant.
HomeKit is a software framework and communication protocol for smart home devices that want to integrate with Apple devices.
The design of HomeKit is to allow compatible devices to integrate with your Apple products easily. The problem with this protocol is that it can only be used by Apple devices and some smart devices only include HomeKit integration.
Luckily, as a user of Home Assistant, you can easily integrate any HomeKit-capable devices with your smart home server instead.
You can even integrate these paired devices with the Apple Home device if that is something you like to use by setting up the Home Assistant HomeKit bridge.
This tutorial will show you how to set up two different HomeKit integrations. While both are related to HomeKit, they achieve fundamentally different results.
- The HomeKit Device integration allows you to integrate any HomeKit-compatible smart device into your home server. It achieves this by using a secure local connection to the device.
- The HomeKit Bridge enables you to take any of your Home Assistant connected devices and control them through the Apple Home device.
Setting up the HomeKit Device Integration on Home Assistant
In this first section, we will be showing you how to set up the HomeKit Device integration in Home Assistant.
This integration allows your smart home server to add any HomeKit device without setting up a controller. It creates a local connection to the device, avoiding relying on any cloud services.
Please note that adding a HomeKit device to Home Assistant requires the device not to be paired with Apple Home. Additionally, it must already have access to your local home network. You may need to pair with the device, set up networking, and then unpair. This is a limitation of the way HomeKit works.
Navigating to the Devices and Services Page
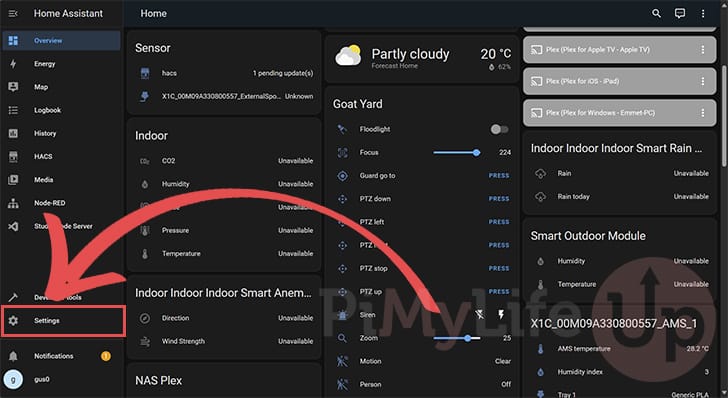
1. To add the HomeKit Device integration to Home Assistant, we must navigate to the “Devices & Services” page.
You can get to this by switching to the “Settings” screen using the sidebar.
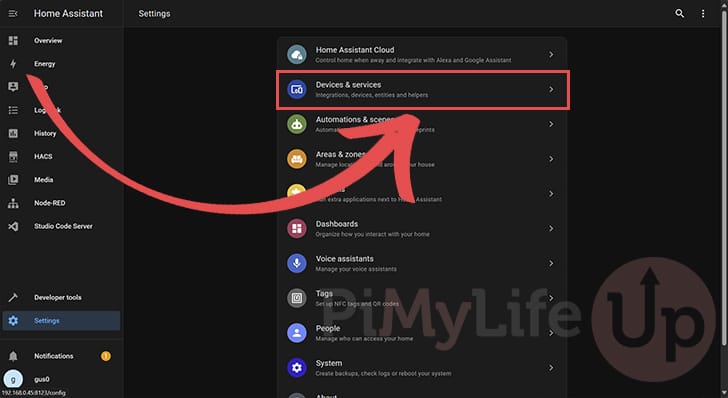
2. Once on the “Settings” page, click the “Devices & Services” option.
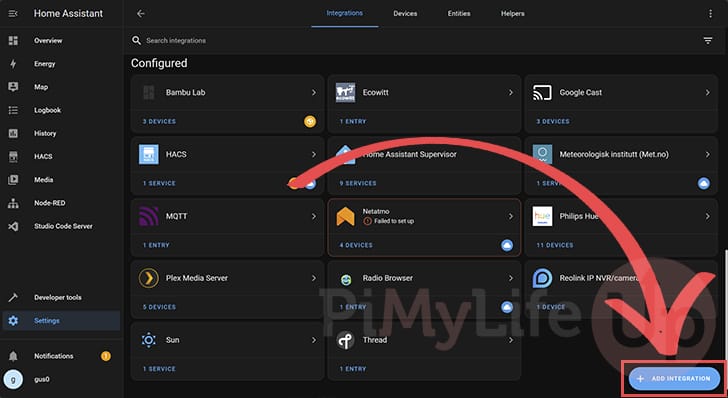
3. Now, you will want to click the “+ ADD INTEGRATION” button in the bottom-right corner of the screen.
This button will open a dialog allowing us to add the HomeKit device integration.
Adding the HomeKit Device Integration to Home Assistant
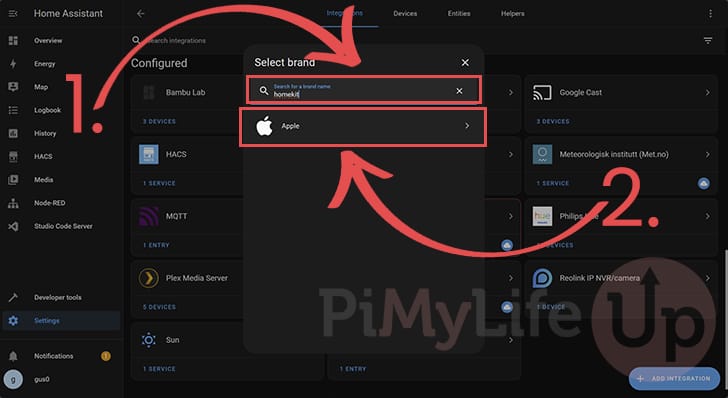
4. You will be asked to type in the brand for the integration you want to add.
In our case, “HomeKit” is an Apple protocol, so type “Apple” or “HomeKit” (1.) in the search bar.
Once you see “Apple” appear within the list. Click the Apple icon to option up some additional options. (2.).
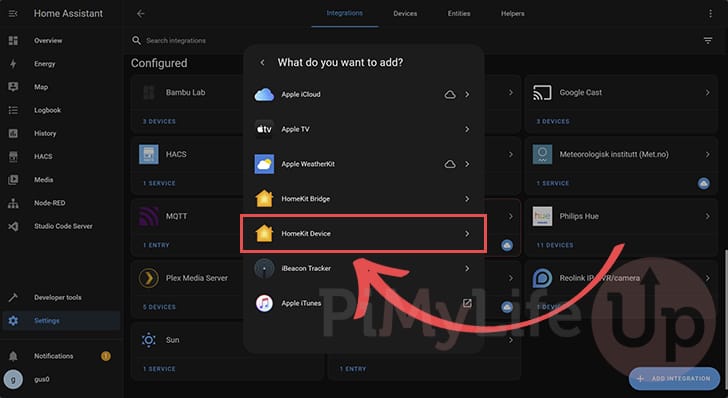
5. You will now see a list of different integrations you can add.
The integration we are after is the one labeled “HomeKit Device“. Click this option to continue.
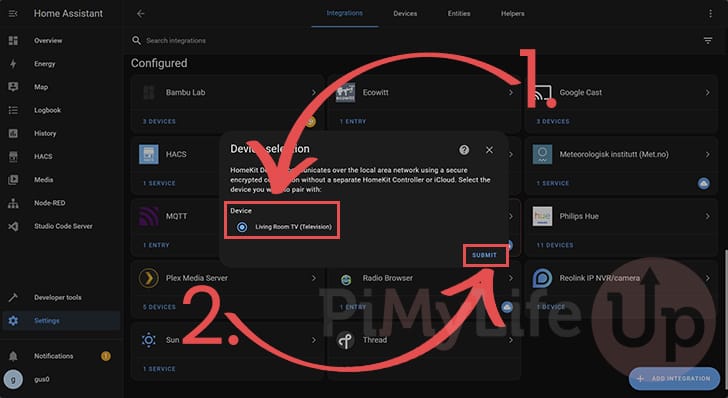
6. You will now be prompted to which HomeKit device you want added to Home Assistant.
We only have one device to connect, so it will be automatically selected (1.). Ensure that this device is powered on and you can access it to get the pairing code.
After selecting a device, click the “Submit” button (2.).
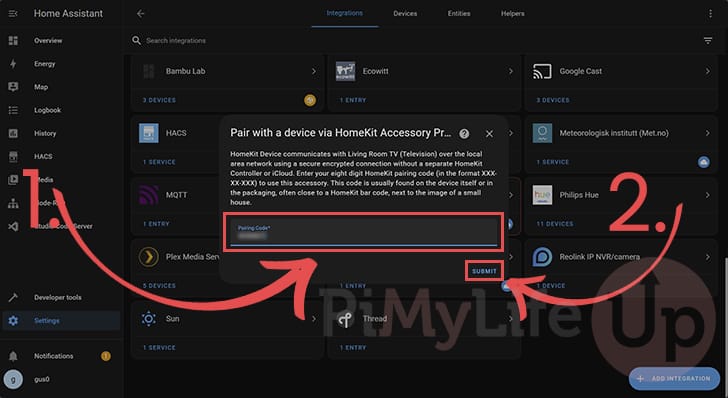
7. This next prompt tells you where to find the pairing code you need to pair your HomeKit device with your Home Assistant server.
In our case, the pairing code was displayed on our TV. This code should be eight digits long.
Once you have found the pairing code, type the code into the textbox (1.).
After typing in the pairing code, click the “SUBMIT” button (2.) to pair the device.
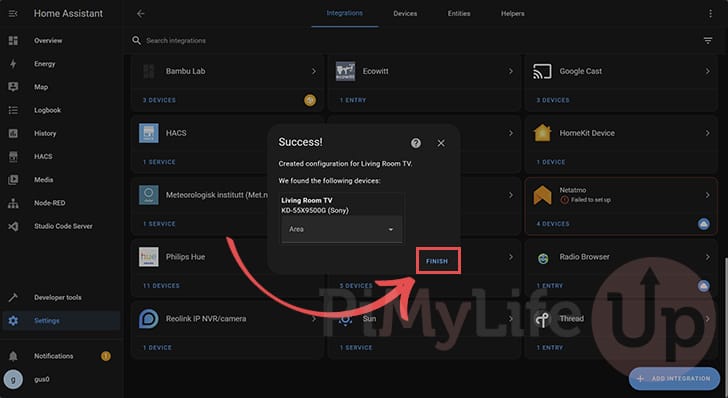
8. If everything has worked properly, you should see a success message like we have shown below.
You can close this message by clicking the “FINISH” button.
Finding your HomeKit Device in Home Assistant
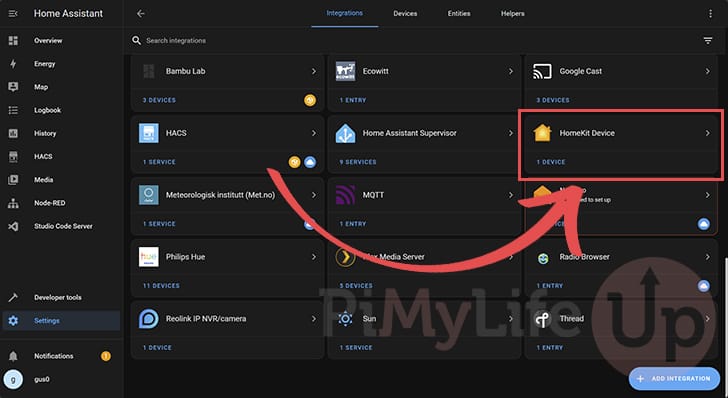
9. With the HomeKit device now added to your smart home server, you might want to know where to find its details quickly.
The easiest way to access the device is to click the “HomeKit Device” integrations under the “Configured” heading. If you only have one device paired to your server, you will be taken straight to the device screen.
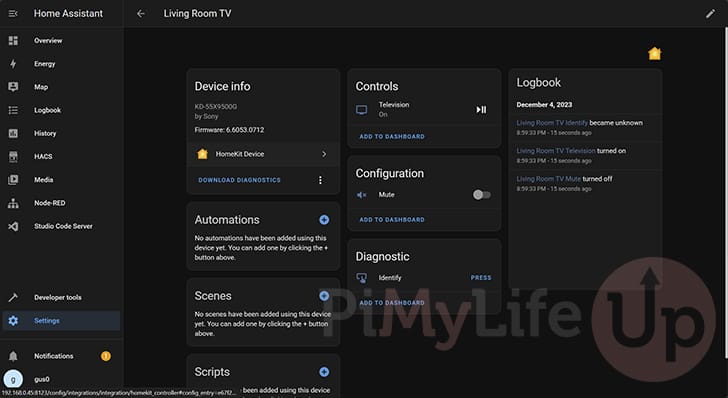
10. Below, you can see all of the controls we have for our television, thanks to the Home Assistant HomeKit integration.
We can now access this device through our dashboard or by using automation.
Setting up the HomeKit Bridge Integration on Home Assistant
This section will show you how to set up the HomeKit bridge integration within Home Assistant.
This integration works the opposite of the device integration. Instead of adding HomeKit devices to your smart home server, it will allow you to add other non-HomeKit devices to Apple Home.
Adding a New Integration
1. To set up the HomeKit bridge integration within Home Assistant, you must first navigate to the settings page.
The easiest way to get to settings is to click the “Settings” option in the sidebar.
2. After changing to the Settings menu, find and click the “Devices & Services” option.
Typically, this option is near the top of the menu.
3. Next, click the “+ ADD INTEGRATION” button in the bottom-right corner.
Setting up the Home Assistant HomeKit Bridge Integration
4. With the “Add Integration” screen now open, type “homekit” into the search box (1.).
You should see “Apple” appear within the list (2.) of available brands. Click the icon to continue.
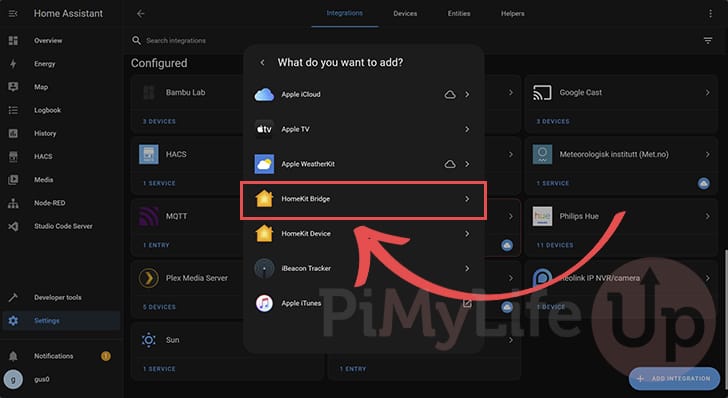
5. You will now see a list of the Apple integrations that Home Assistant supports.
Select the option labeled “HomeKit Bridge” within this list.
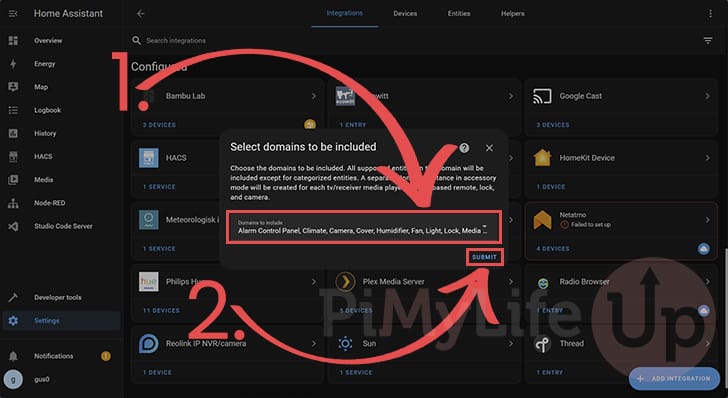
6. This new integration asks what domains should be included as HomeKit devices.
You can control what devices will be bridged from Home Assistant using the select box (1.).
After you are happy with your selection, click the “SUBMIT” button to complete the setup process (2.).
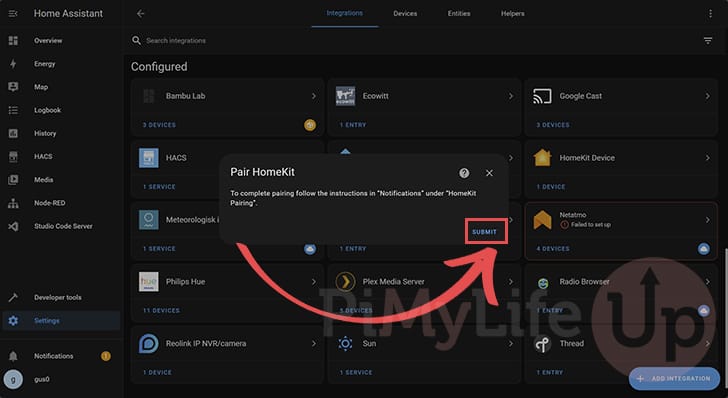
7. You will now see a message telling you to go to the Notifications menu to pair your Home Assistant devices to HomeKit.
For now, click the “SUBMIT” button to acknowledge that you read this message.
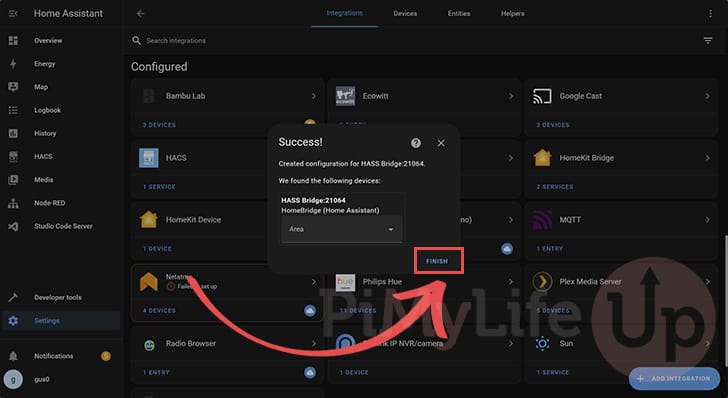
8. The following message is that the bridge has been successfully configured.
To proceed and finalize the setup of this integration, click the “FINISH” button.
Finding the Pairing Codes
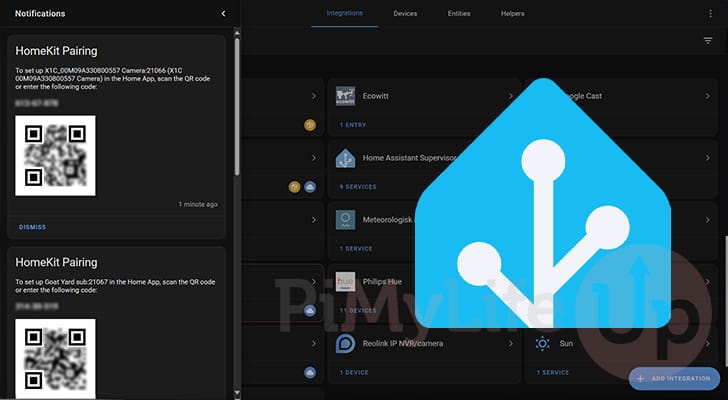
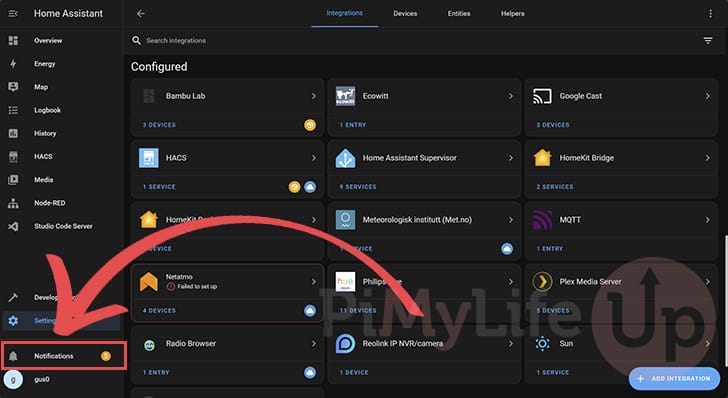
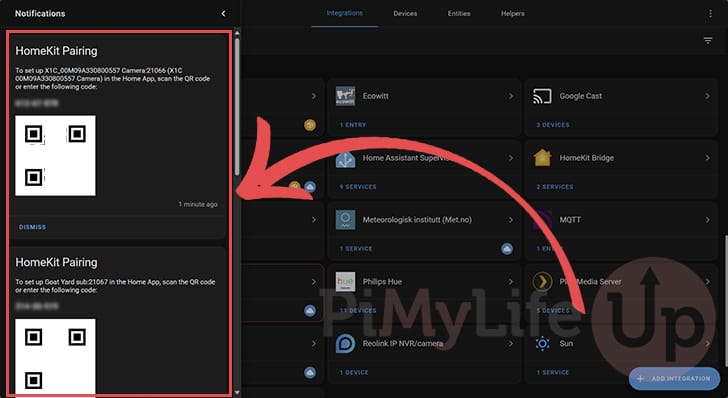
9. Now to pair your Home Assistant devices with Apple HomeKit you will need to open the notifications screen.
You can do this by simply clicking “Notifications” in your sidebar.
10. Within the notifications list, you will find a pairing code for each of your compatible Home Assistant Devices.
Scan the QR Code or enter the generated code to pair these devices with Apple Home.
Conclusion
Hopefully, you will have the HomeKit integrations installed and set up on your Home Assistant server.
The bridge allows you to expand your available HomeKit devices easily. Integrating any HomeKit device expands the data you can show within your dashboards and enables you to use them in automation.
Please feel free to comment below if you have any issues using HomeKit with your smart home server.
If you found this tutorial to be helpful, we recommend checking out our many other Home Assistant tutorials.