In this tutorial, I go through the steps of setting up an Ecowitt weather station in Home Assistant.
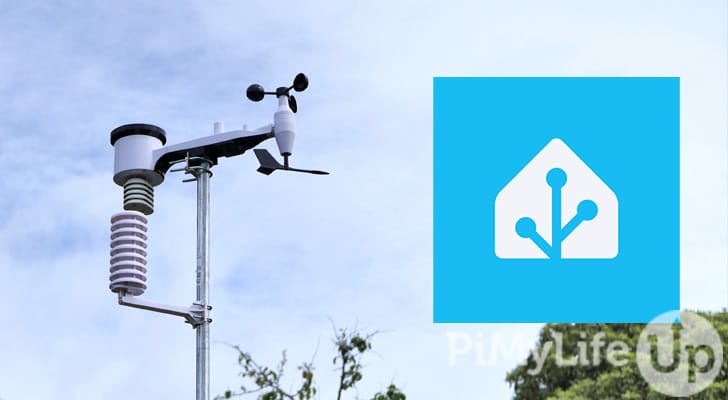
Ecowitt is a popular brand of weather stations and other climate monitoring devices. They sell products such as rainfall sensors, temperature and humidity sensors, water leak sensors, and much more. You can integrate most of these products into Home Assistant.
Adding your weather station to Home Assistant allows you to build a custom dashboard displaying various pieces of information. You can also build automations based on the values from the sensors. For example, if it starts to rain, you can have Home Assistant send an alert to your phone.
This tutorial will help you install the Ecowitt integration and connect your Ecowitt weather station to the integration.
You must ensure you have Home Assistant setup on a computer such as a Raspberry Pi. Also, ensure your weather station is set up correctly and processing data. We are using a Ecowitt HP2441 weather station (Amazon) for this tutorial, but feel free to use a different version.
Installing the Ecowitt Integration
The steps to installing the Ecowitt integration are very straightforward and will only take a couple of minutes.
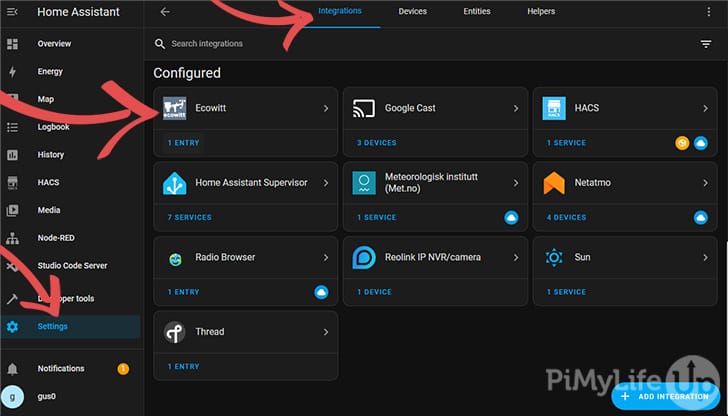
1. In your Home Assistant interface, go to “Settings” and click on “Devices and Services“.
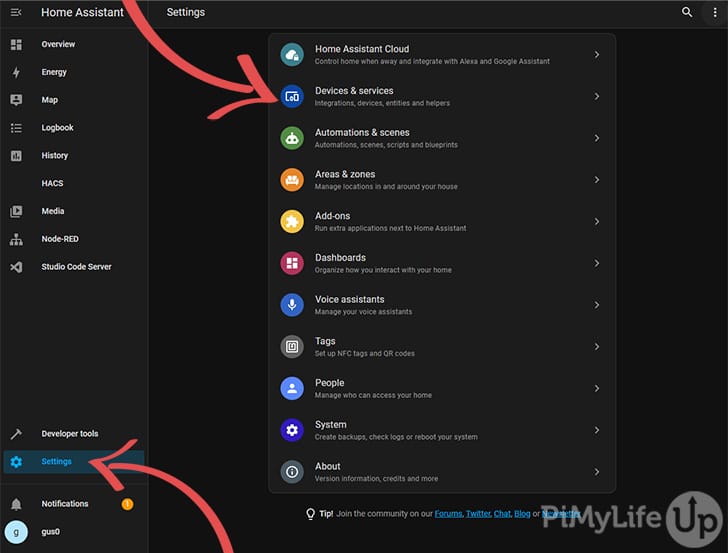
2. On this page, click on “Add Integration“.
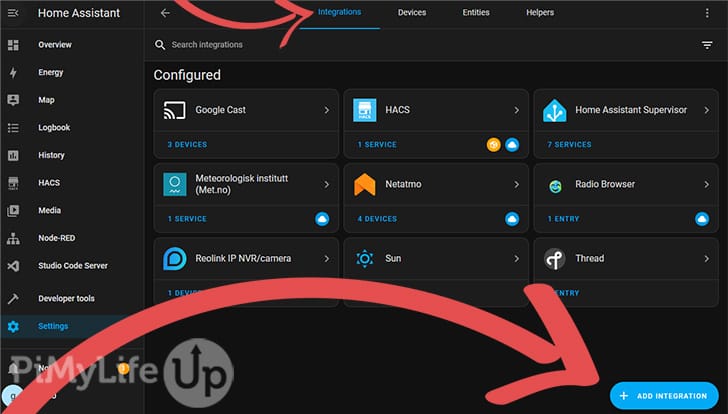
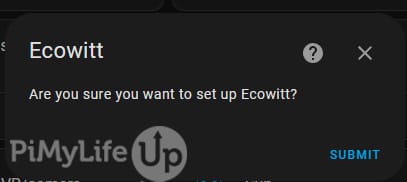
In the pop-up dialog box, search for the “Ecowitt” integration or scroll down to find it. Once you find it, click on it.

Click on submit to install the Ecowitt integration.
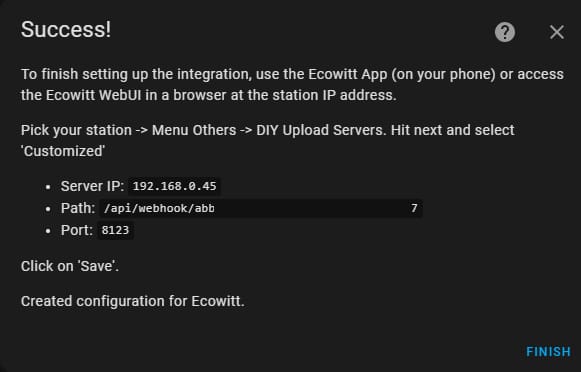
3. You should now see the details you need to enter into your Ecowitt weather station. The following section will take you through the few basic steps to achieving this task.
Connecting the Ecowitt Weather Station to Home Assistant
These next steps require you to use the Ecowitt application on your phone or be able to navigate to the weather station in the browser using its IP address.
Web Browser
To do the web browser steps, you will need to know the IP address of your weather station. Typically, you can find this by going to your router and looking for the device and its allocated IP address.
1. Navigate to the weather station on your favorite web browser by entering the IP into the address bar. For example, my weather station is at 192.168.0.248.
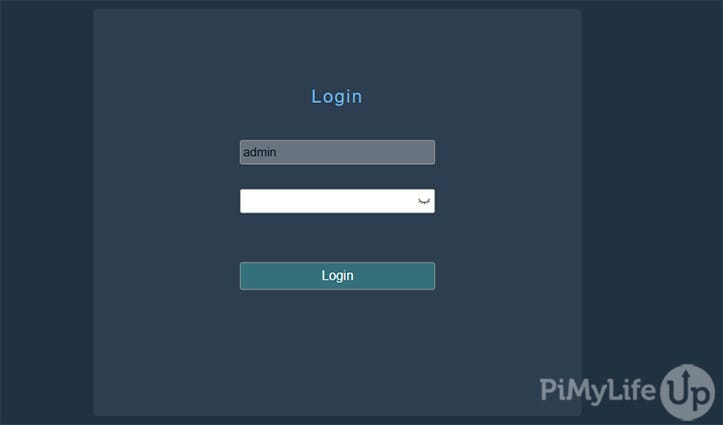
You will see a login screen. Unless you have set a password, you can click on “Login“.
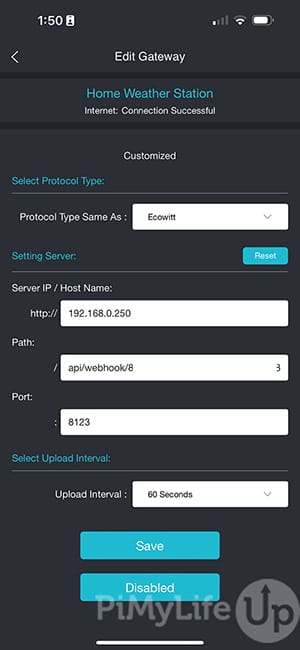
2. On the next screen, scroll until you find the Customized section. Change the “Customized” option to “Enable” and the “Protocol Type Same As” to “Ecowitt“.
Enter all the details from Home Assistant and set the “Upload Interval” to 60 seconds. Afterward, click on “Save“.
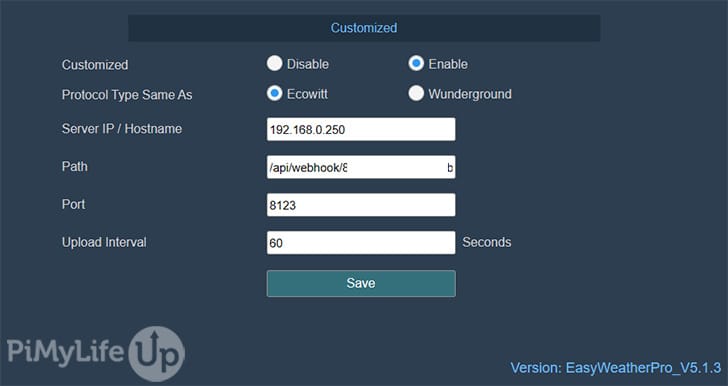
Note: We’re using a different IP in this screenshot as we have a production Home Assistant server at 192.168.0.250 rather than the 192.168.0.45 seen in an earlier screenshot.
Ecowitt Phone App
This step requires you to have your weather station connected to the Ecowitt app on your phone. You can get the Ecowitt app on both iOS and Android.
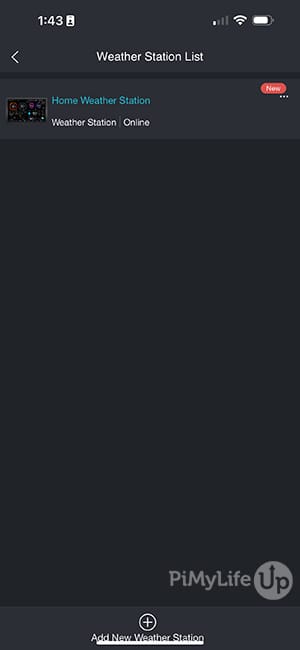
1. Open the Ecowitt application and select the weather station you wish to connect to Home Assistant.
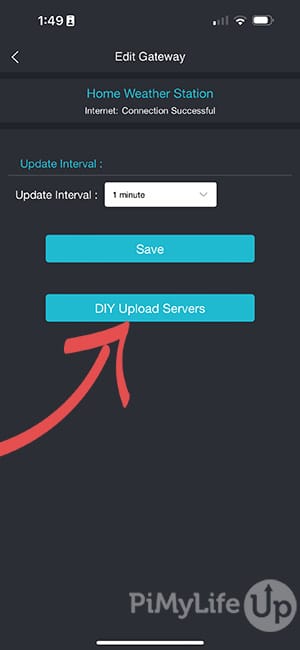
2. On the dashboard page, tap the three dots in the top left corner and select “Others“.
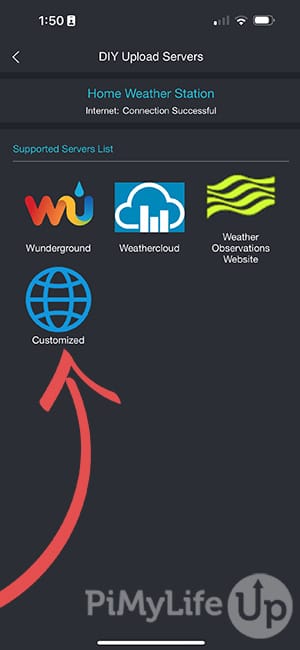
3. On the next screen, select “DIY Upload Servers“.
Next, select “Customized“.
4. On this final page, enter all the details that Home Assistant provided. These details include the server IP, path, and the Port. I left the protocol as Ecowitt and set the upload interval to 60 seconds.
Viewing the Data within Home Assistant
Now that you have connected the weather station to Home Assistant, you should start to see data flow. To view the data, follow the next few steps.
1. In your Home Assistant interface, go to “Settings” and click on “Devices and Services“. On this page, click on the Ecowitt integration.
If it says, “No Devices or Entries“, you may need to reload the integration by clicking on it, clicking the three dots, and then clicking “Reload“.

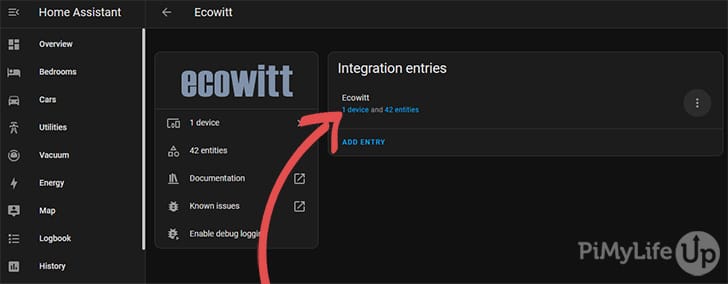
Once “1 device” is showing under the Ecowitt entry, click on it.
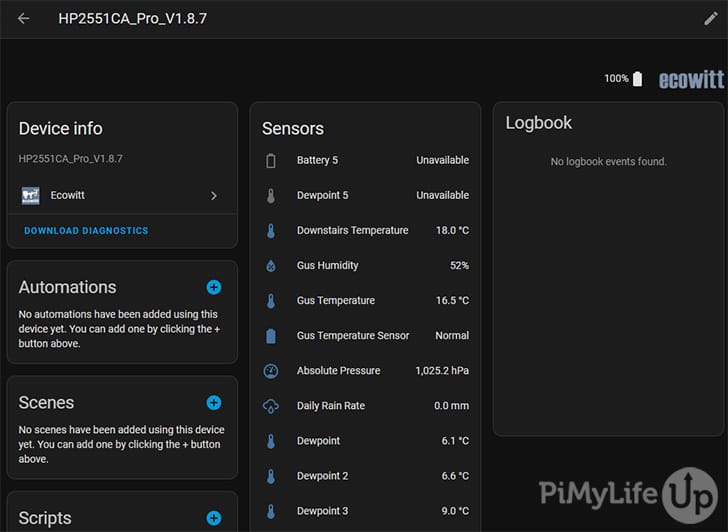
3. You should now see all the weather station’s sensors. It should include data such as temperature, humidity, pressure, dewpoint, rainfall, and more.
4. You can now set up a dashboard that displays all this data. If you need to use the data to trigger automations, use the inbuilt automations tool or Node-RED.
In the example below, we use a mini graph card, a rain gauge card, and a wind compass card. These are custom frontend modules that will need to be installed using HACS.

Conclusion
You should now have your Ecowitt weather station integrated into Home Assistant. The process is easy, and you should not run into any issues. If you encounter an unexpected issue, please let us know, and we will do our best to investigate the issue.
We have plenty more tutorials that cover installing and configuring Home Assistant. I highly recommend taking a look at the tutorials if you are investing time and energy into making a smart home.
Please let us know if you have feedback regarding this tutorial. We may not respond, but we are always reading the comments.


Hello,
I can’t handle this. I do everything as in the guides and it still doesn’t work. One thing I noticed is that the data that HA provides for logging in is significantly different from what I see in the guides:
Server IP / Host Name: [REMOVED].ui.nabu.casa
Path: /api/webhook/[REMOVED]
Port: 443
Hi Marcin,
It looks like you have set up Nabu casa for your home assistant setup? This could potentially be what it causing the issue with your Ecowitt device failing to talk with Home Assistant.
My suggestion would be to use the IP of your Home Assistant instance and the port 8123 and see if that helps out at all. You should be able to keep the path as to what is shown to you.
Kind regards,
Emmet
Thank you very much. Your procedure works perfectly, although I had to wait a bit until the device showed up and I could see the sensors.
Hi, thanks for the tutorial. Do I need Ecowitt gateway or it can work directly with HA?
Hi Artur,
The Ecowitt integration expects you to be using an Ecowitt gateway as you utilize the “DIY Upload Server” functionality that the gateway gives you access to.
Kind regards,
Emmet
Hi. You didn’t mention if you had to install from HACS first. Is this not necessary on the raspi install of HA?
I’m having an issue when trying to install the integration on a docker install of HA and am wondering if you had any issues with installing the integration.
Cheers,
John
Hi John,
Sorry to hear that you are having issues. The Ecowitt integration is part of the Home Assistant core so you shouldn’t need to install any additional software to get it to work, it should all just work out of the box.
Is there any particular error you are running into in the adding process? Also might be good to know what Ecowitt device you are trying to add.
Kind regards,
Emmet
Hi, sorry but why are you putting a different address (192.168.0.250) in the weather station settings than the integration offers (192.168.0.45)?
Thanx
Fitor
The
.250is our production Home Assistant setup, and the.45is for development. Ideally, I should have altered these for the tutorial, but Ecowitt was already configured and communicating with our production server.Hello,
I tryed the procedure with the last version of Home Assistant (2023.11.3) but there is no way to see the data.
I also tried the procedure with an older installation of HA (2023.6.9), just with some difference in the values to be inserted for path and port in the customized settings of the weather station and it was perfectly working… but when I updated this HA to the latest version no more data from the weather station….
With which release of HA did you try?
Thanks,
Hi Massimilano,
Sorry to see that you are running into issues, it is super strange that the ecowitt extension isn’t working for you.
We are running Home Assistant 2023.11.3 and ecowitt is detecting our devices and pulling in the relevant data. However, I can see on the Home Assistant Github you aren’t the only one running into problems.
One thing I can suggest in the meantime is ensuring the webhook path is correct on your Ecowitt hub and that the path starts with a slash so it should look a bit like “/api/webhook/xxxxxxxxxxxxxxxxxxxxx”.
Kind regards,
Emmet