In this tutorial, we will show you how to use the gpasswd command on a Linux operating system.
The gpasswd command allows you to edit a group’s password, members, and administrators. It is used to edit both the /etc/group and /etc/gshadow files. If you use the command without any options, it will prompt for a new password for the group.
Since a group password is often shared amongst multiple people, they are not considered very secure. However, they are a useful tool if elevated security is required.
If you want a password manager to generate and keep your passwords secure, we highly recommend checking out NordPass. (Affiliate Link)
This tutorial will touch on a variety of topics for the gpasswd command. For example, we cover the commands syntax, options, and several ways you can use the command. If you want something else covered, please let us know in the comments section at the bottom of this page.
gpasswd Command Syntax
The syntax for the gpasswd command is simple as it only accepts two parameters, with group being the only one required. However, there are a few options that you can use to alter the functionality of the command, and we will touch on them further down the page.
gpasswd [OPTIONS] groupCopy- [OPTIONS] is where you specify the options you want to set for the command.
- group is the group name of the group you wish to modify.
gpasswd Command Options
There are a few options that you can use with this command, each having a different effect on the command’s functionality.
You should note that only options -A and -M can be combined.
-aor--adduserwill add the specified user to the group.-dor--deleteuserremoves the specified user from the group.-ror--remove-passwordremoves the password from the group. However, only group members will be able to join the group.-Ror--restrictwill restrict access to the group by setting the password to “!“. Users will need a password to join the group.-Aor--administratorsusers,allows you to set the list of administrative users.-Mor--membersusers,allows you to set the list of group members-Qor--rootCHROOT_DIRmakes changes in theCHROOT_DIRdirectory and uses configuration files from within the same directory.-hor--helpwill print brief help information to the terminal.
Using the gpasswd Command
In this section, we go through some of the different methods for using the gpasswd command to alter groups. This command is powerful as it can change a variety of different settings.
You must use an account with superuser privileges (sudo) or the root account. If you do not use either of these, you will likely face permission errors such as gpasswd: Permission denied.
Set Password for a Group
The most basic usage of the command is setting a password for a group. If a group has a password, a user must specify the password when using the newgrp command unless they are the root user or a group member.
To set a password for a group, enter gpasswd followed by the group name.
sudo gpasswd testGroupCopyIt will prompt you to enter the password and then enter the password again. Once done, you have successfully set a password for the group.
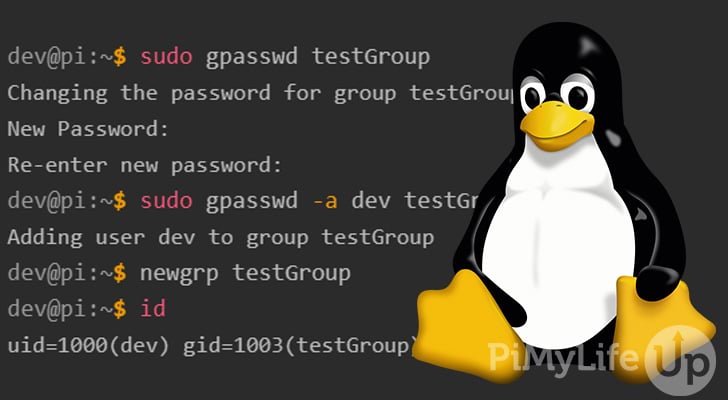
dev@pimylifeup:~$ sudo gpasswd testGroup
Changing the password for group testGroup
New Password:
Re-enter new password:Copy
If I try to use newgrp with testGroup, I will need to enter a password as I am not the root user and do not belong to the group.
dev@pimylifeup:~$ newgrp testGroup
Password:Copy
Adding a User to a Group
Adding a user to a group is very easy and requires using the -a or --add option. In addition, you can add multiple users by using a comma-separated list. For example, dev,pi,usr.
To add a user, enter the following command into the terminal where dev is our user and testGroup is our group.
sudo gpasswd -a dev testGroupCopyThe command above should output something similar to the example below.
dev@pimylifeup:~$ sudo gpasswd -a dev testGroup
Adding user dev to group testGroupCopy
You can now use the newgrp command with testGroup without requiring a password, as we are now a group member. Use the id command to see the current primary group.
dev@pimylifeup:~$ newgrp testGroup
dev@pimylifeup:~$ id
uid=1000(dev) gid=1003(testGroup),1000(dev)Copy
Removing a User from a Group
To remove a user from a group, you can use the -d or --delete option followed by the user you wish to remove.
The example below demonstrates removing our dev user from the testGroup group.
sudo gpasswd -d dev testGroupCopyYou should see text similar to the example below printed on your terminal.
dev@pimylifeup:~$ sudo gpasswd -d dev testGroup
Removing user dev from group testGroupCopy
For changes to take effect, you may need to log out and log in again. You may need to use the logout command or the pkill command to log out another user.
Once successfully removed from the group, you will be prompted to enter a password if there is one set.
More Help
There are a couple of different methods that you can do to get more help regarding the gpasswd command. I will go through the easiest methods below.
The manual command is a great way to get in-depth help for most Linux commands. Enter the following command to bring up the manual information for the gpasswd command.
man gpasswdCopyThe other method is to use the -h or --help option. This option will print a small amount of helpful information to the terminal.
gpasswd --helpCopyHopefully, either of these methods will provide you with enough information to sort out your issue.
Conclusion
I hope that you now have a good understanding of how you can use the gpasswd command on a Linux operating system such as Ubuntu. We have touched on the syntax, options, and how you can use the command to make changes to a group.
If you want to learn more about the Linux operating system, I recommend you check out some of our other tutorials. For example, the usermod command is useful for editing the settings of existing users. Other Linux commands can help manage files, permissions, and much more.
Please let us know if you notice a mistake or if an important topic is missing from this guide.