In this tutorial, we will be showing you how to install and run qBittorrent NOX using a Docker container.
qBittorrent is one of the best torrent clients known for being lightweight and feature-packed.
Thanks to qBittorrent NOX having its own web interface, it is a great torrent client for running within a Docker container.
An advantage to running this torrent client using Docker is that it is super easy to use the latest version. You can upgrade with a couple of commands rather than relying on your package repository to provide the new release.
We will use the official qBitttorrent NOX docker container, so you will always get the latest versions. Additionally, it has builds for x86, AMD64 and even ARM-based operating systems, meaning it should run on almost any device.
If you want to expand this even further, you can set up Gluetun to run this container through a VPN of your choice.
Installing qBittorrent as a Docker Container
Over the following sections, we will walk you through the entire process of installing qBittorrent to your system using a Docker container.
To run and manage qBittorrent, we will be utilizing a Docker Compose file. These files make managing services a breeze.
Below you can find a video embedded that will walk you through each of the steps of running qBittorrent using Docker. If you prefer a step by step written guide, be sure to continue on to the next section.
Installing Docker for qBittorrent
1. Before we can run qBittorrent using Docker on your device, you will need to install Docker.
If you have Docker installed already, you can skip to the next section. Otherwise, follow our Docker installation guide.
https://pimylifeup.com/linux-docker-install/Setting up Folders for qBittorrent
4. Our next step is to create a folder to store the Docker Compose file for our qBittorrent container. It is also the directory where we will get the container to store its configuration files.
You can create a folder at “/opt/stacks/qbittorrent” by running the mkdir command in the terminal.
sudo mkdir -p /opt/stacks/qbittorrentCopyBy using the “-p” option, the mkdir command will create all the directories within the given path.
5. The following steps will expect you to be in the directory we just created, so change into it by using the cd command.
cd /opt/stacks/qbittorrentCopyWriting a Docker Compose file for qBittorrent
6. We can now begin to write the Docker Compose file for qBittorrent. This Compose file is like instructions for how Docker should install and run qBittorrent.
To begin writing this file, use the following command within the terminal. We are using the nano text editor as it is one of the easiest editors to utilize.
sudo nano compose.yamlCopy7. In this file, you will want to type out the following lines. These lines configure the port that qBittorrent operates on, the timezone it should use, and more.
<ACCEPTEULA>: qBittorrent requires you to agree to their EULA before you can use their client.
If you accept these terms, replace this text with the word “accept“.<TIMEZONE>: The next thing you want to do is specify the time zone for qBittorrent to use when running within the container.
You can find a valid value for this line by looking at Wikipedia’s list of tz database time zones. An example of a valid value here is “Australia/Hobart“.<DOWNLOADPATH>: Replace this value with the full path to where you want files downloaded to on your device.
For example, if we wanted to store the files in our user’s home directory, we might use something like “/home/pimyubu/downloads“.
services:
  qbittorrent-nox:
    container_name: qbittorrent-nox
    restart: unless-stopped
    environment:
      #- PGID=1000
      #- PUID=1000
      - QBT_EULA=<ACCEPTEULA>
      - QBT_VERSION=latest
      - QBT_WEBUI_PORT=8080
      - TZ=<TIMEZONE>
    image: qbittorrentofficial/qbittorrent-nox:latest
    ports:
      - 6881:6881/tcp
      - 6881:6881/udp
      - 8080:8080/tcp
    read_only: true
    stop_grace_period: 30m
    tmpfs:
      - /tmp
    tty: true
    volumes:
      - ./config:/config
      - <PATHTOSTOREDOWNLOADS>:/downloadsCopy
8. After typing out the lines above, you can save and quit by pressing CTRL + X, followed by Y, and then the ENTER key.
Starting your qBittorrent Container for the First Time
9. With the Compose file now written we can start the qBittorrent container using the following command in the terminal.
We don’t use the “-d” option here as we do not want Docker to detach from the terminal. This is because we need a password that qBittorrent generates at start-up.
docker compose upCopy10. After starting the qBittorrent container, you should see the following text appear within the terminal.
You should note the temporary password, as you will need this to access the web interface for the first time.
qbittorrent-nox  | WebUI will be started shortly after internal preparations. Please wait...
qbittorrent-nox  |
qbittorrent-nox  | ******** Information ********
qbittorrent-nox  | To control qBittorrent, access the WebUI at: http://localhost:8080
qbittorrent-nox  |
qbittorrent-nox  | The WebUI administrator username is: admin
qbittorrent-nox  | The WebUI administrator password was not set. A temporary password is provided for this session: MetBJdDbj

qbittorrent-nox  | You should set your own password in program preferences.
Accessing the qBittorrent Web Interface
11. To access the qBittorrent web interface, you must know the IP address of the machine Docker is running on.
If you are unsure of your IP, you can get it using the hostname command as shown below.
hostname -ICopy12. Once you know your IP address, go to the following web address in your favourite web browser.
Ensure you replace “<IPADDRESS>” with your IP.
http://<IPADDRESS>:8080Setting the Admin Password for your qBittorrent Docker Container
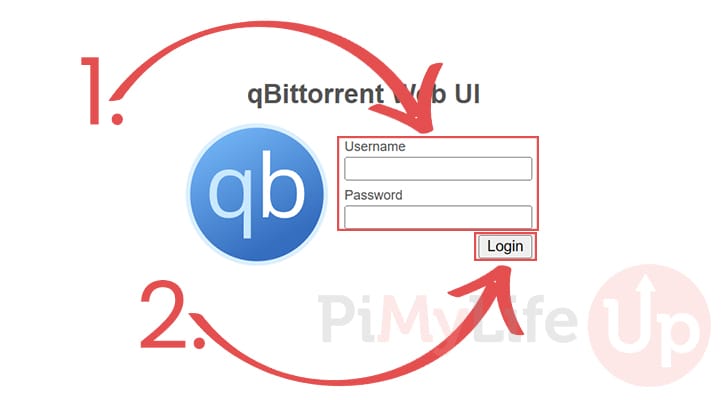
13. With the qBittorrent web interface open in your web browser, you must type in your username and password (1.).
By default, the username will be “admin“, and the password will be the one generated and shown within the terminal earlier.
After typing out your username and password, click the “Login” button (2.).
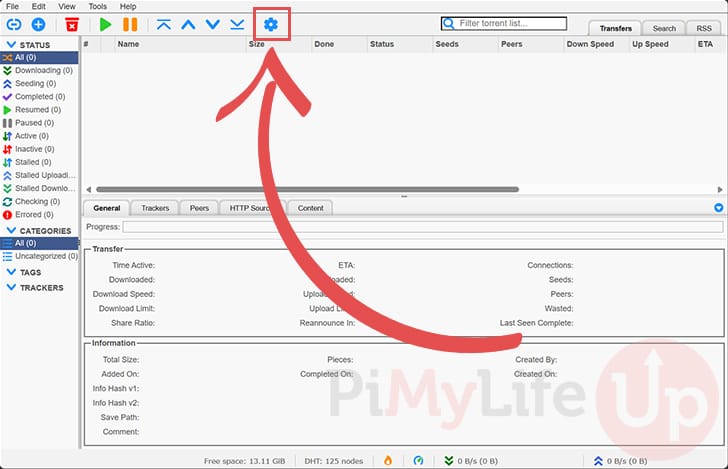
14. After logging into qBittorrent, you must set a password; otherwise, your Docker container will generate a new password every time it starts.
To begin setting the password, click the cog icon in the taskbar.
15. With the settings page open, you will want to swap to the “Web UI” tab.
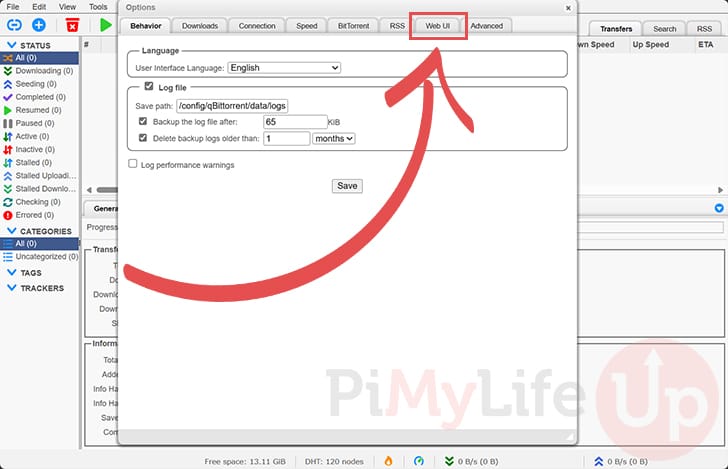
16. Once in the “Web UI” tab, scroll down until you see the “Authentication” header and type in a password you want to use to log in to the qBittorrent web interface.
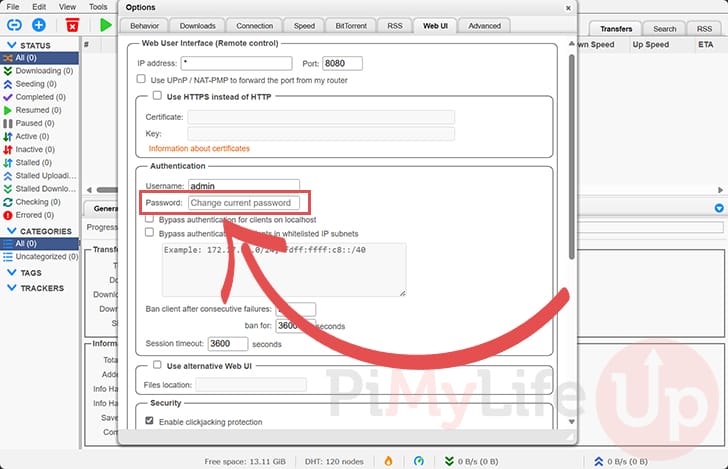
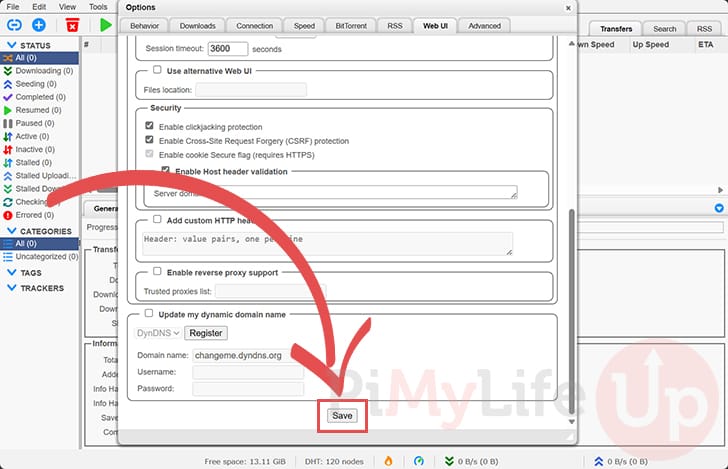
17. After typing out a new password, scroll down until you see the “Save” button and click it.
This will save your new password to your qBittorrent Docker containers “config” volume.
Starting qBittorent in the Background
18. With a password set for your admin account, you can stop the container from running within your terminal.
To stop the container, press CTRL + C with the terminal open.
19. We can now start up the qBittorrent Docker again, but this time using the “-d” option.
This option detaches the container from the terminal once it starts up.
docker compose up -dCopyUpdating the qBittorrent Docker Container
One advantage of running qBittorrent through a Docker container is that updating the software is as simple as running a few commands.
By the end of the following steps, you will be running the latest version.
1. To update our qBittorrent Docker container, we must change to the directory where we wrote the Compose file.
You can change this directory by using the following command within the terminal.
cd /opt/stacks/qbittorrentCopy2. Once we are in the correct directory, we can tell Docker to pull the latest version of the qBittorrent container.
docker compose pullCopy3. Even though we pulled a new version of the container, Docker will only begin to use it if we tell it to start again.
When starting the Compose stack, Docker will detect a new version of the qBittorrent container and move over to it.
docker compose up -dCopyConclusion
Hopefully, at this point in the tutorial, you will now have qBittorrent running on your device using a Docker container.
Keeping the software in a container makes it significantly easier to update while keeping it somewhat separated from the rest of your system.
Please drop a comment below if you have encountered any issues with getting this torrent client running in a Docker container.
If you found this tutorial helpful, we highly recommend you check out our many other tutorials.


Great tutorial, as always. pimylifeup is always my first stop for RPI tutorials.
One question, when using the search tab, the following error appears in the qbittorrent-nox log file,
Failed to load torrent. Reason: “expected value (list, dict, int or string) in bencoded string”
No matter what on searches for. Any thoughts on this?
Thank you very much.
Hi Dan,
Unfortunately I’ve never ran into that error myself during my usage of qBittorrent. The error would indicate that something is returning invalid data. You could also try turning off some of the search addons to see if its a particular one breaking the functionality.
Kind regards,
Emmet
You are quite right! Since posting this message I noticed that some search addons to not give this error. I’ll test them individually to find the culprit.
Thanks so much for getting back and for what must be hundreds of hours you’ve put into this site.
Dan
Excellent guide, had no issues making the necessary yaml changes and launching this. I did have two follow on questions. First, I am trying to consolidate all my containers into one master folder, any issues with doing that instead of following your directory scheme? Second, all of my other dockers, NGinx, immich, Home Assistant, and Flame autostart after a reboot, Qbittorrent does not. Is there a fix for this?
Hi Rick,
On the first question, you should be fine storing your docker compose files in a different directory to what we use. The only thing is its typically easier to have Compose files set up in a directory for what its for, so like qbitorrent compose file in a directory called “qbittorrent” if that makes sense.
ON the second question, there problem here is that we weren’t specifying the “
restart” rule within the qBittorrent Compose file. I have adjusted the tutorial so that we add the “restart: unless-stopped” option. This should ensure Docker will automatically restart your container whenever it goes offline.Please let me know if that answers your questions.
Kind regards,
Emmet
Qbit remains firewalled whatever I do and I can see that is the same in the images above. How can the firewall be changed in docker.
Hi Marcus,
The qBittorrent container we are using doesn’t have a firewall, and Docker typically allows opened ports through your firewall automatically by inserting iptables rules.
What exactly is the issue that you are having?
Kind regards,
Emmet
Nice guide as always.
I found an error in , it should be ‘accept’ and not ‘agree’.
Also if you want to bind qbittorrent to a VPN add ‘network_mode: host’ at the end of the compose file.
Hi gerado,
Thank you very much for letting me know about that typo. I have corrected the guide so it now says to type in “accept”.
Also thank you for the tips about setting the network mode to host.
Kind regards,
Emmet