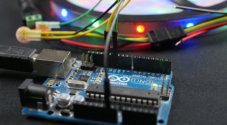
In this Arduino accelerometer tutorial, we will be going through the steps on how to set up a circuit for the cheap and affordable ADXL345 accelerometer.

In this tutorial, you will learn how to connect the ADXL345 accelerometer to an Arduino Uno. We also show you how to write a program that makes use of Adafruit’s ADXL345 sensor library.
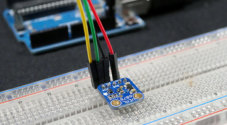
The ADXL345 is an affordable low power, 3-axis MEMS accelerometer that supports both the I2C and SPI serial interfaces.
MEMS stands for micro electro mechanical system, which means that the ADXL345 contains a microscopic mechanical component that helps determine the acceleration.
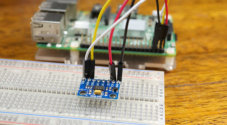
You are also able to use this the ADXL345 on the Raspberry Pi. The setup process is quite different, so be sure to check out the tutorial if you decide on using a Pi.
This sensor is just one of the many that you can connect to your Arduino. It can be used in a wide range of different Arduino projects where knowing the acceleration is important.
Equipment
You will need to have the following pieces of equipment to complete this Arduino accelerometer tutorial.
Recommended
Video
The video below will take you through the steps to assembling the accelerometer circuit. It will also take you through the steps of deploying the code to the Arduino Uno using the Arduino IDE.
If you prefer a written tutorial, then you can find that right underneath the video.
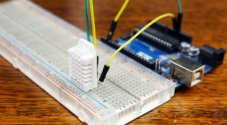
Setting up the Arduino Accelerometer Circuit
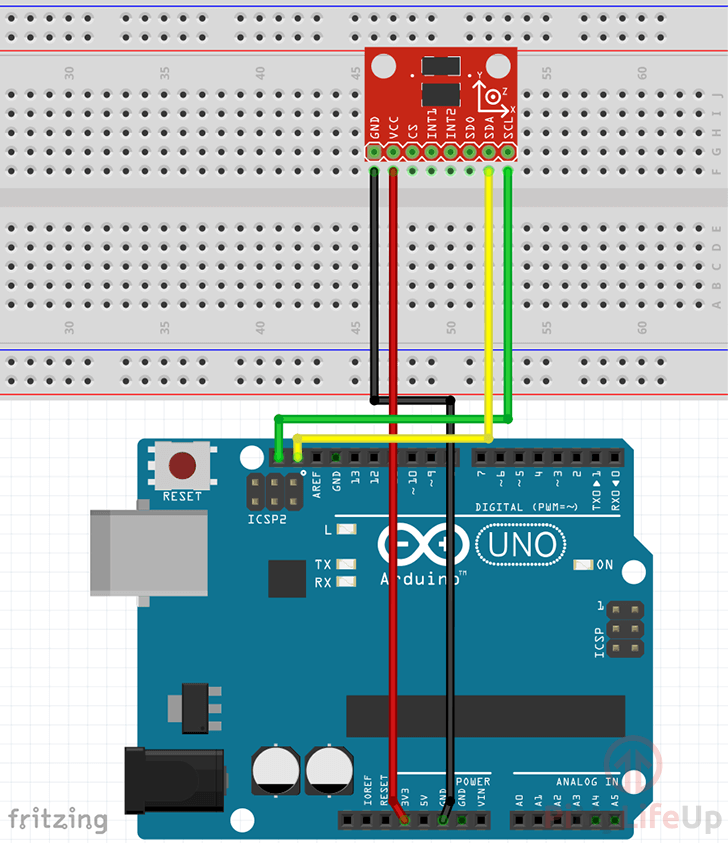
The circuit for the ADXL345 accelerometer is pretty straightforward and doesn’t require any complex parts or wiring and can be connected directly to the Arduino.
Below we have included all the steps that you will need to follow to connect the ADXL345 accelerometer to an Arduino Uno.
- Wire the GND pin of the ADXl345 to the GND Pin on the Arduino.
- Wire the VCC pin of the ADXL345 to the 3v3 Pin on the Arduino.
- Wire the SCL pin of the ADXL345 to the SCL Pin on the Arduino.
- Wire the SDA pin of the ADXL345 to the SDA Pin on the Arduino.
The circuit diagram below is also very helpful for connecting your Arduino to the ADXL345 correctly.
If you are utilizing the Adafruit ADXL345 board, you can also use a 5V connection as that breakout board contains circuitry to level shift the voltage down to the required 3v.
Importing the Libraries
Writing code to read the data from the accelerometer is a relatively simple process thanks to the libraries that we can utilize.
For this Arduino project, we will be making use of the “Adafruit Unified Sensor” library and the “Adafruit ADXL345” library.
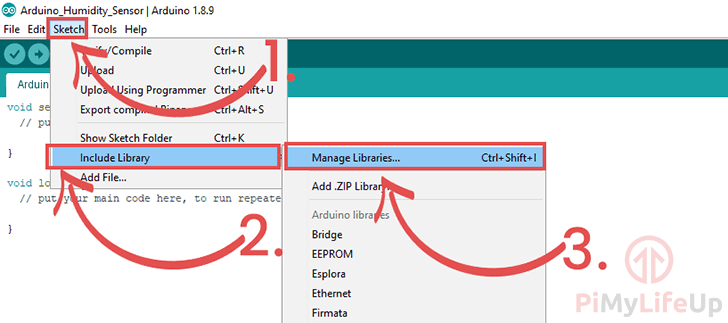
1. To start, open up the library menu within the Arduino IDE by going to Sketch (1.) -> Include Library (2.) -> Manage Libraries (3.)
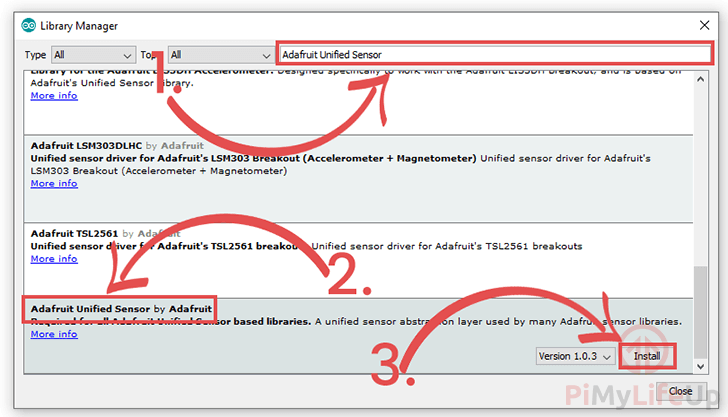
2. In this window, search for Adafruit ADXL345 (1.) and find “Adafruit ADXL345 by Adafruit” (2.), it should be the only search result.
Install the latest version of the library by clicking the “Install” (3.) button, as shown below.

3. Now, in the same window, search for “Adafruit Unified Sensor” (1.) and find the library (2.).
Once found, click the “Install” (3.) button to proceed.
Coding for the Accelerometer
1. Within the Arduino IDE enter the following lines of code.
We will explain each section of the Arduino accelerometer code so that you get an understanding of how it all works and what each important bit does.
#include <Wire.h>
#include <Adafruit_Sensor.h>
#include <Adafruit_ADXL345_U.h>Copy
We start by including all the library header files that we will be relying on for most of the functionality of our program.
The “Wire” library is used within the ADXL345 library so that the Arduino can communicate with the accelerometer using the i2C serial protocol.
The “Adafruit_Sensor” library is required as it is the base of the ADXL345 library that we are utilizing. It handles a few different things for the ADXL345 library and is used as the basis for most of Adafruit’s sensor libraries.
The final library we import is the “Adafruit_ADXL345” library. This library is what handles all the code for interacting with the accelerometer from the Arduino.
We will be utilizing this library to read back the acceleration data from the sensor.
Adafruit_ADXL345_Unified accel = Adafruit_ADXL345_Unified();CopyThis line instantiates the Adafruit ADXL345 library to the “accel” variable.
The “accel” variable will have a custom object that allows access to numerous helper functions for interacting with the ADXL345 accelerometer.
void setup(void)
{
   Serial.begin(9600);

   if(!accel.begin())
   {
      Serial.println("No ADXL345 sensor detected.");
      while(1);
   }
}Copy
This “setup()” function is run automatically when the Arduino powers on.
We start by running the “Serial.begin()” function so that the Arduino will be able to send messages over a serial connection. Into this function, we pass in the baud rate of 9600.
Afterward, we utilize the “accel” objects “begin()” function to start its connection to our ADXL345 accelerometer.
Next, we check the result returned by this function. If it returns “False” we then print out a message to the serial monitor alerting the user that we failed to access the ADXL345 accelerometer.
If an error did occur, we run an infinite loop using “while(1)“, this ensures we never enter the main loop. To exit this loop, you will need to restart the Arduino.
void loop(void)
{
   sensors_event_t event;
   accel.getEvent(&event);
   Serial.print("X: "); Serial.print(event.acceleration.x); Serial.print("  ");
   Serial.print("Y: "); Serial.print(event.acceleration.y); Serial.print("  ");
   Serial.print("Z: "); Serial.print(event.acceleration.z); Serial.print("  ");
   Serial.println("m/s^2 ");
   delay(500);
}Copy
This “loop()” function automatically runs after the “setup()” function has finished executing.
Within this function, we create a variable called “event” that utilizes the “sensors_event_t” struct.
Next, we use our “accel” object’s “getEvent()” function, passing in the event variable we defined before.
This “getEvent()” function will retrieve data from the accelerometer and fill out the struct that we pass into it (In this case the “event” variable) with the relevant data.
We then print out the X, Y and Z acceleration values that have been stored in our “event” variable. All three of these values are available through the “event.acceleration” vector.
Lastly, we delay the loop from running again for 500ms by using the “delay()” function.
2. With everything done, your final code should end up looking like what we have shown below.
#include <Wire.h>
#include <Adafruit_Sensor.h>
#include <Adafruit_ADXL345_U.h>

Adafruit_ADXL345_Unified accel = Adafruit_ADXL345_Unified();

void setup(void)
{
   Serial.begin(9600);
   if(!accel.begin())
   {
      Serial.println("No ADXL345 sensor detected.");
      while(1);
   }
}
void loop(void)
{
   sensors_event_t event;
   accel.getEvent(&event);

   Serial.print("X: "); Serial.print(event.acceleration.x); Serial.print("  ");
   Serial.print("Y: "); Serial.print(event.acceleration.y); Serial.print("  ");
   Serial.print("Z: "); Serial.print(event.acceleration.z); Serial.print("  ");
   Serial.println("m/s^2 ");
   delay(500);
}
Testing the Arduino ADXL345 Accelerometer
1. To upload the code to your Arduino, go ahead and click the “Verify” button (1.) and then click the “Upload” button (2.)
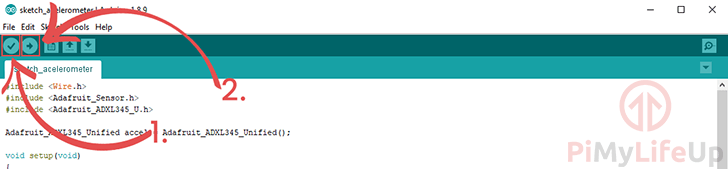
If you run into issues, check the code to make sure everything is correct.
Also, verify that your Arduino is connected and you have it selected under Tools -> Port:
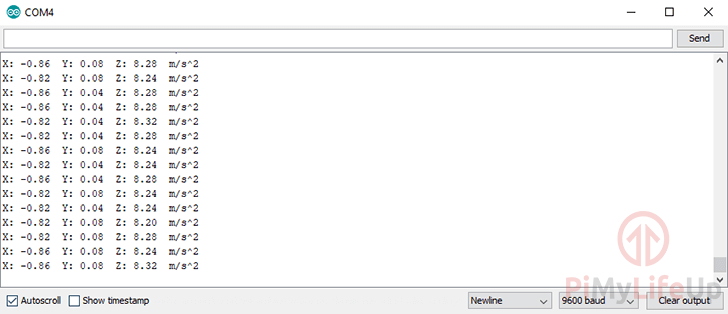
2. Your Arduino accelerometer should now be up and running and feeding data through the serial monitor.
Now is the best time to load up the Serial Monitor so that you can see the measurements being taken by the ADXL345 accelerometer.
You can open up the Arduino serial monitor software by clicking “Tools” (1.) then clicking “Serial Monitor” (2.)

3. Within the serial monitor, you should start seeing the data from the ADX345 Accelerometer attached to your Arduino.
I hope by the end of this tutorial you have your Arduino accelerometer working and the data is what you’re expecting it to be returning.
If you have any feedback on this tutorial then please don’t hesitate to leave a comment below.
Great – all working thank you.
i think you had a typo (SCL Pin should be SDA Pin on the below line)
Wire the SDA pin of the ADXL345 to the SCL Pin on the Arduino.
Hi Ian,
I am glad to hear that it all worked for you!
Thank you for pointing out that typo, I have now corrected that mistake.
Cheers,
Emmet
Its my first time on the site and your explanations are clear and concise thank you for this.
Thanks for you help . I was struggling to find a good tutorial. Very detailed explanation.