In this tutorial, I will be going through the steps on how to set up an Arduino distance sensor using the HC-SR04 ultrasonic sensor.
There are many different projects where this tutorial will come in handy. I go through just a few examples below.
A distance sensor will come in handy in a lot of robot projects where knowing the distances of objects will come in handy. For example, you can use the distance information to avoid obstacles that might be in your way.
You can also use the HC-SR04 distance sensor to detect when the distance to an object has radically changed. You can use something like MyDevices Cayenne or your own custom solution to alert you to the change.
There are so many possibilities and we hope to build, and share some projects that will make use of this sensor in the near future.
If you prefer the Pi, then you can also set up the HC-SR04 to work with the Raspberry Pi. Both the Arduino and the Raspberry Pi have many uses for a distance sensor.
If you’re ready to get learning, then you can find the full tutorial right below. We have even included a video to help guide you through all the steps to set up this sensor.
Equipment
All the equipment that you will need to complete this Arduino distance sensor is listed below. This tutorial is for the HC-SR04, so make sure you pick one of those up.
Recommended
Video
The video below will go through all the steps to set up an HC-SR04 ultrasonic sensor with the Arduino.
A full written explanation can be found right under the video and goes through a few extra things the video does not.
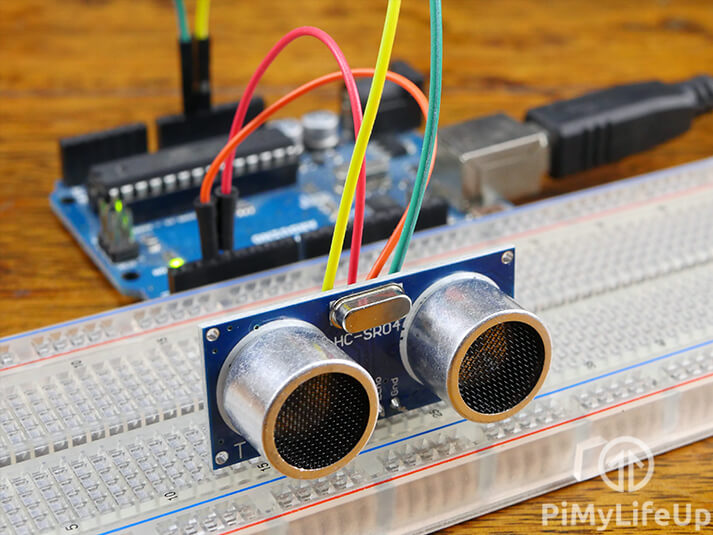
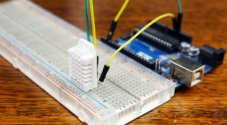
The HC-SR04 Ultrasonic Sensor
The HC-SR04 ultrasonic distance sensor is a popular affordable sensor that provides 2cm (0.7 inches) to 400cm (157 inches) of measurement. It can be as accurate as 3 mm (0.1 inches) but can vary depending on the quality of the sensor.
Ultrasonic sensors are relatively simple devices and extremely useful in a lot of high tech setups. They work by emitting sound waves then waiting for them to bounce off a nearby object. The receiver will detect when the sound waves have bounced back to the sensor.
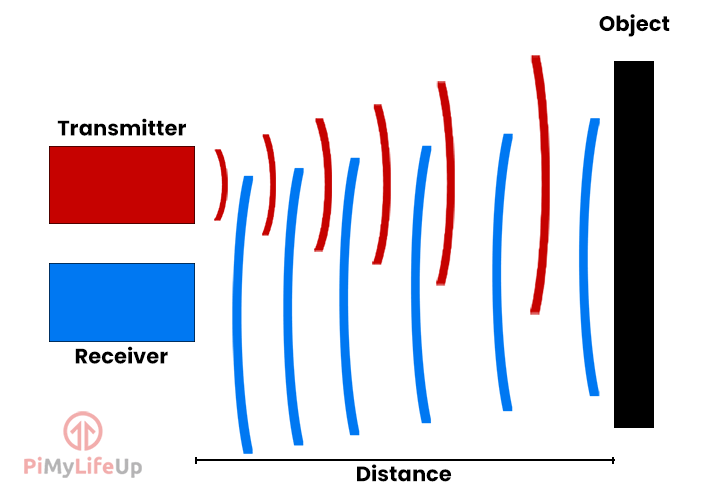
You can measure the time it took from when you emitted the sound wave to when you received it by using the sensor and a bit of code.
Since we know the speed of sound is 340 meters per second or 0.0343 centimeters per microsecond, we can calculate the distance using the time it took for a sound wave to bounce back. (Distance = Time * Speed)
It’s important to remember that we need to halve either the speed of sound or the time it took to travel since we only want to know the distance to the object. If you don’t halve one of the values, you will calculate the distance to the object and back.
I should note that the math used for calculating the distance is very rudimentary and isn’t super accurate. However, it should be good enough for most projects.
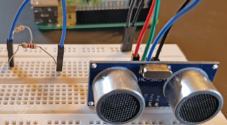
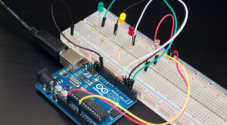
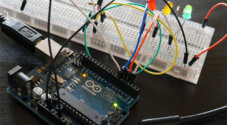
Setting up the Distance Sensor Circuit
The circuit for this Arduino distance ultrasonic sensor is very straightforward. It shouldn’t take more than just a couple of minutes to get it set up.
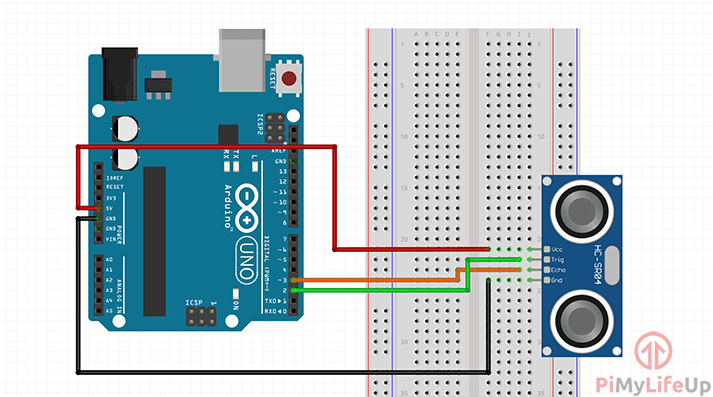
Either follow the few steps below or refer to the circuit diagram on how to assemble this super easy circuit.
- VCC connects to 5v
- Trig connects to pin 2
- Echo Connects to pin 3
- GND connects to GND
Arduino Distance Sensor Code
There are a few different code implementations that you can use to calculate the distance. This calculation is always done by using the signal that is being produced by your distance sensor.
The easiest method is to use a library, but for this tutorial, we will be writing the code from scratch.
1. The code is pretty straightforward, if you rather just download it, then you can find it on our Github. Alternatively, you can continue and learn about what the code does.
int trigger_pin = 2;
int echo_pin = 3;
long distance, pulse_duration;Copy
First, we will need to find all the variables that we will need in our script. We will need to define the pins for the trigger and echo.
We also require two variables for our distances and the pulse duration.
void setup() {

  Serial.begin (9600);

  pinMode(trigger_pin, OUTPUT);
  pinMode(echo_pin, INPUT);
}Copy
Next, we need to code our setup function. This function will initialize anything we need ready for our loop function.
Firstly, we start the serial output and set the baud rate to 9600.
As we mentioned earlier, the trigger pin (trigger_pin) will need to be set up as an output. This pin will tell our sensor to emit the ultrasonic sound wave that the receiver will pick up.
The echo pin (echo_pin) will need to be set as an input. This pin will go high when the ultrasonic wave has bounced back and hit the receiver.
void loop() {

  //Set pin to high for 10 microseconds
  digitalWrite(trigger_pin, HIGH);
  delayMicroseconds(10);
  digitalWrite(trigger_pin, LOW);

  //Check the echo pin for when it goes high and save the time it took in microseconds)
  pulse_duration = pulseIn(echo_pin, HIGH);
Copy
Next, we take a look at our loop function. It is where we will fire our HC-SR04 ultrasonic distance sensor and work out the distance to the nearest object.
We start by setting our trigger_pin (echo) high, and this will emit ultrasonic waves for our echo_pin (receiver) to receive. We keep the pin high for 10 microseconds before setting it back to low.
Lastly, we use the pulseIn function to measure the time it takes for the echo pin (echo_pin) to go from low to high. It returns the time in microseconds.
If there is an error, it will simply return 0, and this indicates that it never received a complete pulse within the timeout period.
  // Math: distance = ( (duration) * (speed of sound in cm per microsecond 0.0343 / 2)
  distance = round(pulse_duration * 0.0171);

  // Math: distance = ( (duration) * (speed of sound in inches per microsecond 0.01350 / 2)
  //distance = round(pulse_duration/0.00675);
Copy
Now we have our distance calculations, as you can see above we have two. One is for centimeters and the other is for inches.
The math for both centimeters and inches is roughly the same except for the speed of sound value. I will explain the cm calculation.
The speed of sound in cm per microsecond is roughly 0.0343. We divide this by two as we only measure half the distance taken by ultrasonic sound. This gives us the value of 0.0171.
  Serial.print(distance);
  Serial.print("cm");
  Serial.println();

  delay(500);
}Copy
Lastly, we need to print out our information so we can view it. We make use Serial.print so all our data will be printed in the serial monitor.
We first print distance, followed by cm. You can change cm to inches if you need to. After this we send a Serial.println so our next line of data will be on a new line.
Finally, we delay the script by 500 milliseconds.
That’s all the code now covered, remember you can download it off GitHub if you’re having problems. You can also the find final code without comments right below.
int trigger_pin = 2;
int echo_pin = 3;
long distance, pulse_duration;

void setup() {
  Serial.begin (9600);

  pinMode(trigger_pin, OUTPUT);
  pinMode(echo_pin, INPUT);

  digitalWrite(trigger_pin, LOW);
}

void loop() {
  digitalWrite(trigger_pin, HIGH);
  delayMicroseconds(10);
  digitalWrite(trigger_pin, LOW);

  pulse_duration = pulseIn(echo_pin, HIGH);

  distance = round(pulse_duration * 0.0171);

  //distance = round(pulse_duration/0.00675);

  Serial.print(distance);
  Serial.print("cm");
  Serial.println();

  delay(500);
}Copy
2. You should now be ready to deploy the code to the Arduino and see your creation in action.
Testing the Circuit and Code
1. To upload the code click verify (1.) and then upload (2.).
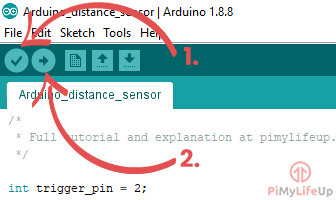
If you run into issues check the code to make sure everything is correct.
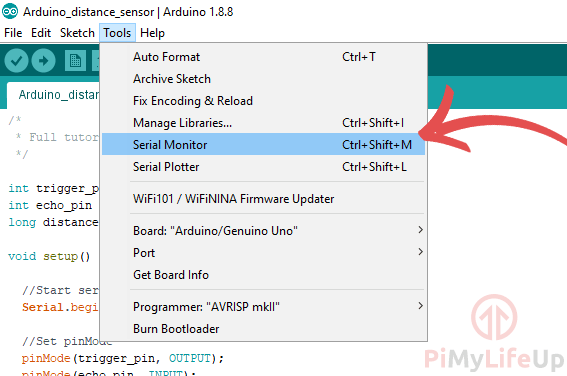
Also, verify that your Arduino is connected and you have it selected under Tools->Port:
3. Your Arduino distance sensor should now be in action. Load up the serial monitor located in the tool menu and you should see some measurements being printed.
Troubleshooting
There are a few things that go wrong in this tutorial. I will highlight some of the most common issues people run into.
- If the Arduino compiler is throwing errors then go back through the code to verify that you have copied it correctly. The compiler will usually point out any issues, fix these issues and the code should compile.
- Weird values that make no sense are usually related to either a badly wired distance sensor or a faulty distance sensor. A badly wired sensor is a lot easier to fix as you just need to double check your circuit. If it is defective, you will need to buy a new one. Also, check that you have declared the right pins in the script.
- If you’re having trouble uploading the code to the Arduino then double check that you have selected it in the IDE. This is located under “Tools->Port:” and “Tools->Board” .
I hope that this tutorial has shown you all the steps on how to setup a Arduino distance sensor that makes use of the HC-SR04. If you have any feedback, tips or anything else then please don’t hesitate to leave a comment below.
thank you for this write up , i have a chest freezer in the garage that the kids were using and several times they left it open ,well with a combination of a d1 mini a distance sensor and nodered i can now relax and know its shut