In this Arduino UV Sensor tutorial, we will be showing you how to wire the cheap VEML6075 UV sensor to an Arduino Uno.
Alongside showing you how to wire the UV sensor to an Arduino Uno, we will also show you how to utilize Adafruit’s VEML6075 library to interact with the UV sensor and calculate the UV index of the light that is currently being detected.
The VEML6075 is an affordable low power UV sensor that is designed to read in both UVA and UVB light bands. The sensor comes with calibration registers built in to allow easy conversion of the UVA/UVB reading to a UV index.
This sensor is excellent for Arduino projects that are designed to be exposed to UV light. So, mainly outdoor projects such as weather stations or a simple device to alert you to the current UV index.
You can also use this same UV Sensor with the Raspberry Pi. Both the Raspberry Pi and Arduino are excellent devices for the VEML6075.
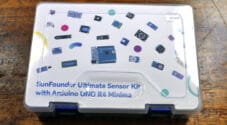
Equipment
To complete this Arduino UV sensor project you will need to pick up a few pieces of equipment.
Recommended
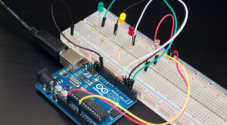
Setting up the Arduino UV Sensor Circuit
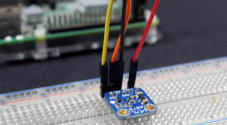
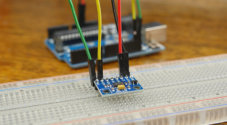
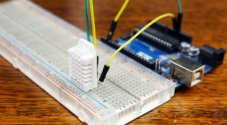
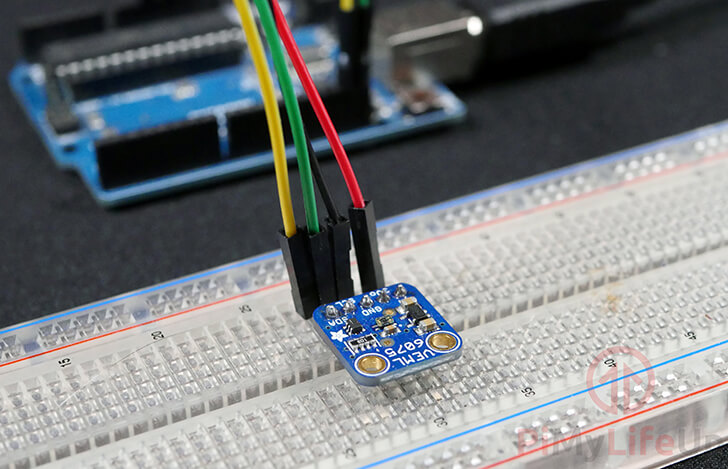
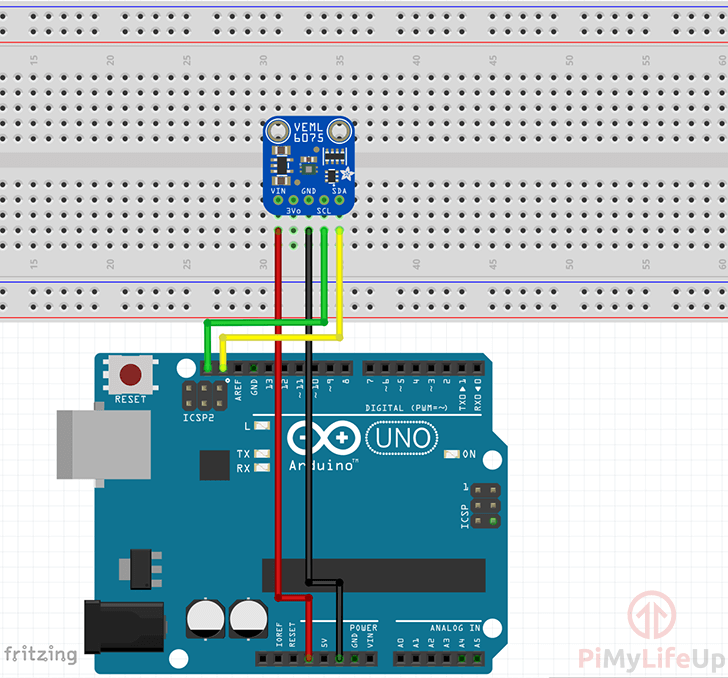
Luckily the wiring for the VEML6075 UV sensor is a simple process as it uses a serial interface to interact with the device. We will only need to connect up to four wires to the Arduino.
Below are some written instructions on how to connect the UV sensor to your Arduino. We have also included a diagram that shows the wiring of the VEML6075 UV Sensor with an Arduino Uno.
- Wire the VIN pin of the UV Sensor to the (3v3) on the Arduino.
- Wire the GND pin of the UV Sensor to the (GND) on the Arduino.
- Wire the SDA pin of the UV Sensor to the (SDA) on the Arduino.
- Wire the SCL pin of the UV Sensor to the (SCL) on the Arduino.
Importing the VEML6075 UV Sensor Libraries
Interacting with the VEML6075 UV sensor via the Arduino Uno is a simple process as we can rely on the Adafruit VEML6075 library to talk with the UV sensor.
The Adafruit VEML6075 library is designed to work with the UV sensor over the Arduino’s I2C interface.
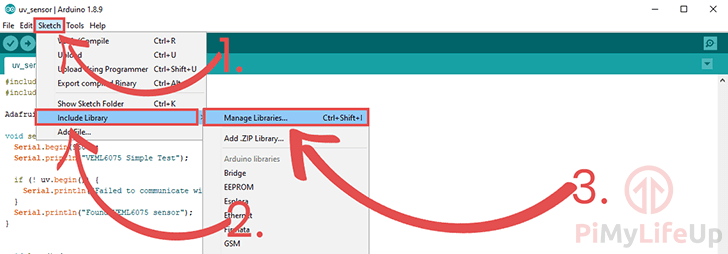
1. Open up the library menu within the Arduino IDE by going to Sketch (1.) -> Include Library (2.) -> Manage Libraries (3.)
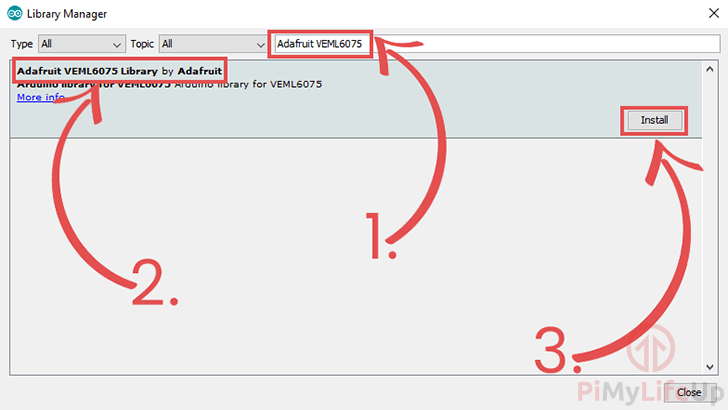
2. In this window, search for “Adafruit VEML6075” (1.) and find the “Adafruit VELM6075 Library by Adafruit” (2.).
Install the latest available version of the library by clicking the “Install” (3.) button as shown below.
Coding for the VEML6075 UV Sensor
1. Open up the Arduino IDE interface and begin entering the following lines of code.
Throughout the next section, we will explain each line of code so that you gain an understanding of how everything works.
#include <Wire.h>
#include "Adafruit_VEML6075.h"Copy
At the start of the script, we include the header files for libraries that we will be relying on to communicate with the VEML6075 UV Sensor.
The Wire library is the most important library that we need to import. This library provides the functionality to talk and interact with sensors over the I2C serial protocol.
The Adafruit_VEML6075 library is used to interact with the VEML6075 UV sensor itself. This library does all the heavy lifting with communicating with the sensors and interpreting the data that it reports.
We will be using the libraries functionality to calculate the current UV index that the sensor detects.
Adafruit_VEML6075 uv = Adafruit_VEML6075();CopyNow we instantiate the “Adafruit_VEML6075” library to our “uv” variable. We will be using this object to interact and read data back from the UV sensor.
void setup() {
  Serial.begin(9600);
  Serial.println("VEML6075 Test");

  if (! uv.begin()) {
    Serial.println("Failed to communicate with VEML6075 sensor.");
  }
  Serial.println("Found the VEML6075 sensor");
}Copy
The “setup()” function is run by the Arduino when it powers on, we utilize this function to initialize anything that we require for our main loop.
To begin our setup, we start our serial connection by running the “Serial.begin()” function with the baud rate of 9600.
We immediately use this serial connection to print out the text to let us know that the program has started.
Afterward, we use the “uv” objects “begin()” function to get it to initiate a serial connection with the VEML6075 UV sensor. Doing this will allow us to read the UV data being returned by the sensor within our loop.
If the “uv.begin()” function returns false we then print a message using the Arduino’s serial connection to alert the user that there is a problem. Otherwise, we print a message saying that we found the sensor.
void loop() {
  Serial.print("UV Index reading: "); Serial.println(uv.readUVI());
  delay(1000);
}Copy
The “loop()” function runs after the “setup()” function has finished firing. The loop is maintained as long as the Arduino is powered or something causes it to crash.
The first thing we do in this loop is to print out the UV index as calculated by Adafruit’s VEML6075 UV Sensor library. We do this by running the “uv” object’s “readUVI()” function.
This “readUVI()” function calculates the UV index by reading in the UVA (long-wave ray) and UVB (shortwave ray) from the UV sensor and uses those values to calculate the index.
You can read in the UVA and UVB values individually by using the “readUVA()” and “readUVB()” functions respectively.
At the end of the loop, we put the script to sleep for 1 second (1000ms) by using the “delay()” function.
2. With the code entered, it should look like what we have displayed in the code box below. You can also find the example code that we based ours off of over at Adafruit’s Github.
#include <Wire.h>
#include "Adafruit_VEML6075.h"

Adafruit_VEML6075 uv = Adafruit_VEML6075();

void setup() {
  Serial.begin(9600);
  Serial.println("VEML6075 Test");

  if (! uv.begin()) {
    Serial.println("Failed to communicate with VEML6075 sensor.");
  }
  Serial.println("Found the VEML6075 sensor");
}

void loop() {
  Serial.print("UV Index reading: "); Serial.println(uv.readUVI());
  delay(1000);
}Copy
Testing the Arduino UV Sensor
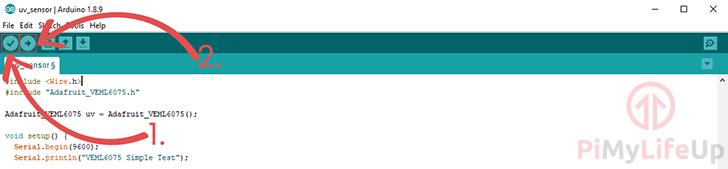
1. To upload the Arduino UV sensor code to your Arduino, go and click the “Verify” button (1.) and then click the “Upload” button (2.)
If you run into any issues, check the code to make sure that everything is correct.
To verify that your Arduino device is connected to your PC, find and select it under Tools -> Port:
2. With the Arduino now reading the data from your VEML6075 UV sensor, we can now load up the Arduino IDE serial monitor.
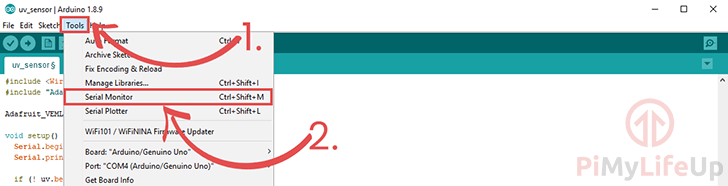
You can open up the Arduino serial monitor software by clicking “Tools” (1.) then clicking “Serial Monitor” (2.)
3. Upon the serial monitor launching, you should start seeing the data being read in by your Arduino and outputted through the serial connection.
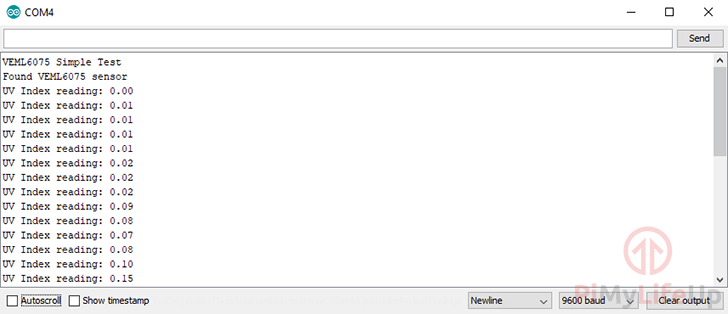
Much like our Raspberry Pi version of this tutorial, we made use of a UV light to manipulate the results. The UV light was required since we are inside, and regular lights give very low results, sometimes even negative.
Going outside should provide you with similar readings to weather websites. If you’re finding your values are way off, then you will need to check the wiring of your sensor.
There is plenty of projects where this sensor will come in handy. You can bundle it with a humidity and temperature sensor and build a basic Arduino weather station. The possibilities are endless.
I hope by the end of this tutorial your Arduino UV sensor is up and running successfully. You should now hopefully have an understanding of how to wire the VEML6075 sensor to the Arduino. You should also understand to read data from the sensor and display it in the serial monitor.