In this quick guide, we will be showing you how to flush the DNS cache on an Ubuntu-based operating system.
Domain name servers or DNS are crucial components of how the modern web works. It is what your operating system, like Ubuntu, utilizes to translate a domain name such as “pimylifeup.com” to an address it can connect to such as “1.1.1.1“. Without a system like DNS, browsing the web would be a much more tedious process.
To translate a domain name, the operating system has to make a call to an external DNS server. In turn, that server responds with the required IP address.
Operating systems like Ubuntu will try to speed up the DNS resolution by creating a cache of every DNS request. This means when a DNS lookup is performed it only needs to access the local cache for the IP address making the process almost instant.
However, the DNS cache on Ubuntu and other systems is not perfect as it relies on an outside service. So if the system has cached a bad result, you will want to flush/clear it.
Over the following two sections, we will give you a quick overview of how exactly the DNS cache system works. Additionally, we will cover how you can easily and quickly flush the DNS cache on Ubuntu.
Table of Contents
What is the DNS Cache
With the release of Ubuntu 17.04, the operating system started using “systemd-resolve” to handle network name resolution.
With this new implementation came an inbuilt DNS cache to Ubuntu. This cache is designed to significantly improve the DNS lookup speeds as the request will not need to leave your system after the initial lookup.
To show how this all works, let us give you a rough overview of how the DNS request flow goes when using a DNS cache.
1. When Ubuntu looks up a domain name such as “pimylifeup.com“, the request is made locally to the resolve service.
This service operates on the local 127.0.0.53 address and is utilized by the system by default.
2. When the service on your Ubuntu system receives the DNS request, it will check whether that domain name exists within its DNS cache.
If the domain name exists within the DNS cache, the service will respond instantly to your request.
If the domain name isn’t in the DNS cache, it will make a request to an external DNS server. You can set the DNS server Ubuntu uses for these requests.
3. Your DNS request is forwarded to the defined DNS server. Hopefully, this server will translate the domain name to a connectable IP address for your system.
Ubuntu will wait for a short period for a response before moving on to the secondary DNS server.
4. If your Ubuntu device receives a valid DNS response, it will cache it within the DNS cache. After being cached, the response is
Subsequent requests will now be able to be served by the local DNS service, speeding up the process.
Flushing the DNS Cache on Ubuntu
To clear the DNS cache on your Ubuntu system, you will need access to a user with superuser privileges (sudo).
Additionally, all the steps will be required to be completed within the terminal. If you are unfamiliar with the terminal, don’t worry, as the commands we need to use are very straightforward.
Before proceeding further, you will need to work out what version of Ubuntu you are running. These steps differ slightly depending on what release you are using.
1. Since we will need to be using commands, you will need to open the terminal on your Ubuntu device.
If you are using the desktop variant of Ubuntu, you can open the terminal by pressing CTRL + ALT + T on your keyboard.
2. With the terminal open, you will need to use one of the following commands to flush Ubuntu’s DNS cache.
These commands differ as Ubuntu has moved to use “resolvectl” rather than “systemd-resolve” in new versions. However, despite the different names, the tools basically work the same.
Clear the DNS Cache on Ubuntu 20.04, Ubuntu 22.04, and Newer
If you are using any version of Ubuntu newer than 20.04, you can clear the DNS cache using the command below.
sudo resolvectl flush-cachesCopyFlush the DNS Cache on Ubuntu 17.04 and Ubuntu 18.04
On earlier versions of Ubuntu, such as 18.04 and 17.04, you will need to use the following command to flush the DNS cache
sudo systemd-resolve --flush-cachesCopy3. Your system’s DNS cache should now be flushed out. Any DNS-related issues you are having should hopefully now be solved.
If you want to view the status of this cache, you can read on to our next section.
Viewing the Status of the DNS Cache on Ubuntu
Now that we have shown you how to flush the DNS cache on Ubuntu, let us explore how to view the status of the cache.
The same tools we used in the previous section to clear the DNS cache allow you also to retrieve the statistics. These statistics give you the current cache size and the number of cache hits and misses.
1. Like flushing the cache, you will need to perform these steps within the terminal on your device.
When using Ubuntu desktop, you can open the terminal quickly by pressing CTRL + ALT + T.
2. The commands you run will differ slightly depending on the version of Ubuntu you are running.
Getting DNS Cache Statistics on Ubuntu 20.04, Ubuntu 22.04, and Newer
If you are using Ubuntu 20.04, 22.04, or newer, you can utilize the following command to get the statistics on your DNS cache.
sudo resolvectl statisticsCopyRetrieving the DNS Cache Statistics on Ubuntu 17.04 and Ubuntu 18.04
If you use Ubuntu 17.04 or 18.04, the command below will retrieve the statistics on your DNS cache.
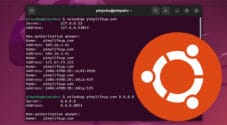
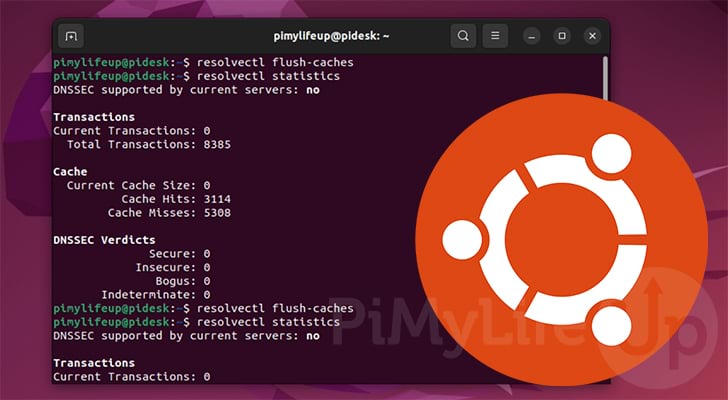
sudo systemd-resolve --statisticsCopy3. Below, you can see the result that you will get from running either one of the commands below.
Our Ubuntu systems DNS cache size is currently 0 as we only just cleared the cache.
Using these statistics, you can get an idea of how many DNS requests your system is caching, and how many times that cache is hit or missed.
DNSSEC supported by current servers: no

Transactions
Current Transactions: 0
  Total Transactions: 8005

Cache
  Current Cache Size: 0
          Cache Hits: 2967
        Cache Misses: 5075

DNSSEC Verdicts
              Secure: 0
            Insecure: 0
               Bogus: 0
       Indeterminate: 0
Conclusion
By this point in the guide you should now know how to flush the DNS cache on an Ubuntu system.
As we explained earlier, the cache is designed to significantly improve the speed of DNS lookups by caching them locally.
If you have any questions about clearing the DNS cache, please comment below.
We have a variety of other Ubuntu guides if you want to learn more about the system. Alternatively, we have a ton of general Linux guides.