In this quick guide, we will show you how to install and run the Caddy web server on Ubuntu.
Caddy is a web server that is much like others, such as Nginx and Apache. However, it has its own set of features that help it stand out from its competitors.
One of the key pieces that help Caddy stand out from its competition is its focus on providing HTTPS straight out of the box. It will automatically fetch certificates for your websites and renew them when required, all without any input required.
This HTTPS functionality built into Caddy can be a great utility, especially if you are running software where you have multiple domain names or intend to allow other users to point a domain name to your Caddy server.
On top of this HTTPS functionality, Caddy is also a great solution for easily setting up a reverse proxy on Ubuntu.
Setting up and installing Caddy on Ubuntu is actually a pretty simple process and isn’t any more complicated than any other web server. Over this guide, we will be walking you through how you can
If you intend to run Caddy on an Ubuntu server in your home, you will want to do a couple of things before continuing.
- First, you will want to ensure that you have a static IP address on Ubuntu.
- Secondly, you must port forward ports 80 and 443 to your Ubuntu system. These are a must, as Caddy will need to use them to fetch SSL certificates.
- Thirdly, if you are running a firewall on Ubuntu, you must open ports 80 and 443. We have a guide on how to use UFW if you are unsure on how to do this.


Installing and Running Caddy on Ubuntu
Over the next few sections, we will be walking you through the simple steps of installing and running the latest version of Caddy on Ubuntu.
These steps should work on any version of Ubuntu that is actively maintained. We will be using Ubuntu 24.04 for our run-through of installing Caddy.
Preparing Ubuntu
1. Before we go ahead and begin installing Caddy, we should complete a few tasks first.
The first of these is to update the package list cache and upgrade any out-of-date packages by using the following two commands.
sudo apt update
sudo apt upgrade -yCopy
2. With that done, our next step is to install any additional software that we need to run Caddy on Ubuntu.
In particular, we need to ensure that both the curl and wget packages are installed. You can do this by running the following command in the terminal. We will be using these packages to add the latest
sudo apt install curlCopyAdding the Caddy Package Repository to Ubuntu
3. To install the Caddy web server on Ubuntu, we will add the official Caddy package repository. Using the official repository ensures we can easily install the latest available release and upgrade when new releases are pushed out.
For the first part of this process, we must download the GPG key for the Caddy repository to our system. We can retrieve this key by using the following command in the terminal.
A GPG key is basically a way for the APT package manager to verify the packages it is downloading.
curl -1sLf 'https://dl.cloudsmith.io/public/caddy/stable/gpg.key' | sudo gpg --dearmor -o /usr/share/keyrings/caddy-stable-archive-keyring.gpgCopy4. With the GPG key now saved to your Ubuntu system, we can move on to adding the Caddy repository itself. All you need to do to add this repository is to run the command below.
curl -1sLf 'https://dl.cloudsmith.io/public/caddy/stable/debian.deb.txt' | sudo tee /etc/apt/sources.list.d/caddy-stable.listCopy5. Before the APT package manager knows that it can download packages from this repository, we must update the package list cache again.
You can update this cache by using the following command.
sudo apt updateCopyInstalling Caddy onto Ubuntu
6. At this point, all we need to do to install and start the Caddy web server on Ubuntu is to use the command below within the terminal.
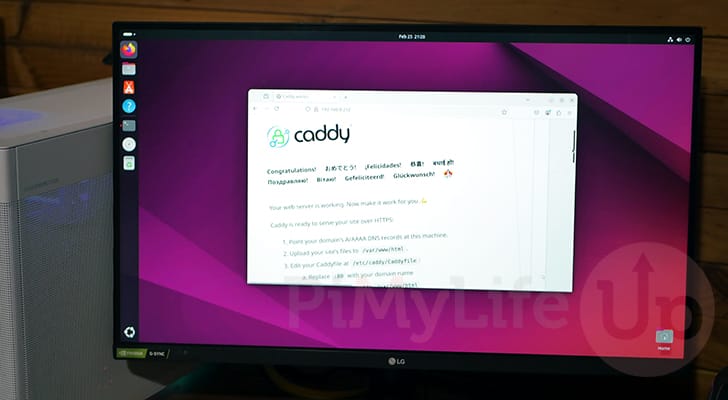
sudo apt install caddyCopy7. Once Ubuntu has installed the web server, it will start immediately. This means we can now browse to your Ubuntu device’s IP address to check that Caddy is indeed now running on your Ubuntu system.
If you don’t know the IP address of your Ubuntu device, you can use the hostname command within the terminal to retrieve it.
hostname -ICopy8. With your IP address in hand, go to the following address in your favorite web browser. Just make sure you swap out “<IPADDRESS>” with the IP of your Ubuntu device.
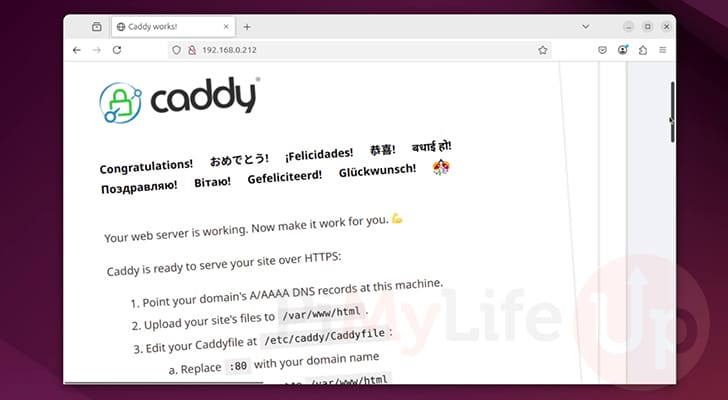
http://<IPADDRESS>9. Since we are currently running the Caddyfile that ships with the Caddy web server, you should see the following appear on your screen.
This basically tells you that Caddy has been successfully set up on Ubuntu and is now ready for configuration.
Creating a Sample Website
10. Since you are installing Caddy on Ubuntu, you will probably want to have some idea of how you can use it. In this guide, we will walk you through some basic steps of display a simple HTML file using Caddy.
The first part of this process is to use the mkdir command to create a directory where we will store the HTML files. You can create a directory in which to store your HTML by running the following command.
While typing out this command, ensure that you replace “<DOMAINNAME>” with the domain you intend on using.
sudo mkdir -p /var/www/<DOMAINNAME>/htmlCopy11. With the directory created, we can begin writing an HTML file by using the following command.
We are using Nano to write this file, but you can use whatever text editor you like.
sudo nano /var/www/<DOMAINNAME>/html/index.htmlCopy12. Now, within this file, enter the following lines.
This creates a very simple HTML page with the title “Hello World” and the text “Hello World from PiMyLifeUp“.
<!DOCTYPE html>
<html>
    <head>
        <title>Hello World</title>
    </head>
    <body>
        <p>Hello World from PiMyLifeUp</p>
    </body>
</html>Copy
13. Once you have finished writing out this file, save and quit by pressing CTRL + X, Y, and then ENTER.
Creating your Own Caddyfile
15. With some basic HTML now saved to our Ubuntu system, we will need to adjust Caddy to actually serve the files from the directory we just created.
To do this, we will be writing our own Caddyfile and discarding the one that came with the installation of Caddy on Ubuntu.
A Caddyfile is similar to a virtual host in Apache and a server block in Nginx. Basically, it’s how you define a website and how it should be handled by the web server.
You can remove the basic Caddyfile that came with the Caddy installation by using the following command.
sudo rm /etc/caddy/CaddyfileCopy16. With the default Caddyfile now removed, we can write our own in its place. The Caddyfile format is pretty easy to use once you get your head around it.
You can begin writing a new Caddyfile on Ubuntu by using the command below within the terminal.
sudo nano /etc/caddy/CaddyfileCopy17. Now, within this file, you will want to type out the following lines. We will explain what this does as we go along so that you can get a brief understanding of how Caddy uses these files to set up a web server.
a. Each website you plan to host using Caddy on Ubuntu should have its own block. A block is defined using an address followed by the open curly bracket symbol ({).
An address can actually be one of several different things. We will be covering a couple of these, but you can find a full list on the Caddy website.
Domain name (example.com): By using a domain name, Caddy will listen for that particular host name and will also attempt to generate a publicly trusted certificate for it.IP Address (192.168.0.1): If you specify an IP address, Caddy will instead generate a self-signed certificate for your website. Basically, this means you will run into a warning every time you load up your website, but it will still be able to utilize HTTPS.localhost: Caddy can also be set up to only serve web content to the local machine. When setting the address to localhost, only your Ubuntu device will be able to access the content being served by Caddy.
Like if you used an IP address, Caddy will generate a self-signed certificate so that your web traffic can still be encrypted.Protocol (http:// or https://): By setting the address to either the http or https protocol, Caddy will use this block as a catch all. If there is no hostname set, it will fall through to this block.
If you are using “https://” then Caddy will attempt to generate a valid certificate for any incoming traffic.
<ADDRESS> {b. Now within this block, you can do a few different things. The two primary ways that Caddy is used are to either set up a reverse proxy or to serve content from a particular directory.
For this example, we will be setting up the Caddy web server on Ubuntu to serve files from the “/var/www/<DOMAINNAME>/html” directory.
All we need to do is type out the following line. By specifying the asterisk symbol (*), Caddy will use this directory for all incoming requests. Using this you could in theory set different folders based on the incoming request.
root * /var/www/<DOMAINNAME>/htmlc. The Caddy web server has a lot of functionality baked into it. One of these pieces of functionality is its file server.
This file server allows Caddy to serve static files from your chosen root directory easily. If you want, you can even make your directory browseable by adding a space and then “browse” to the end of this line.
file_serverd. That is all we need to set up and serve a static website using Caddy on Ubuntu.
The last thing we need to do is ensure that we end this new server block, by adding a close curly bracket symbol at the end.
}18. Below is an example of what a valid Caddyfile might look like after you have finished filling out the file.
The Caddy web server is capable of a lot more, but for our basic guide on installing it to Ubuntu, this will be enough to verify everything is working. For our example, you can see that we are using our localhost.
localhost {
    root * /var/www/localhost/html
    file_server
}
19. Once you have finished writing your Caddyfile, save and quit by pressing CTRL + X, Y, and then ENTER.
Testing your New Ubuntu Caddy Web Server
20. Even though we have rewritten the Caddyfile, the Caddy web server itself will be completely unaware of this.
Luckily, getting Caddy to load in the updated file is incredibly simple, and all we need to do is run the command below on your Ubuntu system.
sudo systemctl reload caddyCopy21. Once the Caddy web server finishes reloading, you only need to go to your designated domain name within your favourite web browser.
If everything has worked properly and you have set a valid domain name, Caddy should have also automatically fetched you a valid SSL certificate.
https://<DOMAINNAME>22. Below you can see how the web server is now serving the super simple HTML file that we saved earlier. This indicates that Caddy is working properly on Ubuntu.
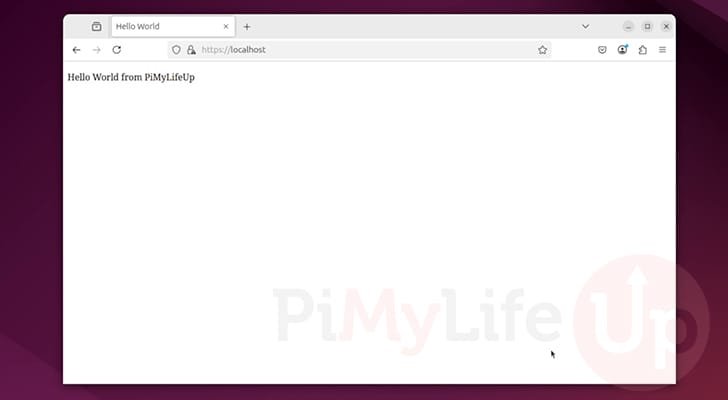
Conclusion
Hopefully, if you have got to this point in the guide, you will have successfully managed to get the Caddy web server up and running on Ubuntu.
Caddy is a great web server, especially when dealing with HTTPS. While it is a little slower than its competitors like Nginx, its extra built-in functionality can be incredibly useful, especially when dealing with multiple domain names or setting up reverse proxies.
Please feel free to leave a comment below if you have run into any issues with our guide on setting up Caddy on Ubuntu.
If you liked this guide, be sure to take some time to explore some of our many other Ubuntu guides and projects.