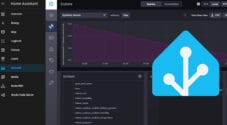
In this tutorial, we will take you through the steps of configuring Home Assistant to view and store data from the Ubiquiti sunMax.
The Ubiquiti sunMax SolarPoint and SolarSwitch are solar charge controllers. These devices allow you to collect solar power and use it to charge a battery and power devices. It can switch off devices whenever the battery voltage starts to get too low, which helps prevent battery damage. If you want to use either one, I recommend reading more on Ubiquiti Solar products.
Both sunMax devices have a web admin containing all the data you need. However, accessing this data could be more convenient if stored within Home Assistant.
You can create alerts using Home Assistant whenever the battery gets too low or if no solar power is being collected. These are just a couple of examples of how you can use the solar data within Home Assistant.
This tutorial requires a basic knowledge of networking and setting up Unifi products. SunMax is a standalone product and does not run through the regular Unifi software, such as the one you can set up on the Raspberry Pi.
This tutorial has been tested using the Ubiquiti sunMax SolarPoint and Home Assistant 2023.9.2. However, instructions shouldn’t vary too much if you use the SolarSwitch or a different version of Home Assistant.
Prerequisites
There are a couple of requirements that you will need to meet before you can start this tutorial.
You will need an Ubiquiti sunMax setup accessible on your local network. You should be able to access its web user interface within your local network.
Home Assistant must also be set up and accessible within the same network that your sunMax is connected to. You can set up Home Assistant on a Raspberry Pi or an unused computer. The software is relatively efficient, so you do not need a powerful computer.
If you have the above ready, you can continue with this tutorial.
Retrieving Data from sunMax in Home Assistant
The process of collecting data from your sunMax should be straightforward. The steps below will take you through the process of collecting data.
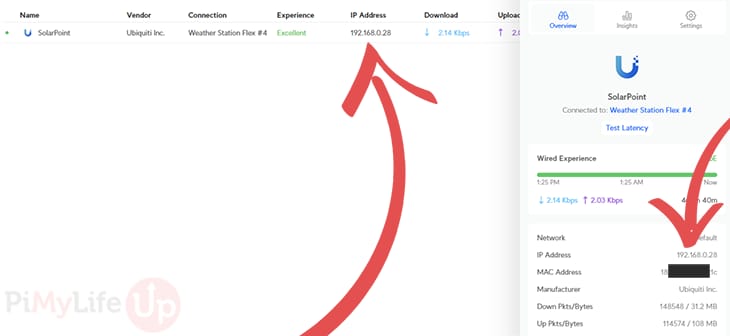
1. Ensure that your Ubiquiti sunMax is accessible within the same local network as your Home Assistant. For example, within the same network, you should be able to connect to the sunMax. In our case, the IP is 192.168.0.28.
If you are running Unifi, you should be able to find the IP of the sunMax under the client devices tab.
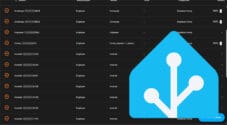
2. In Home Assistant, load the configuration.yaml in your chosen editor. We use the Studio Code Server editor within Home Assistant itself.
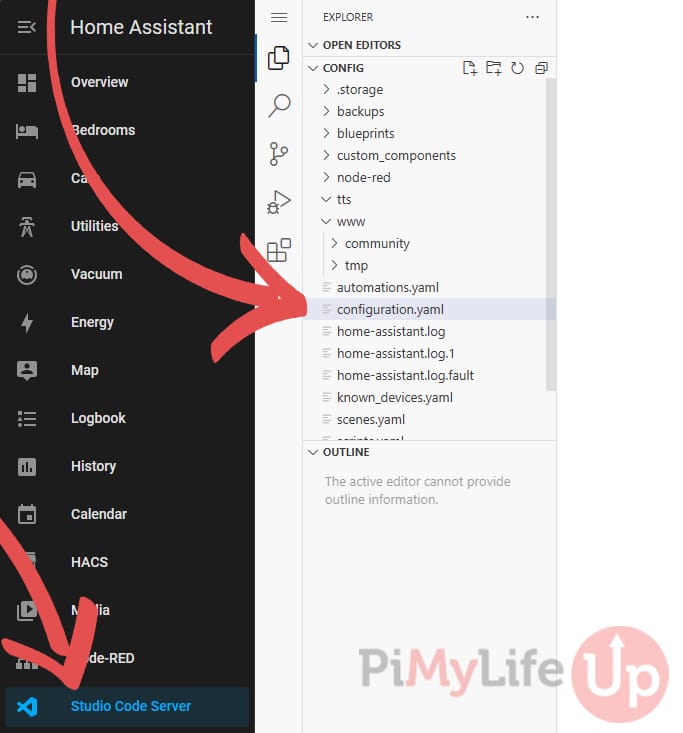
3. Inside the configuration yaml, you will need to enter each item you wish to be collected and stored within Home Assistant. We will use the SNMP integration that is already included in the base installation of Home Assistant.
Each of the following configurations must be nested inside the sensor block.
sensor:CopyBattery Current
Track the amount of current that is stored within the battery connected to the sunMax, measured in milliamperes.
The OID (Object Identifier) for the battery current is stated below. You will need to reference this number to get the data for the battery current.
.1.3.6.1.4.1.41112.1.11.1.1.1.0CopyBelow is my configuration for the battery current. Ensure you update the host IP so it correctly points to your sunMax. The value returned by the sunMax is in mA (milliampere), so we change it to A (amperes) in the value_template.
  - platform: snmp
    name: "sunMax Battery Current"
    unique_id: "sunmax_battery_current"
    host: 192.168.0.28
    baseoid: .1.3.6.1.4.1.41112.1.11.1.1.1.0
    accept_errors: true
    unit_of_measurement: "A"
    value_template: "{{((value | float) / 1000) | float}}"Copy
Battery Voltage
Track the amount of voltage that is stored within the battery. This data is provided in millivolts. Keeping the voltage at decent levels will help prolong the life of the battery.
Below is the OID for the battery voltage. You must use this when adding the sensor into your configuration yaml.
.1.3.6.1.4.1.41112.1.11.1.1.2.0CopyThe configuration below will add the battery voltage to Home Assistant. The raw value is in mV (millivolts), so we can convert this into v (Volts) using basic maths.
  - platform: snmp
    name: "sunMax Battery Voltage"
    unique_id: "sunmax_battery_voltage"
    host: 192.168.0.28
    baseoid: .1.3.6.1.4.1.41112.1.11.1.1.2.0
    accept_errors: true
    unit_of_measurement: "V"
    value_template: "{{((value | float) / 1000) | float}}"Copy
Battery Power
This value is the power stored within the battery, measured in milliwatts.
The OID for the battery power is below. Using this number should retrieve the current battery power within Home Assistant.
.1.3.6.1.4.1.41112.1.11.1.1.3.0CopyOur configuration below will retrieve the battery power from the Ubiquiti sunMax. However, the raw value is in mW (milliwatts), so we need to convert this into W (watts).
  - platform: snmp
    name: "sunMax Battery Power"
    unique_id: "sunmax_battery_power"
    host: 192.168.0.28
    baseoid: .1.3.6.1.4.1.41112.1.11.1.1.3.0
    accept_errors: true
    unit_of_measurement: "W"
    value_template: "{{((value | float) / 1000) | float}}"Copy
Battery Temperature
Track the temperature of the battery using this data. The data is provided in Kelvin. The battery temperature will only be returned when the solar panels charge the batteries.
To fetch the temperature, you will need to use the OID below.
.1.3.6.1.4.1.41112.1.11.1.1.4.0CopyThe configuration below is slightly different from most of our configs. Our measurement is degrees Celsius, but you can change this to Fahrenheit by changing the math slightly. We cover this underneath the code below.
Battery temperature will only return a value when it is charging.
  - platform: snmp
    name: "sunMax Battery Charging Temperature"
    unique_id: "sunmax_battery_charging_temperature"
    host: 192.168.0.28
    baseoid: .1.3.6.1.4.1.41112.1.11.1.1.4.0
    accept_errors: true
    unit_of_measurement: "°C"
    value_template: >
      {% if (value | float) == 0 %}
        {{ (value | float) }}
      {% else %}
        {{ ((value | float) / 1000) - 273.15 | float }}
      {% endif %}Copy
If you require Fahrenheit, change the maths so it converts Kelvin to Fahrenheit rather than Celsius.
{{ ((value | float) / 1000) - 273.15 | float }}CopyThe Fahrenheit math is slightly more complex than Celsius but still easy enough to understand.
{{ (((value | float) / 1000) − 273.15) × 9/5 + 32 | float }}CopySolar Panel Current
The solar panel current is the number of milliamperes the solar panels are providing to the sunMax.
Use the OID below to retrieve the panel current from the sunMax unit.
.1.3.6.1.4.1.41112.1.11.1.2.1.0CopyBelow is our configuration for handling the panel current. As you can see, the sunMax returns the current in mA (milliampere), so we will need to convert it to A (amperes) using some simple maths.
  - platform: snmp
    name: "sunMax Panel Current"
    unique_id: "sunmax_panel_current"
    host: 192.168.0.28
    baseoid: .1.3.6.1.4.1.41112.1.11.1.2.1.0
    accept_errors: true
    unit_of_measurement: "A"
    value_template: "{{((value | float) / 1000) | float}}"Copy
Solar Panel Voltage
This value is the voltage that is being provided by the solar panels, measured in millivolts.
You will need to use the OID below in your config to get the panel voltage.
.1.3.6.1.4.1.41112.1.11.1.2.2.0CopyOur configuration for the panel voltage is below. The sunMax returns the value in mV (millivolts), so we need to convert the value to volts (V).
  - platform: snmp
    name: "sunMax Panel Voltage"
    unique_id: "sunmax_panel_voltage"
    host: 192.168.0.28
    baseoid: .1.3.6.1.4.1.41112.1.11.1.2.2.0
    accept_errors: true
    unit_of_measurement: "V"
    value_template: "{{((value | float) / 1000) | float}}"Copy
Solar Panel Power
This value is the amount of power that the solar panel is currently providing to your system, measured in milliwatts.
To retrieve the panel power, you must use the following OID in your configuration.
.1.3.6.1.4.1.41112.1.11.1.2.3.0CopyBelow is our config for the panel power. Of course, make sure you change the IP address so it correctly references your Ubiquiti sunMax. We must also convert our value from mW (milliwatts) to W (watts).
  - platform: snmp
    name: "sunMax Panel Power"
    unique_id: "sunmax_panel_power"
    host: 192.168.0.28
    baseoid: .1.3.6.1.4.1.41112.1.11.1.2.3.0
    accept_errors: true
    unit_of_measurement: "W"
    value_template: "{{((value | float) / 1000) | float}}"Copy
Load Current
The load current is the amount of current running through the sunMax to connected devices, measured in milliamperes.
In your configuration, make sure you reference the following OID to retrieve the load current of the sunMax system.
.1.3.6.1.4.1.41112.1.11.1.3.1.0CopyFor a quick and easy configuration, copy the code segment below. However, make sure you update the IP address. Also, the sunMax will return mA (milliampere), so we need to convert it to A (amperes) using the value template.
  - platform: snmp
    name: "sunMax Load Current"
    unique_id: "sunmax_load_current"
    host: 192.168.0.28
    baseoid: .1.3.6.1.4.1.41112.1.11.1.3.1.0
    accept_errors: true
    unit_of_measurement: "A"
    value_template: "{{((value | float) / 1000) | float}}"Copy
Load Voltage
The load voltage is the voltage running through the sunMax to connected devices, measure in millivolts.
To get the load voltage from the sunMax, make sure you reference the following OID in your config.
.1.3.6.1.4.1.41112.1.11.1.3.2.0CopyThe config below will retrieve the load voltage from the sunMax. However, like the rest of the values, we must also convert this one from (mV) millivolts to (V) volts using the value template.
  - platform: snmp
    name: "sunMax Load Voltage"
    unique_id: "sunmax_load_voltage"
    host: 192.168.0.28
    baseoid: .1.3.6.1.4.1.41112.1.11.1.3.2.0
    accept_errors: true
    unit_of_measurement: "V"
    value_template: "{{((value | float) / 1000) | float}}"Copy
Load Power
The load power is the current load from devices on the SunMax in milliwatts.
Our last value is load power, which you can retrieve using the OID below in your configuration.
.1.3.6.1.4.1.41112.1.11.1.3.3.0CopyBelow is our configuration for the load power. We need to convert our value from mW (milliwatts) to W (watts) by dividing the returned value by 1000 in our value template. Also, update the IP address to correctly point to your sunMax.
- platform: snmp
name: "sunMax Load Power"
unique_id: "sunmax_load_power"
host: 192.168.0.28
baseoid: .1.3.6.1.4.1.41112.1.11.1.3.3.0
accept_errors: true
unit_of_measurement: "W"
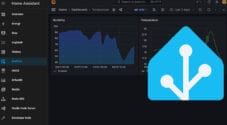
value_template: "{{((value | float) / 1000) | float}}"CopySetting up the User Interface
4. Lastly, you may want to display the data on the frontend of your Home Assistant installation. In our example, we use several custom interfaces that can be installed using HACS.
We make use of the mini graph card and the layout card.
Our setup is very basic and can be easily extended if you wish to add more data or present the data differently.
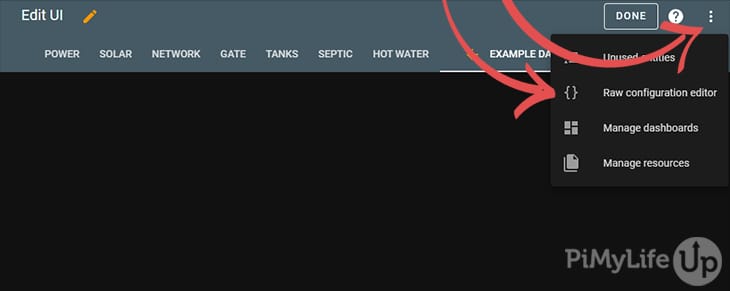
5. To use our dashboard configuration, go into the dashboard you wish to use and click the three dots in the top right-hand corner. In here, click on raw configuration editor.
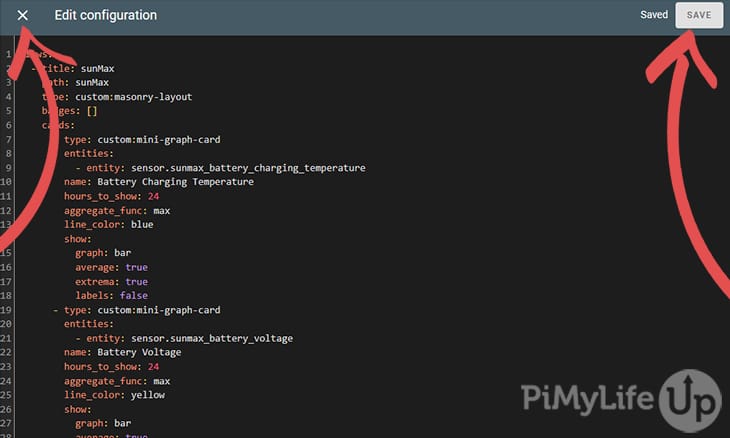
6. Copy and paste the following code into the configuration. Ensure you keep the parent views: setting and do not remove anything you want to keep. It is always good practice to backup configs before making changes.
  - title: sunMax
    path: sunMax
    type: custom:masonry-layout
    badges: []
    cards:
      - type: custom:mini-graph-card
        entities:
          - entity: sensor.sunmax_battery_charging_temperature
        name: Battery Charging Temperature
        hours_to_show: 24
        aggregate_func: max
        line_color: blue
        show:
          graph: bar
          average: true
          extrema: true
          labels: false
      - type: custom:mini-graph-card
        entities:
          - entity: sensor.sunmax_battery_voltage
        name: Battery Voltage
        hours_to_show: 24
        aggregate_func: max
        line_color: yellow
        show:
          graph: bar
          average: true
          extrema: true
          labels: false
      - type: custom:mini-graph-card
        entities:
          - entity: sensor.sunmax_load_power
        name: Power Consumption
        hours_to_show: 24
        aggregate_func: max
        line_color: red
        show:
          graph: bar
          average: true
          extrema: true
          labels: false
      - type: custom:mini-graph-card
        entities:
          - entity: sensor.sunmax_panel_power
        name: Power Collection
        hours_to_show: 24
        aggregate_func: max
        line_color: green
        show:
          graph: bar
          average: true
          extrema: true
          labels: falseCopy
7. Afterwards, click save in the top right corner and then click on the x in the top left corner.
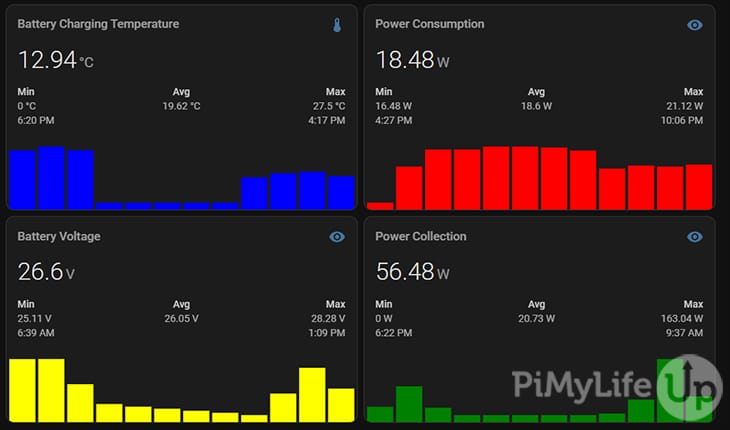
8. You should now see your data displayed in the frontend. As I mentioned earlier, you can easily alter this to display different data or display the data differently.
Conclusion
I hope you now have your Ubiquiti sunMax’s data stored in Home Assistant and that it all makes sense. If you have values that do not look correct, you may need to adjust the value template. Also, keep in mind that there is a slight delay between the web interface and the values in Home Assistant.
We have more tutorials covering Home Assistant and the many things you can do with the software. Please let us know if you have any ideas on what we should cover.
If you encounter any problems or have any suggestions to contribute, please do not hesitate to leave a comment down below.