In this tutorial, I will take you through the steps to installing InfluxDB on Home Assistant.
InfluxDB is an open-source time series database that uses the Rust programming language. It can store and retrieve time series data. Data such as analytics, sensor data, metrics, or any other data bundled with a timestamp will work best.
By using InfluxDB alongside Home Assistant, you will be able to store time series data and retrieve it later. You can use Grafana to display the data in an easy-to-read form, such as graphs and more. It is important to note that InfluxDB does not replace Home Assistant’s own database and will run alongside it instead.
This tutorial will cover how to install InfluxDB and walkthrough on some basic configurations. Our other tutorial will install Grafana and demonstrate how to use it to display data stored in InfluxDB.
How to Install InfluxDB
The installation of InfluxDB is relatively simple. However, it is important to note that you must use a version of Home Assistant that supports add-ons such as supervised or the operating system for this tutorial to work correctly. Alternatively, you can install InfluxDB in a docker and skip to the configuration steps.
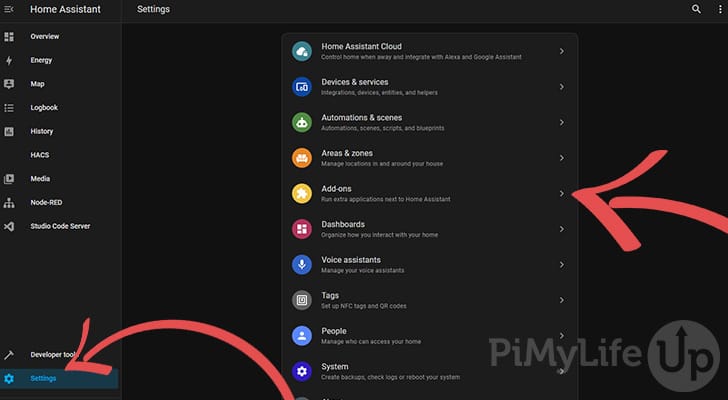
1. In Home Assistant, go to Settings. On this page, click on Add-ons.
2. On this page, click on ADD-ON STORE at the bottom right corner of the screen.
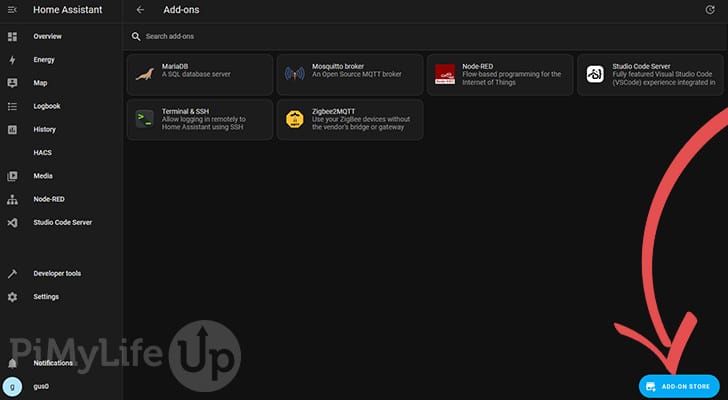
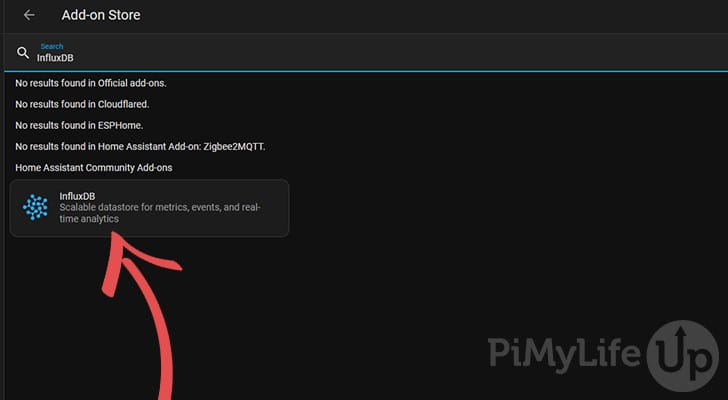
3. Next, either scroll and find the InfluxDB add-on or search for it using the search box near the top of the page. Once you find the add-on, click on it.
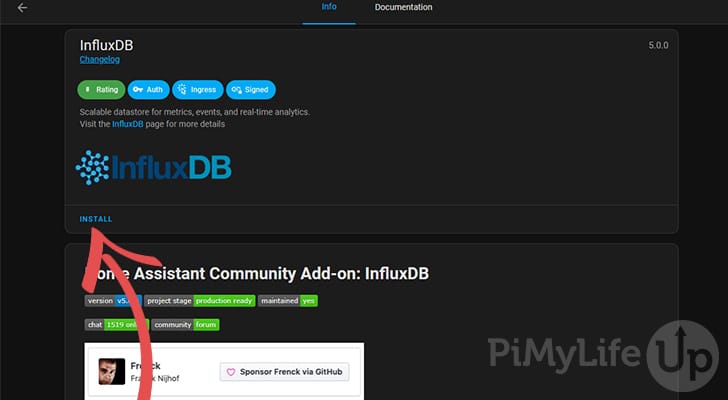
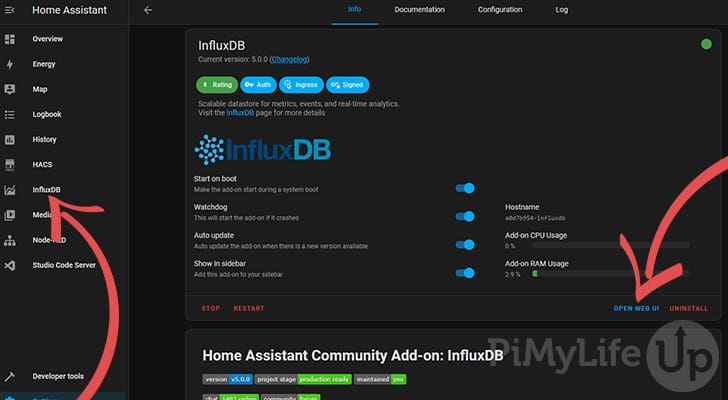
4. You should now see a screen that contains information about the InfluxDB add-on. To install the add-on, click on the INSTALL button.
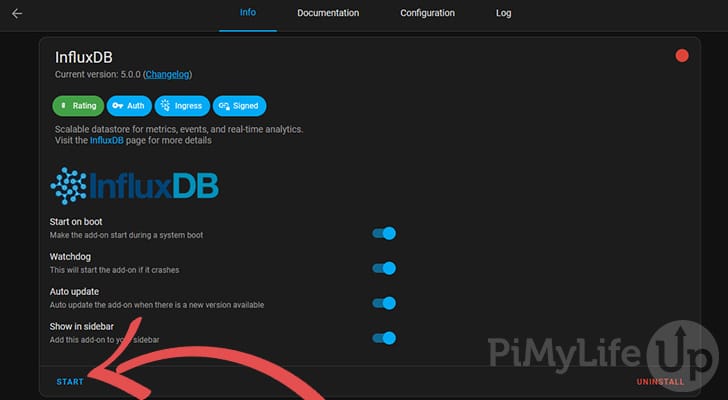
5. Once installed, you can start the add-on by clicking the START button.
You can turn on the watchdog, auto-update, and sidebar menu. However, these all come down to personal preference.
6. You can view the logs in the Log tab to ensure no errors have occurred during start-up. If you see errors, you may need to investigate to ensure that InfluxDB will start and be stable.

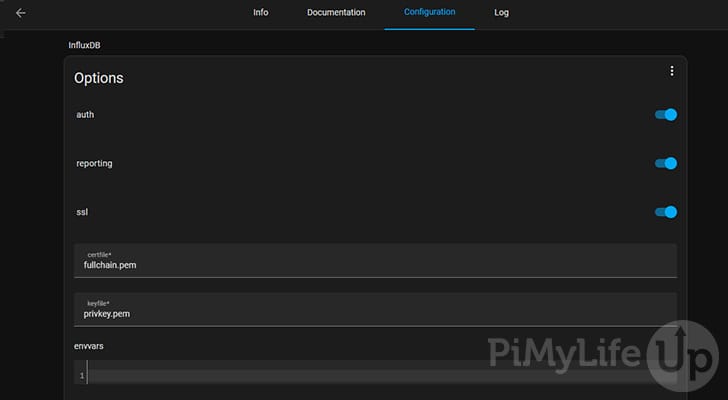
7. The Configuration tab lets you alter some of the options that come with the InfluxDB add-on. I leave these as the default configuration.
Configuring InfluxDB
Now that InfluxDB is running, we will need to configure it so we can start storing data in the database.
1. On the InfluxDB add-on page, click “Open Web UI“. Alternatively, locate the InfluxDB icon in the sidebar and click on it.
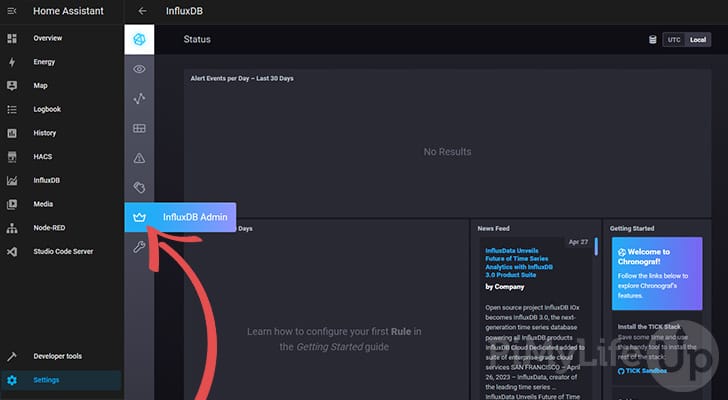
2. Within the InfluxDB interface, click on the “InfluxDB Admin” option (The Crown).
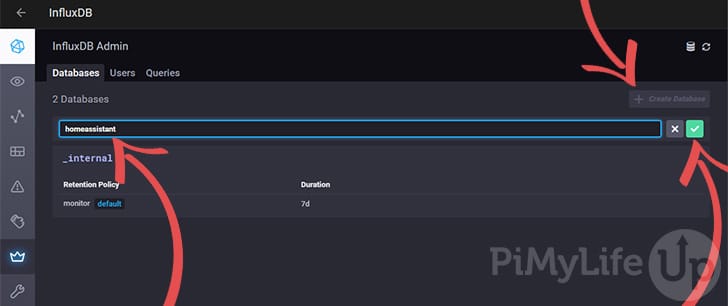
3. On the next page, create a database to store our Home Assistant data. You can give this database any name, but I recommend keeping it simple with something like “homeassistant“.
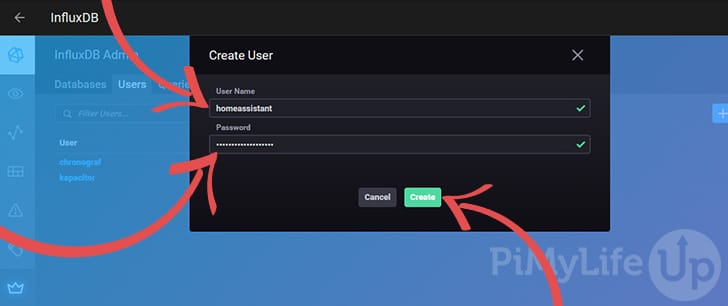
4. We need to create a user for the newly created database. Go to the Users tab and click on Create User.
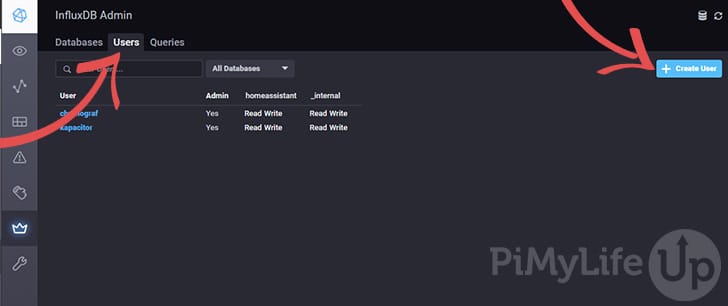
5. On the next screen, enter the username and password you wish to use for your database. I recommend using a secure password generated by a password manager.
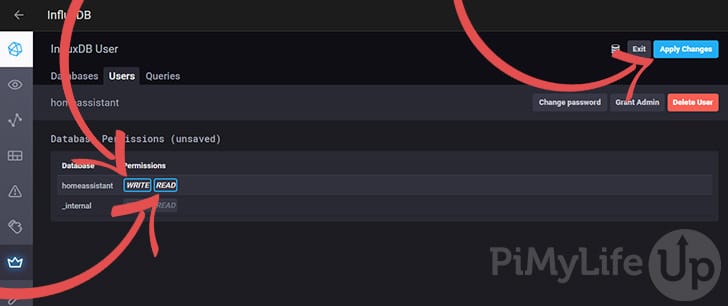
6. Grant the user read and write permissions to the homeassistant database. You can save your changes by clicking on the Apply Changes button in the top right corner.
Sending Data to InfluxDB from Home Assistant
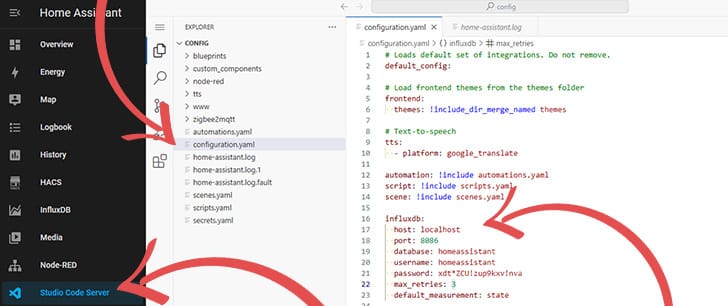
7. Now that InfluxDB is set up, we will need to add a few new lines to our configuration.yaml file.
Using the Studio Code Server editor, open up the config file and enter the following snippet.
Replace all the relevant fields with your data. For example, the password will need to be updated.
influxdb:
  host: localhost
  port: 8086
  database: homeassistant
  username: homeassistant
  password: password
  max_retries: 3
  default_measurement: stateCopy
The result should look something like our example below.
There are more options that you can configure, such as storing specific entities, sensors, and more. Please check out the full documentation if you need to alter the configuration.
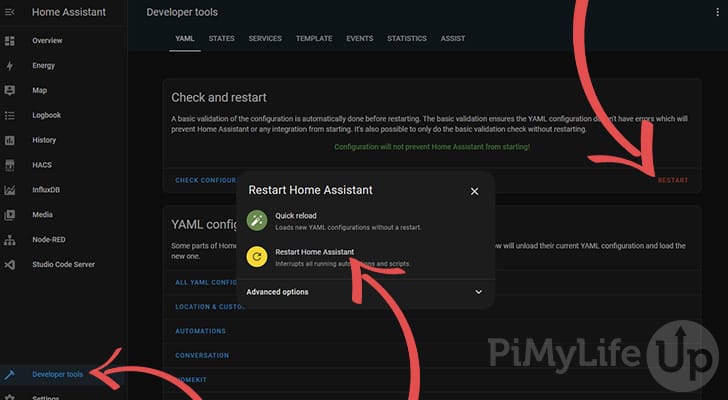
8. Now, you will need to restart Home Assistant. Go to Developer Tools and click on Restart.
In the pop-up, click on “Restart Home Assistant“.
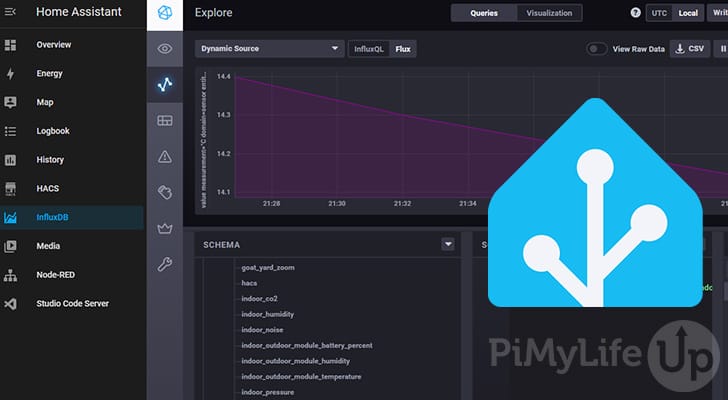
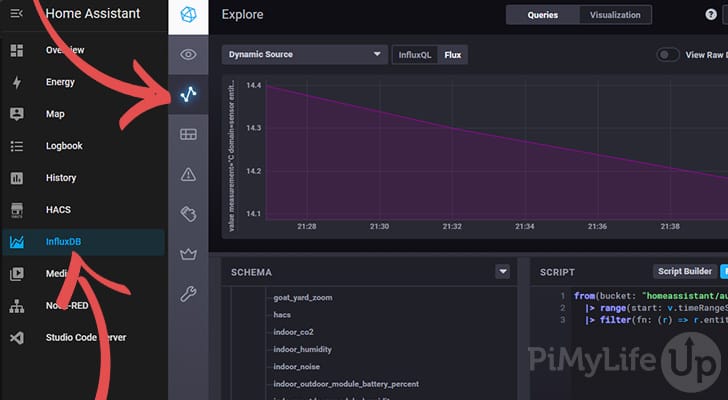
9. You should now start to see Home Assistant data in the database. Go to InfluxDB and select the Explore (Graph icon) to check.
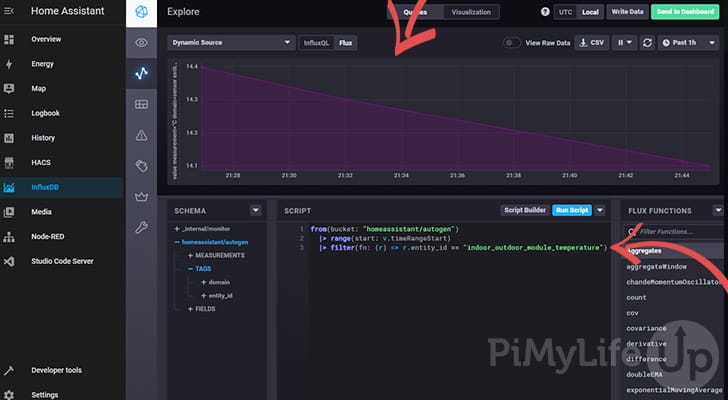
On this page, go to the SCHEMA section, and you should see a range of different data that you can query. For example, tags->entity_id will list all the different entities providing data.
Below is an example of data from the Netatmo outdoor module.
I recommend being a bit more selective by specifying the data you wish to send in the config file. This will help prevent your database from bloating. I will briefly explain how to do this below.
You can use the include and exclude parameters to specify the data you wish to send to the InfluxDB. The example below uses include so that only sensors, binary_sensor, and weather.home will be sent to the database. The add-on page contains much more detail on how to use include and exclude correctly.
influxdb:
  host: localhost
  port: 8086
  database: homeassistant
  username: homeassistant
  password: <yourpassword>
  max_retries: 3
  default_measurement: state
  include:
    domains:
      - sensor
      - binary_sensor
    entities:
      - weather.homeCopy
Conclusion
I hope the InfluxDB server is running and receiving data from Home Assistant. I highly recommend that you follow our Grafana tutorial (Coming Soon) to visualize the data better.
We have plenty more Home Assistant tutorials that I highly recommend reading if you want to expand your home automation. Also, let us know if there are any topics you would like covered, and we will do our best to find a solution.
If you have any questions or feedback, please leave a comment below.