In this tutorial, we will show you how to run the UniFi Network Controller on a Synology NAS.
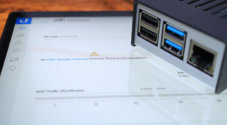
The UniFi Network Controller is a key component to any house or office that uses the widely popular UniFi range of networking gear.
This controller is in charge of adopting new devices to your UniFi network and managing them. While you can buy one of the devices Ubiquiti sells with the Network controller running on it, it is also possible to self-host this controller yourself.
A Synology NAS is a great place to host your UniFi network controller as it isn’t demanding enough that it will gobble up all your performance. Additionally, since you probably keep your NAS powered on anyway it saves you from having to plug in and manage yet another device.
We will use a Docker container to make running this controller as straightforward as possible. This has the benefit of not having to install additional software that isn’t natively supported on the Synology operating system.
Installing and running the UniFi Network Controller on a Synology NAS
In the following sections, we will walk you through installing and using the UniFi network controller on your Synology NAS and show you how to override the IP address your controller broadcasts.
Please note that before proceeding with this tutorial, you will need to have the container manager installed on your Synology NAS.
Additionally, your NAS must have a static IP address. If your router assigns it a random IP, there is a big chance the controller will break down the track.
Creating a Directory to Store the UniFi Network Controller
1. Before we install and get the UniFi Network Controller up and running on a Synology NAS, we need to do some preparatory work. The first step requires us to create a couple of folders. These folders will be where we store the controller’s Docker Compose file.
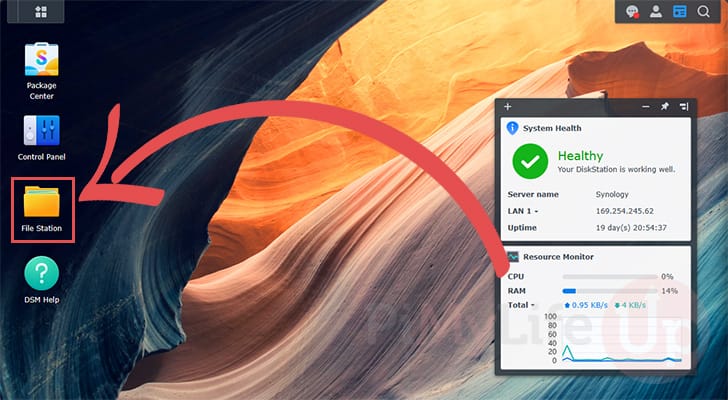
To begin this process, open the “File Station” application.
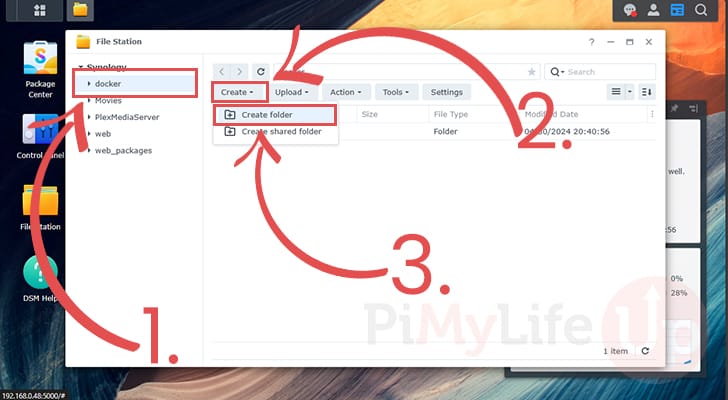
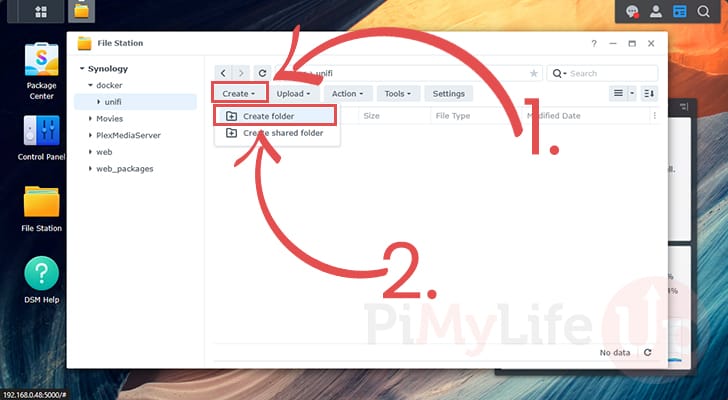
2. With File Station open, change to a directory where you want to store the network controller. In our case, we are storing ours within a shared folder called “docker” (1.).
Once you are in the correct location, click the “Create” button (2.). A drop-down menu will appear. You will want to click the “Create folder” option (3.) within this menu.
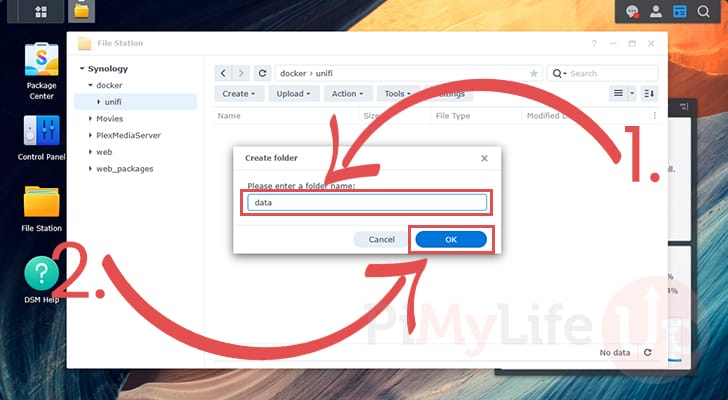
3. Using the following dialog, type in the name “unifi” (1.), and then click the “OK” button to proceed.

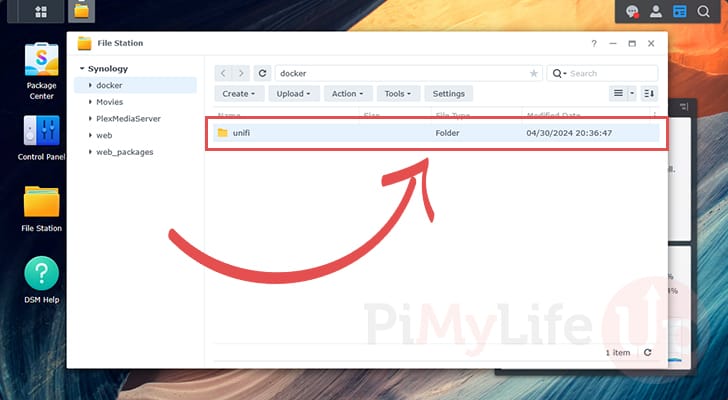
4. You should now have a directory called “unifi“. Enter this folder, as we will still need to create one more directory for the UniFi network controller to work on our Synology NAS.
5. Open the create folder dialog again by clicking the “Create” button (1.) and then clicking the “Create folder” option (2.).
6. This final folder must be named “data” (1.). Once you have typed out this name, click the “OK” button (2.).
Opening the Container Manager
7. Now that you have created the required folders, you will want to open the container manager. We will use this tool to download and run the UniFi network controller on our Synology.
You can access this tool by first opening the applications menu in the top-left corner.
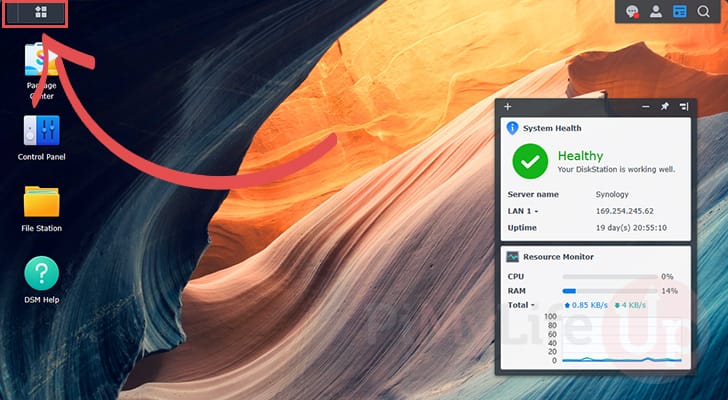
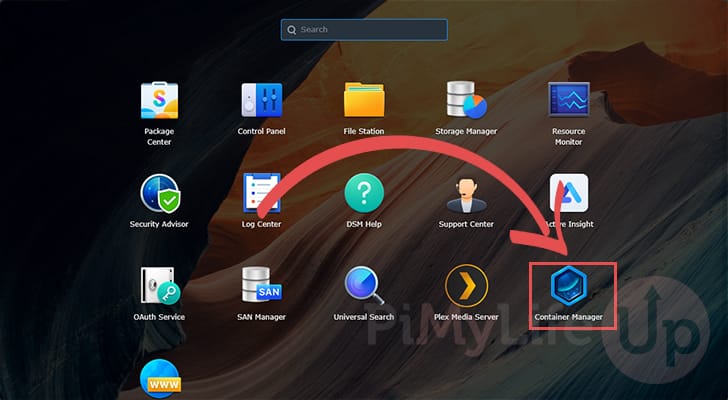
8. With the application menu open, scroll and open the “Container Manager” application.
Installing the UniFi Network Controller to your Synology NAS
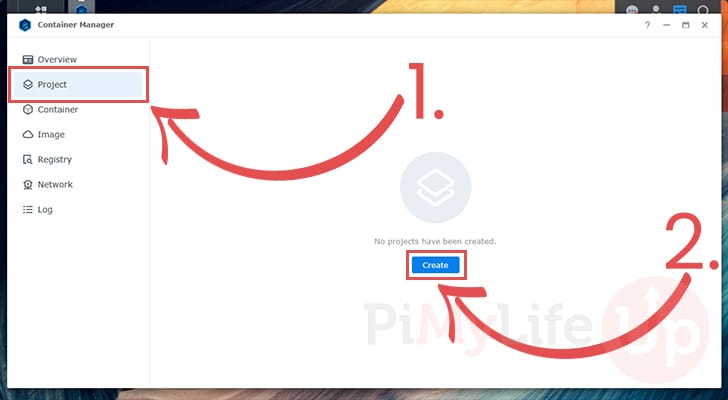
9. With the container manager now open on your Synology, change to the “Project” tab (1.).
On this tab, find and click the “Create” button (2.) to begin creating the Docker project for the network controller.
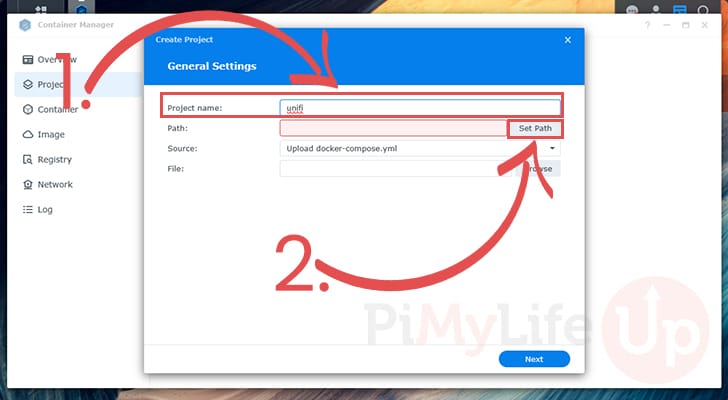
10. You will now get to fill out some information about this new project. Start by filling out a name for your project, we recommend calling this project “unifi” (1.).
After filling out the project name, click the “Set Path” button (2.).
11. This screen allows us to select where the UniFi Network Controller will be set up on our Synology NAS. Using this dialog, select the folder we created earlier in this guide (1.).
Once you have selected the right folder, click the “Select” button (2.).

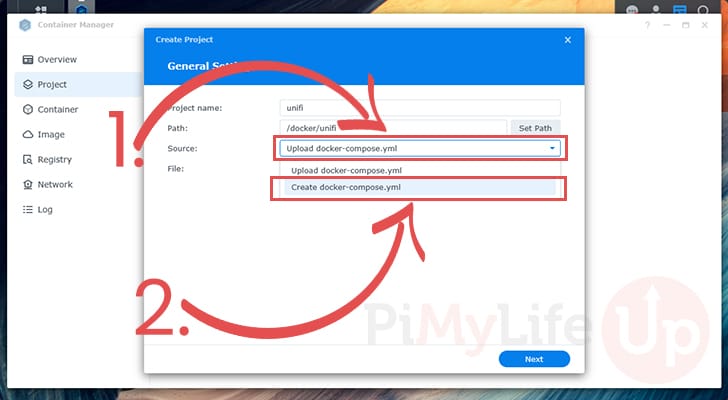
12. Now, we want to change the mode from “upload” to “create“. To do this, click the select box on this screen (1.).
Out of the two options, you will want to select the “Create docker-compose.yml” option (2.).
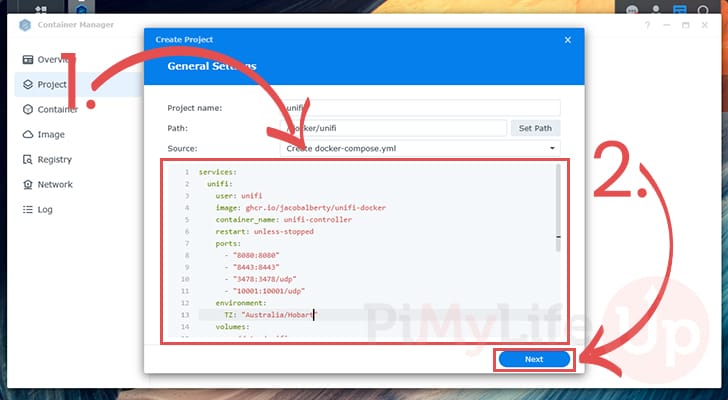
13. We can now fill out the Docker Compose file (1.) that will install the UniFi network controller on the Synology NAS.
While typing out these lines, you replace “<TIMEZONE>" with a TZ identifier for where you live. For example, we live in Hobart, Australia, so we used “Australia/Hobart“.
services:
  unifi:
    user: unifi
    image: ghcr.io/jacobalberty/unifi-docker
    container_name: unifi-controller
    restart: unless-stopped
    ports:
      - "8080:8080"
      - "8443:8443"
      - "3478:3478/udp"
      - "10001:10001/udp"
    environment:
      TZ: "<TIMEZONE>"
    volumes:
      - ./data:/unifiCopy
Once you have filled out this information, click the “Next” button (2.).
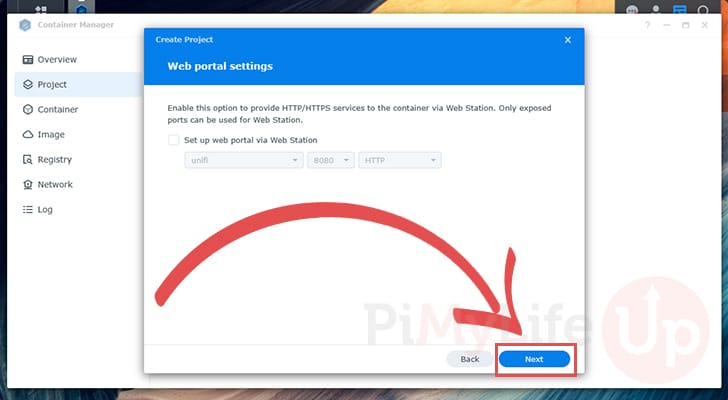
14. We don’t intend on using the web portal, so click the “Next” button to proceed.
15. To finish setting up the UniFi network controller and start it on your Synology, click the “Done” button.
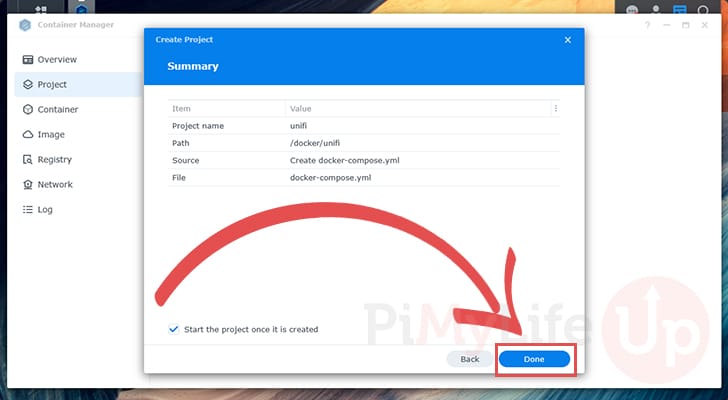
16. If everything has worked correctly, you should see the “unifi” project with a little green orb next to it.

Accessing the UniFi Network Controller Web Interface
17. Now that the UniFi network controller is up and running on your Synology NAS, you will want to access its web interface.
In your favorite web browser, go to the following address. Replace "<IPADDRESS>” with the IP of your NAS.
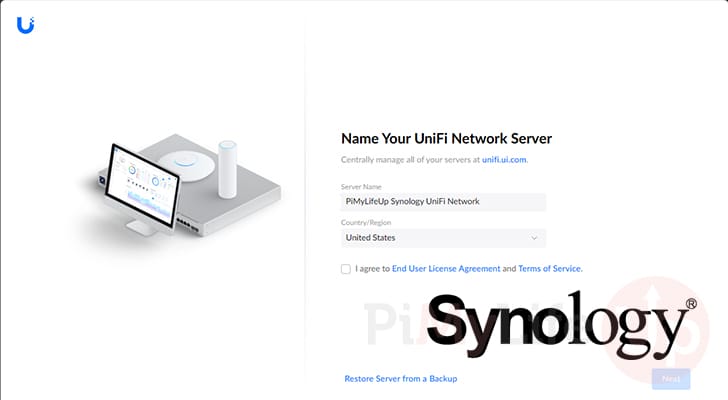
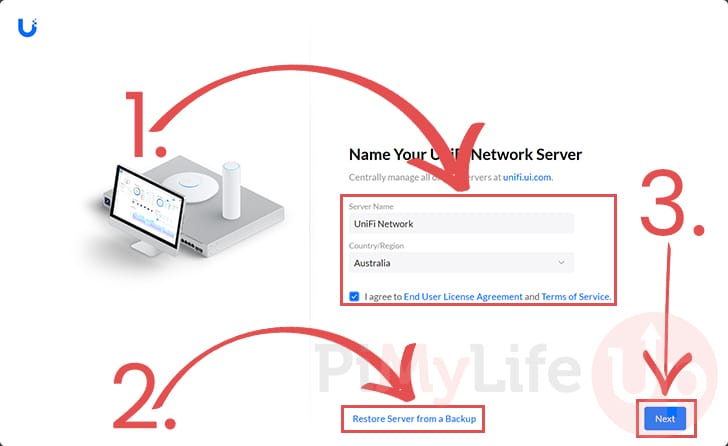
https://<IPADDRESS>:8443/18. Since this is your first time accessing your UniFi network controller, you will need to run through some initial setup steps.
Using this screen, type in a name for your server and select the country where you live (1.). With this information filled out, you can click the “Next” button (3.).
If you have run the UniFi controller previously, you can click the “Restore Server from a Backup” option (2.) to restore your controller from a backup.
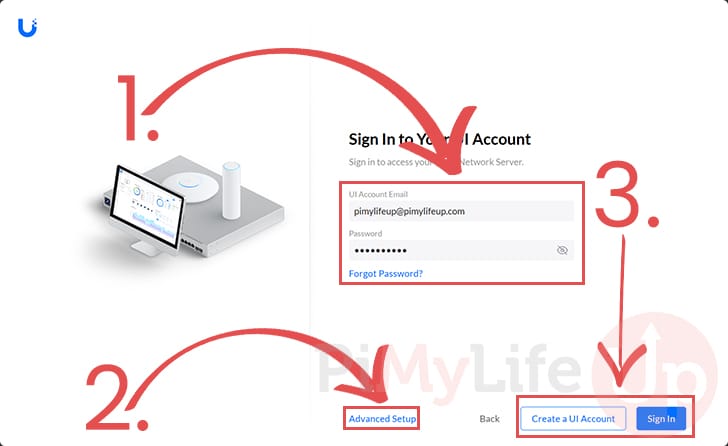
19. Next, you can choose to use a UniFi account or create a local one.
If you want to use a UI account, use the provided textboxes (1.) to fill out your email and password. With your information filled out, click the “Sign In” button to continue (2.).
Alternatively, Ubiquiti allows you to run the controller without an account. Click the “Advanced Setup” option (2.) and follow the prompts to set up a local account.
20. You have now successfully installed the UniFI network controller on your Synology NAS.
However, since we are running this controller within Docker, we must complete a few additional steps.
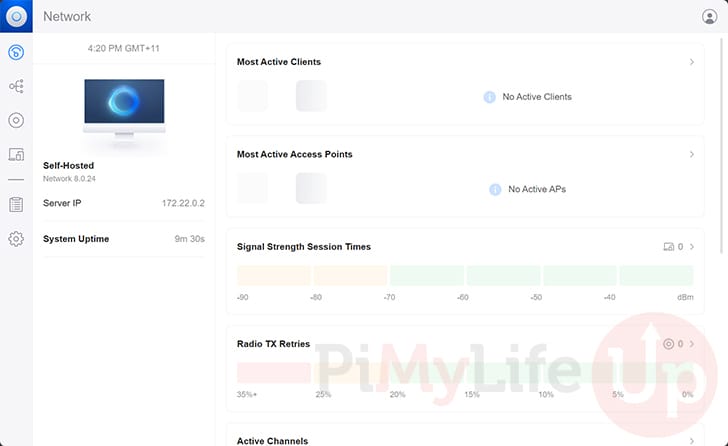
Setting the UniFi Network Controller to your Synology NAS IP address
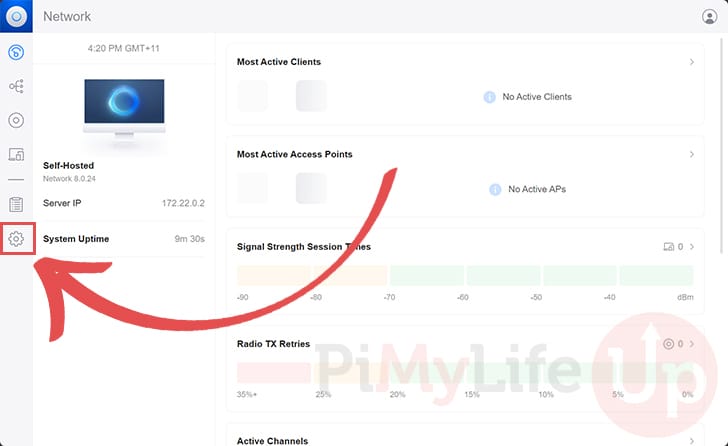
21. Since the UniFi network controller is running within a Docker container on your Synology, it won’t be able to get your machine’s IP address. Instead, it is currently using the IP Docker gave it, which will cause issues.
To change this, open the settings panel by clicking the cog in the sidebar.
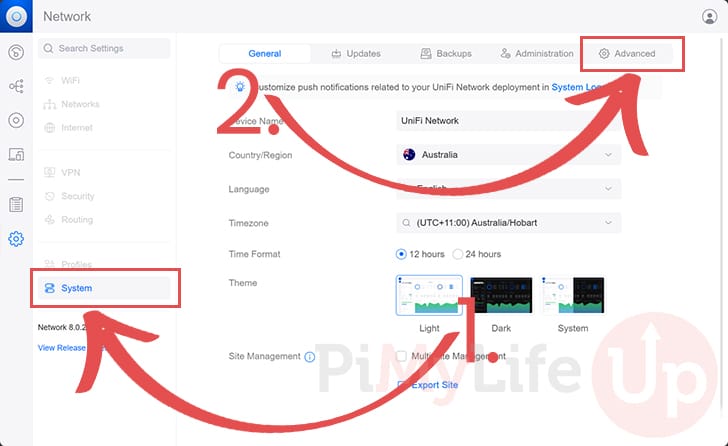
22. Within the network settings page, change to the “System” (1.) menu and then click the “Advanced” tab (2.).
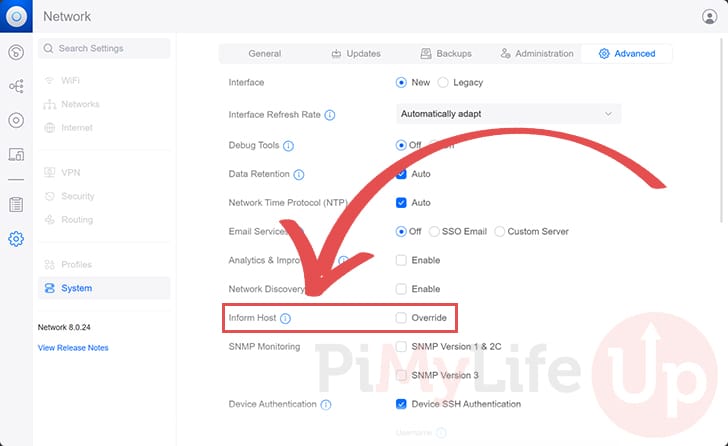
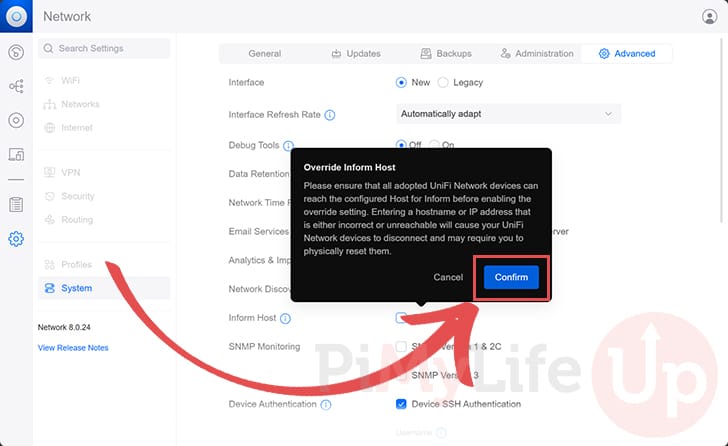
23. On this screen, you will want to find the option labeled “Inform Host” and tick the “Override” checkbox.
This option will allow us to tell the network controller what IP address we want it to broadcast.
24. You will see a warning that if you set the wrong IP address your network devices may need to be physically reset for them to start working again.
To proceed with overriding the inform host option, click the “Confirm” button.
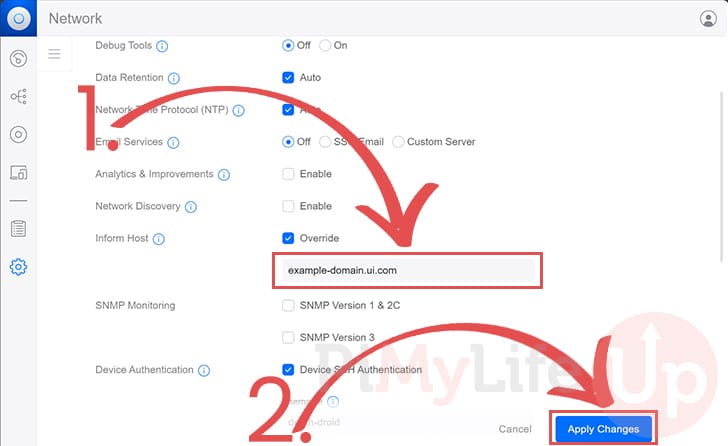
25. With the “Override” checkbox now ticked, you should see a textbox on the screen. In this textbox (1.), you will want to fill out the IP address of your Synology NAS.
Once you have typed in the correct IP, click the “Apply Changes” button (2.).
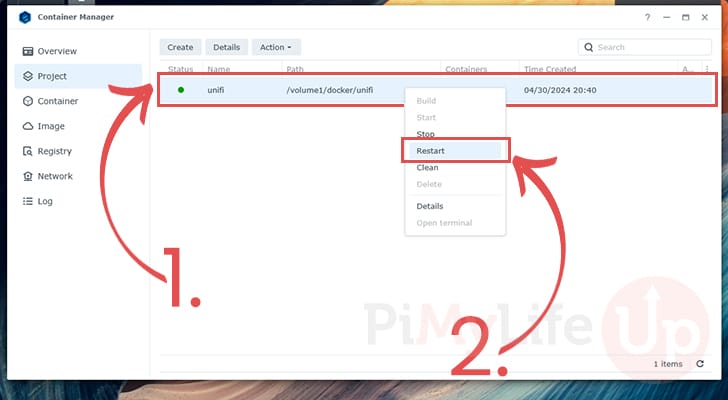
26. For this change to take effect, we must restart the UniFi network controller from our Synology NAS.
Open the Container Manager again on your Synology, find the project you created earlier (1.), and right-click it.
In the drop-down menu that appears, click the “Restart” option (2.).
Conclusion
Hopefully, at this stage, you will now have the UniFi Network Controller up and running on your Synology NAS.
Thanks to the NAS supporting Docker, installing and setting up this network controller is a relatively easy process.
Please comment below if you have had any issues getting this controller working on your Synology.
If you found this tutorial helpful, we recommend you explore what other Synology guides we offer.
Thanks, followed instructions and works perfect! Was able to adopt my UniFi devices on version 10.0.162