In this tutorial, we will show you how to play WoW on the Steam Deck.

World of Warcraft (WoW) has managed to keep its spot as one of the most popular MMORPGs despite being over 19 years since its first release.
While WoW doesn’t have a native version for the Deck’s operating system, there are a couple of ways that you can play it.
- The first is to run the game through the Steam Deck’s Proton compatibility layer. From our experience, this is a fairly flawless experience.
- Alternatively, you can dual-boot Windows on your Steam Deck and run it natively.
In this guide, we will be focusing on running WoW through the Steam Decks native operating system. The game runs quite well, even through the Proton compatibility layer.
Over the following sections, you will learn how to install and run WoW on your Steam Deck. We will also show you how to install an addon that significantly improves your experience with playing WoW using the Steam Deck’s controls.
Installing and Playing WoW on your Steam Deck
Over the following sections, we will walk you through the entire process of getting WoW to run on your Steam Deck.
We will even show you how to install the ConsolePort addon that significantly improves the controls of World of Warcraft on your Deck.
These steps are relatively easy but take some time to follow, especially if you still need to install Battle.net.
Installing Battle.net
1. Before proceeding any further with this guide, you must have Battle.net installed on your Steam Deck.
We have a guide that walks you through the process of installing Battle.net. If you already have Battle.net installed, skip this step.
2. Once you have the Battle.net client installed, you may continue with this guide.
The following sections will expect you to be in desktop mode already.
Opening the Battle.net Launcher
3. To install WoW to your Steam Deck, you must use the Battle.net launcher.
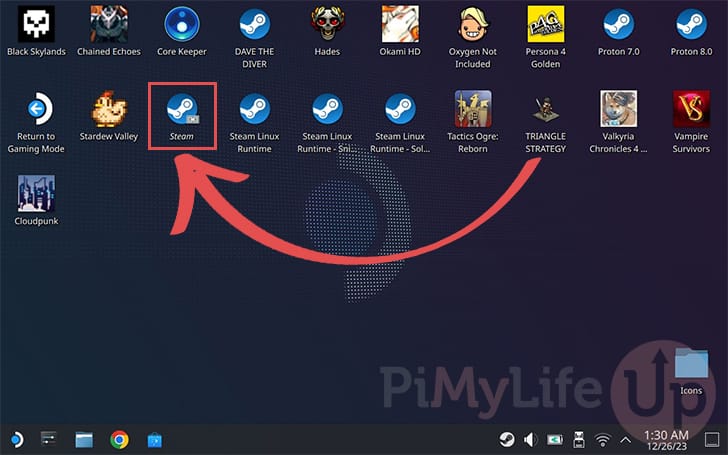
If you already have the launcher open, skip to step 6 of this tutorial. Otherwise, open the desktop version of Steam.
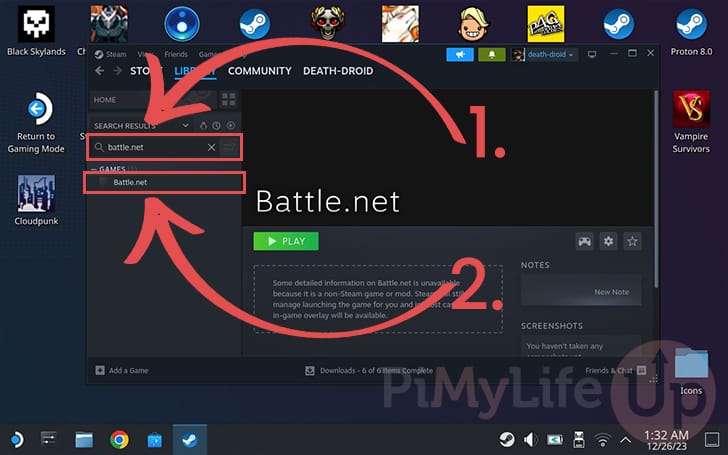
4. With the Steam desktop client open, change to your library and use the search box (1.) to look for “battle.net“.
You should “Battle.net” appear in your library list (2.). Click this entry to open up its library page.
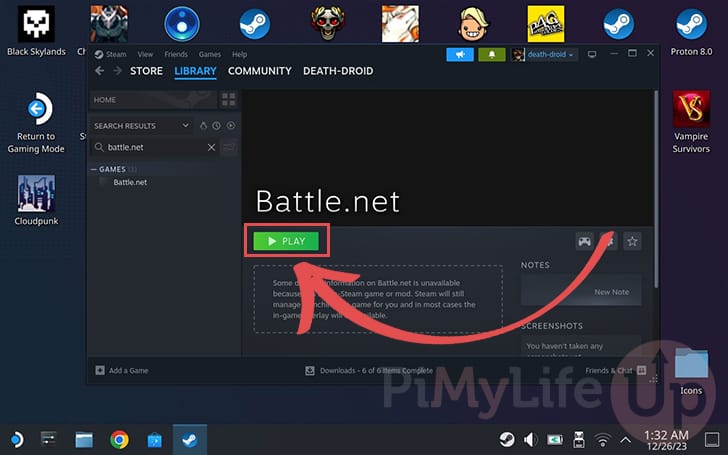
5. Once you have the Battle.net entry open, click the “PLAY” button to launch it.
Using Battle.Net to install WoW to the Steam Deck
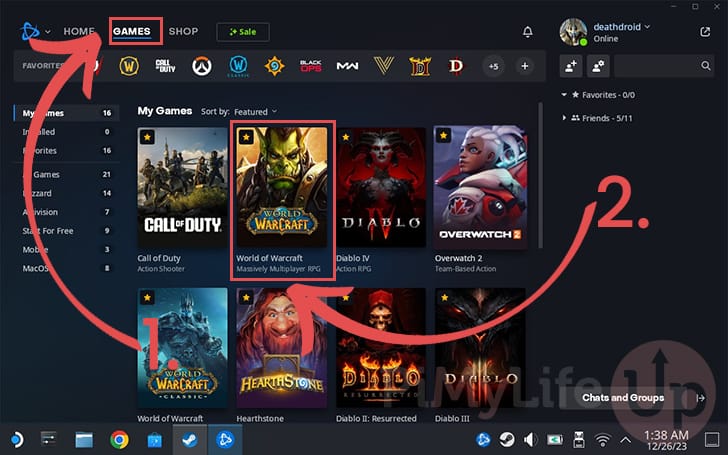
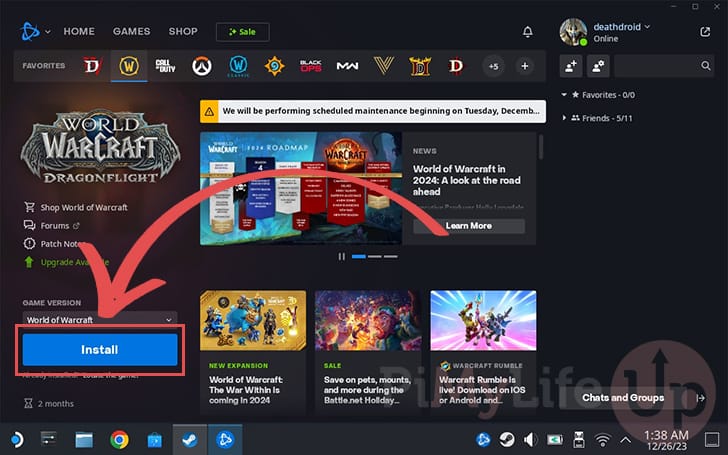
6. Now that you have the Battle.net client open on your Steam Deck, we can move on to installing WoW.
First, change to the “Games” tab (1.), and then find and select “World of Warcraft” (2.) under the “My Games” header.
7. Once you are on the game page for WoW, you can begin the install process by clicking the big “Install” button.
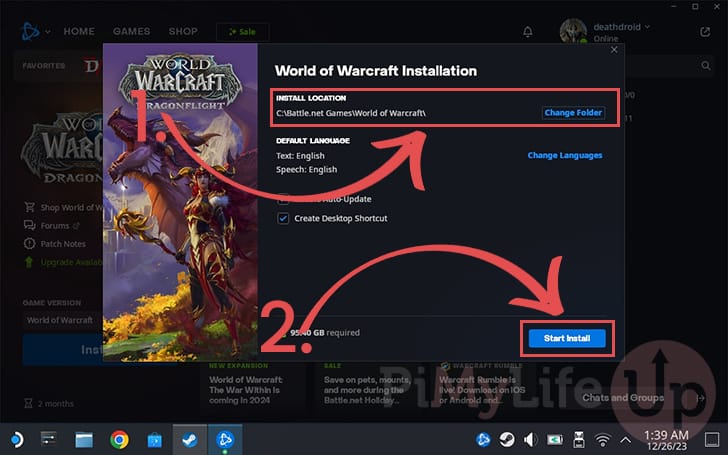
8. You will now get to select where WoW is installed on your Steam Deck (1.).
If you followed our Steam Deck Battle.net tutorial, you will have created a directory in your home to store your Battle.net games. Use this directory to make accessing WoW folders easy on your Deck.
After ensuring the install location is correct, click the “Start Install” button (2.).
9. WoW may take considerable time to download and install to your Steam Deck. This highly depends on the speed of your internet connection.

10. Once World of Warcraft has finished installing to your Steam Deck, you may proceed with this tutorial.
Downloading and Running CurseForge on the Steam Deck
11. Before you launch WoW on your Steam Deck, we will want to install an addon called ConsolePort. This addon makes WoW significantly easier to play on a gamepad like the Deck’s controls.
To install this addon, we will use a tool called CurseForge. This tool facilitates the downloading and installation of add-ons for WoW. While others are available, this is one of the few with a native client for the Linux operating system.
To install this tool, we must first open a web browser on your Steam Deck.
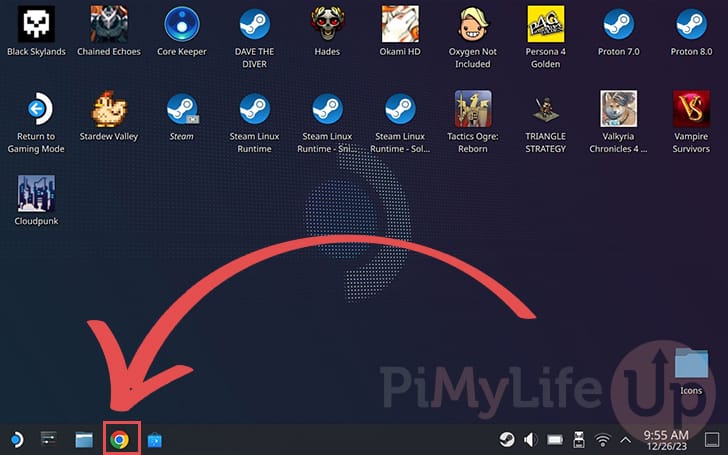
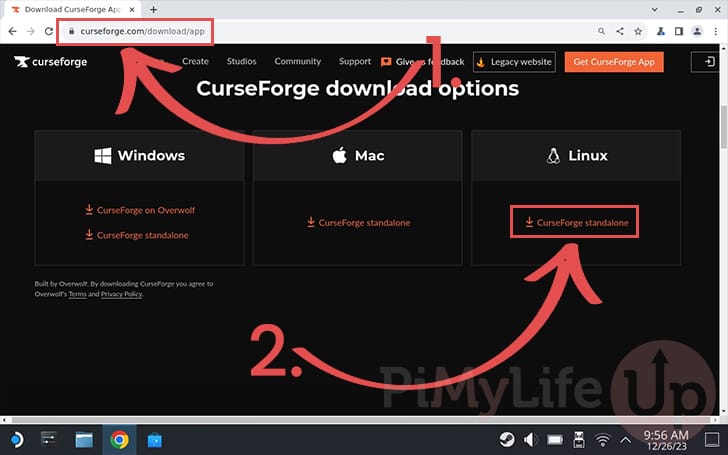
12. With a browser open, go to the following URL (1.). This URL is the download page for CurseForge on Linux.
https://www.curseforge.com/download/app#download-optionsOnce on this page, click the “CurseForge standalone” link under the “Linux” header.
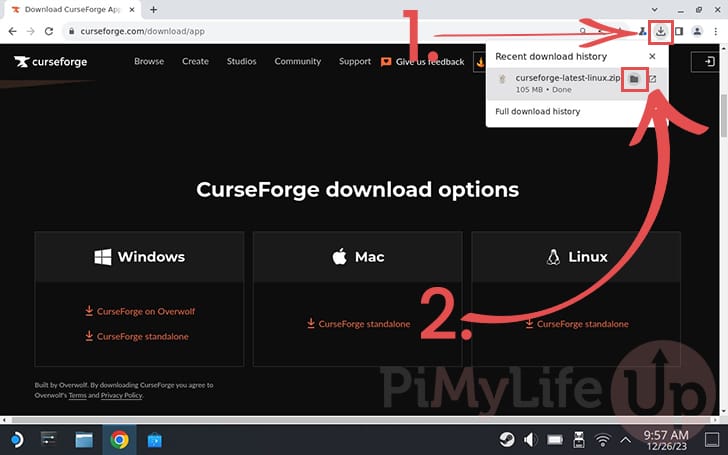
13. After the archive has been downloaded, click the “Download” icon in the top bar of the browser (1.).
In the downloads pop-up, you should see a file called “curseforge-latest-linux.zip“. You must click the “Folder” icon next to this entry (2.). This button takes you to where you downloaded CurseForge.
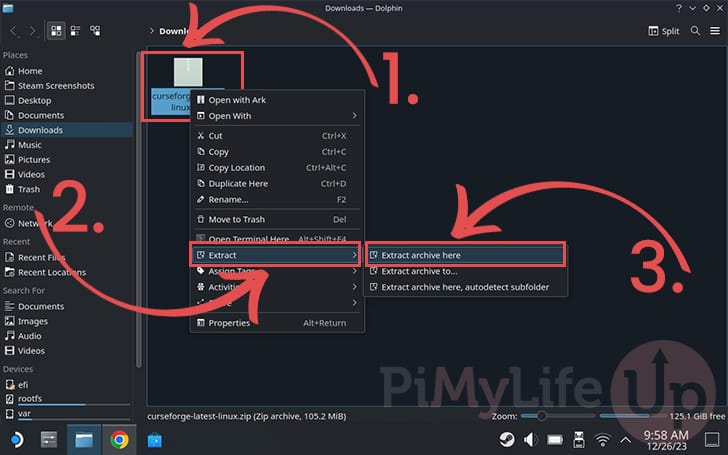
14. With the downloads folder open, right-click the “cursforge-latest-linux.zip” archive (1.). You can right-click using the Steam Deck by using the left trigger.
You should now be greeted with a few different options. Navigate to the “Extract” option (2.) to reveal more options.
Finally, click the “Extract archive here” (3.) option to unzip this archive.
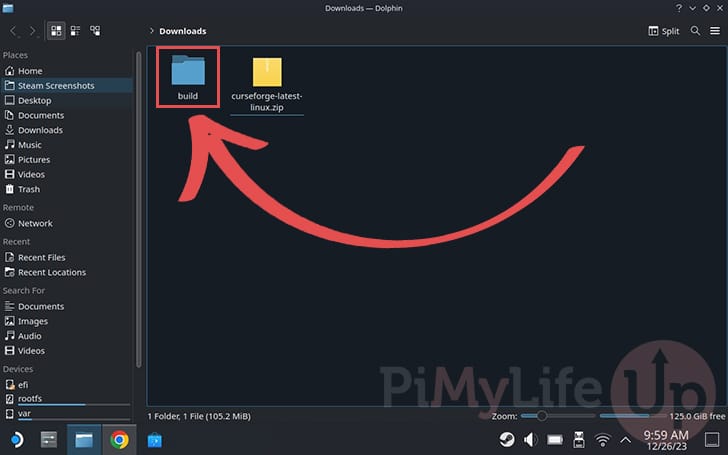
15. You should now have a directory called “build” in your downloads folder.
Navigate to this folder to continue.
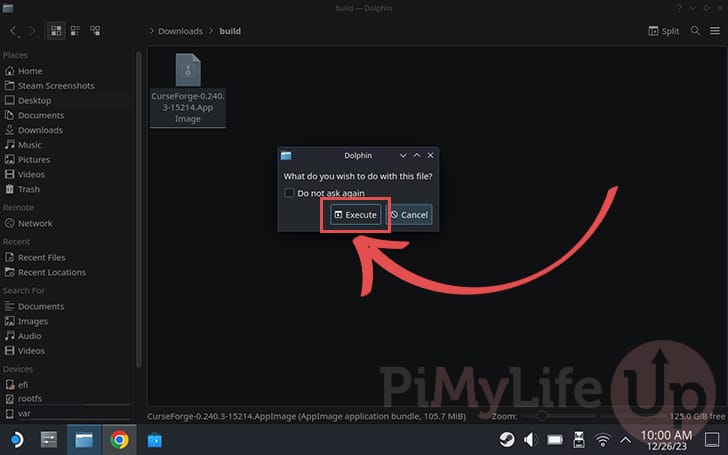
16. Within this “build” folder, you should see a file starting with “CurseForge” and ending in “.AppImage“.
Double-click this file to begin running CurseForge on your Steam Deck.

17. Dolphin will ask if you want to “Execute” this file.
To continue launching this WoW Add-on manager, click the “Execute” button.
Adding your Steam Deck WoW Install to CurseForge
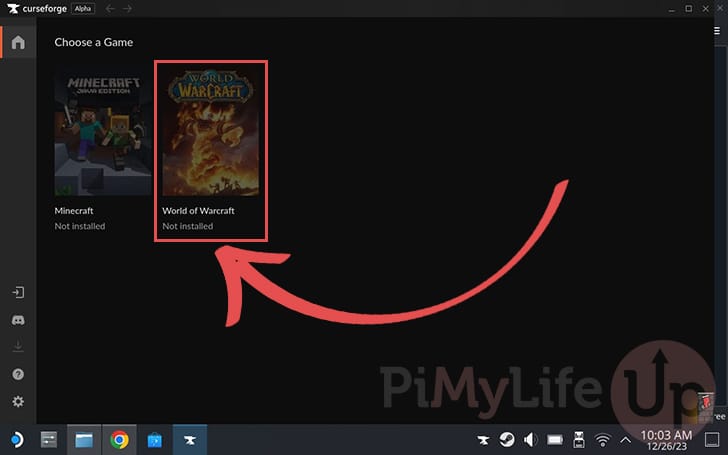
18. CurseForge will not automatically detect our Steam Deck WoW Installation. Luckily, it allows us to select the install directory fairly easily ourselves.
To begin this process, click the “World of Warcraft” option.
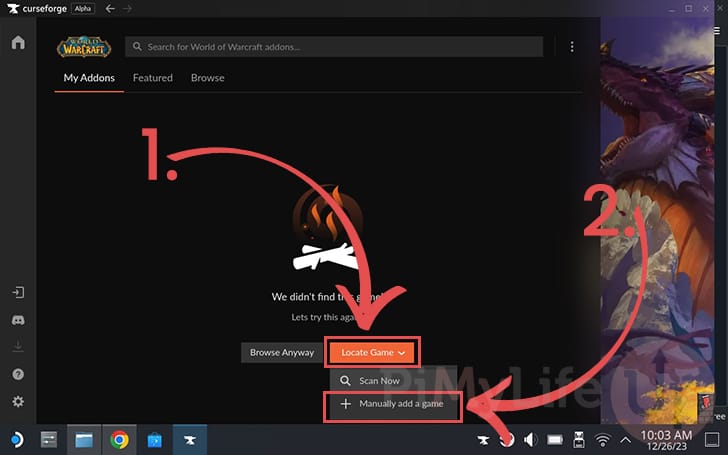
19. On this page, click the “Locate Game” button (1.) to bring up two options.
You must click “Manually add a game” (2.) in the top options that appear. The scanning functionality will not pick up your WoW installation.
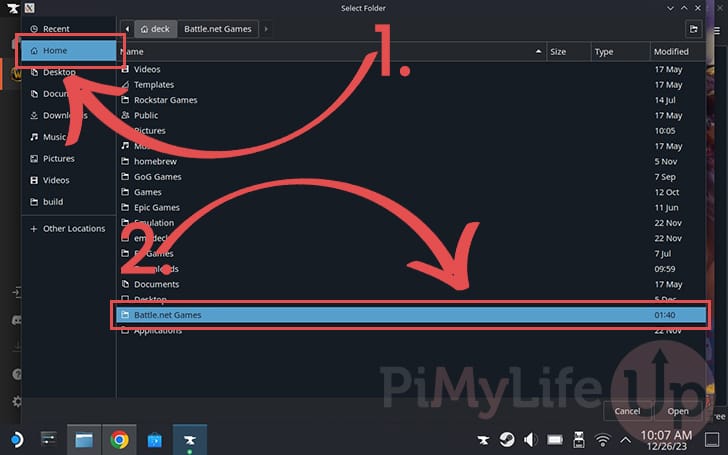
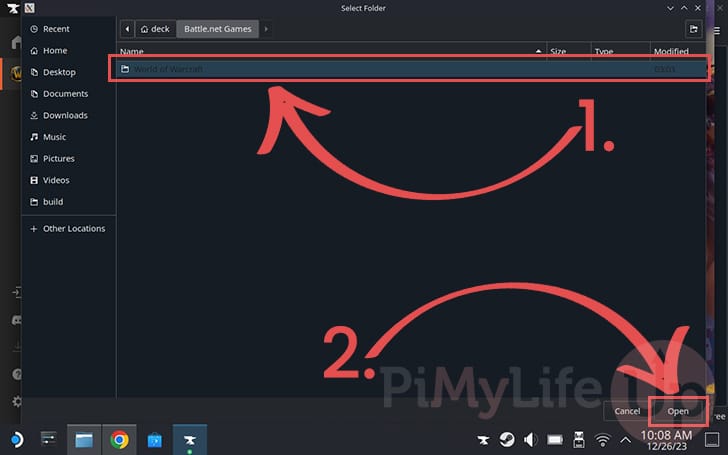
20. With the file browser now open, you must navigate to where you installed World of Warcraft. If you have been following our guides, this should be similar to what we show below.
First, change to the “Home” directory using the sidebar (1.). Once you are back in your Home directory, find a folder labeled something like “Battle.net games” (2.) and double-click it.
21. You can see in our example that this is where we installed World of Warcraft on our Steam Deck. Single-click the folder to select it (1.).
With the folder selected, click the “Open” button (2.) in the bottom-right corner.
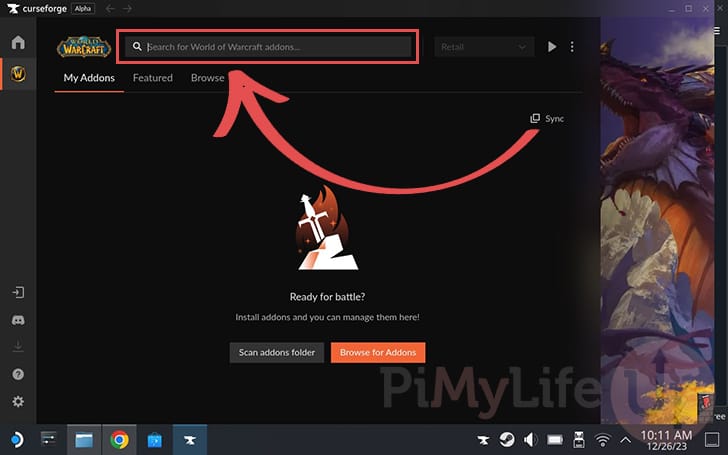
22. CurseForge should now notice your WoW installation, and you can begin installing addons.
Sometimes, you have to click back to the home in CurseForge and then back on the WoW icon for it to refresh its screens.
Adding the ConsolePort Addon to WoW
23. Using the search box at the top of the screen, look for “ConsolePort“.
This ConsolePort addon will make playing WoW on your Steam Deck a much nicer experience.
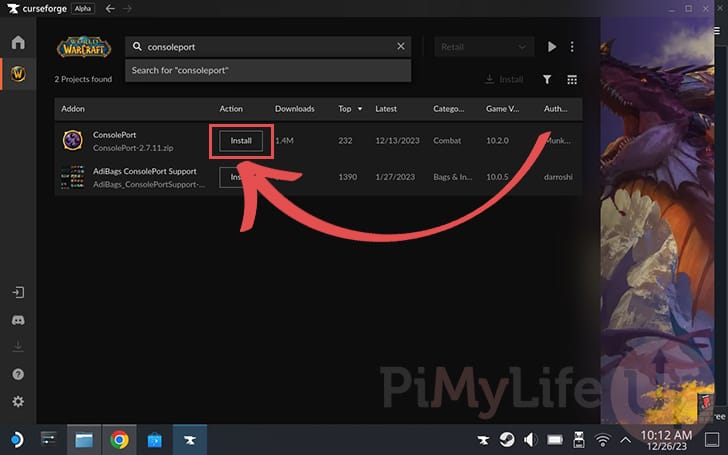
24. Eventually, you should see “ConsolePort” appear in the list of available addons for WoW.
Once you have found it, all you must do is click the “Install” button.
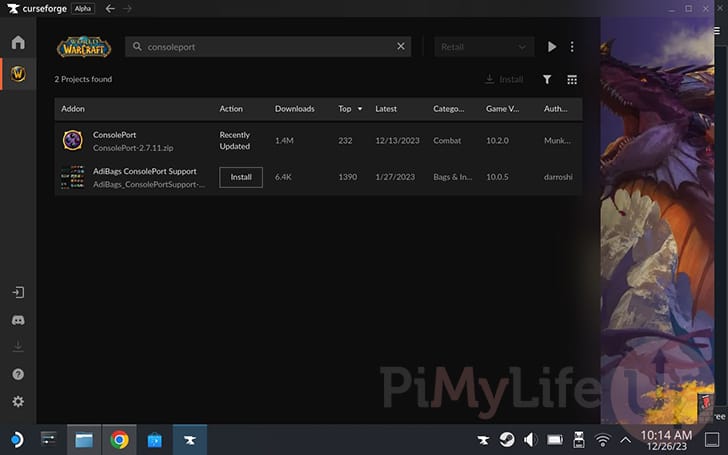
25. Below, you can see that we now have the ConsolePort addon installed, and we can now try launching the game.
Returning to Gaming Mode
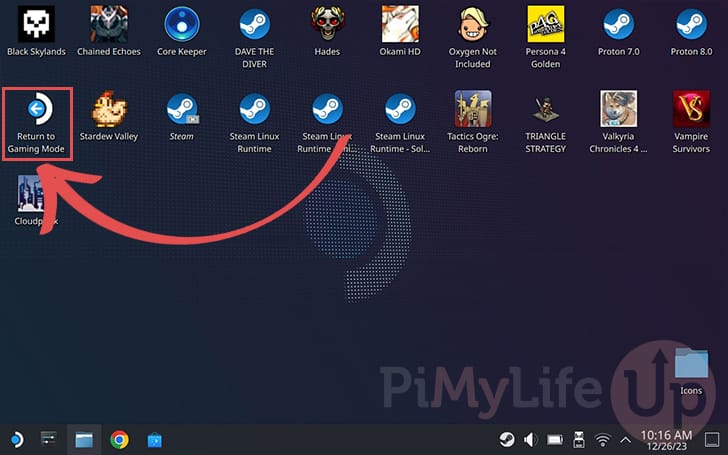
26. Before we launch WoW, we will want to return to gaming mode.
The easiest way to do this is to double-click the “Return to Gaming Mode” icon on the desktop.
Running WoW on the Steam Deck
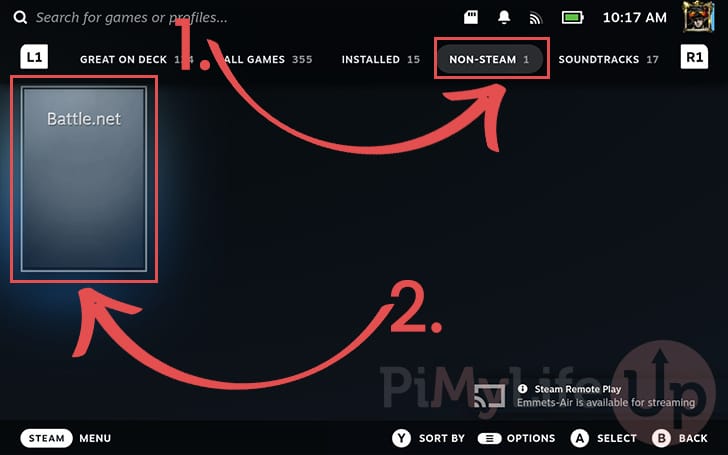
27. Now that you are back in gaming mode, open your Steam Deck library and change to the NON-STEAM (1.) tab.
Here, you should see the Battle.net launcher you installed earlier. Select the launcher (2.) to continue.
We need to use this launcher to play WoW as it helps keep the game up to date and automatically logs us in.
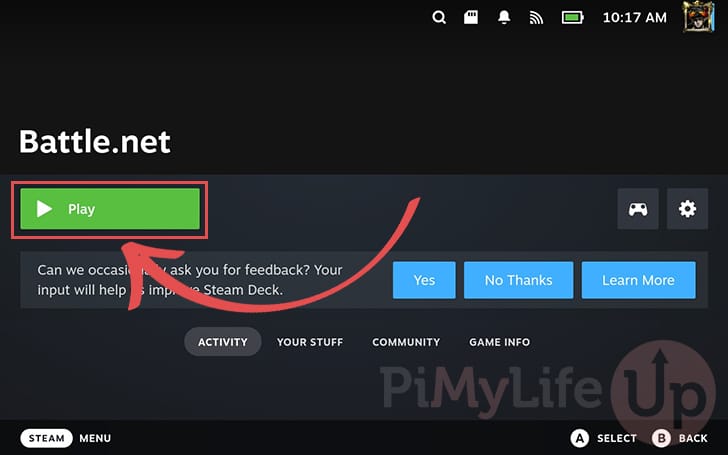
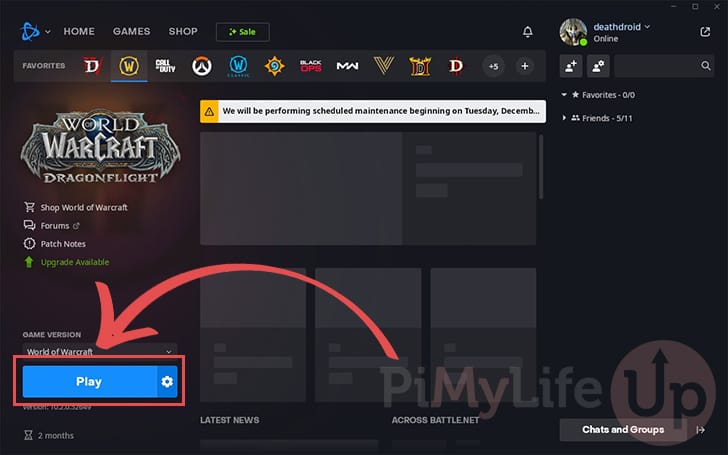
28. Launch the Battle.net client by clicking the big green “Play” button.
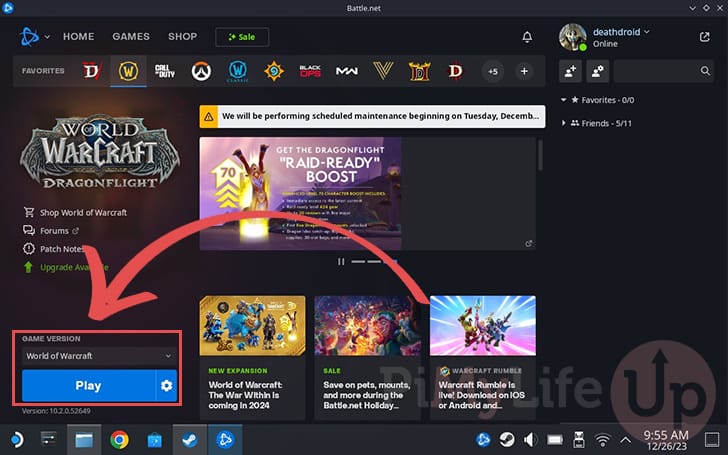
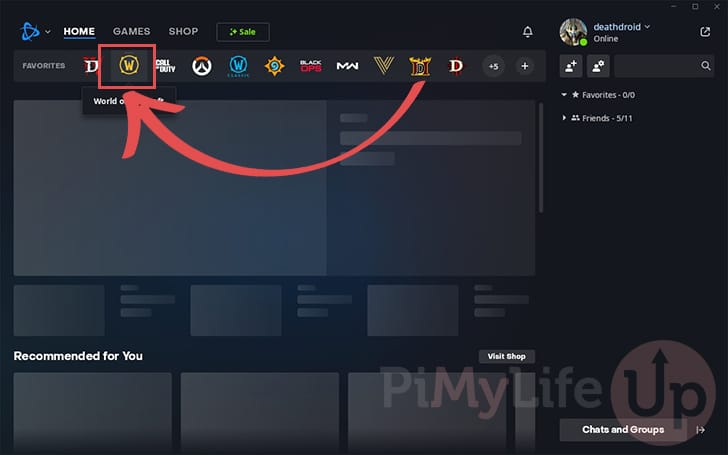
29. With Battle.net now open in gaming mode, click the World of Warcraft icon to be quickly taken to its game page.
30. You can now play WoW on your Steam Deck by clicking the “Play” button.
31. With WoW open on your Steam Deck, select or create your character, then launch into the game world.
You may have to press the STEAM button to perform clicks while using WoW. Don’t worry, as the ConsolePort addon will significantly improve the in-game experience.
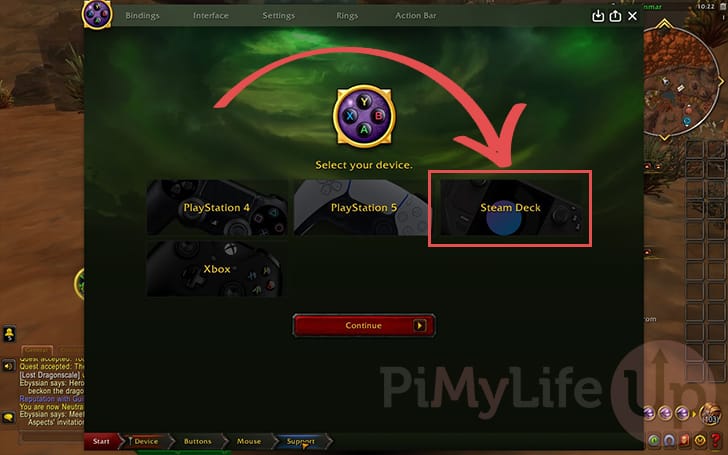
32. Immediately after starting a game with your character, you will be asked to select a device for the ConsolePort addon.
Look for and select the “Steam Deck” option, as this will configure WoW to work best with your Steam Deck controls.
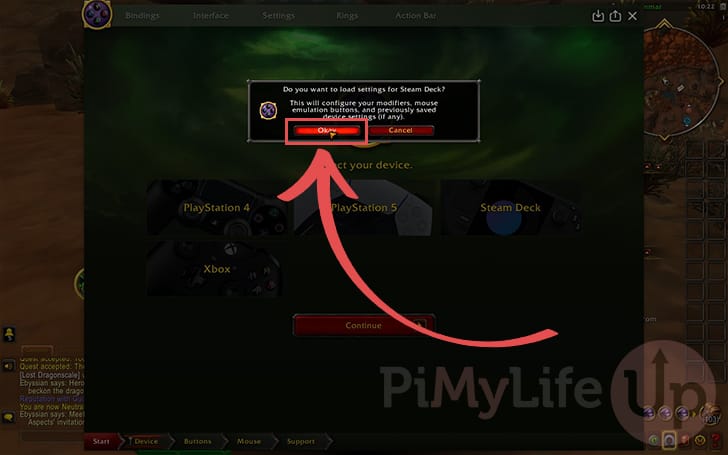
33. You will see a message asking if you want to load in the ConsolePort settings for the Steam Deck.
Click the “Okay” button to proceed.
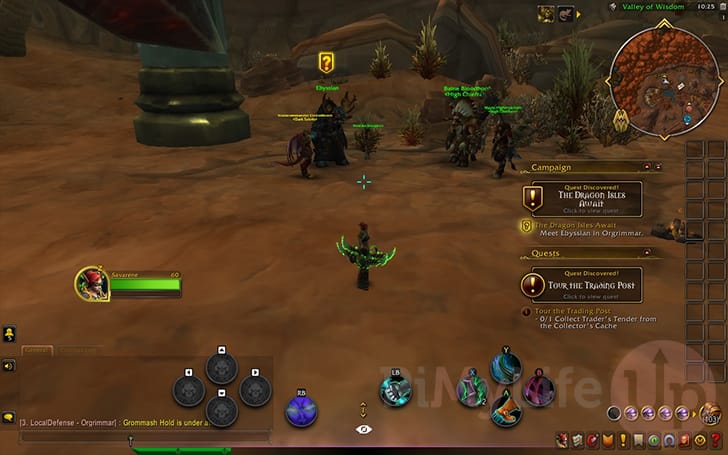
34. Once you finish setting up the ConsolePort addon, you will finally be greeted with your Steam Deck-friendly WoW interface.
It may take a little bit to get used to, but this interface allows you to control your character and all of its special abilities with ease.
Conclusion
Hopefully, at this stage in the tutorial, you will now have WoW installed on your Steam Deck alongside the ConsolePort addon.
This ConsolePort addon makes playing World of Warcraft on your Steam Deck a much more native experience. It automatically helps map abilities to specific actions and button presses. It is also highly configurable, so you can customize it to suit your needs.
Please feel free to leave a comment below if you have run into issues with getting WoW to work.
If you found our tutorial helpful, we highly recommend checking out our numerous other Steam Deck tutorials.