In this tutorial, we will be showing you how to use Chiaki4Deck on your Steam Deck to stream PlayStation games.
Chiaki4Deck is a modified version of Chiaki focusing on the Steam Deck. It comes with additional functionality that isn’t provided through the original version and improves your PlayStation streaming experience.
Some of the improvements Chiaki4Deck offers your Steam Deck are the support of HDR, better discovery of PlayStations on your local network, and the ability to resume the connection to your PlayStation when your Deck resumes from sleep.
This version even has a UI that is friendly to both the touch screen and GUI of the Deck, making it significantly easier to use in gaming mode.
Installing Chiaki4Deck is a super easy process as it is available in desktop mode through the Discover app.
Please follow our updated guide on installing Chiaki on your Steam Deck. This guide is kept here for archive purposes as this was renamed from Chiaki4Deck to Chiaki-NG.
Installing and Using Chiaki4Deck on your Deck
Over the following steps, we will be walking you through the whole process of installing and using Chiaki4Deck on your Steam Deck.
This process won’t take very long, thanks to Chiaki4Deck being built for the Deck and packaged as an easy-to-install Flatpak.
Change to Desktop Mode
1. If you have gotten to this point, you must change to our guide on setting up Chiaki on the Steam Deck. The steps included below will no longer work correctly.
Before we can install Chiaki4Deck to the Steam Deck, we will need to change to desktop mode.
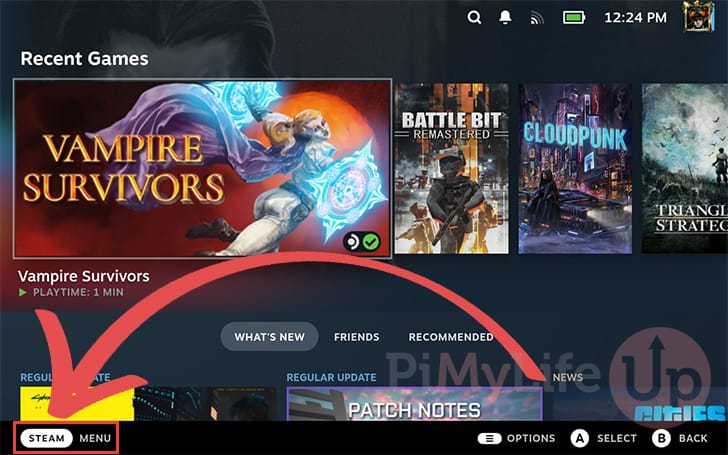
To start this process, click “STEAM MENU” in the bottom-left corner or press the STEAM button on your Deck.
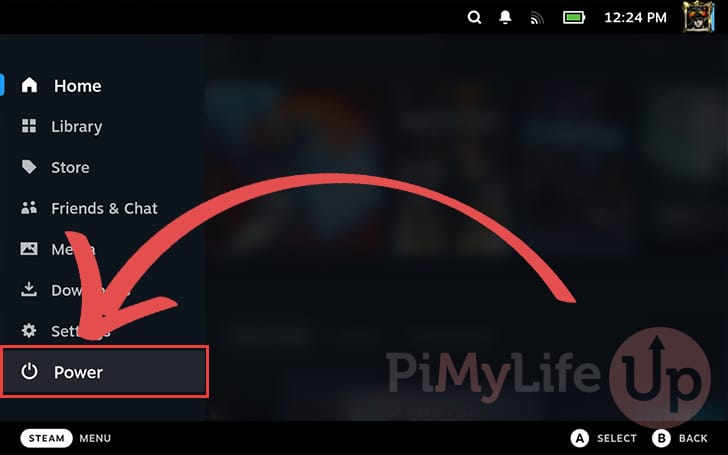
2. After opening up the Steam menu, click the “Power” option at the bottom of the list.
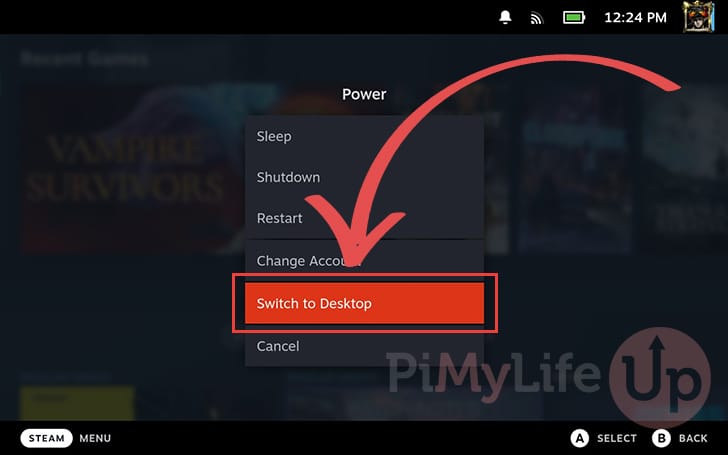
3. Find and select the “Switch to Desktop” option within the power menu.
Installing Chiaki4Deck on the Steam Deck using the Discover App
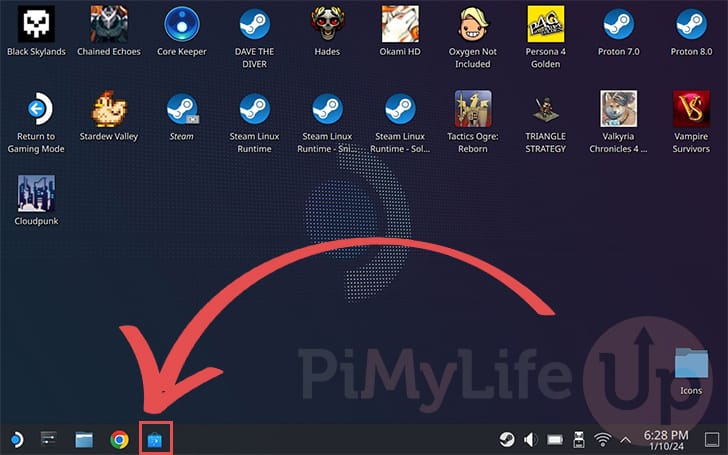
4. Once you are in desktop mode, you will want to open the Discover app by clicking the shopping bag icon.
We will use this app to install Chiaki4Deck to the Steam Deck easily.
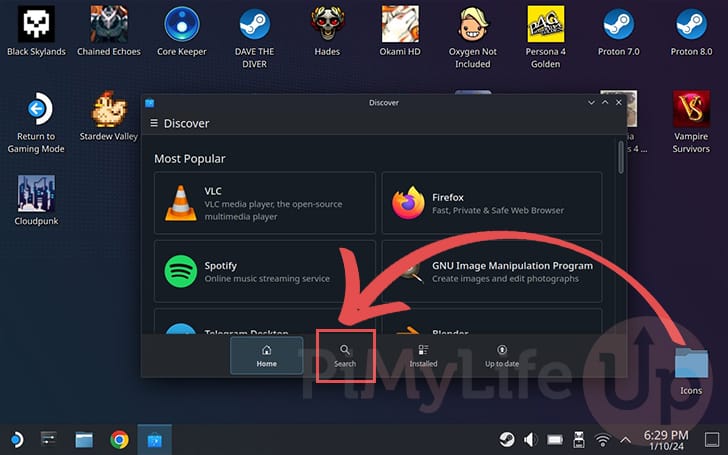
5. Once you have the Discover app open, you must change to the “Search” tab.
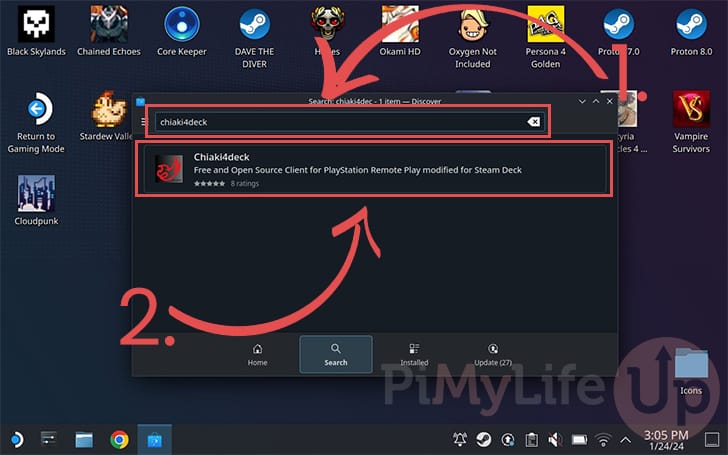
6. After switching to the search screen, you will want to use the search box to search for “chiaki4deck” (1.). Remember you can bring up the virtual keyboard by pressing X on your Deck.
You should eventually see “Chiaki4Deck” appear as an entry on this page. Double-click it to open its Discover page.
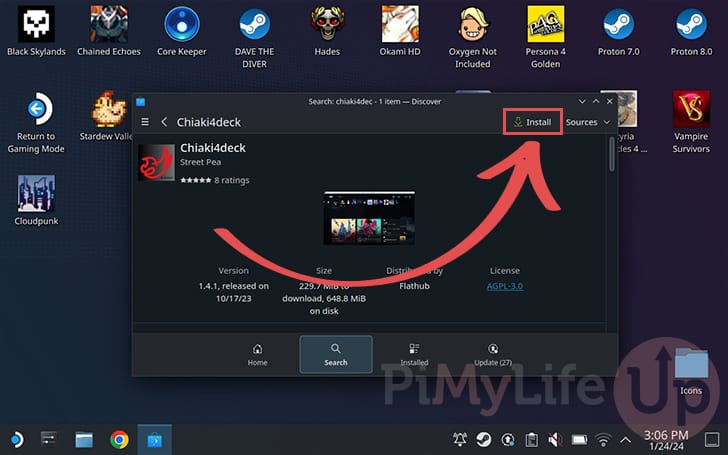
7. Now, all you need to do to install Chiaki4Deck to your Steam Deck is to click the “Install” button in the top-right corner.
The installation process might take a few minutes, depending on your internet connection speed.
Adding As a Non-Steam Game
8. With Chiaki4Deck installed, our next step is to make it available through the Steam Deck’s gaming mode.
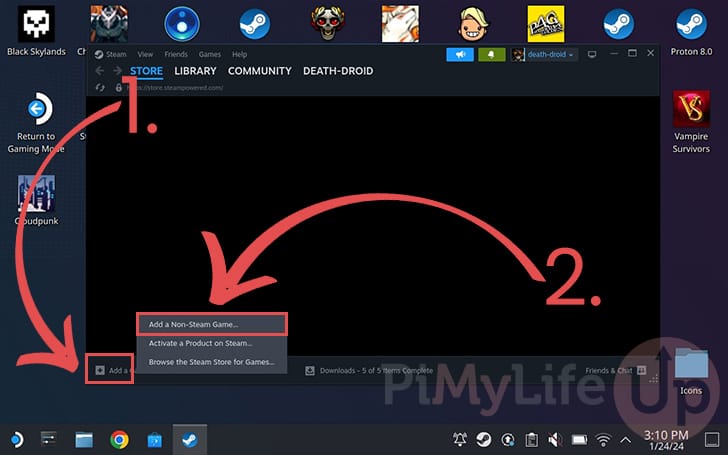
To do this, we must add this application as a Non-Steam Game. To begin this process, open the desktop version of the Steam client.
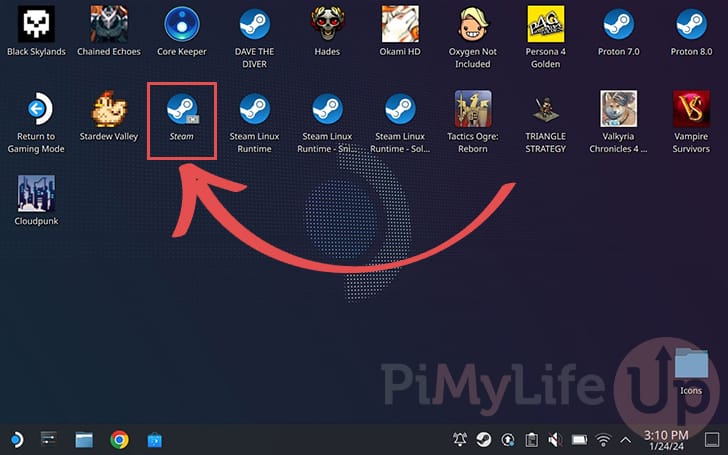
9. After opening the Steam desktop client, click the “Add a game” option (1.) in the bottom-left corner.
Clicking this button should open up a few more options. Click the option labeled “Add a Non-Steam Game...” (2.).
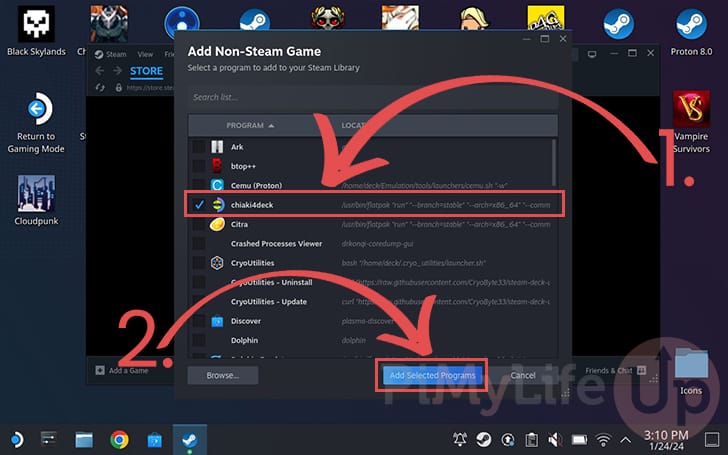
10. With the “Add Non-Steam Game” dialog open, find and tick the checkbox next to the item labeled “chiaki4deck” (1.).
Once you have Chiaki4Deck selected, all you need to do to add the software to your Steam Deck library is click the “Add Selected Programs” button.
Return to Gaming Mode
11. With Chiaki4Deck added to your Steam Deck library, you will want to return to gaming mode.
One of the easiest ways to return to gaming mode is to double-click the “Return to Gaming Mode” icon.

Launching Chiaki4Deck on your Steam Deck
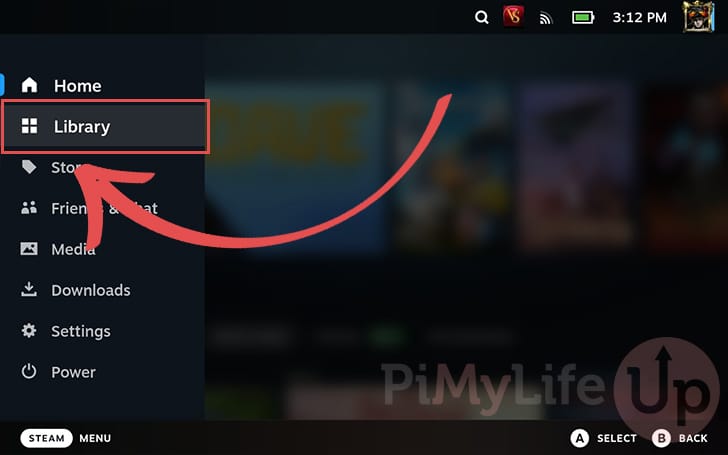
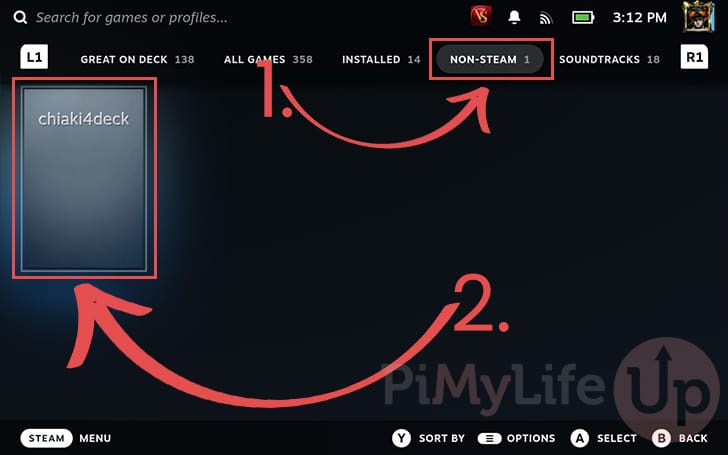
12. Once you are back in gaming mode, you will want to change to your library.
13. Within your Steam Deck library, you will want to change to the “NON-STEAM” tab (1.).
On this tab, find and select the entry labeled “chiaki4deck” (2.).
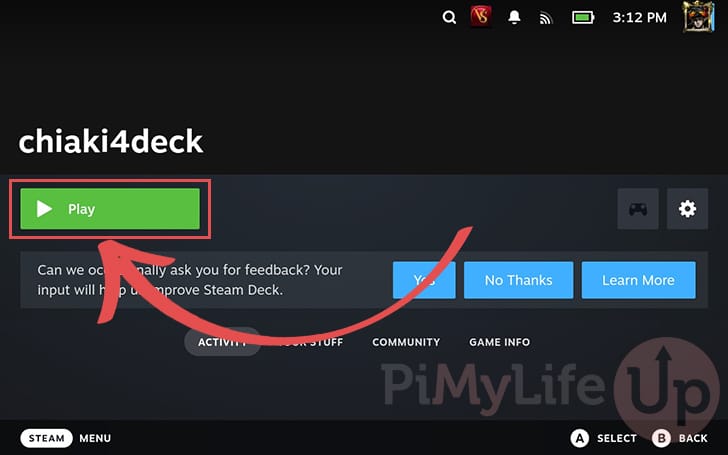
14. Now, all you need to do to launch the Chiaki4Deck software on your Steam Deck is click the big green “Play” button.
Getting your PlayStation Link Code
15. We will need to get a link code Before we can register your Chiaki4Deck on your Steam Deck with your PlayStation.
Turn on your PlayStation and go to the settings screen to proceed with this guide.
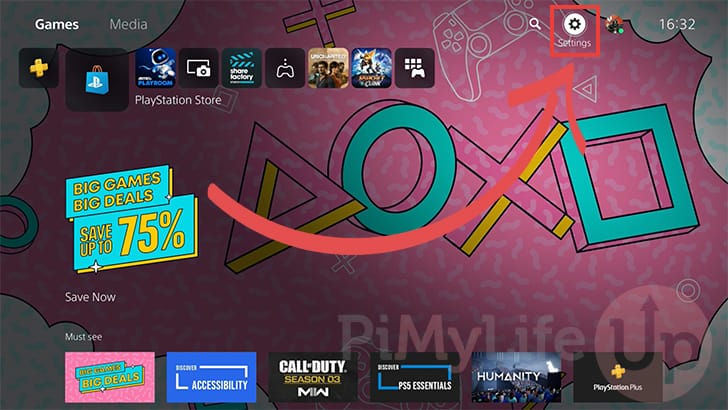
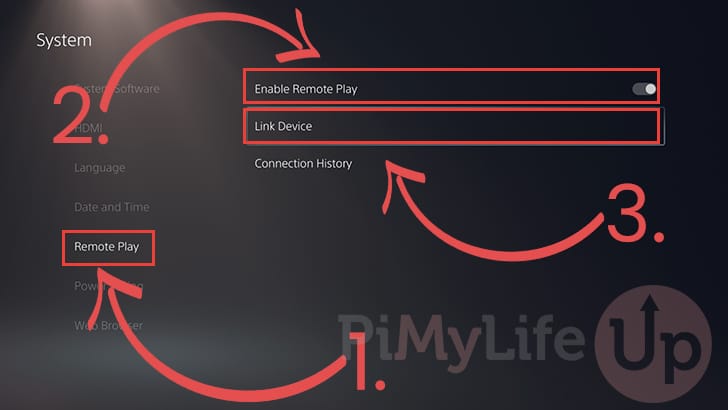
16. Once on the settings screen, you must scroll down and select the “System” option.
17. Within the “System” options, you will want first to select the “Remote Play” category (1.) using the sidebar.
Once you are in the right place, you must ensure that the “Enable Remote Play” option (2.) is toggled on.
If remote play is enabled, you can select the “Link Device” option (3.) to get the code you need to connect your PlayStation to Chiaki4Deck.
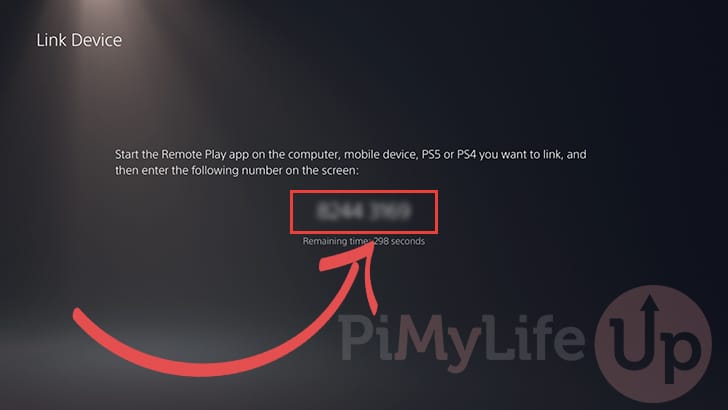
18. On your screen, you should now see a code. You will need this code back on your Steam Deck.
This code is used to authenticate and register your Deck with the PlayStation.
Registering your PlayStation with Chiaki4Deck
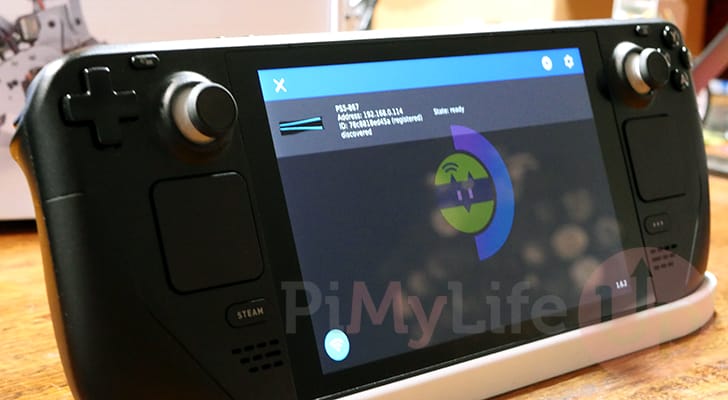
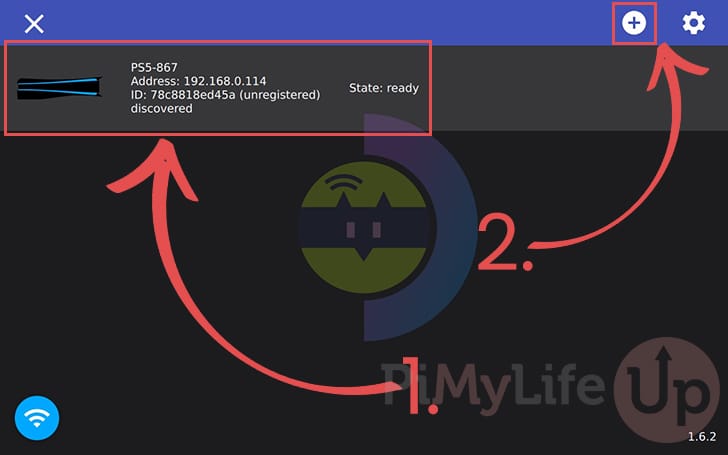
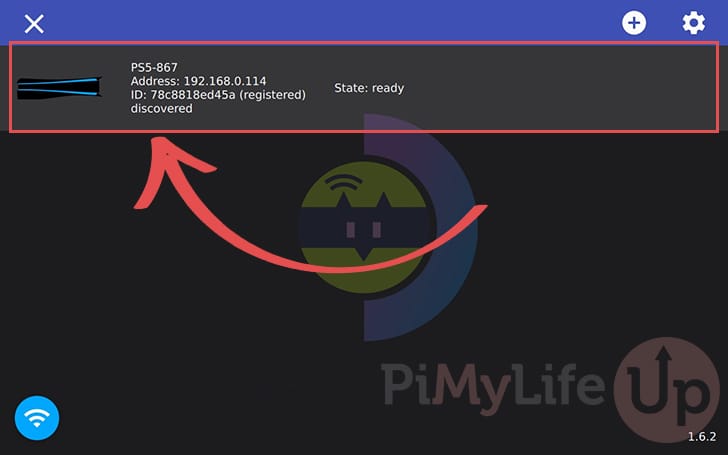
19. Back on your Steam Deck, you should now see your PlayStation listed within the Chiaki4Deck app (1.). If you see your PlayStation, you can double-click it to connect.
Alternatively, you can click the plus (+) symbol (2.) to add your console manually.
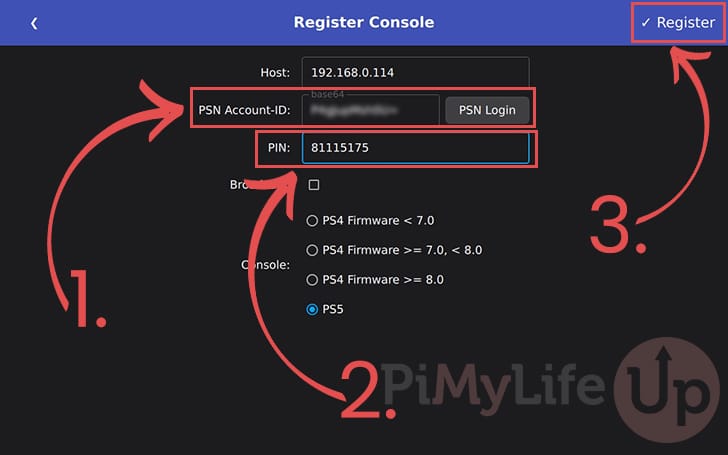
20. Now that you are on the register screen, there are a few details that you must fill out before Chiaki4Deck can stream from your PlayStation.
- First, you must type in the base64 code for your PlayStation account. The Chiaki4Deck software can automatically retrieve this by clicking the “
PSN Login” button and following the prompts.
Alternatively, there is a website you can use to get this ID if your account isn’t set to private. - After specifying your account ID, you will need to type in the PIN currently displayed on your PlayStation.
This code might have changed since your last look, as they are only valid for 300 seconds.
Once you have everything set, click the “Register” button (3.) to authenticate your PlayStation with the Chiaki4Deck software on your Steam Deck.
21. The PlayStation listed within the Chiaki4deck interface should now be marked as “(registered)“.
You can start streaming from it immediately by double-clicking it. If your PlayStation has gone into standby mode, you can wake it by pressing Y on your Deck.
22. Below, you can see that we now have our PlayStation 5 streaming to our Steam Deck through the Chiaki4Deck software.
You can bring up Chiaki4Deck’s menu by pressing the L1 + R1 + L3 + R3 buttons at any time (Pressing both shoulder buttons and the thumbsticks).

Conclusion
Hopefully, you will have Chiaki4Deck installed and running on your Steam Deck at this stage.
This version of Chiaki has several improvements that improve the PlayStation streaming experience on your Deck. It has an improved interface that works better with the Deck’s controls and touch screen.
Please feel free to leave a comment below if you need any help with getting this software to work.
If you found this tutorial to be helpful, we recommend you check out our many other Steam Deck tutorials.