In this project, we will show you how to use Waydroid on a Raspberry Pi to run Android Apps.
Waydroid is a container-based approach for running Android apps on a Linux-powered device such as the Raspberry Pi. This container approach allows the Waydroid to run a full Android operating system alongside your main operating system.
The most significant advantage of this method is that you can run an Android app as if it were a native Linux application. Waydroid seamlessly maps the Linux namespace to their Android equivalents while giving it full access to your Raspberry Pi’s hardware.
With this software, you can continue to use Raspberry Pi OS while still being able to install a huge range of Android apps. You can even use this to run the Plex media player, Amazon Prime Video, and more.
The performance is pretty solid, and you don’t seeem to lose any performance by using Waydroid over running Android as your main operating system.
While you can always use an Android operating system on your Raspberry Pi as your primary OS thanks to LineageOS or EmteriaOS, we find Waydroid to be nice to use and less problematic than those other solutions.
We highly recommend that when following this tutorial, you use a Raspberry Pi that has at least 2GB of memory. Personally, we used a 4GB Raspberry Pi 5 but have seen people report issues when using a 1GB Raspberry Pi 4.


Equipment
Below is a list of equipment we used when running Waydroid on our Raspberry Pi.
Recommended
- Raspberry Pi Amazon
- Monitor Amazon
- Micro SD Card Amazon
- Power Supply Amazon
- Ethernet Cable Amazon or Wi-Fi Amazon
Optional
This tutorial was tested on a Raspberry Pi 5 running Raspberry Pi OS Bookworm (64-bit).
Installing and Setting up Waydroid on the Raspberry Pi
In the following sections, we will walk you through the installation and setup of Waydroid on your Raspberry Pi.
We will also show you how to get the Google Play Store working through Waydroid, as it’s one of the easier ways to install additional Android apps.
While this process has numerous steps, they should be relatively easy to follow. A couple of things to note before you begin:
First is that Waydroid requires Wayland to operate. You can proceed if you are using a Raspberry Pi 4 or newer and running Bookworm or newer.
Second, you must run a version of Raspberry Pi OS with a desktop interface. Using the terminal version of Pi OS is a no-go for this guide.
Getting your Pi Ready
1. Before setting up Waydroid on our Raspberry Pi, we must ensure a few things are set up beforehand
Our first task is to update the package list cache and upgrade any out-of-date packages by running the following two commands.
sudo apt update
sudo apt upgrade -yCopy
2. Your next step is to install the “curl” and “lsb-release” packages by running the following command.
We will use these packages when we set up the Waydroid package repository later in the guide.
sudo apt install curl lsb-releaseCopy3. If you are following this tutorial on a Raspberry Pi 5 or newer, you may need to change the kernel page size to 4k rather than the default 16k. Waydroid doesn’t play nice with the larger page size.
We have a guide that covers changing the page size on a Raspberry Pi.
https://pimylifeup.com/raspberry-pi-page-size/4. Your next step requires us to enable a kernel feature called “pressure stall information” or “psi” for short. Waydroid requires this information to function properly.
To enable this functionality on our Raspberry Pi, we must modify the “cmdline.txt” file by using the following command.
sudo nano /boot/firmware/cmdline.txtCopy5. Within this file, you will see a super long line. Add the following to the end of it. You will want to add a space before specifying this value.
psi=1Copy6. After making this change, save and quit by pressing CTRL + X, Y, and then ENTER.
7. For this change to take effect, you must restart your Raspberry Pi. When it boots again, your Pi should now be able to get the pressure stall information and have the page correctly sized.
sudo rebootCopyVerifying your Settings
8. The first setting we will verify is where the pressure information has been enabled.
You can check this using the ls command to list the “/proc/pressure” directory.
ls /proc/pressureCopyIf everything has worked correctly, you should see three directories listed.
cpu io memory9. The next thing we will want to do is verify that the page size is set to 4k. As mentioned earlier, Waydroid won’t function properly with larger page sizes.
You can verify the page size by running the following command.
getconf PAGESIZECopyIf you get the following result, then you are ready to go.
4096Adding the Waydroid Package Repository
10. To make installing Waydroid easier on our Raspberry Pi, we will add their official package repository.
The first part of this process is to save the GPG key for this repository to your Pi. This key is a way for the apt package manager to verify the packages it downloads.
sudo curl -Sf https://repo.waydro.id/waydroid.gpg --output /usr/share/keyrings/waydroid.gpgCopy11. Next, you will want to add the Waydroid repository to your package sources using the command below. This is where we utilize the “lsb-release” package we installed earlier.
echo "deb [signed-by=/usr/share/keyrings/waydroid.gpg] https://repo.waydro.id/ $(lsb_release -cs) main" | sudo tee /etc/apt/sources.list.d/waydroid.listCopy12. As we changed the available repositories, you will want to update the package list cache by running the command below.
sudo apt updateCopyInstalling Waydroid on the Raspberry Pi
13. Finally, at this point, all we need to do to install Waydroid onto our Raspberry Pi is to run the following command.
This process shouldn’t take very long, but we will still need to complete some additional steps before using Waydroid.
sudo apt install waydroidCopy14. Once the Waydroid package has been installed, we need to initialize it by running the command below.
Waydroid will install and download a modified version of the Lineage operating system, which will run within its container. This can take longer to complete as the operating system is downloaded from Sourceforge.
Using the “-s GAPPS” option tells Waydroid that it should install a version of Lineage with the Google Applications pre-installed. If you don’t want or need Google Apps remove this option,
sudo waydroid init -s GAPPSCopyFirst Run of Waydroid
14. Waydroid won’t function properly right off the bat on your Raspberry Pi due to issues with the Wayland compositor the operating system uses.
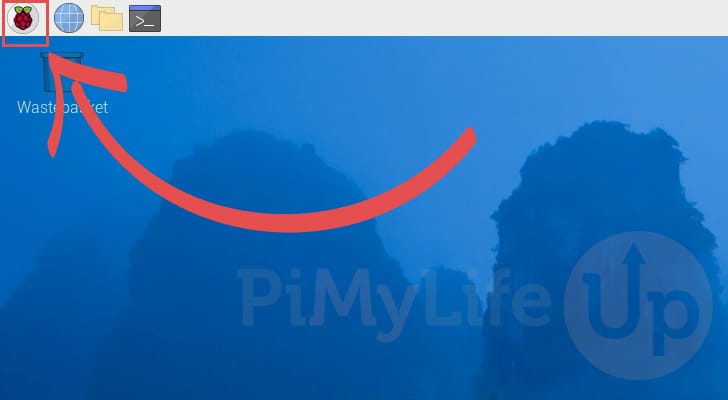
To launch Wayland, open the start menu by clicking the Raspberry icon in the top-left corner.
15. With the start menu open, hover over “Other” (1.), and click the “Waydroid” option (2.).

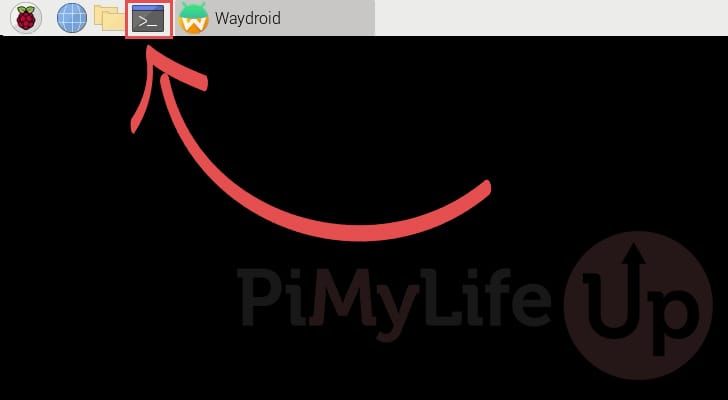
16. Due to a problem with the compositor, you will now be greeted with a black screen. Luckily, we can work around this issue.
Your next step is to open the terminal by clicking the terminal icon.
17. With the terminal now open, you can use the following command to set the “multi_windows” option to true. This avoids Waydroid trying to use the functionality missing from the Raspberry Pi’s implementation of Wayfire.
waydroid prop set persist.waydroid.multi_windows trueCopy18. Once this setting has been changed, you will want to restart your Raspberry Pi for it to properly take effect.
sudo rebootCopyLaunching your First Android App on the Raspberry Pi using Waydroid
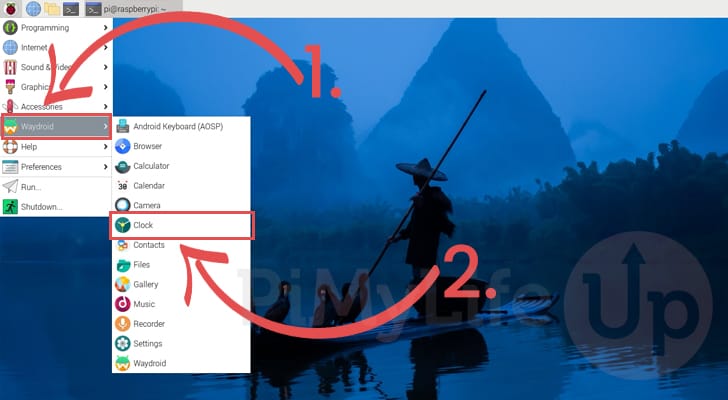
19. Once your Raspberry Pi has rebooted, reopen the start menu.
You should see that there is now an option labeled “Waydroid“. Hover over this option to see a list of Android applications you can launch.
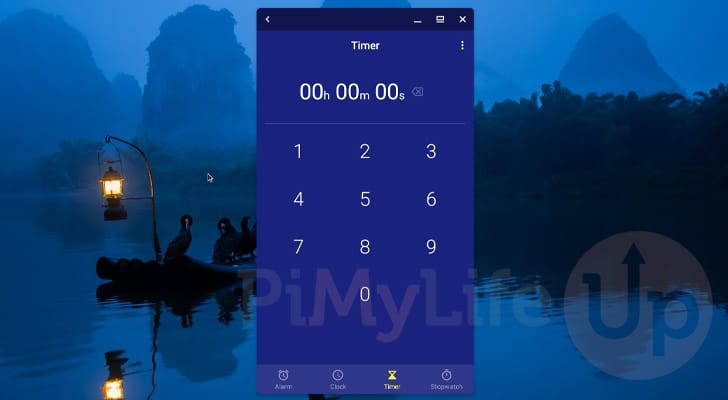
For this example, let us start the Clock application to see that everything works properly.
20. We now have the Android Clock application running on our Raspberry Pi, thanks to Waydroid.
Certifying your Raspberry Pi Waydroid Installation to Run Google Apps
21. Since your Raspberry Pi’s Waydroid installation is not a certified Google device, you must register it yourself. This requires us to run a few commands to get the ID of our installation.
Luckily for us, Waydroid makes accessing its shell as simple as using the following command.
sudo waydroid shellCopy22. With the Waydroid shell now open, run the following command within the terminal to grab the ID of your Android installation.
ANDROID_RUNTIME_ROOT=/apex/com.android.runtime ANDROID_DATA=/data ANDROID_TZDATA_ROOT=/apex/com.android.tzdata ANDROID_I18N_ROOT=/apex/com.android.i18n sqlite3 /data/data/com.google.android.gsf/databases/gservices.db "select * from main where name = \"android_id\";"CopyAfter running the command above, you should see the following output to the terminal. The value you want is directly after the pipe symbol (|).
android_id|37128187XXXXXXXXXXXTaking our example, we will use the following ID in the next step.
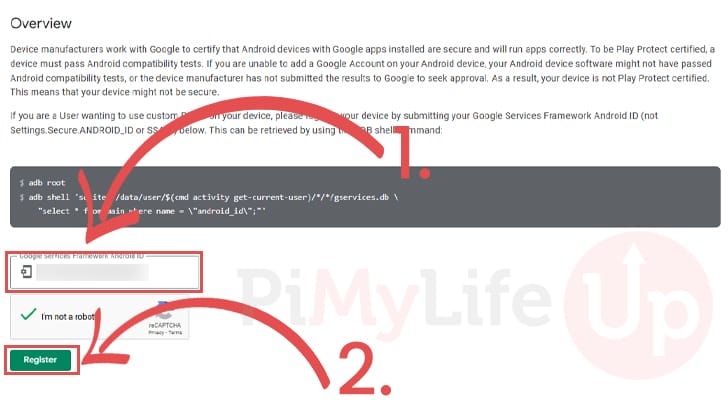
37128187XXXXXXXXXXX23. In your favorite web browser, you will want to go to the following address. This page will allow you to authenticate your Waydroid installation with Google using the ID we got in the previous step.
https://www.google.com/android/uncertifiedWith the page now open, type in your ID (1.) and then click the “Register” button (2.).
24. Before following this next step, you will want to wait a couple of minutes for your Android ID to propagate through Google’s servers.
After waiting a bit, run the command below to restart the Waydroid container.
sudo waydroid container restartCopy25. Now, you should be able to log in and use the Google Play Store to install Android apps onto your Raspberry Pi.
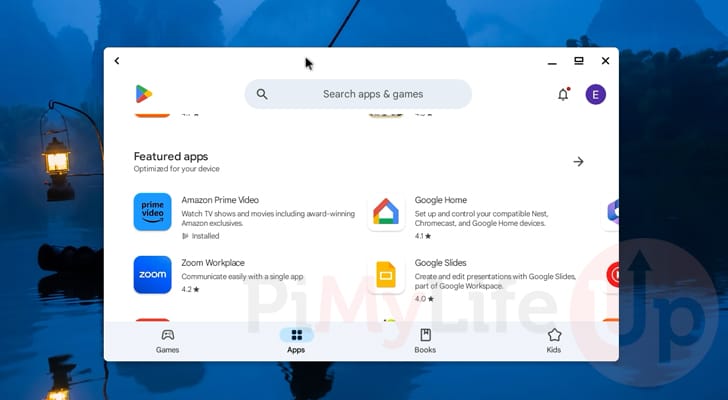
26. Below you can see that we have used Google Play to install the official Plex app onto our Raspberry Pi.
We can now use this to stream media from our Plex server. It is one of the best ways to watch your Plex media on a Raspberry Pi, but it may still struggle with some 4k media.

Conclusion
You should now have Waydroid installed and running on your Raspberry Pi.
This software allows you to run Android apps directly on your Pi without installing a specific operating system such as LineageOS.
Please feel free to leave a comment below if you have had any issues with getting this software running on your Pi.
If you found this project to be helpful, we recommend taking some time to browse through our other Raspberry Pi projects.


apparently, everything worked, (i didn’t even need to apply the multi_windows step) but SkyGo sees the device as rooted, do you know how to solve the problem?
Hi Massimiliano,
I’m glad that it ran well and is no longer needing the multi windows step! That will make things significantly simpler for others.
In regard to the root detection issue, this very much depends on how SkyGo is checking if a device is rooted. Some methods can’t be avoided.
There is one workaround we can attempt, I haven’t had the chance to test this so please let me know if this works or has any errors.
1. First we want to download a script that will reconfigure Waydroid to spoof a particular device. In this case, a Pixel 5.
We can grab this script from Quackdoc’s Github by running the command below.
2. With the script saved, we will now want to run it by using the following command.
3. You should now be able to start up Waydroid again (may want to restart your Pi) and hopefully run your desired app.
I can’t get past step 4, get message “[ Directory ‘/boot/firmware’ does not exist ] “
Hi Terry,
What version of Raspberry Pi OS are you running? Any recent version would of had the firmware and the config files moved into that sub-directory.
Kind regards,
Emmet
Hey, I just installed Waydroid on my RP4 with this tutorial and everything is working great except I can’t get the container to connect to the internet in any way, has anyone else come across this and found a solution?
Hey, when I do step 12, I get the following code:
Also, I am using a Raspberry Pi 4B 8GB model. Am I doing anything wrong? Can you help me? Thanks!
(Also, Hit 1-7 were removed due to privacy reasons.)
Hi Cody,
Hmm this is indeed a little strange, we are providing the GPG key so it should be using that to verify the repositories.
Can you verify that the GPG key was successfully downloaded from step 10, and that the sources file was generated properly from step 11.
You can check the GPG key was saved properly by using the command below.
Then verify the contents of the source file by using the command below.
The result of this should look something like the following.
Kind regards,
Emmet
Hello there, I’m currently facing an error on the No. 22.
Once I put the command line to the android shell, it says it can’t open it.
Is there any way to resolve it?
Hi Jeremiah,
Sorry to see that you are having issues with this tutorial, I’m not entirely sure why that would be happening and would need to see the full error message to try and get a bit mroe of an idea.
Kind regards,
Emmet
Hi Emmet,
Awesome! I am running it on a Raspberry Pi 6 with 16GB. It runs smoothly. Great job! You are the best. Thanks for all your work.
Thank you for the tutorial. I have been looking for a way to get Android on my Raspberry Pi and you write this just in time. Thanks again.
Great Tutorial, thanks!
One thing worth adding: In the intro you say, that a RPi 4 is sufficient. That is only true for the version with at least 2GB of RAM. I have a Pi4 with 1GB RAM, the performance is really bad and I get “system/UI/trebuchet not responding” dialogs every few seconds.
Waydroid works great but i have very little storage on it which doesn’t allow me to install bigger apps is there a way to allocate more
Thanks for this amazing tutorial !!
Cool guide, however this link does not seem to work. Anyone know how to get around this? Thanks.
https://www.google.com/android/uncertified
Hi John,
The link works fine on my end, is there any particular error you are running into?
Kind regards,
Emmet