This tutorial will show you how to install Steam on the Ubuntu operating system.
Steam is the most popular video game storefront and distribution service for PC operating systems, which is no different for Ubuntu.
This game store has cemented its position within Linux gaming thanks to its being one of the few that bothered to support the ecosystem properly. It even comes with functionality that helps reduce the friction of moving from Windows to Ubuntu for gaming while also significantly increasing the number of games that can be played.
On top of supporting Ubuntu, the Steam Client has many other features that make it one of the best. It will automatically ensure all of your games are updated and has neat features like cloud saves. Cloud saves are super helpful as they enable you to continue your game if you switch devices.
Thanks to Valves’ dedication to Linux gaming and maintaining support for popular systems like Ubuntu, Linux games are viable. One critical function that Valve brought to the table was their work on the Proton compatibility layer. This layer helps Steam run games that were initially built on Windows on Linux. While not perfect, it has fantastic compatibility.
You can install Steam on whatever version of Ubuntu you are running. However, we recommend sticking with the latest stable release. Typically, the Steam devs will maintain the best compatibility with this version.
Installing Steam on Ubuntu
You can easily install Steam on your Ubuntu device in a couple of different ways. The easiest methods are to utilize the terminal, as you can install the client in a few short steps.
As you will soon see over the next few sections, installing the latest version of the Steam Client on Ubuntu is incredibly easy, but there are a few different methods that you can use.
In the following few sections, we will show you two different methods for installing Steam. The first is to utilize the Multiverse repository, and the second is to download and install the official Debian package.
Both steps we are covering require you to use the Ubuntu terminal. You can easily open the terminal using your keyboard by pressing CTRL + ALT + T.
We have embedded below a video that will walk you through installing Steam on Ubuntu using the official package. If you want to try different methods or prefer to go at your own pace, check out our written instructions instead.
Installing Steam from the Ubuntu Multiverse Repository
The first method we will show you involves installing the Steam client using the Ubuntu multiverse repository.
This repository is disabled by default on Ubuntu as it contains packages with certain licensing restrictions that don’t fit with Ubuntu’s open-source ethos. If you prefer not to enable multiverse, skip to the next section.
1. Before we can install Steam using this method, we must enable the multiverse repository. Luckily, this whole process is incredibly easy.
To enable multiverse, simply run the following command within the terminal.
sudo add-apt-repository multiverseCopy2. Since we have made changes to the package repositories, we will need to update the package list cache. This cache is basically what apt uses to identify what packages it can install, but at the moment, it won’t know if it can install Steam.
To update the package list cache, all we need to do is type the command below into the terminal and press enter.
sudo apt updateCopy3. Once your Ubuntu system has finished updating the package list, you can install Steam by running the command below.
This process shouldn’t take very long as we are actually only downloading a launcher for Steam that will download the client itself.
sudo apt install steamCopy4. With the client now installed on your Ubuntu system, skip to the “Running Steam on Ubuntu” section.
These steps will walk you through the initial setup experience of Steam.
Installing Steam from the official Package
The second method, which is always guaranteed to work, is to download and install the official Steam package to your Ubuntu system. This process is pretty straightforward and is, honestly, just as easy as enabling the multiverse repository.
For these steps, we will assume that you have already installed wget on your system. Typically, this tool is already installed with Ubuntu, but there are some unusual cases where it isn’t.
1. We can download the Steam installer to our Ubuntu device directly from Steams CDN.
To download the Steam package onto your Ubuntu system, all we need to do is use the following command on your system.
wget https://repo.steampowered.com/steam/archive/precise/steam_latest.debCopy2. We have downloaded the Steam package and need to install it to Ubuntu now. Luckily, we can utilize the apt package manager.
Instead of typing in a package name, we point the package manager at the “steam_latest.deb” file we downloaded in the previous step.
sudo apt install ./steam_latest.debCopyRunning Steam on Ubuntu
Now that you have Steam installed on to your Ubuntu operating system, you will probably want to know how you can launch it.
This section will show you the two different methods for launching Steam. The first is actually the simplest, and that is to launch it from the terminal. The second is to find and open the game store client through the desktop interface.
Opening Steam using the Terminal
If you already have the terminal open on Ubuntu, launching the Steam client is actually incredibly simple. Remember that you can easily open the terminal by pressing CTRL + ALT + T.
1. All you need to do to launch Steam from within the terminal is to simply type in “steam” and press ENTER.
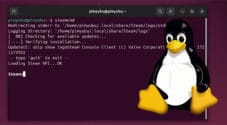
steamCopy2. Once Steam launches for the first time, you will need to go through a couple of installation steps. These are basically installing the Steam client itself.
Skip down to step four of the next section to continue.
Opening Steam on Ubuntu from the Desktop
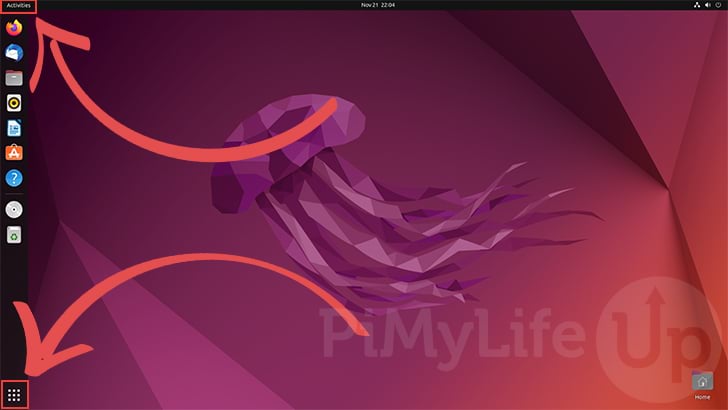
1. If you want to open Steam from the Ubuntu desktop, the first thing you will want to do is open the activities screen.
You can open this screen by clicking the top or bottom right of the screen.
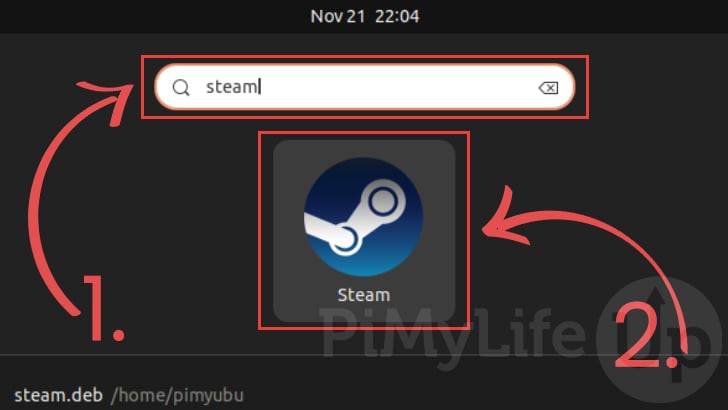
2. With the activities screen open, use the search box (1.) at the top of the screen to search for “steam“.
After typing in “steam“, you will see the Steam client icon (2.). You must click the icon to open the Steam client.
3. After running Steam for the first time, it will automatically add the Steam icon to your desktop, so it will be easier to find and launch later.
First Time Running Steam
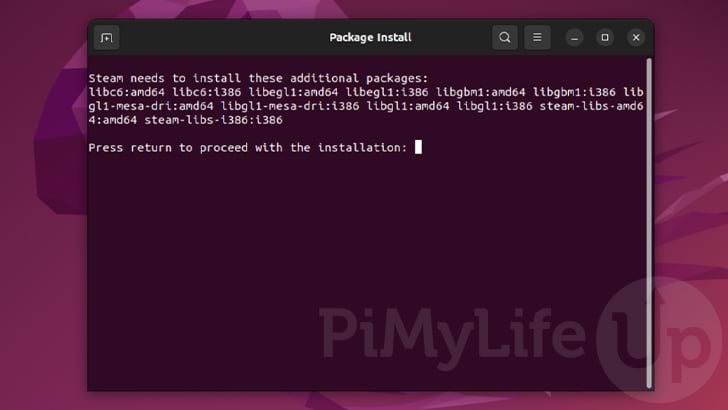
4. The first time you launch the Steam client on Ubuntu, you must go through some initial setup steps. The first of these will be Steam asking to install additional packages that it requires.
To proceed with the installation process, press the ENTER key.
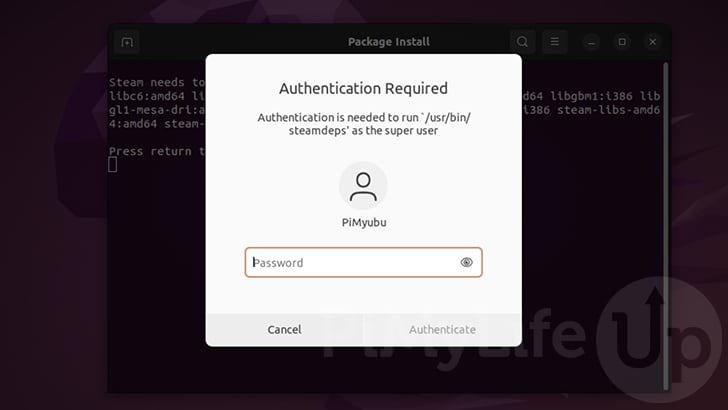
5. Before Steam can install these additional packages, you must authenticate yourself so that it can actually perform this task.
Type in the password for your account, then press the ENTER key to continue.
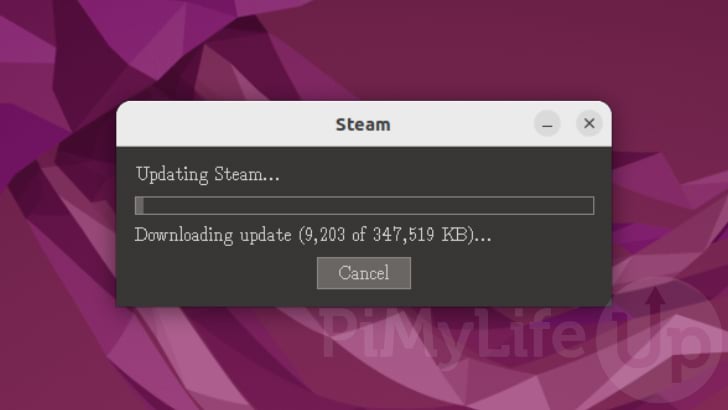
6. Once the packages have been installed, Steam will move on to installing it’s actual client to your Ubuntu system
This process shouldn’t take too long but depends entirely on your connection speed.
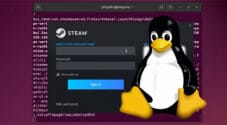
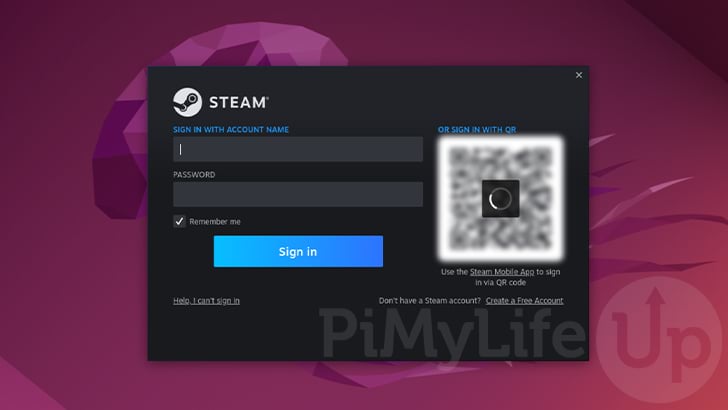
7. With the client downloaded and installed onto your system, you will now be prompted to log in to your Steam account.
If you have the Steam Mobile App, you can log in by scanning the QR code. Otherwise, type in your username and password and then click “Sign in“.
8. At this point, you should have successfully installed and run the Steam client on Ubuntu.b You can put it to use and install any games you want to play on your system, and with Proton this means you can even run some of your Windows only games.

Conclusion
Steam is the premier game marketplace and client that offers fantastic support for Linux-based operating systems such as Ubuntu. Combined with its Proton compatibility layer implementation, it is hard to go past using Steam for your Ubuntu gaming.
Please comment below if you have had any issues with getting Steam installed on your system.
Be sure to check out our many other Ubuntu guides, as well as several guides on Linux in general.