In this tutorial, we will show you how to run the Plausible Analytics platform on a Raspberry Pi.

Plausible is a website analytics platform that lets you keep your visitor’s data private and in your control.
It is a solid alternative to Google Analytics that is both lightweight and open source. If you aren’t running a high-traffic website, you can even run it off a Raspberry Pi.
Over the following sections, we will show you how to install Plausible Analytics and configure it to run on your Raspberry Pi.
Plausible Analytics on the Raspberry Pi is a relatively straightforward process thanks to being installed through a Docker container. We will, however, need to make adjustments to get it running on our ARM based system.
Equipment
Below is a list of the equipment we used when setting up Plausible Analytics on the Raspberry Pi.
Recommended
Optional
This tutorial was tested on a Raspberry Pi 400 running the latest version of Raspberry Pi OS Bullseye.
Installing Plausible Analytics on your Raspberry Pi
Over the following sections, you will get Plausible Analytics up and running on your Raspberry Pi.
Before you proceed, you will need a website you want to gather analytics for. You will also need a domain name to use this software properly.
Installing the Required Packages
1. Our first step is to update the package list and upgrade any out of date packages.
You can update your Raspberry Pi operating system by using the following two commands in the terminal.
sudo apt update
sudo apt upgrade -yCopy
2. Next, you will want to install Git, NGINX and Certbot.
We will use git to clone the Plausible analytics hosting repository to our Pi. Additionally, we also install NGINX on our Raspberry Pi. This webserver acts as a reverse proxy for Plausible as it does not support HTTPS.
sudo apt install git nginx certbot python3-certbot-nginxCopy3. After the update completes, you will now need to move on to install Docker.
Before continuing, follow our guide on installing Docker on the Raspberry Pi. This guide will get Docker running correctly on your device.
Cloning Plausible Analytics to the Raspberry Pi
4. We can now use the cd command to change into the “/opt” directory.
This directory is an excellent place to store optional software such as Plausible.
cd /optCopy5. Within this directory, we want to clone the Plausible Analytics self-hosting base to our Raspberry Pi.
By specifying “plausible” at the end, we are telling it to clone the repository into a directory named “plausible“.
sudo git clone https://github.com/plausible/hosting plausibleCopy6. We now need to change into the “plausible” directory using the following command.
cd plausibleCopyInitial Configuration of Plausible
7. Our next step is to generate a random hash that can be used as the secret key base for Plausible.
You can generate a usable hash by using the following command. Copy it down, as we will use it in the following steps.
openssl rand 64 | base64 -w 0 ; echoCopyAn example of the value generated by this command is the following. Don’t use this for your own key.
qS7IxUUaOzq/x8TUk7UwZ3oxYBnYmJ1jmGAnXdcdjlBaV644fDEB6rMBQGLcEJdgznXUpCYITNuIBx7en970fw==8. We can now edit the Plausible environment file on your Raspberry Pi using the command below.
sudo nano plausible-conf.envCopy9. Within this file, you will find the following lines. You will need to replace the two values labeled “replace-me“.
- BASE_URL: Replace this value with the path you intend on accessing your Plausible analytics URL through.
This can start with “http” or “https” and is used purely for URL generation within the Plausible analytics interface.
An example of a valid setting for this would be “https://analytics.pimylifeup.com” or “http://192.168.0.134“. - SECRET_KEY_BASE: You should replace this value with the one you generated in step 7 of this guide.
BASE_URL=replace-me
SECRET_KEY_BASE=replace-meCopy
10. An example of a valid configuration for this file would be a bit like what we have shown below.
In our example, we use our Raspberry Pi’s local IP address as a part of the base URL.
BASE_URL=http://192.168.0.134
SACRET_KEY_BASE=qS7IxUUaOzq/x8TUk7UwZ3oxYBnYmJ1jmGAnXdcdjlBaV644fDEB6rMBQGLcEJdgznXUpCYITNuIBx7en970fw==Copy
11. Once you are happy with the configuration, save and quit by pressing CTRL + X, followed by Y, then ENTER.
Modifying the Docker Compose File
12. As we plan on using a reverse proxy for accessing Plausible Analytics on our Raspberry Pi, we need to modify the “docker-compose.yml” file.
You can begin modifying this file by using the following command.
sudo nano docker-compose.ymlCopy13. You will want to find the following line within this file. It should be under the “plausible:” header.
- 8000:8000Copy14. Once you have found the above value, replace it with the following.
Doing this will set it so Plausible can only be accessed through the Pi’s localhost.
This change stops someone directly accessing Plausible on our Raspberry Pi and bypassing the reverse proxy.
- 127.0.0.1:8000:8000Copy15. Next, we need to modify the Docker compose file to use an older version of Clickhouse. New releases appear to no longer run on the Raspberry Pi.
Find the following line within this folder.
image: clickhouse/clickhouse-server:23.3.7.5-alpineCopy16. Now replace that line with the following line.
image: clickhouse/clickhouse-server:22.6-alpineCopy17. We also need to replace the Docker container that is used to provide an smtp server for Plausible analytics on the Raspberry Pi.
The current version does not have a build for ARM systems.
image: bytemark/smtpCopy18. You will want to replace the above line with the one below. This alternative container should work as a safe replacement and has support for ARM64.
image: ixdotai/smtpCopy19. After making the above change, save and quit by pressing CTRL + X, then Y, followed by the ENTER key.
Setting up a Reverse Proxy for Plausible Analytics on the Raspberry Pi
20. Our next step is configuring NGINX on our Raspberry Pi to act as a reverse proxy for Plausible analytics.
Don’t worry. This process is relatively straightforward and is also how you can add https support to Plausible.
Begin writing a virtual host for Plausible by using the following command.
sudo nano /etc/nginx/sites-available/plausible.confCopy21. You will want to add the following lines within this file. This creates a straightforward host that listens on port 80 (HTTP). We will be adding SSL support shortly.
When NGINX receives a request for the specified domain name, it will forward it to Plausible Analytics on our Raspberry Pi.
When typing in the lines below, replace “<DOMAINNAME>” with the domain name you intend on using Plausible with.
If you are testing this on your local network, replace it with an underscore (_). Ensure that you don’t have any other sites enabled, as this will make Plausible Analytics available as the default NGINX host.
server {
    listen       80;
    listen       [::]:80;
    server_name  <DOMAINNAME>;

    access_log  /var/log/nginx/plausible.access.log;
    error_log   /var/log/nginx/plausible.error.log;

    location / {
      proxy_pass http://localhost:8000;
      proxy_set_header X-Forwarded-For $proxy_add_x_forwarded_for;
  }
}Copy
22. Once you have added the above lines to the file, save and quit by pressing CTRL + X, followed by Y, then ENTER.
23. With the NGINX config file, we need to create a symbolic link between it in its current folder and the “sites-enabled” directory.
Create this symbolic link by using the following command.
sudo ln -s /etc/nginx/sites-available/plausible.conf /etc/nginx/sites-enabled/Copy24. Now that the config file has been created, we need to tell NGINX to reload its configuration.
sudo systemctl reload nginxCopyAdding HTTPS to Plausible Analytics
25. If you don’t intend to use Plausible Analytics in a production environment or don’t have a domain name, skip to step 23.
Otherwise, continue with the following steps to add HTTPS support to your NGINX reverse proxy.
26. Certbot allows us to add an SSL certificate to NGINX very simply.
All you need to do is run the following command within the terminal. Ensure that you replace “<DOMAINNAME>” with the domain you are utilizing.
sudo certbot --nginx -d <DOMAINNAME>CopyCertbot will automatically reconfigure your config file to add HTTPS support.
Turning on Plausible Analytics on the Raspberry Pi
27. We are finally ready to switch to Plausible Analytics.
To turn Plausible on, we only need to use the following command. This command tells Docker to launch the container using the provided “docker-compose” file.
Using the “-d” command, we are telling Docker to start the containers in a detached state. They will continue to run until you shut the container down, even on restarts.
sudo docker compose up -dCopyAccessing the Plausible Analytics Web Interface
28. You can now access the Plausible Analytics website interface.
You will want to visit the domain name you specified when setting up the reverse proxy to get to the web interface. If you are testing this out using an IP address, you will want to use that instead.
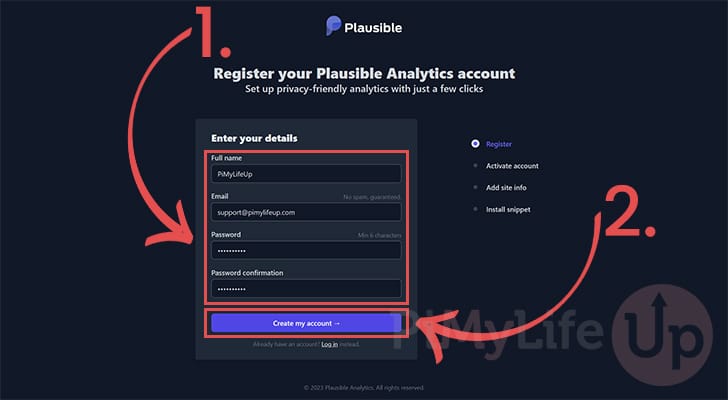
29. When you open your Raspberry Pi’s Plausible Analytics installation for the first time, you will be asked to register a user.
Start by filling out the details for your account (1.).
Once you have filled out your information, click the “Create my account” button (2.).
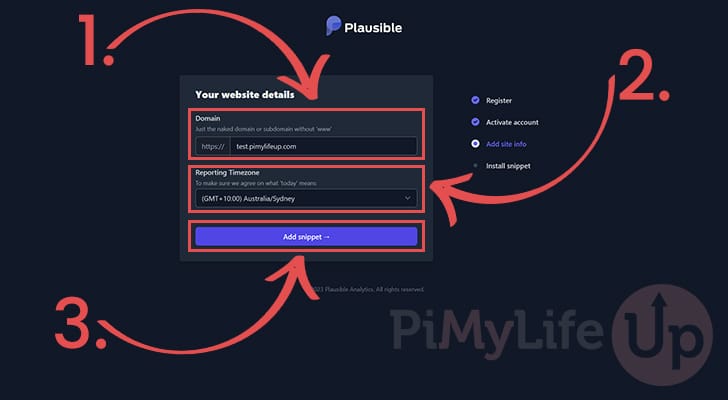
30. Next, you will be prompted to specify the domain name (1.) of the website you intend to gather analytics for
You can also select the reporting time zone (2.). This time zone helps you align the data it retrieves.
With both values filled out, click the “Add snippet” button (3.).
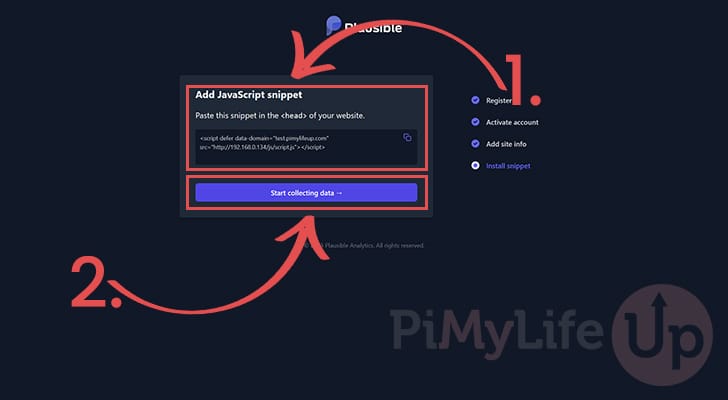
31. You will now be given a JavaScript snippet. You will need to copy this snippet to your website for it to start tracking.
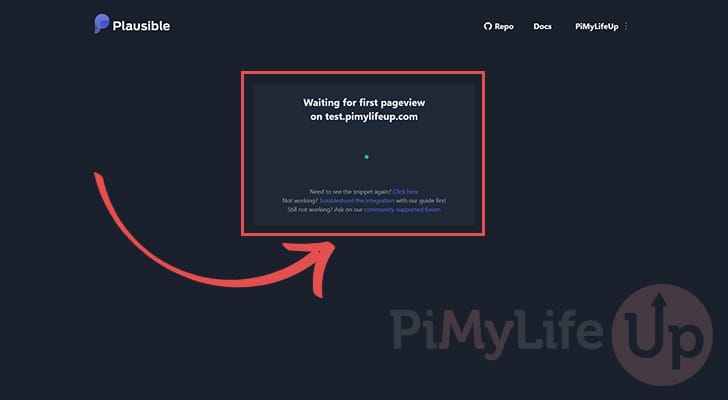
32. Your Raspberry Pi’s Plausible Analytics installation will wait until the snippet has captured its first pageview.
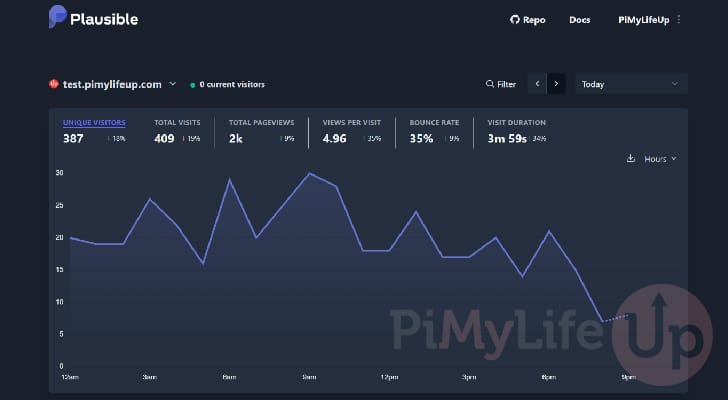
33. Below is an example of what Plausible Analytics looks like after it has captured some data.
We ran this on a sample website for a few days to understand how Plausible runs on the Pi and gather some data.
Conclusion
Hopefully, at this point, you should now have Plausible Analytics up and running on your Raspberry Pi.
This software is an excellent open-source alternative to services like Google Analytics. Best of all, being self-hosted, you remain entirely in control of your data.
Please comment below if you have any issues getting this software to run.
Be sure to check out our many other Raspberry Pi projects to see what else you can do with this device.