In this tutorial, we will be showing you how to install and run BookStack on a Raspberry Pi.
Bookstack is an open-source, free, and self-hosted platform for storing your information. It is similar to other Wiki solutions, such as Wiki.JS, but has a different way of organising and storing data. It uses the concept of each document being a “book” and each collection of documents being a “shelf”.
A Raspberry Pi is a great place to self-host BookStack as it can be affordably kept running. The BookStack software itself is fairly well optimized to make the most of the Raspberry Pi’s computational power.
Best of all, the Raspberry Pi is relatively cheap to keep running all the time, which is great for software like BookStack, where you will likely want to be able to access it whenever.
Please note that this tutorial requires a 64-bit operating system. The BookStack container we are relying on does not have builds for 32-bit.


Equipment
Below is a list of equipment we used to set up Bookstack on our Raspberry Pi.
Recommended
Optional
This tutorial was tested on a Raspberry Pi 5 running a 64-bit release of Raspberry Pi OS Bookworm.
Installing BookStack on the Raspberry Pi
In the following sections, we will walk you through installing BookStack on your Raspberry Pi. To make the process easier and cleaner, we will use a Docker container.
Before you continue with this guide, you must set your Raspberry Pi up with a static IP address. The best way to do this is to set use DHCP reservation on your router, but it is also possible to do it directly on the Pi.
Preparing your Raspberry Pi to Run BookStack
1. Before setting up the Raspberry Pi to run the BookStack software, we should ensure that our system is up-to-date.
You can update the packages on your Raspberry Pi by running the following two commands.
sudo apt update
sudo apt upgrade -yCopy
2. Now that your Pi is up to date, you must follow our guide on installing Docker. This guide will have the latest version of Docker installed in a few short steps.
We will use Docker to make running and setting up BookStack significantly easier.
https://pimylifeup.com/raspberry-pi-docker/3. After installing Docker, we can create a directory where we will store the Compose file for Bookstack on our Raspberry Pi.
For this tutorial, we will be using the mkdir command to create a directory at “/opt/stacks/bookstack“.
sudo mkdir -p /opt/stacks/bookstackCopy4. Once the directory has been created, you can change to it by using the cd command.
cd /opt/stacks/bookstackCopy5. For Bookstack’s to work, it will require an application key to be generated. This key is used by the software to encrypt your session keys.
Luckily, Bookstack makes it easy to generate this key. All you need to do is run the following command within the terminal.
docker run -it --rm --entrypoint /bin/bash lscr.io/linuxserver/bookstack:latest appkeyCopyFrom this command, you will get a result looking a bit like the one that we have shown below. You will want to copy down the result of this command, as you will need it for the next section.
base64:xxxxxxxxxxxxxxxxxxxxxxxxxxxxxxxxxxxxxxWriting a Compose File to Manage BookStack
5. We are now at the stage where we can begin writing the Compose file for BookStack on our Raspberry Pi. This Compose file is essentially a set of instructions for Docker to follow when setting up the BookStack container.
You can begin writing this file within the terminal by using the nano text editor.
sudo nano compose.yamlCopy6. In this file, type out the lines shown below. There are a couple of placeholders that you must swap out before saving this file.
<TIMEZONE>: You must replace this placeholder with your timezone identifier. You can find a list of these identifiers by going to Wikipedia.
An example of a valid entry for this placeholder is “Australia/Hobart“.<APPURL>: This is one of the most important values that you will need to set within this file. Here, you will specify the URL that you will use to access BookStack on your Raspberry Pi.
If you are using your IP to access BookStack, you will set this to something like “http://192.168.0.32:6875“.
For a domain name, ensure your domain is pointed to your IP address and then specify it here. For example, “http://bookstack.pimylifeup.com“.
If you are running this through a Proxy that adds HTTPS support replace “http://” with “https://“.<APPKEY>: Replace this placeholder with the application key that you generated back in step 5 of this guide. This is the key that helps keep your session keys secure.<DBPASSWORD>: Swap this out with a password that will be used for Bookstack to access the database.
services:
  bookstack:
    image: lscr.io/linuxserver/bookstack
    container_name: bookstack
    environment:
      - PUID=1000
      - PGID=1000
      - TZ=<TIMEZONE>
      - APP_URL=<APPURL>
      - APP_KEY=<APPKEY>
      - DB_HOST=bookstack_db
      - DB_PORT=3306
      - DB_USERNAME=bookstack
      - DB_PASSWORD=<DBPASSWORD>
      - DB_DATABASE=bookstackapp
    volumes:
      - ./data:/config
    ports:
      - 6875:80
    restart: unless-stopped
    depends_on:
      - bookstack_db

  bookstack_db:
    image: lscr.io/linuxserver/mariadb
    container_name: bookstack_db
    environment:
      - PUID=1000
      - PGID=1000
      - TZ=<TIMEZONE>
      - MYSQL_ROOT_PASSWORD=<DBPASSWORD>
      - MYSQL_DATABASE=bookstackapp
      - MYSQL_USER=bookstack
      - MYSQL_PASSWORD=<DBPASSWORD>
    volumes:
      - ./db:/config
    restart: unless-stoppedCopy
7. After writing out your Compose file, save and quit by pressing CTRL + X, Y, and then ENTER.
Starting BookStack on your Raspberry Pi
8. Now that you have written the Compose file, starting up the BookStack software on your Raspberry Pi is as easy as running the following command.
After running this command, Docker will download the BookStack and MariaDB containers and start them up. This process can take a few minutes if you have a slow internet connection.
docker compose up -dCopyIf you want a better way of managing Compose files like this one, we highly recommend checking out Dockge.
Accessing the BookStack Web Interface
9. To access the BookStack web interface you will need to know your Raspberry Pi’s IP address.
The easiest way to get the IP address is to use the hostname command within the terminal.
hostname -ICopy10. Now, in your favorite web browser, go to the following address. Ensure that you replace “<IPADDRESS>” with the IP of your Pi.
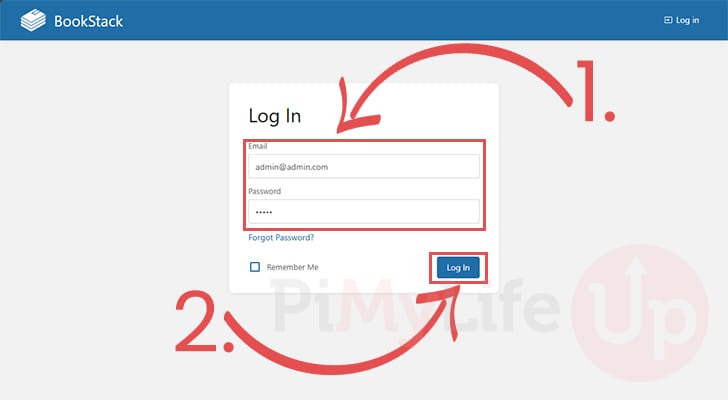
http://<IPADDRESS>:687511. You should now be greeted by the login page for the BookStack software.
By default, the admin user’s username is “admin@admin.com“. The password is also simply “password” (1.). You will definitely want to update the password as soon as you have logged in.
After entering in the default username and password, click the “Log In” button to proceed (2.).
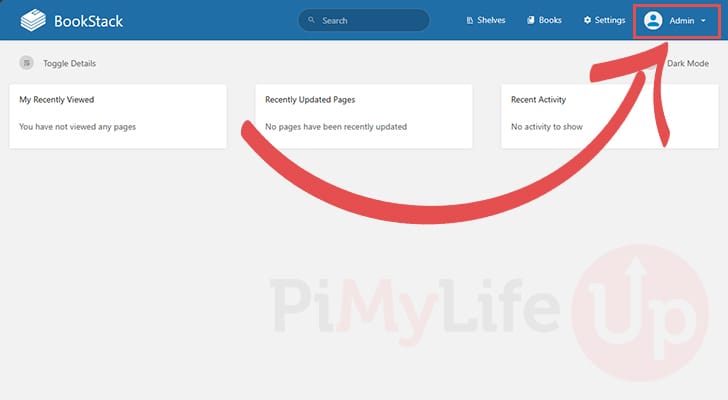
12. Once you have access to BookStack, the first thing you will want to do is change the password for the admin account.
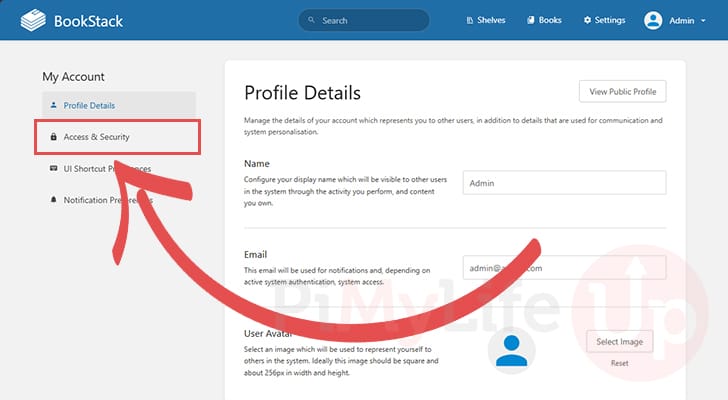
To get to the password screen, start by clicking the user profile in the top-right corner.
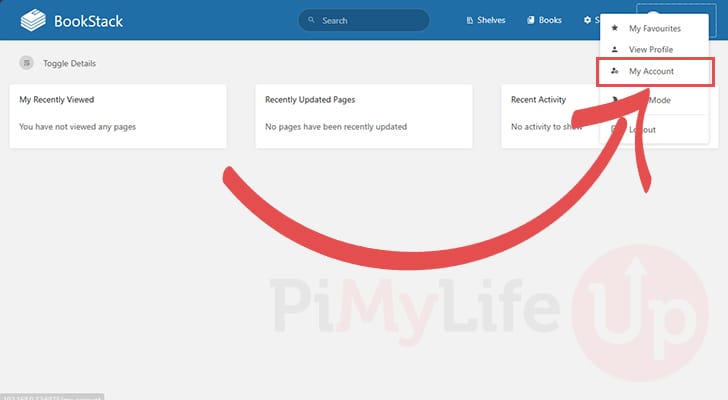
13. By clicking this profile a drop-down box will appear on your screen. The option you will want to select is the one labeled “My Account“.
14. Once you are on the “My Account” page, you should use the sidebar to switch to the “Access & Security” screen.
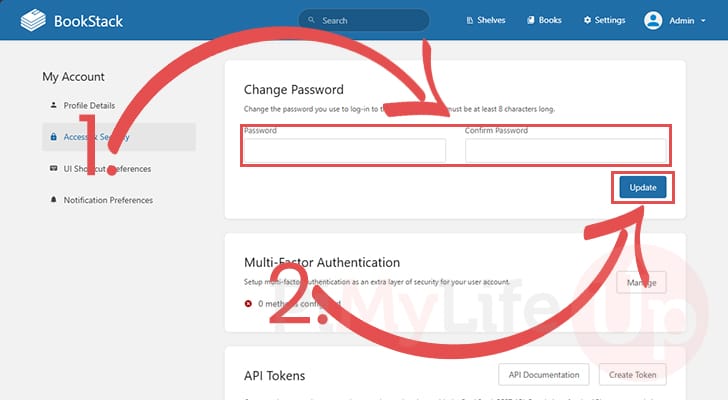
15. Finally, we are at the screen where we can update the admin user’s password. Use the provided two textboxes to type out the new password you want to use for your BookStack admin (1.).
Once you have typed out a new password, click the “Update” button to change it (2.).
Conclusion
At this stage, you should have BookStack up and running on your Raspberry Pi and be able to begin writing and organizing your data within it.
BookStack is a great solution for organizing and storing your information. It’s easy to self-host and has a very easy-to-use web interface.
Please feel free to post a comment below if you have had any issues with getting this software to run on your Pi.
If you liked our guide, we highly recommend browsing through our many other Raspberry Pi projects.


I’ve got it sorted by using a Raspberry Pi 4 with NOTHING but Bookworm on it. My home lab Raspberrys start with a custom configuration which is incompatible with BookStack.
After a successful (and working) installation of Trixie, docker and dockge, I tried BookStack and got this:
Oops! An Error Occurred
The server returned a “500 Internal Server Error”.
Something is broken. Please let us know what you were doing when this error occurred. We will fix it as soon as possible. Sorry for any inconvenience caused.
I don’t know who the us and we are, do you?
Following these instructions I ran into issues. bookstack does not load correctly, it appears there is an APP_KEY value that is missing.
In the docker logs it mentions that you need to run the following command:
After a couple hours of googling and trying different things I deleted the whole works and installed wiki.js.
I had that up and running in 20 minutes.
Hi Mike,
Sorry to hear that you had so many issues with getting Bookstack running using our tutorial. It looks like the Docker container that we were using made several changes to some of the environment variables that broke our guide, including the addition of the APP_KEY.
I have updated the tutorial to hopefully resolve the issues that you were running into.
Kind regards,
Emmet
The above needs a few updates to environment variables. The LSIO Bookstack container expects DB_USERNAME and DB_PASSWORD, not DB_USER and DB_PASS. Second, one must generate and set an APP_KEY value. All good otherwise. Cheers
When actioning docker-compose up -d I get the following error:
ERROR: The Compose file ‘./docker-compose.yaml’ is invalid because:
Unsupported config option for services: ‘bookstack_db’
Please note I have docker and docker-compose already installed.
docker -v
Docker version 20.10.5+dfsg1, build 55c4c88
docker-compose -v
docker-compose version 1.25.0, build unknown
Raspberry pi 4
Hi Alan,
You are running a significantly out of date version of Docker which is likely what is leading to the issues you are running into. If you installed Docker from the Debian repository it is likely the reason you have ended up with this old release.
Our guide on installing Docker to the Raspberry Pi gets the package from the official Docker repository to ensure you get the latest release.
For comparison checking the Docker version after installing it on my Pi, we ended up with the following version. Compose is now included with the newer releases of Docker as well so you don’t need to install a separate module for it to function.
Kind regards,
Emmet
Thank you so much for this tutorial!
I tried it out yesterday and it worked for me. First time installing Raspberry Pi OS haha so everything was kinda new for me but it worked. Now I’m successfully running Bookstack with my Raspberry Pi 3b at home, yay 🙂
Thank you very much. Those who having cloudflare tunnel notworking, try to see if your dns server is updates with domain name