In this tutorial, we will show you how to run a Minecraft Java Edition Server using Docker.
Minecraft is one of the most popular games, known for its fantastic sandbox experience. It is also a game that can be even better when played with other people.
Hosting your own Minecraft Java Edition server can be a cost-effective way to play your world anywhere and let others join the fun. All you need for this tutorial is a computer you can install Docker and a decent internet connection to which you can open a couple of ports.
Docker is a great way to run a Minecraft Java Edition server, as you can keep it somewhat isolated from the rest of your system. Using Docker can also make managing the server a breeze, with updates as simple as restarting the container.
As Mojang does not provide its own container for the Minecraft Java Edition server, we will be using one provided by Itzg. This container is the go-to solution for running the Minecraft server using Docker.
The following guide is written with a focus on Linux-based operating systems. We highly recommend Ubuntu as a great starting point if you are unfamiliar with a Linux operating system.
Running a Minecraft Java Edition Server using Docker
These sections will walk you through getting a Minecraft Java Edition Server running through a Docker container.
You should hopefully find these steps relatively easy to follow, even for a beginner. All you need to know is how to open the terminal. We explain what each command does and how you can configure the server for your own needs.
If there is anywhere in this guide that you feel like needs more explaining, please drop a comment below.
Installing Docker to run the Minecraft Server
1. To be able to run a Minecraft server using Docker, we will need to install it.
If you already have Docker installed on your system, skip straight to step 2. Alternatively, you can follow our guide below to get Docker installed to your Linux system in no time.
https://pimylifeup.com/linux-docker-install/Creating a Directory to Store the Server and Docker Compose File
2. With Docker installed, we can now do some other preparatory work so that we can use it to run a Minecraft server.
Our first task is creating directory to store our Docker Minecraft server by using the mkdir command.
sudo mkdir -p /opt/stacks/minecraftjavaCopyUsing the “-p” option, the command will create all missing directories in the path.
3. After creating the directory, you must change to it by utilizing the cd command.
We will write the Docker Compose File to start the Minecraft Server within this directory. It is also where the server will store your world data and other files.
cd /opt/stacks/minecraftjavaCopyWriting a Docker Compose file for the Minecraft Java Edition Server
4. Now that everything is set up, we can write the Docker Compose file to manage the Minecraft server.
You can begin writing this file by running the command below within the terminal.
sudo nano compose.yamlCopyWe are using the nano text editor as it is a relatively simple terminal-based text editor.
Filling out the Compose File
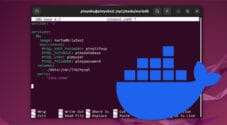
5. Within this Compose file, you will want to enter the following lines. These lines tell Docker we want to use the Minecraft Server Image.
We also use this file to define variables that the Docker image will use to set up the server. We are only touching on a few of these options, but you will find that this container is super configurable.
- TYPE: Using this option, you can choose what type of Minecraft Java Edition server you want to use.
This guide focuses on setting up a Vanilla server, but you can set up alternatives like PaperMC, SpigotMC, and even Minecraft Forge. - VERSION: The next environment variable we define specifies the Minecraft version the Docker Container should set up.
We set this to “LATEST” so that it will always download the latest version. - EULA: This option you should always remain the same. It is saying that you agree to the Minecraft end-user license agreement.
You must agree to this document to run a Minecraft server on any device. - MEMORY: The memory option allows you to set the amount of RAM your Minecraft server can consume.
A good starting value for this option is “2G“, which will allocate 2 gigabytes of RAM to your server.
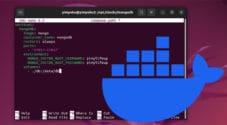
Ensure you replace “<MEMORY>” with the memory you want to be allocated to the server. - RCON_PASSWORD: The last thing you need to set is the RCON Password. This password will allow you to control your Docker Minecraft server remotely.
Replace “<PASSWORD>” with a password of your choosing. Ensure you make this something secure, as someone could abuse it.
version: "3.8"

services:
  mc:
    image: itzg/minecraft-server
    tty: true
    stdin_open: true
    ports:
      - "25565:25565"
    environment:
      TYPE: "VANILLA"
      VERSION: "LATEST"
      EULA: "TRUE"
      MEMORY: <strong><MEMORY></strong>
      RCON_PASSWORD: "<strong><PASSWORD></strong>"
    volumes:
      # attach the relative directory 'data' to the container's /data path
      - ./data:/dataCopy
Saving the Docker Compose File for Minecraft
6. After writing out the Compose file, save and quit by pressing CTRL + X, Y, and then the ENTER key.
Starting the Server
7. At this point, we can start up the Minecraft Java Edition Docker Server by running the command below.
During start-up, Docker will download the latest Minecraft container and then start it using your environment variables.
docker compose up -dCopyBy utilizing the “-d” option, Docker will start up the Minecraft server and detach from the terminal. This allows the server to continue to run even after the current session closes.
8. Once the Minecraft container is running, you can now connect to it.
To connect to your server, you will need to know the local IP address of your device. You can get this IP by using the hostname command in the terminal.
hostname -ICopyBelow, you can see how this command returned our device’s local IP address.
192.168.0.134Connecting to your Minecraft Server
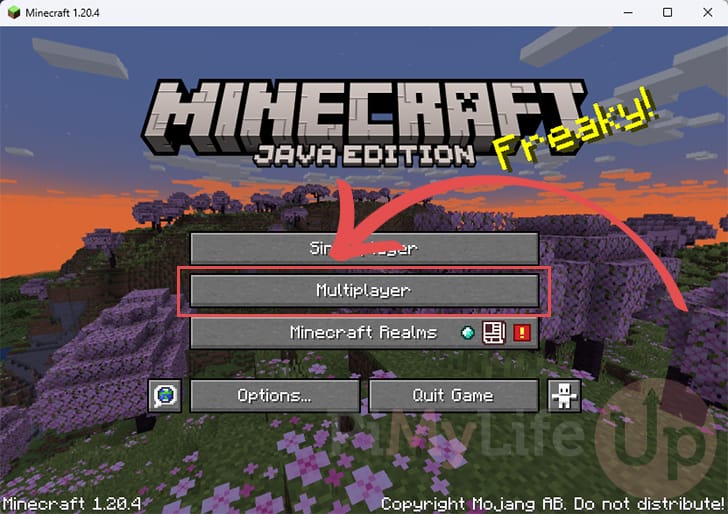
9. To access your new Docker Minecraft server, you must load up the Minecraft client.
Once you have the client open, click the “Multiplayer” option.
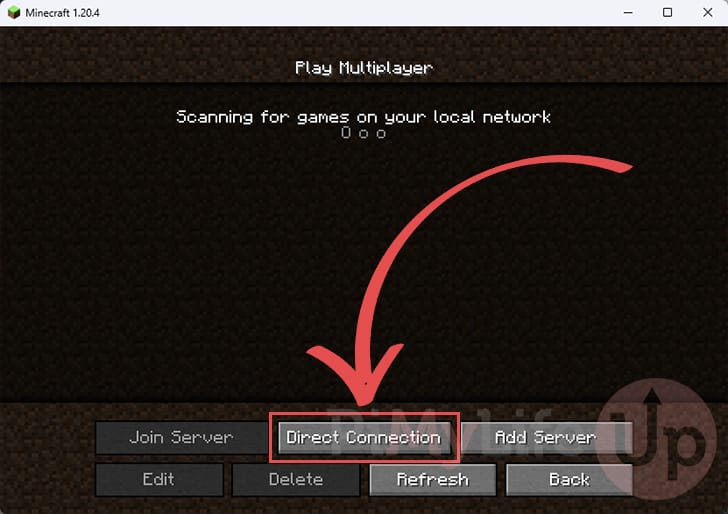
10. On the multiplayer screen, there is a chance your server is automatically detected.
However, you can click the “Direct Connection” button if you have the IP address.
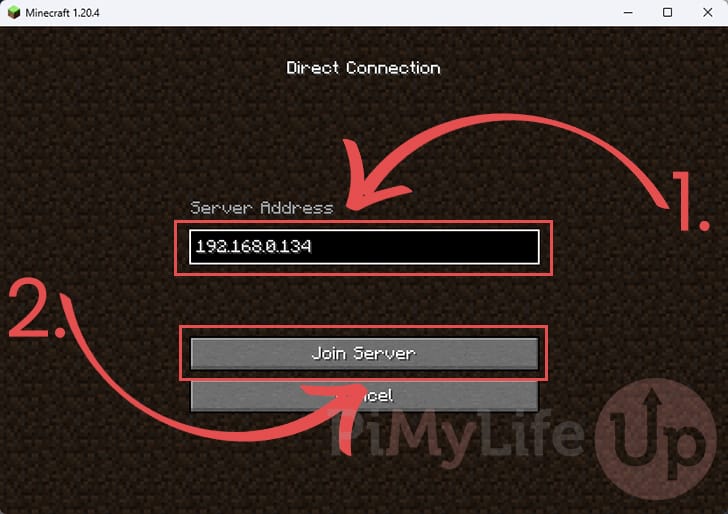
11. Now, type the IP address of your Minecraft server into the provided textbox (1.).
After typing in your address, click the “Join Server” button to connect (2.).
12. You should now hopefully be playing on your Docker Minecraft server.
If you want outside access, you can now port forward port 25565 to your server, or you can use a service like Tailscale.
Sending Commands to the Docker Minecraft Java Edition Server
13. Next, you will want to know how to send commands to your Minecraft Docker server.
The best way to do this is to utilize the “rcon-cli” tool that is included within the container.
You can open this command line tool using the following command while in the same directory in which you wrote the “compose.yaml” file earlier.
docker compose exec -i mc rcon-cliCopy14. You can now run any Minecraft commands within the terminal.
For example, if you wanted to “OP” a player, you would use the following command.
op PLAYERCopy15. Once you are done using the command line tool, you can press CTRL + C to exit.
Managing your Minecraft Docker Server
In this section, we will quickly show you a couple of ways that you can manage your Minecraft Docker Server.
In particular, we will show you how to shut the server down, restart it, and update it.
You must run all the commands in the following sections within the same directory you wrote the compose file. If you strictly followed our guide, you should be in the directory “/opt/stacks/minecraftjava“.
Shutting Down your Minecraft Java Server
Shutting down your Docker-based Minecraft Java server is super simple.
You only need to run the following command, and Docker will safely shut down the container.
docker compose downCopyRestarting your Server
Restarting is also incredibly straightforward, like shutting down your server, and can be done with the command below.
This command is helpful to know, as the image we are using will automatically update to your chosen Minecraft server when it starts up.
docker compose restartCopyUpdating your Minecraft Docker Server Container
Updating the base image you use for your Minecraft Docker server is quite simple, as you will soon see. All we need to do is tell Docker to re-pull the image and then tell it to start.
You don’t actually need to update the image to update Minecraft, but if something breaks, there’s a chance a new image may fix the issues you are having. You can see changes made to the image by exploring their releases page.
1. To update the Minecraft Docker image, you will want to use the following command.
This command uses Docker to re-pull the images of all containers specified within the compose file.
docker compose pullCopy2. Docker won’t automatically restart the container to use the new image, we must do this ourselves.
Luckily, all we need to do to load the new image is to use the following command. If a new image is available, Docker will move over to that when it tries to start the Minecraft server.
docker compose up -dCopyViewing the Logs of your Minecraft Docker Server
Docker also makes viewing the logs of your Minecraft server an easy process.
You can view the logs using the command below within the terminal. By including the “-f” option, the log will automatically update as new events are added.
docker compose logs -fCopyOnce you are finished reading through your logs, you can quit by pressing CTRL+ C.
Conclusion
Hopefully, you will now have a Minecraft Java Edition server running through a Docker container.
We achieved this setup thanks to the container from Itzg and a handy Docker compose file that makes setting and running the server a breeze.
Please feel free to comment below if you have any questions or concerns with your Minecraft Docker setup.
If you found this tutorial to be helpful, we recommend checking out our many other guides.