In this tutorial, we will show you how to set up and run an InfluxDB server using Docker
InfluxDB is a time series database that is incredibly useful for storing any data that you want to track over a period of time. For example, if you are pulling in data from a sensor, Influx is a great place to store it so you can graph changes over time.
One of the best ways to install and run the InfluxDB server is to utilize a Docker container. One key advantage Docker introduces is the ease of deployment. You don’t have to stress about incompatible operating system packages as long as your base system supports Docker.
Additionally, Docker makes updating to the latest version of InfluxDB as simple as running a couple of commands. It also makes the setup process super straightforward.
The official InfluxDB container we are using supports ARM systems, so you can follow this guide even if you are using a device like a Raspberry Pi.
How to Use Docker to Run InfluxDB
In the following sections, we will show you how to use Docker Compose to download and run InfluxDB.
We are using Docker Compose rather than straight Docker as it simplifies managing your containers.
Installing Docker
1. To run InfluxDB using Docker, you must have Docker installed on your device.
If you don’t have this runtime installed, we highly recommend you follow our guide on setting up Docker on Linux.
https://pimylifeup.com/linux-docker-install/Preparing your System for the InfluxDB Docker Container
2. Your next step is to use the mkdir command to create a directory where we will store the InfluxDB Docker Compose file and where it will store its data.
You can create a directory within the “/opt/” folder using the following command. The “-p” tag ensures the whole path will be generated.
sudo mkdir -p /opt/stacks/influxdbCopy3. With the directory created, you will want to change into it by using the cd command.
cd /opt/stacks/influxdbCopyWriting a Docker Compose File for InfluxDB
4. Now that we are within the InfluxDB directory we created, we can move on to writing a Compose file.
This Docker Compose file will be used to select and configure the InfluxDB container. By running the command below, we can begin writing this file using the nano text editor.
sudo nano compose.yamlCopy5. Within this compose file you will want to fill out the following lines.
You will need to replace a few placeholders within this file that will be used to configure the InfluxDB Docker container.
<ADMINUSER>: The first step is to specify the username that you want to use for your InfluxDB admin.<ADMINPASSWORD>: Next, specify the password you will use to log in to your admin account.
This password must be between 8 and 72 characters long. Otherwise the InfluxDB container will refuse to start.<ORGANIZATION>: With InfluxDB, every user must belong to an organization. Multiple users can belong to an organization.<BUCKET>: When you first set up InfluxDB, it requires an initial bucket. Assign a name for this initial bucket, which will be created when the container starts.
services:
  influxdb:
    image: influxdb:2
    container_name: influxdb
    restart: always
    ports:
      - '8086:8086'
    environment:
      DOCKER_INFLUXDB_INIT_MODE: setup
      DOCKER_INFLUXDB_INIT_USERNAME: <ADMINUSER>
      DOCKER_INFLUXDB_INIT_PASSWORD: <ADMINPASSWORD>
      DOCKER_INFLUXDB_INIT_ORG: <ORGANIZATION>
      DOCKER_INFLUXDB_INIT_BUCKET: <BUCKET>
    volumes:
      - ./data:/var/lib/influxdb2
      - ./config:/etc/influxdb2Copy
6. Once you have finished writing the Compose file, you can save and quit by pressing CTRL + X, Y, and then ENTER.
Starting your InfluxDB Container
7. With the Compose file written, all we need to do to start the InfluxDB Docker Container is use the below command.
By including the “-d” option, Docker will detach from the terminal once it has downloaded and run InfluxDB.
docker compose up -dCopyAccessing the InfluxDB Web Interface
8. With the InfluxDB Docker container up and running, you will want to know how to access its web interface.
First, you will want to know the IP address of your machine. If you don’t know it, you can get your IP using the hostname command.
hostname -ICopy9. Within your favorite web browser, you will want to go to the following address.
Ensure you replace “<IPADDRESS>” with the IP of the machine you set up InfluxDB on.
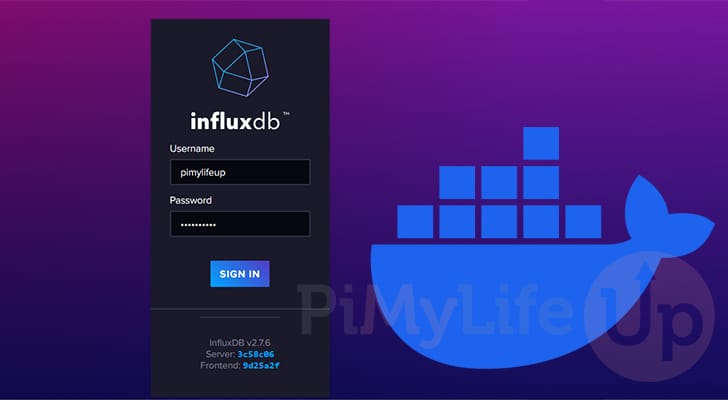
http://<IPADDRESS>:809610. When you access the InfluxDB web interface you will be required to sign in to an account.
Type in the admin username and password you set when creating the Docker container (1.).
Once you are happy with the details you entered, click the “SIGN IN” button (2.).

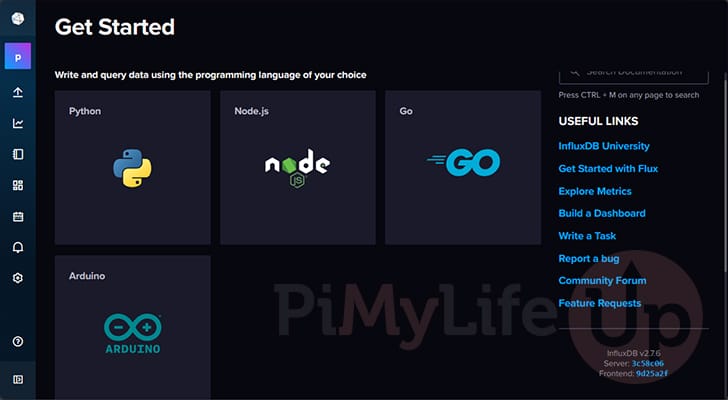
11. You have successfully got InfluxDB up and running using a Docker container.
You can now easily control the database through its web interface and start sending data to your buckets.
Updating the InfluxDB Docker Container
InfluxDB updates its software relatively often, which means an easier update process is crucial. This is where a key advantage to Docker comes in, as upgrading to the latest version is super simple, and you don’t have to worry about any operating system packages causing issues with new releases.
In the next couple of steps, we will show you how easy it is to update your InfluxDB Docker container.
1. Your first step is to change to the directory where we wrote the Compose file for InfluxDB.
Assuming you followed our original guide, you can simply use the command below.
cd /opt/stacks/influxdbCopy2. Once we are in the right place, we need to use Docker to pull the latest version of InfluxDB.
Getting Docker to download new images is as straightforward as using the command below.
docker compose pullCopy3. Even if the previous command downloaded a new update, it won’t automatically move your running container to it.
Luckily, if we use the same command we used to start the container in the first place, Docker will automatically detect the new version, stop the running container, and then start it again using the new image.
docker compose up -dCopyConclusion
At this stage, you should have InfluxDB up and running within an easy-to-use Docker container.
Docker is a great solution for database servers like InfluxDB as it enables you to get it up and running in no time. Additionally, Docker also makes the update process super straightforward.
Please comment below if you have any questions about running this database server on your device.
If you found this tutorial helpful, please check out our many other Docker guides.

You may want to specify, that the admin password needs to be between 8 and 72 characters long, otherwise the container will crash and restart constantly.
Hi Phil,
Thank you for pointing that out! I have updated the guide to point out the password requirements.
Kind regards,
Emmet
When I go to run “docker compose up -d” I get a no matching manifest for linux/arm/v8 in the manifest list entries.
Hi Darren,
If you are trying to follow this guide on an ARM device such as a Raspberry Pi, you must be running a 64-bit operating system. The InfluxDB team do not provide builds of InfluxdDB 2 for 32-bit systems.
Kind regards,
Emmet
I am running Debian 64bit OS.
Hi Darren,
Can you please verify this by running the following command and letter me know the result.
Kind regards,
Emmet
armhf
That indicates you are running a 32-bit system. InfluxDB only supports 64-bit operating systems.
Kind regards,
Emmet