This tutorial will show you how to run a PostgreSQL server using Docker Compose.
PostgreSQL is a popular SQL-based relational database that has become known for being both fast and stable. It is an excellent alternative to MySQL and MariaDB.
Docker is an excellent way to run database servers like PostgreSQL on your system. It dramatically simplifies setting up your server and offers the ability to automatically restart it when it encounters an issue without affecting the rest of your system.
Another advantage of Docker is that you don’t have to worry about the PostgreSQL version that is available on your system. Using Docker, you can easily stick with a specific version of the database server.
The PostgreSQL Docker image that we are using today is usable on the vast majority of systems. You can even run this database on a Raspberry Pi, as they provide ARM builds.
Setting up a PostgreSQL Docker Container
In the following sections, we will show you how to set up the PostgreSQL database using a Docker container.
In addition to the database server, you will see how to add the pgAdmin web tool. This tool allows you to manage your PostgreSQL databases from a web browser.
Installing Docker
1. Obviously, to run the PostgreSQL Docker container, you will need to have the Docker runtime installed on your system.
If you already have Docker installed on your device, you can skip to step 2 of this tutorial. Otherwise, you can easily install the latest version of Docker using our guide..
https://pimylifeup.com/linux-docker-install/Preparing to Run the PostgreSQL Docker Container
2. Our next step is to create a directory to store the Docker Compose file for PostgreSQL. This is also the same directory where we will get the container to store its data.
We can create a directory by using the mkdir command within the terminal.
sudo mkdir -p /opt/stacks/postgresqlCopy3. With the directory created, change to it by using the cd command.
cd /opt/stacks/postgresqlCopyWriting a Docker Compose File for PostgreSQL
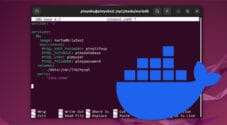
4. With everything now prepared, we can begin writing the Docker Compose file to download and run the PostgreSQL container.
You can begin writing this new Compose file by running the following command.
sudo nano compose.yamlCopyThe Compose File for PostgresSQL
5. We will start this file by adding the lines to set up the database server.
While typing these lines, there are two particular things that you must replace.
<USERNAME>: Replace this with the username you want to use for your PostgreSQL super admin. During start-up Postgres will create a database using the same name.<PASSWORD>: Next, replace this value with the password you want to use to access your super admin and its database. Ensure this is secure, as someone could use it to attack your server.
services:
  db:
    image: postgres:16-alpine
    restart: always
    environment:
      - POSTGRES_USER=<USERNAME>
      - POSTGRES_PASSWORD=<PASSWORD>
    ports:
      - 5432:5432
    volumes:
      - ./data:/var/lib/postgresql/dataCopy
Adding pgAdmin to your Compose File
6. If you want an easy-to-use web-based tool to manage your PostgreSQL Docker container, you can also add pgAdmin to your compose file.
pgAdmin is an easy-to-use tool for interacting with and managing your databases. Like with PostgreSQL, you will need to replace a couple of values before proceeding.
<PGADMIN_EMAIL>: Here, you will want to specify the email address you will use to log in to the pgAdmin web interface.<PGADMIN_PASSWORD>: Replace this value with the password you want to use to access the interface.
  pgadmin:
    image: dpage/pgadmin4:latest
    environment:
      PGADMIN_DEFAULT_EMAIL: <PGADMIN_EMAIL>
      PGADMIN_DEFAULT_PASSWORD: <PGADMIN_PASSWORD>
    ports:
      - 8080:80Copy
Saving your Changes
7. Once you have finished filling out the Compose file, you can now save and quit.
If you are using the nano text editor, you can save and quit by pressing CTRL + X, Y, and then ENTER.
Starting the PostgreSQL Database Docker Container
8. With the COmpose file written for the PostgreSQL container, we can now start up the database server.
To download and start the PostgreSQL container, you will want to use the following command within the terminal.
docker compose up -dCopyUsing the “-d” option will detach Docker from the currently running terminal session. The database will continue to run in the background.
Testing your New PostgreSQL Database
9. If you choose to install pgAdmin alongside the PostgreSQL Docker container then we can use it to test our database server is working.
To access this database tool, you must go to the IP address of your machine followed by the port “8080“.
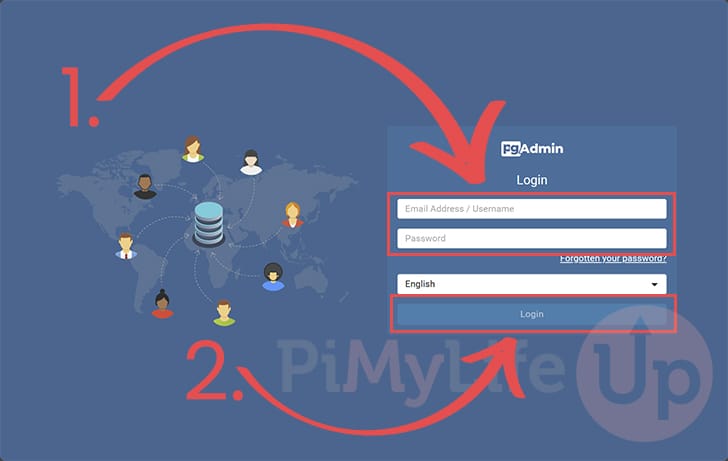
http://<IPADDRESS>:808010. When you access the pgAdmin web interface, you must log in (1.). Use the login details you specified within the Compose file to continue.
After filling out your information, click the “Login” button (2.) to continue.
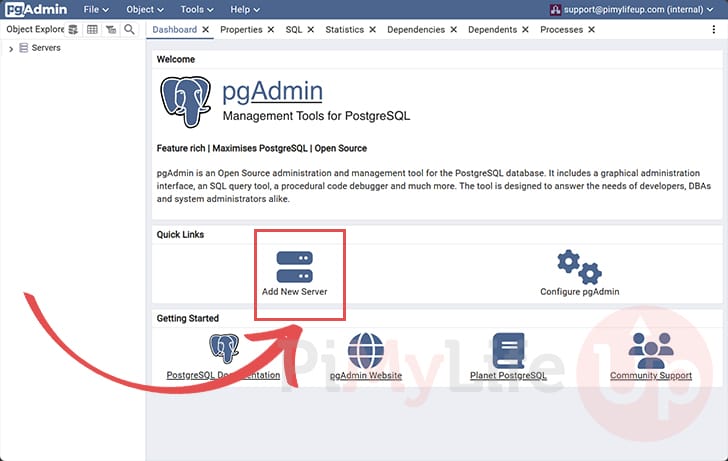
11. With the pgAdmin interface open, we must add our PostgreSQL Docker container as a server.
To start this process, click the “Add New Server” button.
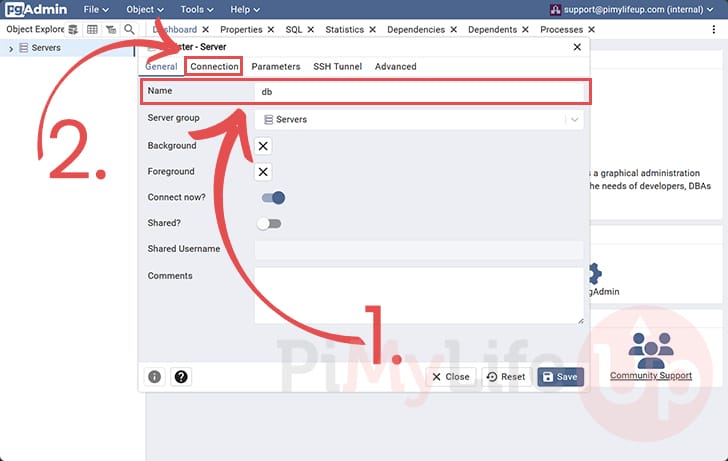
12. The first thing you will want to do within this interface is give your database a name (1.). We kept it simple and just named it “db“.
After naming the database, change to the “Connection” tab (2.).
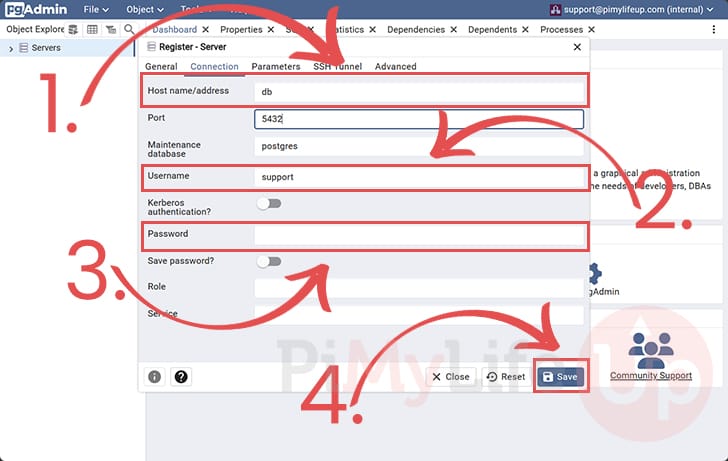
13. Since pgAdmin is running within the same Docker Compose file as our PostgreSQL database you can use “db” as the hostname/address (1.).
The next thing you need to do is specify the username (2.) you want to use when connecting to your database server. These details should be the ones you specified within the Compose file earlier.
After setting the username, you must also specify the password (3.) for your account.
Once you have finished filling out these details, click the “Save” button (4.) to continue.
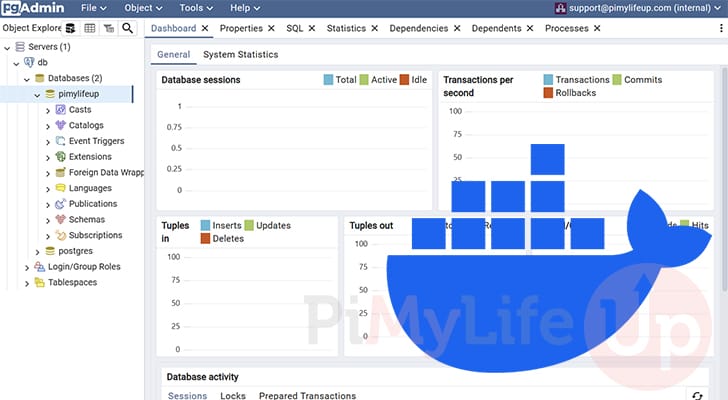
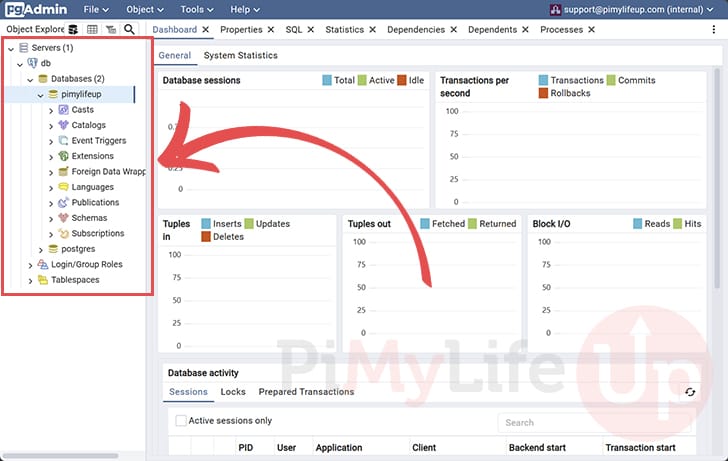
14. You can now interact with your PostgreSQL database directly from the pgAdmin web interface.
Also, if the connection was made successfully, you know the database server started up successfully.
Updating your PostgreSQL Docker Container
One advantage of using the Docker container for the PostgreSQL database is that upgrading to the latest version is straightforward. You aren’t trapped by whatever version of PostgreSQL your operating system ships with.
1. Your first step is to change to the directory where we wrote the Compose file for your PostgreSQL Docker container.
We need to be in this directory as we want to use the Compose file.
cd /opt/stacks/postgresqlCopy2. After swapping to the correct directory, you will want to tell Docker to pull a new version of any container specified within the Compose file.
Luckily Docker makes pulling a new version as simple as using the following command. While this command downloads new versions it won’t automatically move an already running container over to it.
docker compose pullCopy3. If a new version is downloaded, you will want to restart your container so that it can start utilizing it.
By running the “compose up” command, Docker will detect the new image for PostgreSQL, stop the current running container, and start it back up using the new release.
docker compose up -dCopyConclusion
Hopefully, you will have successfully gotten the PostgreSQL database up and running using Docker Compose.
PostgreSQL is a popular alternative to the more popular MySQL and MariaDB database servers. It is known for its powerful features and great performance.
Please feel free to comment below if you have had any issues with getting this database server to function properly.
We have many other guides for both Docker and Linux that are worth checking out.

Hello. I have been trying to use dockge as a docker management software. As well when you guys direct people to add stuff to the bottom i keep getting errors and can never figure out what to do to get out of that and have things work properly. Any help would be greatly appreciated.
Hi Andrew,
If you could post your errors, we may be able to try and help direct you in the right direction.
Kind regards,
Emmet
Move the ports: block out of environment. Indent is not correct.
pgadmin:
image: dpage/pgadmin4:latest
environment:
……
ports:
– 8080:80
Hi pv,
Thank you for pointing that out. I have corrected that mistake.
Kind regards,
Emmet