In this tutorial, we will cover the whoami command that is available on Linux systems.
The whoami command is short for “Who am I” and will print the effective username of the user that invoked the command. It is a fundamental command and will come in handy if you need to know the current user’s identity. For example, you might want to check the user before running a script.
The Linux version of the whoami command differs from the Windows version. The Windows version has more options you can use with the command, while the Linux only features two options. However, the basic functionality of the command is the same on both operating systems.
If you want a command that provides you with more information about the system’s current users, you should look at using the w or who command. Even without any options, the who command will provide you with a decent amount of information.
The tutorial below will take you through the few things you need to know about using the whoami command on Linux.
whoami Command Syntax
The syntax of the whoami command is very straightforward, as it does not typically use any additional options or arguments. The output of the command will be the current effective user.
whoami [options]CopyThere are only two options that you can use with the command. Both options are listed below.
--helpwill display help information on the command.--versiondisplays the license and version information.
How to use the whoami Command
Using the whoami command is extremely easy, as you do not need additional parameters or options.
It is the perfect command for identifying the current user if you use sudo su to change users a lot or you want to verify the correct user is about to run a script.
In the Terminal
To run the command, enter the following into the terminal.
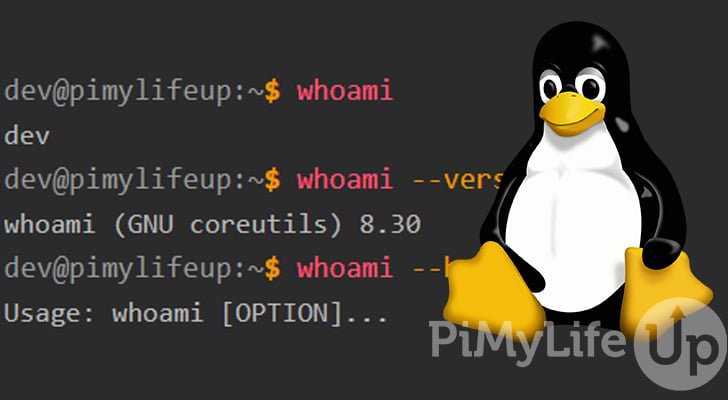
whoamiCopyAfter inputting the above command, you should see the username of the currently logged-in user in the terminal. Below is an example of the output.
dev@pimylifeup:~$ whoami
dev
Copy
You can now use this information in other commands, such as checking the UID or GID, modifying the user, and more.
In a Script
You may find the whoami command extremely useful incorporated into a script. For example, before running any code, you may want to check the correct user is invoking the script.
Below is an example of a simple check that you can add to a bash script.
if [ $(whoami) != "root" ]; then
  echo "Only root can run this script."
  exit 1
fiCopy
Running the above command as the non-root user will result in the following output.
dev@pimylifeup:~$ ./test.sh
Only 'root' can run this script.
Copy
Alternatives to the whoami Command
There are a couple of commands that you can use to get the same data as the whoami command.
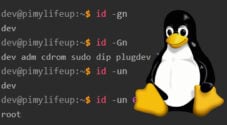
You can use the id command to get the current effective user by simply using the -u and -n options. Below is an example of using the id command to get the current user.
dev@pimylifeup:~$ id -un
dev
Copy
Another alternative is to use the logname command. However, logname will return the current user even when sudo is invoked.
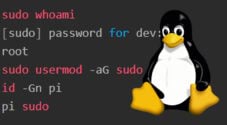
dev@pimylifeup:~$ sudo logname
[sudo] password for dev:
dev
dev@pimylifeup:~$ logname
dev
Copy
Lastly, you can view the current user using the $USER environment variable. However, it will face the same problem as logname when using sudo.
dev@pimylifeup:~$ echo $USER
dev
dev@pimylifeup:~$ sudo echo $USER
devCopy
Conclusion
I hope this quick tutorial on the whoami command has helped you understand when and how to use the command. However, as we mentioned earlier, there are other commands that you might find useful, such as who and the w command.
You might be interested in learning other commands around user management. For example, the id command is useful for finding a user’s id numbers. Alternatively, the usermod command is perfect for modifying some of the user’s data.
Please let us know if you notice a mistake or an important topic is missing from this guide.