We will be showing you how to install Wine on a Ubuntu-based operating system.
Wine is a unique piece of software that allows you to run software and games built for Windows on a Linux system like Ubuntu.
This software acts as a layer that sits between Ubuntu and the windows application. It will translate Windows system calls into a system call that Ubuntu understands.
Wine also differs from virtualization software like VirtualBox as you do not need to run a full version of Windows on top of Ubuntu.
Within this guide, we will show you how to install the latest version of Wine for Ubuntu.
While we are testing this Wine installation on Ubuntu 18.04 and Ubuntu 20.04, it should work for most versions of Ubuntu.
Prepare Ubuntu for Wine
Let us do some preparatory steps to get our Ubuntu system ready to install the Wine software.
You need to run the following steps within the terminal on Ubuntu. You can open the terminal easily by pressing CTRL + ALT + T.
Steps for all Versions of Ubuntu
1. Let us start by updating our Ubuntu system by using the two commands below.
These ensure we have an updated package list while also making sure we have all available updates.
sudo apt update
sudo apt upgrade
2. Our next step is to check if you are running a 32bit or 64bit operating system.
This is because it will affect what version of Wine we can install and whether we need to enable multi-arch support.
We can use the following command to print out the machine hardware name.
uname -m3. Using the result of this command, you can tell if you are running a 32-bit system.
If the result gives an output like ix86, where x is 3, 4, 5, or 6, then you are running a 32-bit system.
Alternatively, if you are running a 64-bit version of Ubuntu, you should see something like “x86_64” be reported by the system.
4. If you are running a 64-bit version of Ubuntu, we need to enable multiarch support.
Enabling multiarch will allow us to install both 64-bit and 32-bit packages to the same system. This is needed for Wine on Ubuntu to support 32-bit Windows applications properly.
We can enable 32-bit support by running the following command on your Ubuntu system.
sudo dpkg --add-architecture i386Extra Steps for Ubuntu 18.04
If you are running Ubuntu 18.04, you need to follow a couple of extra steps to install Wine.
We need to add an additional package repository as the FAudio package that Wine requires is not available through the official repository.
1. For our first step, we will need to add the repository key for the repository containing the FAudio package.
This package is provided as part of the openSUSE Build Service (OBS) repository for wine.
Run the following command on your Ubuntu device to add the package key.
wget -qO- https://download.opensuse.org/repositories/Emulators:/Wine:/Debian/xUbuntu_18.04/Release.key | sudo apt-key add -2. With the package key added, our next step is to add a reference for the package repository itself.
We can do this using the following command. It will add the link to the repository to a file located within the “sources.list.d” directory.
sudo sh -c 'echo "deb https://download.opensuse.org/repositories/Emulators:/Wine:/Debian/xUbuntu_18.04/ ./" > /etc/apt/sources.list.d/obs.list'Installing Wine on Ubuntu
Our next step is to install Wine to our Ubuntu operating system.
While we could use the version provided from the Ubuntu package repository, we will instead add the official Wine repository.
Adding the official repository ensures that we will install the latest available version of the software.
1. Before we can add the package repository for Wine, we need to add its key.
Using the command below, we can add the Wine key to the apt keychain. This key is needed to verify packages are coming from the official repository.
wget -qO- https://dl.winehq.org/wine-builds/winehq.key | sudo apt-key add -2. Next, we need to add the repository for the version of Ubuntu that you are running.
Using the following two commands, we can grab the current Ubuntu release name and then add the correct Wine repository for that release of Ubuntu.
RELEASE_NAME=$(lsb_release -sc)
sudo add-apt-repository "deb https://dl.winehq.org/wine-builds/ubuntu/ $RELEASE_NAME main"
3. Before installing Wine to our Ubuntu operating system, we will need to run an update.
We can run an update by running the command below on your Ubuntu machine.
sudo apt updateWithout running an update, the apt package manager will not be aware of the repositories that we have added.
4. Finally, install Wine to your Ubuntu device by using the following command.
In our case, we will only be installing the stable release of Wine.
sudo apt install --install-recommends winehq-stableAdding the “--install-recommends” option, we are telling apt that it should install any additional package that Wine might need to run on Ubuntu.
5. We can verify that Wine is now installed on Ubuntu by getting it to output its version number.
Using the following command, you can output what version of Wine you just installed.
As we are using the official repository, this should be the latest stable release for your release of Ubuntu.
wine --versionFor example, on our test system, we received the following message.
wine-6.0Launching the Wine Config Tool on Ubuntu
Before you start running Wine on your Ubuntu system, you should first launch the Wine configuration tool.
This tool will help set up Wine for your system and get you to install any additional packages that might be missing after the setup process.
To complete the following steps, you will need to access your Ubuntu devices screen and not be using something like SSH.
1. Let us begin by starting up the Wine configuration menu.
You can open this application by using the following command on your device.
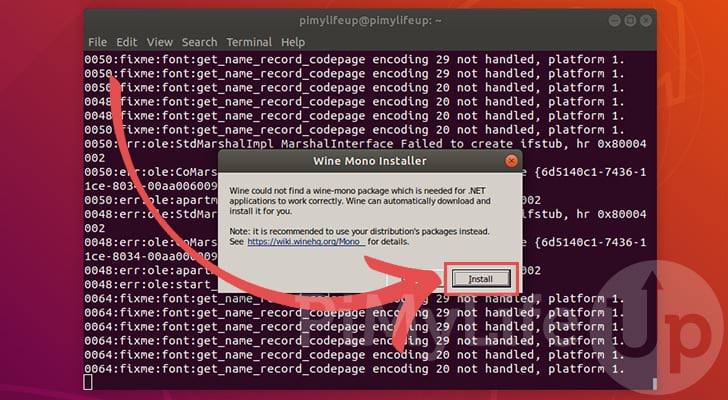
winecfg2. When you first start the wine configuration tool, it will check if you are missing any packages that might hurt your experience.
The first of these messages will prompt you to install Mono for Wine. Mono is an open-source package that allows you to run .net applications.
When prompted if you want to install this package, click the “Install button.
3. Next, you will also be asked if you want to install Gecko for Wine.
Gecko helps with handling applications that embed HTML. Without this, you could run into additional issues.
For this reason, when prompted to install the package, click the “Install” button.

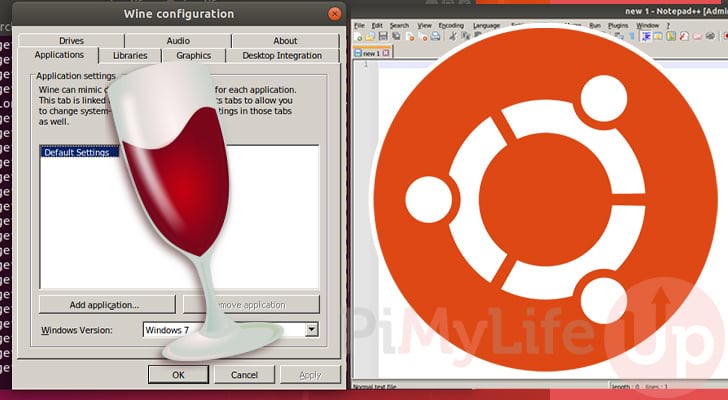
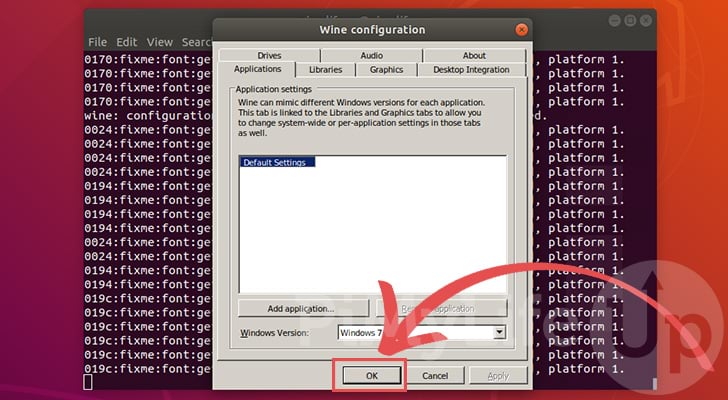
4. Finally, you will be shown the Wine configuration menu.
You can use these settings to control how Wine runs on your Ubuntu system. For most people, you should be able to get away with the default settings.
However, if you run into issues, you should now know where you can reconfigure Wine.
Once you are happy, you can close out of the dialog by clicking the “OK” button.
Testing that Wine is Working
With Wine now installed on your Ubuntu system, we can now test that it is working correctly.
To test Wine, we will be installing Notepad++ as it is a popular, Windows only tool.
1. In your browser, go to the Notepad++ website and download the latest version of the software.
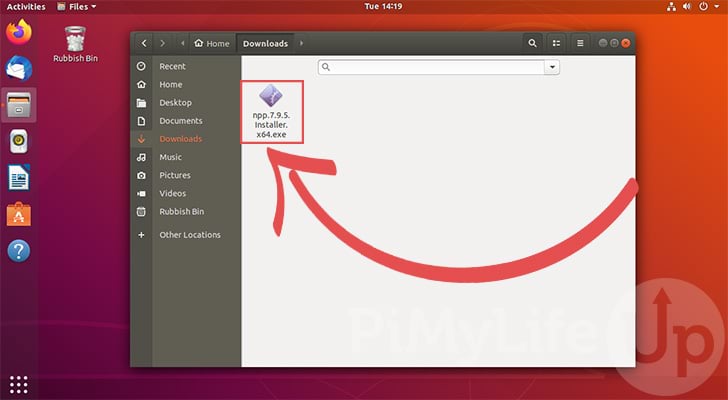
2. Once you have downloaded the Notepad++ installer, locate it in your directory.
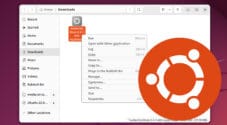
When you have located the installer, right-click it.
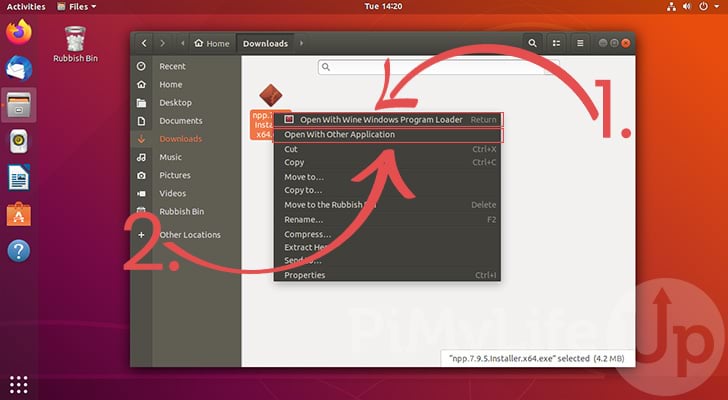
3. Within the right-click menu, you should have a few options.
If everything is correct, the first option should be “Open with Wine Windows Program Loader” (1.). If this is correct, then you can go ahead and click it.
However, if there is different text, you will need to click the second option titled “Open With Other Application” (2.).
The second option will bring up an additional dialog that will allow you to choose the Wine Windows Program Loader.
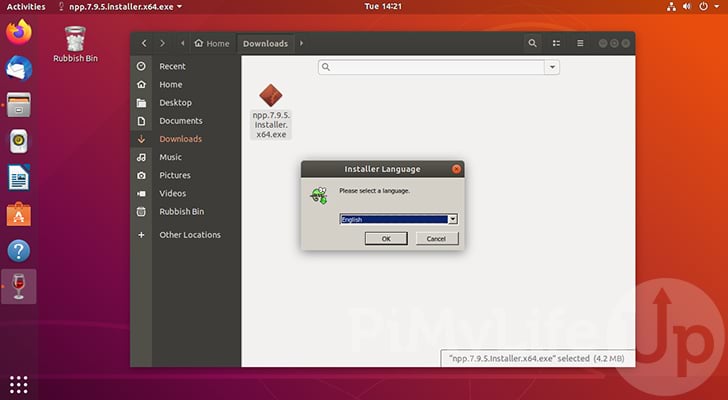
4. Your Ubuntu system will now use Wine to run the Notepad++ installer.
Follow the install prompts as you would on your Windows system to install the program.
If prompted to add a shortcut to the desktop, we recommend you enable the option. It will make running the software a lot easier.
5. Once you have finished, you can now run the Notepad++ software.
If you chose to save the icon to the desktop as we have, all you need to do is double-click the icon to run the software.

If you don’t have the desktop icon, running the software requires a few extra steps that our next section will touch on.
6. Hopefully, you will have Notepad++ up and running on your Ubuntu device using Wine.
You can now experience your first piece of Windows software running through the Wine compatibility layer.

Finding the Wine Directory on Ubuntu
You may be wondering where Wine installs your programs on your Ubuntu system.
This section will show you how you can find an installed application, which in our example will be Notepad++.
While these screenshots are taken on Ubuntu 18.04, these steps are basically the same on Ubuntu 20.04.
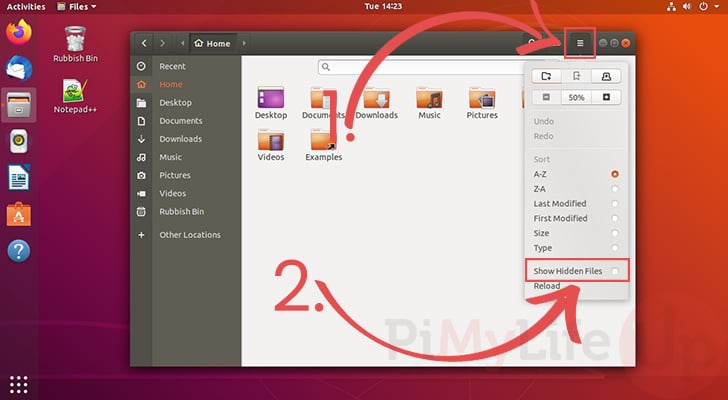
1. First, open up the “Files” application on your Ubuntu device.
With the “Files” application open, you will need to click the hamburger icon in the top left of the window (1.).
This will bring up a context menu, find the option labeled “Show Hidden Files” and click it (2.).
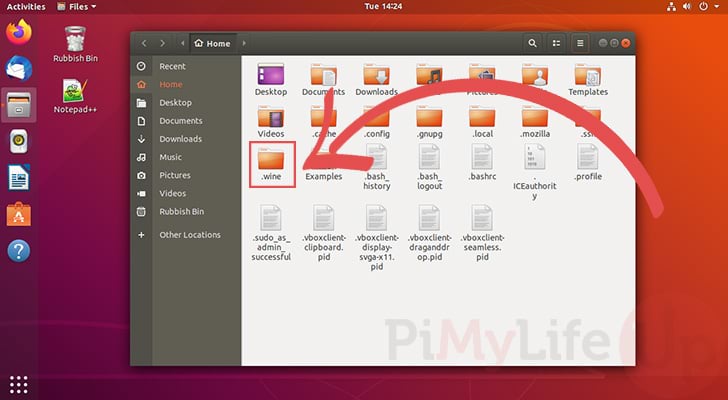
2. Within the home directory, you should now see more files and folders.
The folder we are after is called “.wine“. Once found, double-click it to change to the directory.
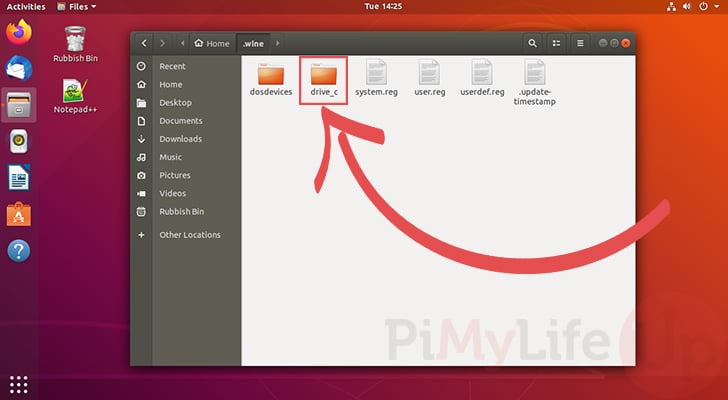
3. Next, we need to change into the “drive_c” directory.
This is the directory wine uses to simulate the typical folder structure of a Windows system.
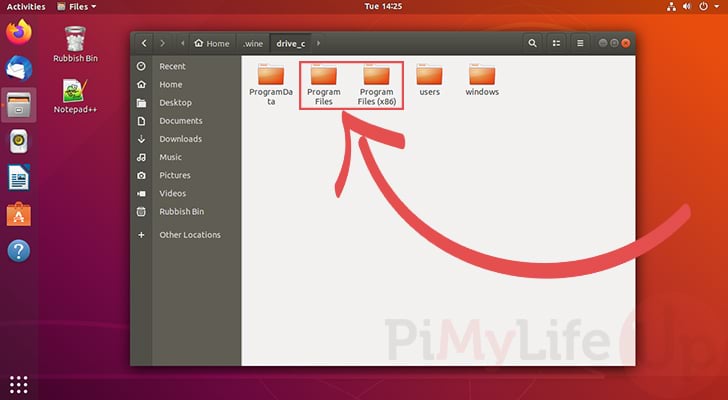
4. The two folders that you will be interested in here are “Program Files” and “Program Files (x86)“.
These directories will contain all of the applications that you have installed using Wine on your Ubuntu device.
The “Program Files” will contain any programs that are in the native systems architecture. So in our case, as we are running a 64-bit system, Wine/Windows will save 64-bit programs to this directory.
Additionally, if you are running a 64-bit operating system, you will have an additional directory called “Program Files (x86)“. This directory will contain 32-bit programs.
As we installed the 64-bit version of Notepad++, we will be going into the “Program Files” directory.
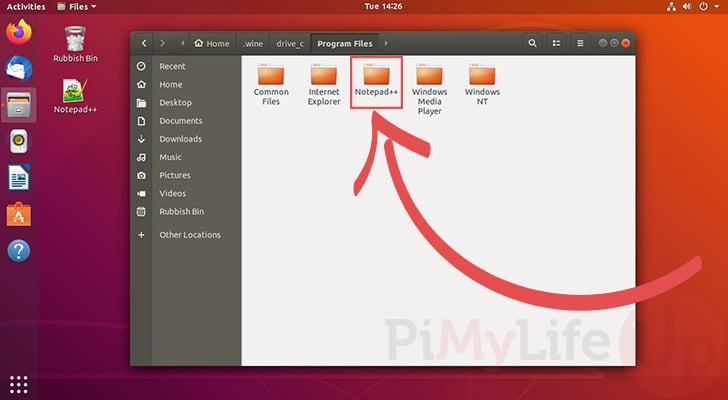
5. Within the “Program Files” directory, we can see any programs that we have already installed.
In our case, the only program we have installed on Ubuntu using Wine is Notepad++, so we will change to its directory.
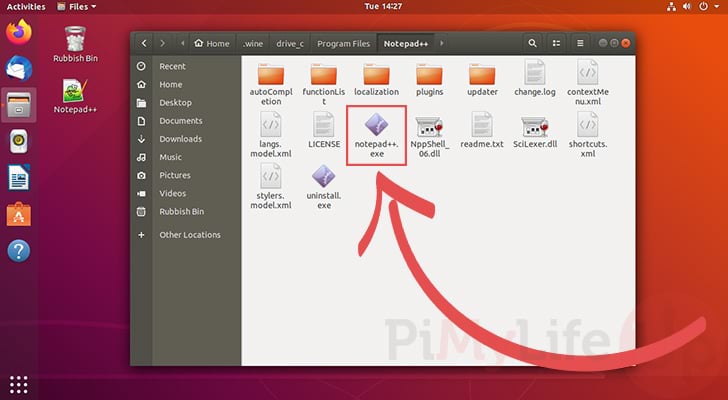
6. Within a program’s directory, you can find all of its files, including the program’s executable.
If we wanted to run Notepad++ from this directory, all we will need to do is double-click the “notepad++.exe” executable.
The Wine compatibility layer will automatically step in to run the software.
Conclusion
This guide should have shown you how you can install and use Wine on your Ubuntu system.
Wine is a compatibility layer the allows you to run software built for Windows on your Ubuntu-based system.
This software has a wide range of uses and has proven to be reasonably successful at running numerous pieces of software and games.
If you have run into any issues with getting Wine to install on Ubuntu, please leave a comment below.
Once done, you should check out some of our other Ubuntu guides to see what else you can do with the system.