In this tutorial, we will be showing you how to add the universe repository on Ubuntu.
Ubuntu has several different repositories that give you access to numerous more packages. However, these packages have been separated for various reasons.
The Ubuntu universe repository contains community-maintained software. Additionally, the software in this repository must also be free and open-source.
An example of a package that you will find within this repository is the open-source and free game SuperTuxKart.
Adding this repository to Ubuntu is a straightforward process and can be done using either the terminal or desktop interfaces.
Adding the Ubuntu Universe Repository
At this point, you need to decide whether you want to add the universe repository using Ubuntu’s desktop or terminal interfaces.
If you are using Ubuntu server, you will need to use the terminal to complete these steps.
Using the Desktop Interface to Add the Repository
This section will show you how to add the Universe repository through the Ubuntu desktop easily.
We took these screenshots on Ubuntu 22.04, but the steps should work the same on older versions of Ubuntu.
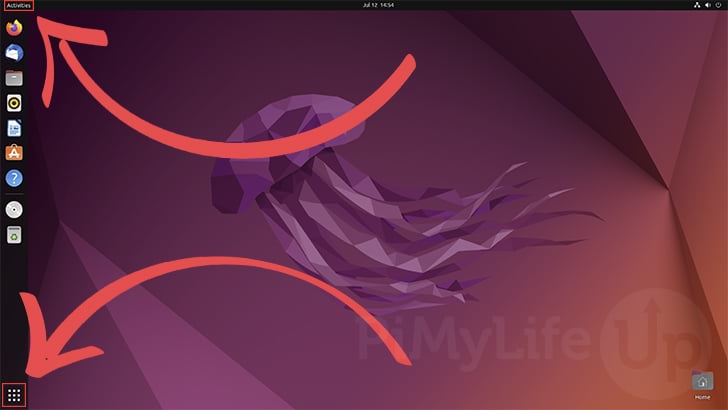
1. To enable the universe repository, we need to open the “Software and Updates” application.
The easiest way to get to this is by opening the activities screen. You can open this screen by clicking on the top-left or bottom-right of the desktop.
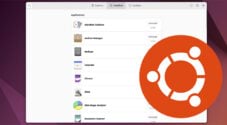
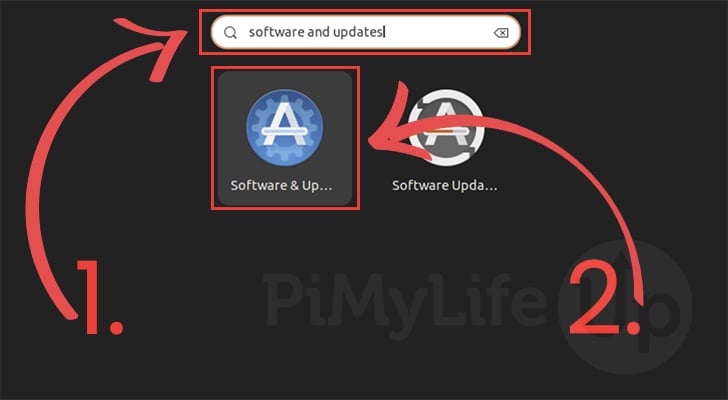
2. With the activities screen open, use the search box at the top of the page to search for “Software and updates” (1.).
After searching this, you should see an application called “Software & Updates“, click it to open it (2.).
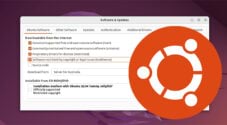
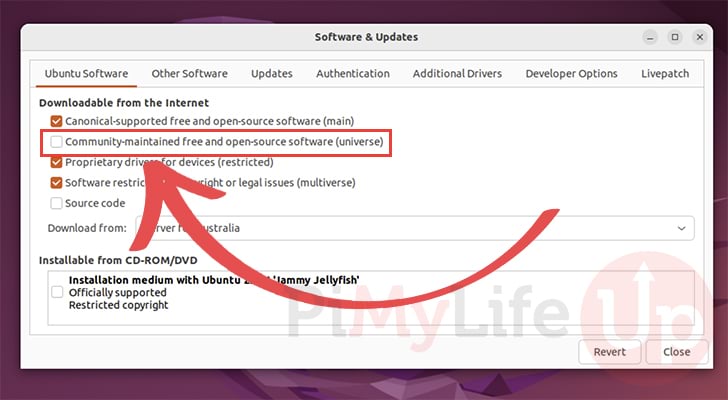
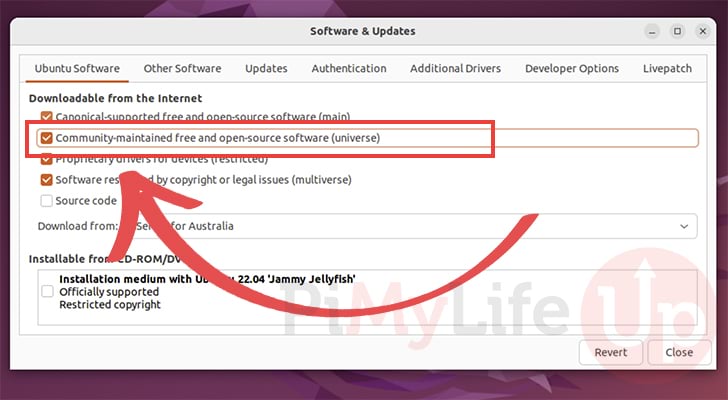
3. With the software and updates application open, we can finally enable the universe repository.
To enable the universe repository on Ubuntu, find the “Community maintained free and open-source software (Universe)” option and click it.
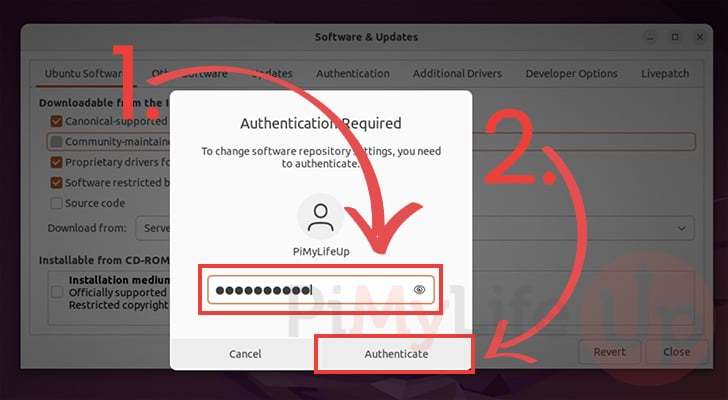
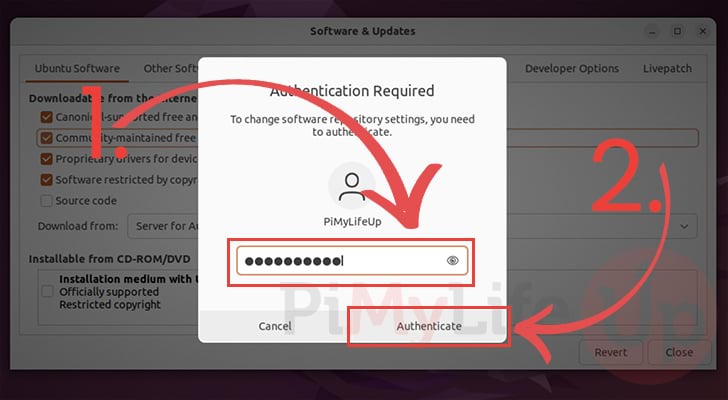
4. Before the universe repository is enabled on Ubuntu, you must authenticate yourself.
First, use the text box to type in the password for your account (1.).
After typing in your password, click the “Authenticate” button (2.) to finish enabling the Ubuntu universe repository.
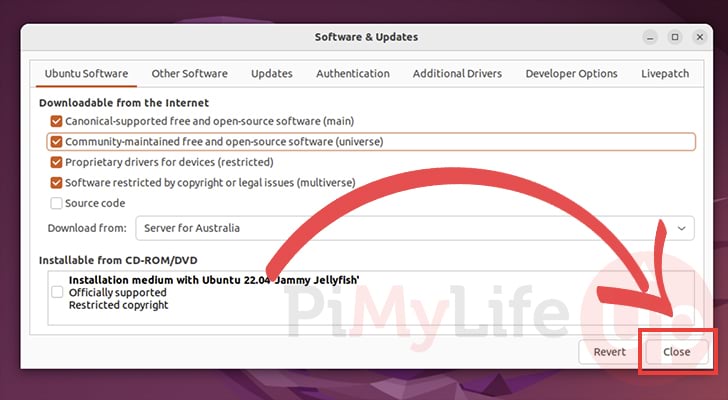
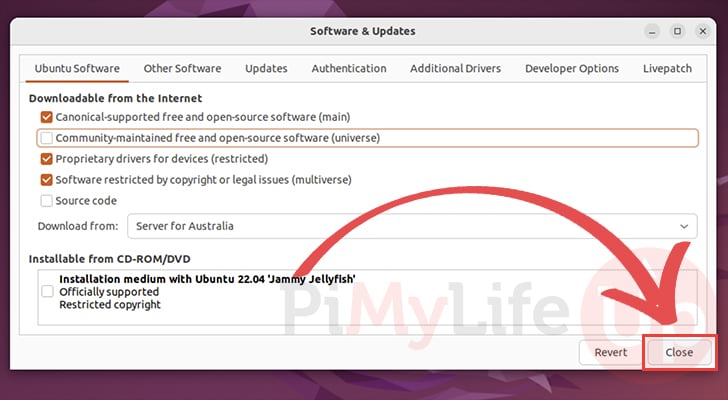
5. Now that we have enabled the repository, we can safely quit out of the application.
To close the app, you should use the “Close” button in the bottom-right of the app.
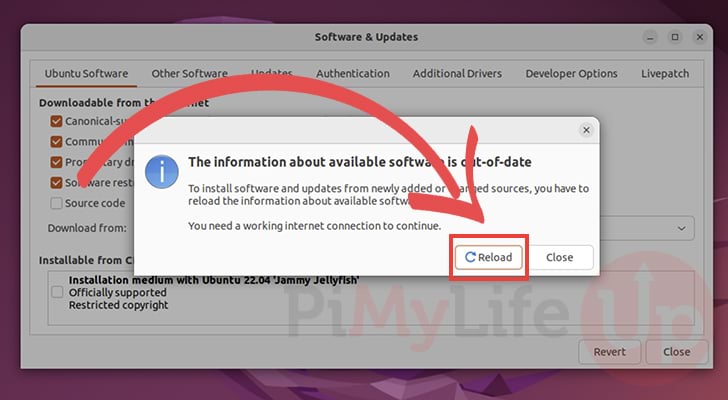
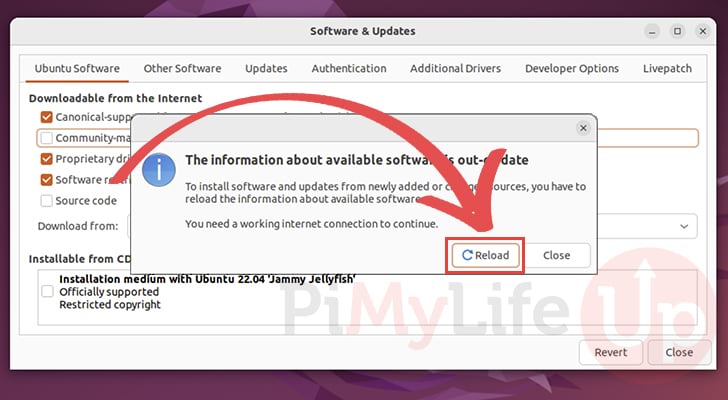
6. Since we made changes by enabling the Ubuntu Universe repository, you will be alerted that you should reload the package information.
You can easily reload now by clicking the “Reload” button.
Using the Terminal to Add the Ubuntu Universe Repository
Adding the Ubuntu Universe repository is a straightforward process when using the terminal. In fact, it only takes a single command to add this repository.
If you are using Ubuntu desktop, make sure to open the terminal before proceeding. You can use the CTRL + ALT + T keyboard shortcut to open the terminal quickly.
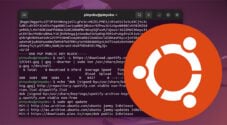
1. To enable the Ubuntu Universe repository, use the following command within the terminal.
With this command, we are using the “add-apt-repository” tool to add “universe“.
sudo add-apt-repository universeCopySince we are using the superuser to add “universe” on Ubuntu, you will be prompted to enter the password for your user.
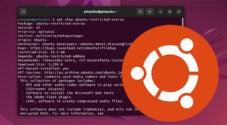
2. After running the above command, you will be prompted to confirm this action.
This message is telling you that it will add the “universe” component to all repositories.
To continue with this, all you need to do is press the ENTER key on your keyboard. Alternatively, if you want to stop the process, press CTRL + C.
Adding component(s) 'universe' to all repositories.
Press [ENTER] to continue or Ctrl-c to cancel.
3. Since we just made changes to the repositories, we should perform an update to the package list cache.
We can update this list by using the following command within the terminal.
sudo apt updateCopyRemoving the Universe Repository on Ubuntu
You can easily remove the Ubuntu universe repository if you have decided that you don’t want to utilize it. Please note removing the repository won’t remove the packages that you installed from it.
You can utilize either the desktop interface, or terminal to remove the universe repository from your device.
Using the Desktop to Remove the Repository
This section will show you how to remove the Universe repository on Ubuntu using the desktop interface.
Using the “Software & Updates” application, you can quickly remove the repository.
1. Before beginning, open the “Software & Updates” application. The easiest way to get to this application is by searching in the “Activities” screen.
2. Within the “Software & Updates” application, find the “Community-maintained free and open-source software (universe)” option.
Once found, all you need to do to disable it is to click the option.
3. Before this repository is removed from Ubuntu, you will be prompted to authenticate yourself.
Start by entering the password for your account (1.).
After typing in your password, click the “Authenticate” button (2.).
4. After unticking the universe repository, you will need to close out of the “Software & Updates” application.
You can quit out of this application by clicking the “Close” button.
5. After disabling the Ubuntu universe repository, you will be prompted that your package list is out-of-date.
You can click the “Reload” button to make Ubuntu refresh this list now.
Using the Terminal to Remove the Universe Repository
Removing the Ubuntu universe repository using the terminal is a straightforward process and only requires a single command.
If you are on Ubuntu desktop, make sure you open the terminal before proceeding.
1. To remove the repository, you must utilize the following command within the terminal.
We are using the “add-apt-repository” tool’s “-r” option to tell it to remove the specific package.
sudo add-apt-repository -r universeCopy2. Below is the message you will get after running the previous command.
To proceed with the removal of the universe component, you will need to press the ENTER key. Alternatively, press CTRL + C to abort the process.
Removing component(s) 'universe' from all repositories.
Press [ENTER] to continue or Ctrl-c to cancel.
3. To ensure that the repository is no longer being used, we can update the package list.
We only need to use the following command to update this list.
sudo apt updateCopyConclusion
This tutorial showed you how to add the universe repository on Ubuntu.
This repository gives you access to numerous additional packages that aren’t available in the main package repository.
Please comment below if you have any questions about adding or removing this repository.
Be sure to check out our many other Ubuntu guides. We also have numerous Linux tutorials that you may want to check out.