This tutorial will show you how to install the Ubuntu restricted extras meta package.
The restricted extra package is a meta package that allows you to install several packages on Ubuntu at once that are considered restricted for various reasons.
A meta package is a package that will install several others by marking them as dependencies. Another example of a meta-package is “build-essential”, which installs packages related to compiling code on your device.
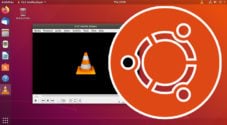
In the case of the Ubuntu restricted extras package, the packages it installs are commonly used media codecs and fonts.
An example of one of the packages that might be installed is “intel-media-va-driver“, which is Intel’s media driver.
Packages Included in the Ubuntu Restricted Extras Package
The packages installed along with the Ubuntu Restricted Extras package can differ depending on the release you are running. However, most of these packages involve adding support for proprietary codecs and file formats.
Some of the packages installed from the “ubuntu-restricted-extras” package are the following.
- unrar
- ttf-mscorefonts-installer
- libavcodec-extra
- ubuntu-restricted-addons (Additional Meta Package)
- chromium-codecs-ffmpeg-extra
- gstreamer1.0-fluendo-mp3
- gstreamer1.0-libav
- gstreamer1.0-plugins-ugly
- gstreamer1.0-vaapi
There are a couple of stand packages that are installed here that you may be familiar with.
- For example, the
unrarpackage is used to extract files that have been compressed using the “rar” format. These files typically end in “.rar”. - Another example is the “
ttf-mscorefonts-installer” package. This package will add support for downloading and installing Microsoft’s TrueType fonts, such as Arial, Times New Roman, and more.
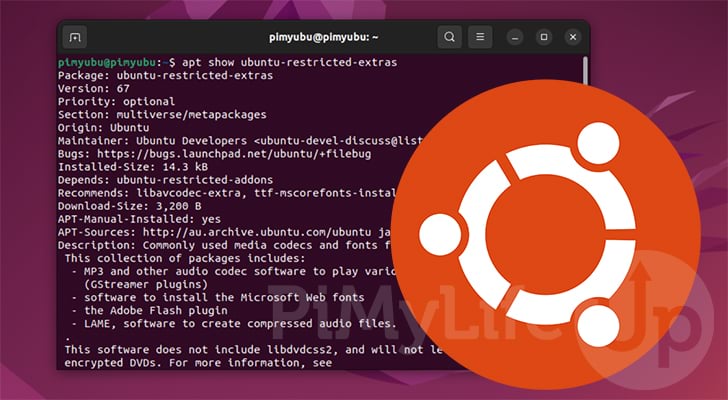
If you want to check what packages are installed on your Ubuntu system when installing the Ubuntu restricted extras package, you can use the following two commands.
apt show ubuntu-restricted-extras
apt show ubuntu-restricted-addonsCopy
These commands will output various information about the “ubuntu-restricted-extras” package and the additional meta package it installs called “ubuntu-restricted-addons“.
Installing the Ubuntu Restricted Extras Package on Ubuntu
This section will show you how to install the Ubuntu restricted extras package on your system. These steps are relatively straightforward and mainly require you to have activated the multiverse repository.
This is because the packages installed during this have licenses that aren’t open-source and may be potentially restrictive.
The following steps will require you to use the terminal on your device. You can open the terminal on Ubuntu desktop by pressing CTRL + ALT + T.
1. Before going any further, you must ensure you have the multiverse repository enabled on your Ubuntu device.
If you are unsure of how to do this, we have a quick guide showing how to enable the multiverse repository.
2. With the multiverse repository added, we can move on to installing the Ubuntu restricted extras package.
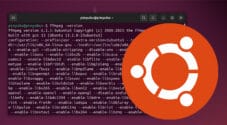
To install this package on your system, you must run the following command in the terminal.
sudo apt install ubuntu-restricted-extrasCopyBe prepared to complete some prompts, as some software requires you to agree to additional terms and agreements.
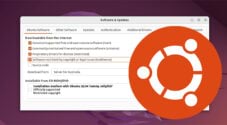
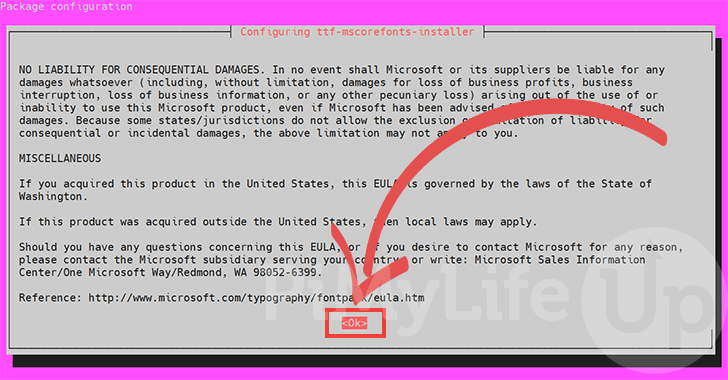
3. One of the packages that are installed during this process requires you to agree to additional licenses.
This package is “ttf-mscorefonts-installer” and is the package that will install several fonts on Ubuntu.
You can scroll through the EULA by using the ARROW keys. Once you are ready to proceed, select the “<Ok>” option and press ENTER.
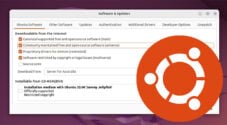
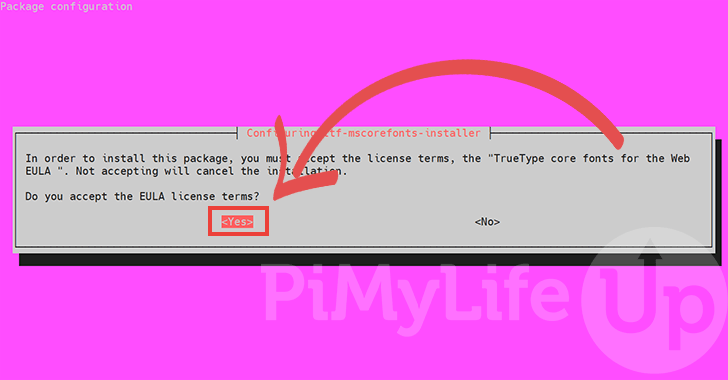
4. You will now be required to agree to the EULA to install this particular package.
To accept and proceed with the install select the “<Yes>” option and press ENTER. If you don’t want to agree to these terms, select “<No>“.
If you choose not to accept the terms, the system will still install the rest of the packages included with “ubuntu-restricted-extras“.
5. If you agree to the terms, the installer will now proceed to download and set up various fonts on your system.
6. At this point, you should now have successfully installed the “ubuntu-restricted-extras” package to your Ubuntu system.
The easiest way to verify Ubuntu installed everything is to try using the unrar command in the terminal like below.
unrarCopyIf everything is fine, you will see a list of options for this tool.
Removing the Ubuntu Restricted Extras Package
If you have decided that you no longer require the packages installed by the Ubuntu restricted extras package, then it is possible to remove them.
To uninstall all packages provided by this meta package, you will want to use the following command in the terminal.
sudo apt autoremove ubuntu-restricted-extras --purgeCopyThe two things you want to pay attention to with this command call are “autoremove” and “--purge“.
autoremove– This tells the apt package manager to remove the named package and any of its dependencies that will no longer be marked as required.
Being a meta package, this is the only way to remove the packages installed alongside it.--purge– The purge option tells apt that it should also remove any configuration files belonging to the software.
Conclusion
By this point in the guide, you should hopefully know how to install the Ubuntu restricted extras package to your system.
This meta-package installs several other packages that add support for various codecs and file formats.
Please comment below if you have any issues installing or uninstalling this package on your Ubuntu system.
If this guide was helpful to you, we recommend you check out our many other Ubuntu guides.