In this tutorial, we will show you how to run a traceroute from your Ubuntu operating system.
A traceroute is a way of tracing the path your Ubuntu’s network connection takes to get to its destination.
These tools will report back every time it routes through another part of the network. This report will let you know the hostname of the hop and the time it takes to communicate with that hop.
The reports produced by a traceroute can be incredibly helpful in diagnosing potential network problems.
If you are fail to connect to a website or server, this traceroute can give you an idea of where it is failing.
Additionally, you can also tell where your connection is having slowdowns, whether due to a slow network route or just poor general routing.
To perform a traceroute from our Ubuntu system, we will be showing two tools.
The first is the tracepath tool. This program is the default application for performing a traceroute on Ubuntu.
Alternatively, you can also install the “traceroute” package. This version of the tool allows you to configure your traceroute a bit more than Ubuntu’s tracepath tool.
This tutorial should work for most versions of Ubuntu. You can even use this to perform traceroute on Ubuntu 18.04 and Ubuntu 20.04.
If you are using the desktop version of Ubuntu, you can open the terminal by pressing CTRL + ALT + T. You can also use SSH on Ubuntu to perform a traceroute.
Table of Contents
Performing a Traceroute using tracepath on Ubuntu
As tracepath is a tool already available on your Ubuntu system, it is the easiest way of performing a traceroute.
In this section, we will show you the simple way of using the tracepath program.
One of this tool’s benefits is that you are not required to be a superuser to install it.
Basic Syntax of the tracepath Command
The tracepath command is very straightforward to use, especially if you want to perform a basic traceroute.
All you need to use is “tracepath” followed by the destination you want to route to.
tracepath DESTINATIONWhen using this command, make sure you replace “DESINTATION” with the IP address or hostname (For example, pimylifeup.com) you want to perform the route to.
Example of using Tracepath on Ubuntu
Now that we have given you the basic syntax of the tracepath command, let us show you how to use it.
1. For this example, we will check how our network routes to Google’s web servers by using “google.com” as our destination.
On your Ubuntu operating system, you can perform this traceroute by running the following command on it.
tracepath google.com2. From this command, you will start to get a list of each node that the network connection is routed through.
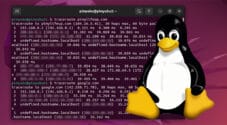
We have included an example of what this output might look like when you perform the traceroute on Ubuntu using tracepath.
 1?: [LOCALHOST]                      pmtu 1500
 1:  dlinkrouter                                           0.370ms pmtu 1460
 1:  192.168.1.1                                           0.760ms
 2:  example-network-routing-from.exampletelco.net         21.803ms
 3:  example-bigouter-router-big.exampletelco.net             31.384ms asymm  9
The tracepath utility provides you the hostname for the node it is routing through. The time in ms it took for the connection to complete. As well as some additional bits of information about the routing.
You can see from our result that our connection has two local network devices it has to hop between before it even hits the wider network.
Using the traceroute Package on Ubuntu
Instead of the tracepath tool, you can utilize the traceroute package.
This package is very much like tracepath but performs the routing a bit differently and provides a bit more information back.
Unfortunately, this requires a little extra work to run as it is not available as a default package on Ubuntu. Instead, we will need to install it from the package repository.
One thing to note is that the traceroute tool does require you to have access to a user with superuser privileges to install it.
Installing traceroute to Ubuntu
Luckily for us, the process of installing the traceroute package to Ubuntu is relatively straightforward.
This is in large thanks to the tool being available on Ubuntu’s package repository.
1. Before we can install traceroute to Ubuntu, we need to update the package list.
If we have an out-of-date package list, there’s a chance the package will not install correctly.
You can run the following command on your Ubuntu system to update its package list.
sudo apt update2. Once the package list has been updated, we can finally install the traceroute utility.
All you need to do is run the following command to install the software to your Ubuntu device.
sudo apt install tracerouteWhen prompted, if you would like to continue with the installation process, type in Y, then press the ENTER key.
Syntax of the traceroute Command
At its very basics, using the traceroute command is just as simple as using tracepath.
All we need to do is use “traceroute” followed by the destination you want to check the routing of.
traceroute DESTINATIONWhen using this command, make sure you replace “DESINTATION” with either the hostname or the IP address you want to route to.
If you use a hostname, the tool will automatically resolve any hostnames using your Ubuntu systems specified DNS provider.
Example of using traceroute on Ubuntu
To show you how this traceroute command works on Ubuntu, we will be running a quick test to route the connection from our computer to “google.com“.
Using this command will give us an idea of how many hops our connection needs to make to reach its destination and how long these hops are taking to complete.
1. All you need to do to perform this traceroute is to run the command below.
This will check for the routing between your current device and “google.com“.
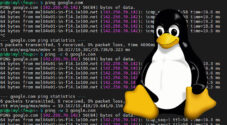
traceroute google.com2. After performing a traceroute, you should get a report as we have below.
It will show you the route the connection went from your Ubuntu system to the destination.
traceroute to google.com.au (216.58.196.131), 30 hops max, 60 byte packets
 1  192.168.1.1 (192.168.1.1)  0.663 ms  0.550 ms  0.739 ms
 2  example-network-routing-from.exampletelco.net (xxx.xx.xxx.x)  18.630 ms  18.507 ms  18.351 ms
 3  example-bigouter-router-big.exampletelco.net (xxx.xxx.xxx.xxx)  30.810 ms  30.739 ms  30.669 ms
 4  bigouter-example-router-big.randombackbone.net (xxx.xxx.xxx.xx)  31.139 ms  31.052 ms  30.966 ms
 5  justarandomsubnet.crossingaround.net (xxx.xxx.x.xxx)  30.313 ms  31.047 ms  30.958 ms
 6  sydneybased-netrouting.australia.net (xxx.xxx.xxx.xxx)  31.298 ms  30.426 ms  30.195 ms
 7  gettingneartheend.littlebigbyte.net (xxx.xx.xx.xxx)  29.967 ms  29.616 ms  29.395 ms
 8  * * *
 9  209.85.247.132 (209.85.247.132)  28.851 ms syd15s04-in-f3.1e100.net (216.58.196.131)  30.257 ms  30.123 ms
In our view the traceroute tool on Ubuntu provides the routing in a bit of a cleaner format then what tracepath produces.
The tool will try and provide both the hostname for the hop alongside the IP address. It will also provide the speeds for the three individual packets it sent to the hop.
Traceroute sends three different packets to give you an idea if your connection is being consistent.
Conclusion
You should now have an idea of how you can perform a traceroute from your Ubuntu system.
Traceroutes are a great way of checking how your device is having routing issues connecting to an end destination.
The tool will provide the hostname and IP address for every hop it makes before getting to the end destination.
It will also provide response times to that server. This helps you see if a specific hop is taking considerable time to be connected through.
If you have had issues using traceroute on Ubuntu, please leave a comment below.
Be sure to check out our other Ubuntu guides, such as setting a static IP address on Ubuntu.